Unlike the MGA body and structure, there is no shortage of detailed information on overhauling, repairing and tuning MGA engines – after all they are all based on the ubiquitous BMC ‘B’ series engine that appeared in so many of their products in one form or another, throughout the 50’s and 60’s. However, as I was keen to record as much as possible of my restoration work, I’ve included a section and highlighted a few specific items, such as replacing core plugs and cleaning oilways and replacing oilway plugs.
At the end of this section there’s a short video of the finished engine start-up.
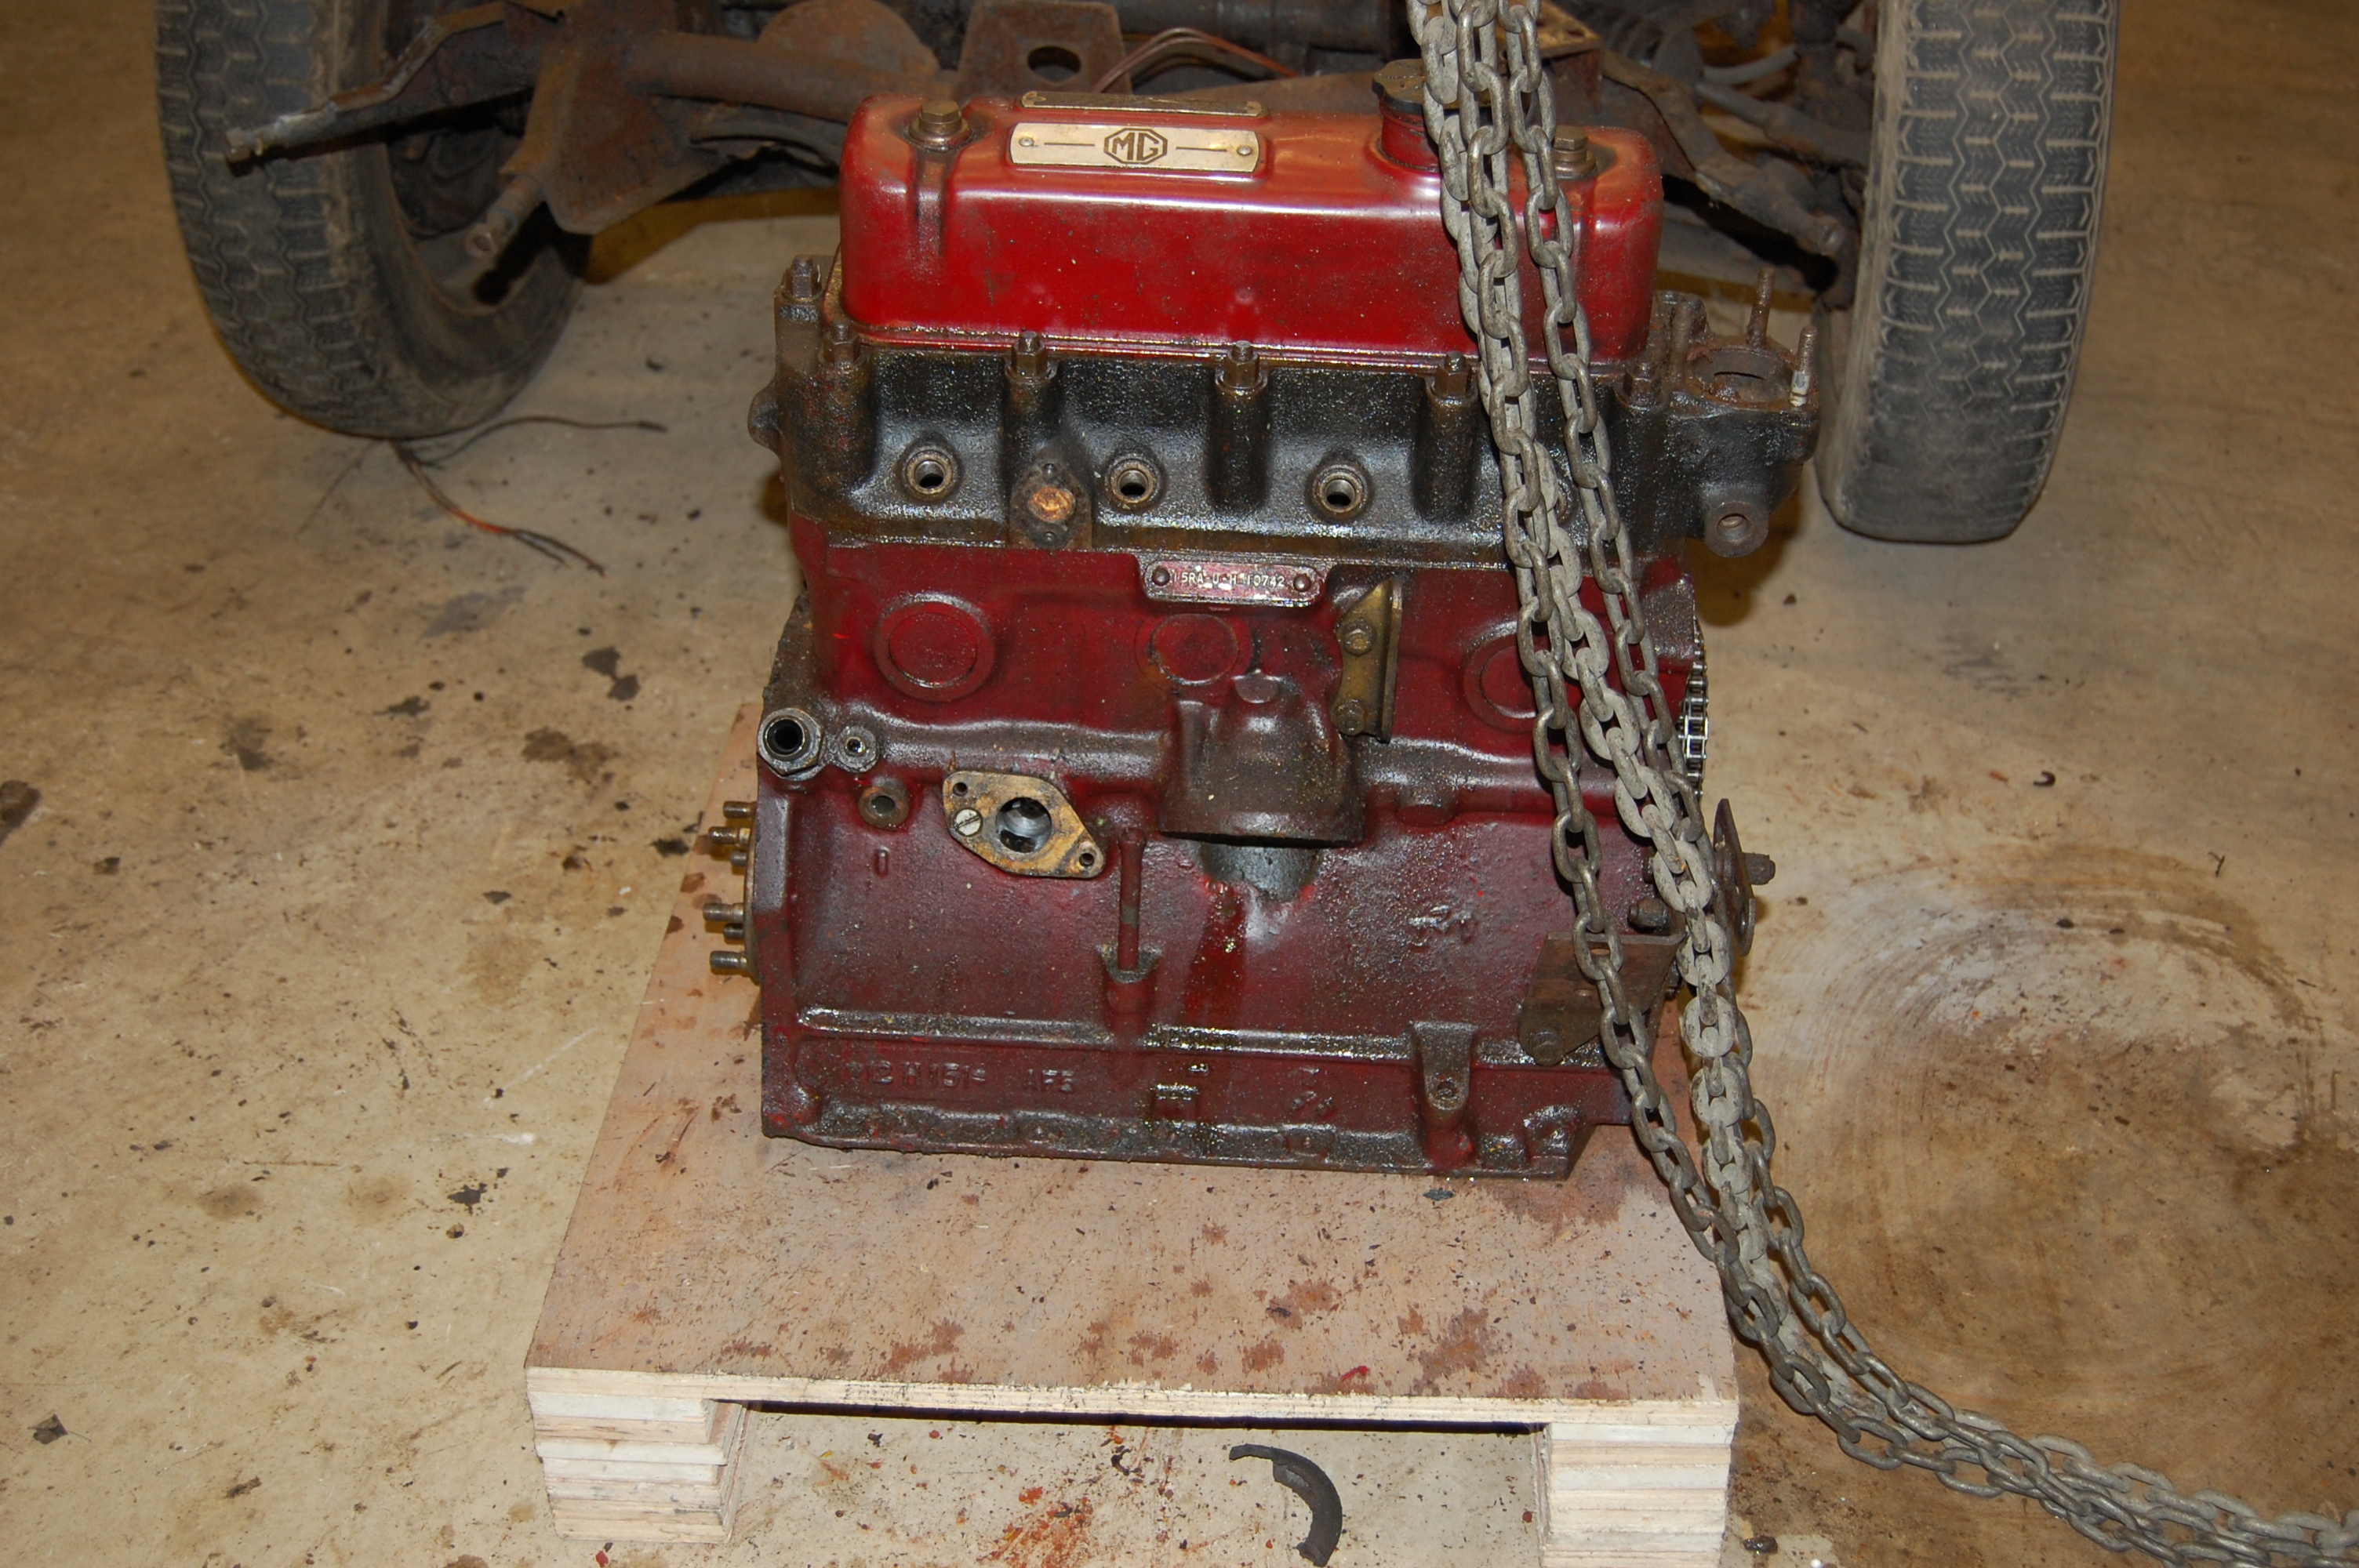
Engine to be put to one side while the chassis strip is completed…. Well, that’s what should happen, but being a mechanic at heart I couldn’t resist getting it stripped to see how it had faired over the years.
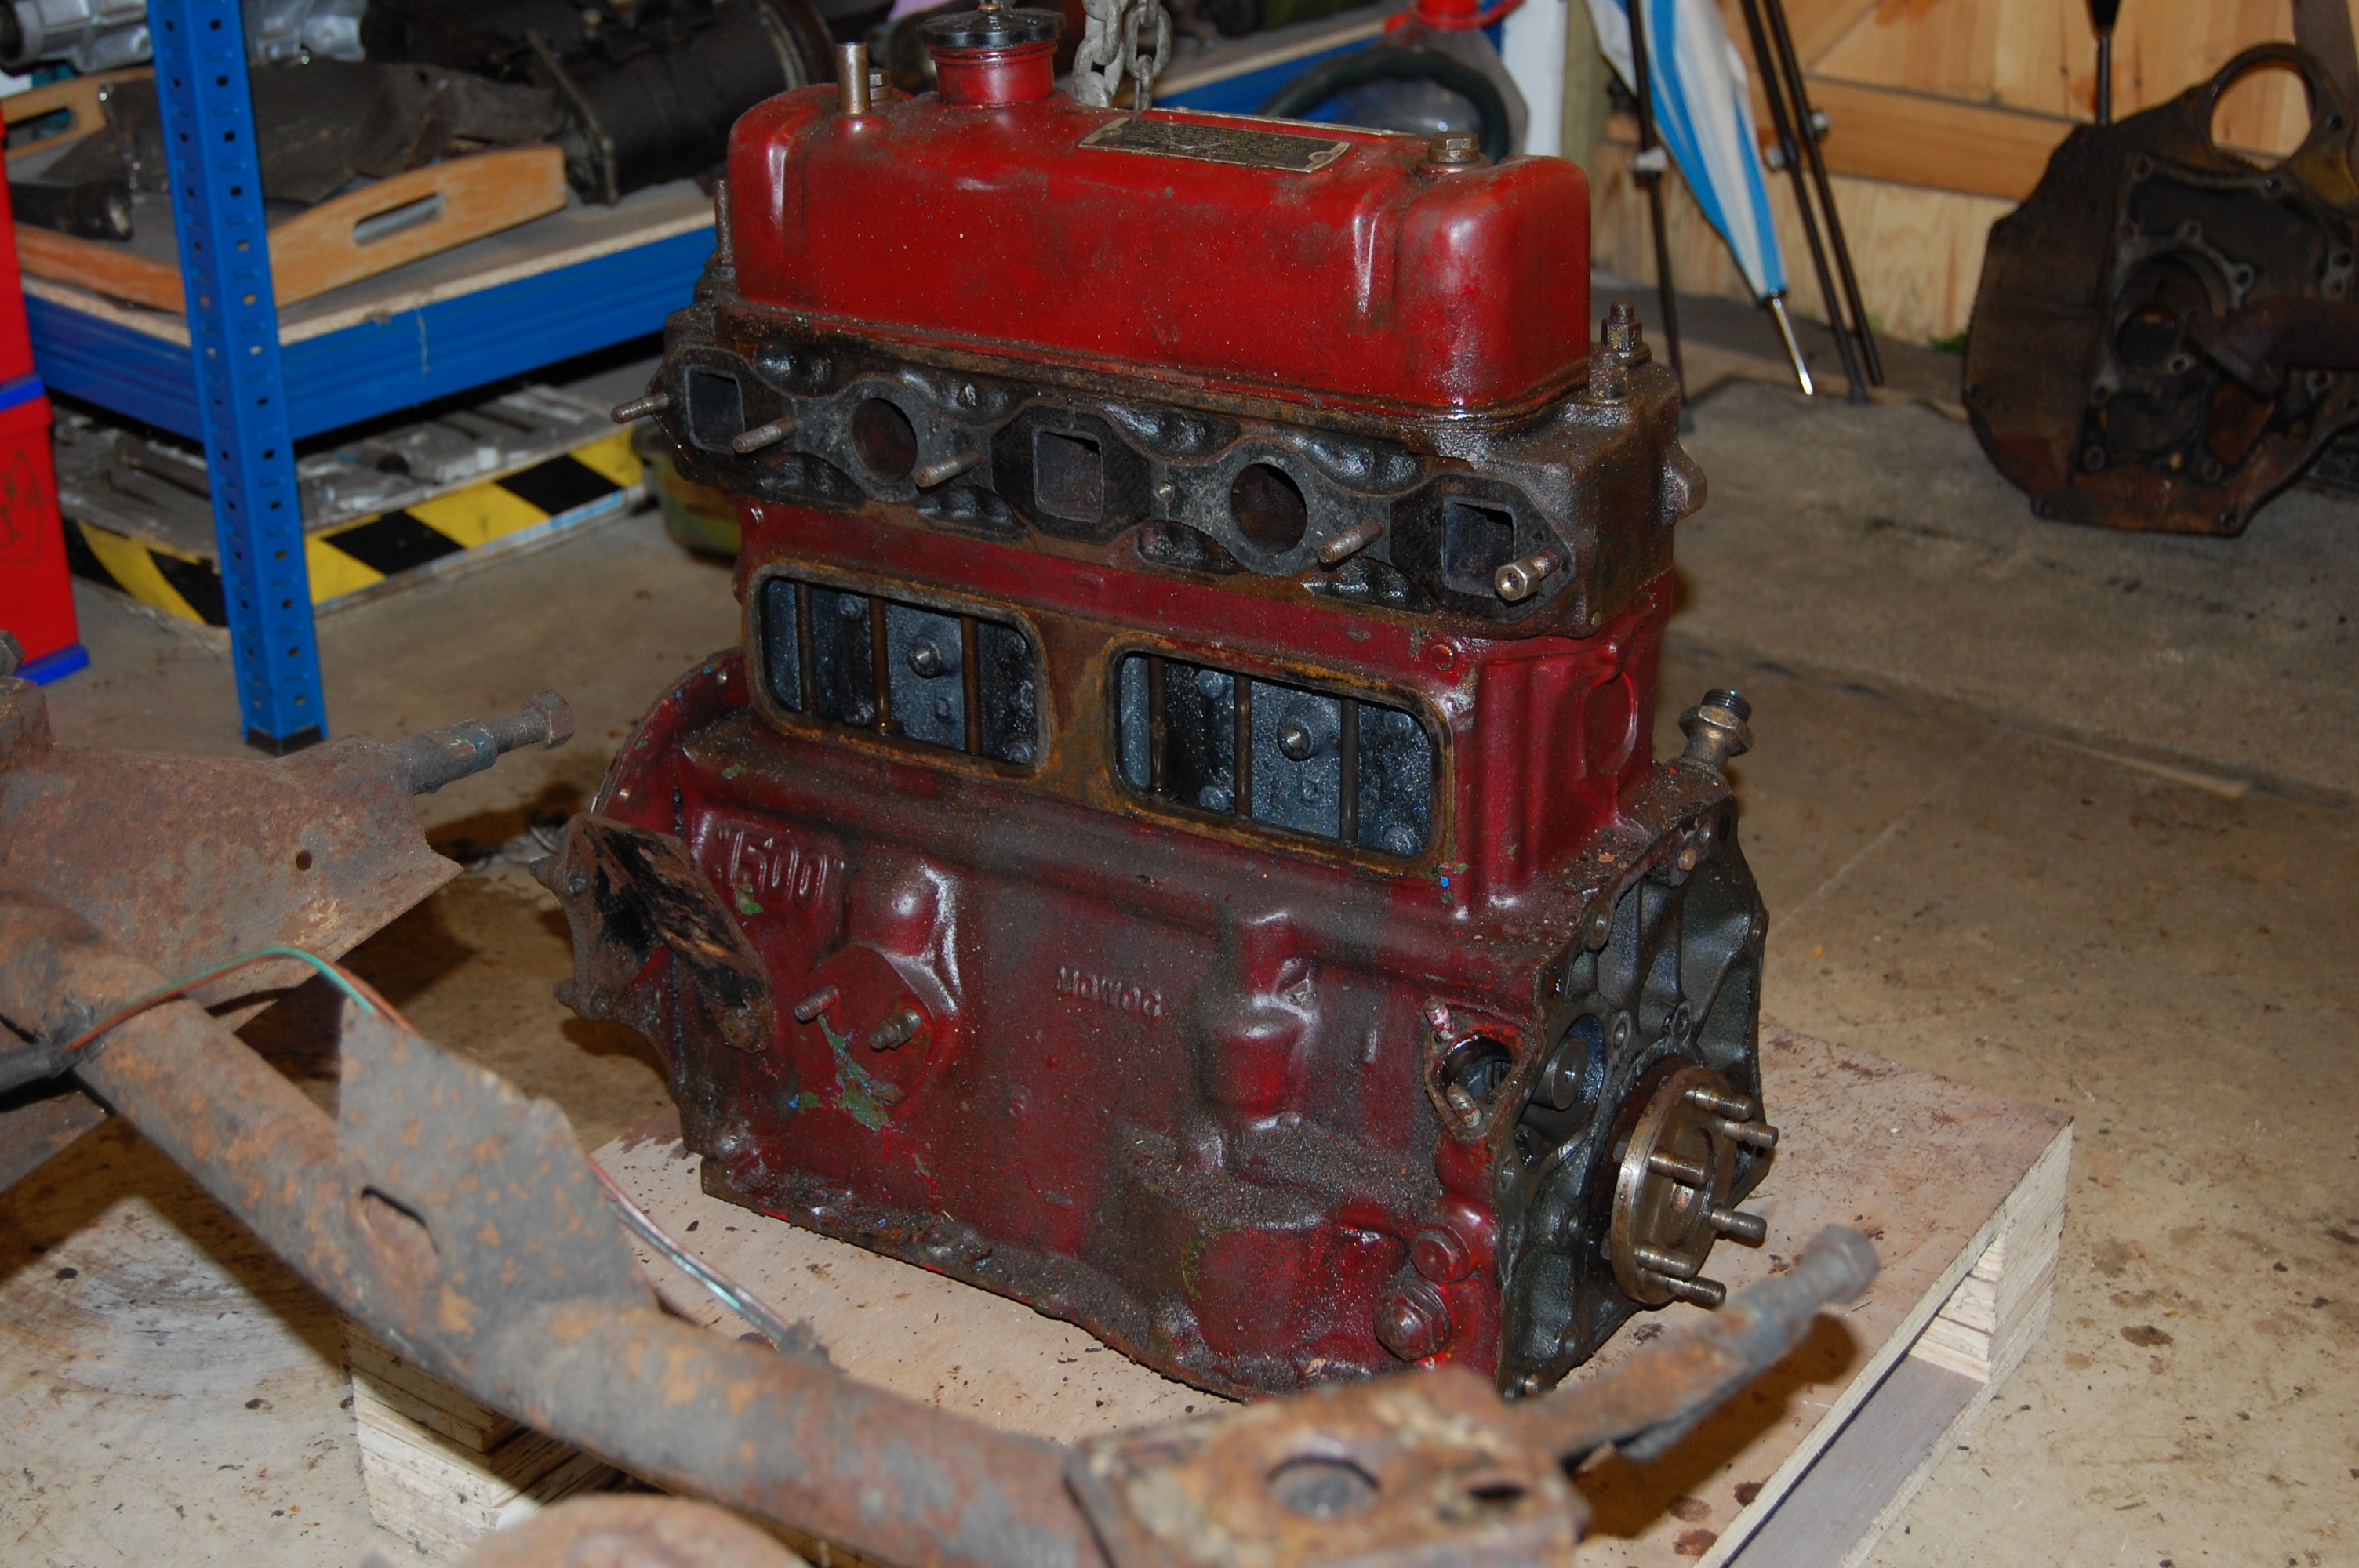
I’ve scratched my head to remember where the cylinder head came from. The engine was built up nearly 40 years ago and I think I bought it less the head and fitted the original one from the ‘Gold Seal’ engine. It has no identification mark (15 or 18) at the rear and hasn’t been gas-flowed as I remember doing…..a mystery.
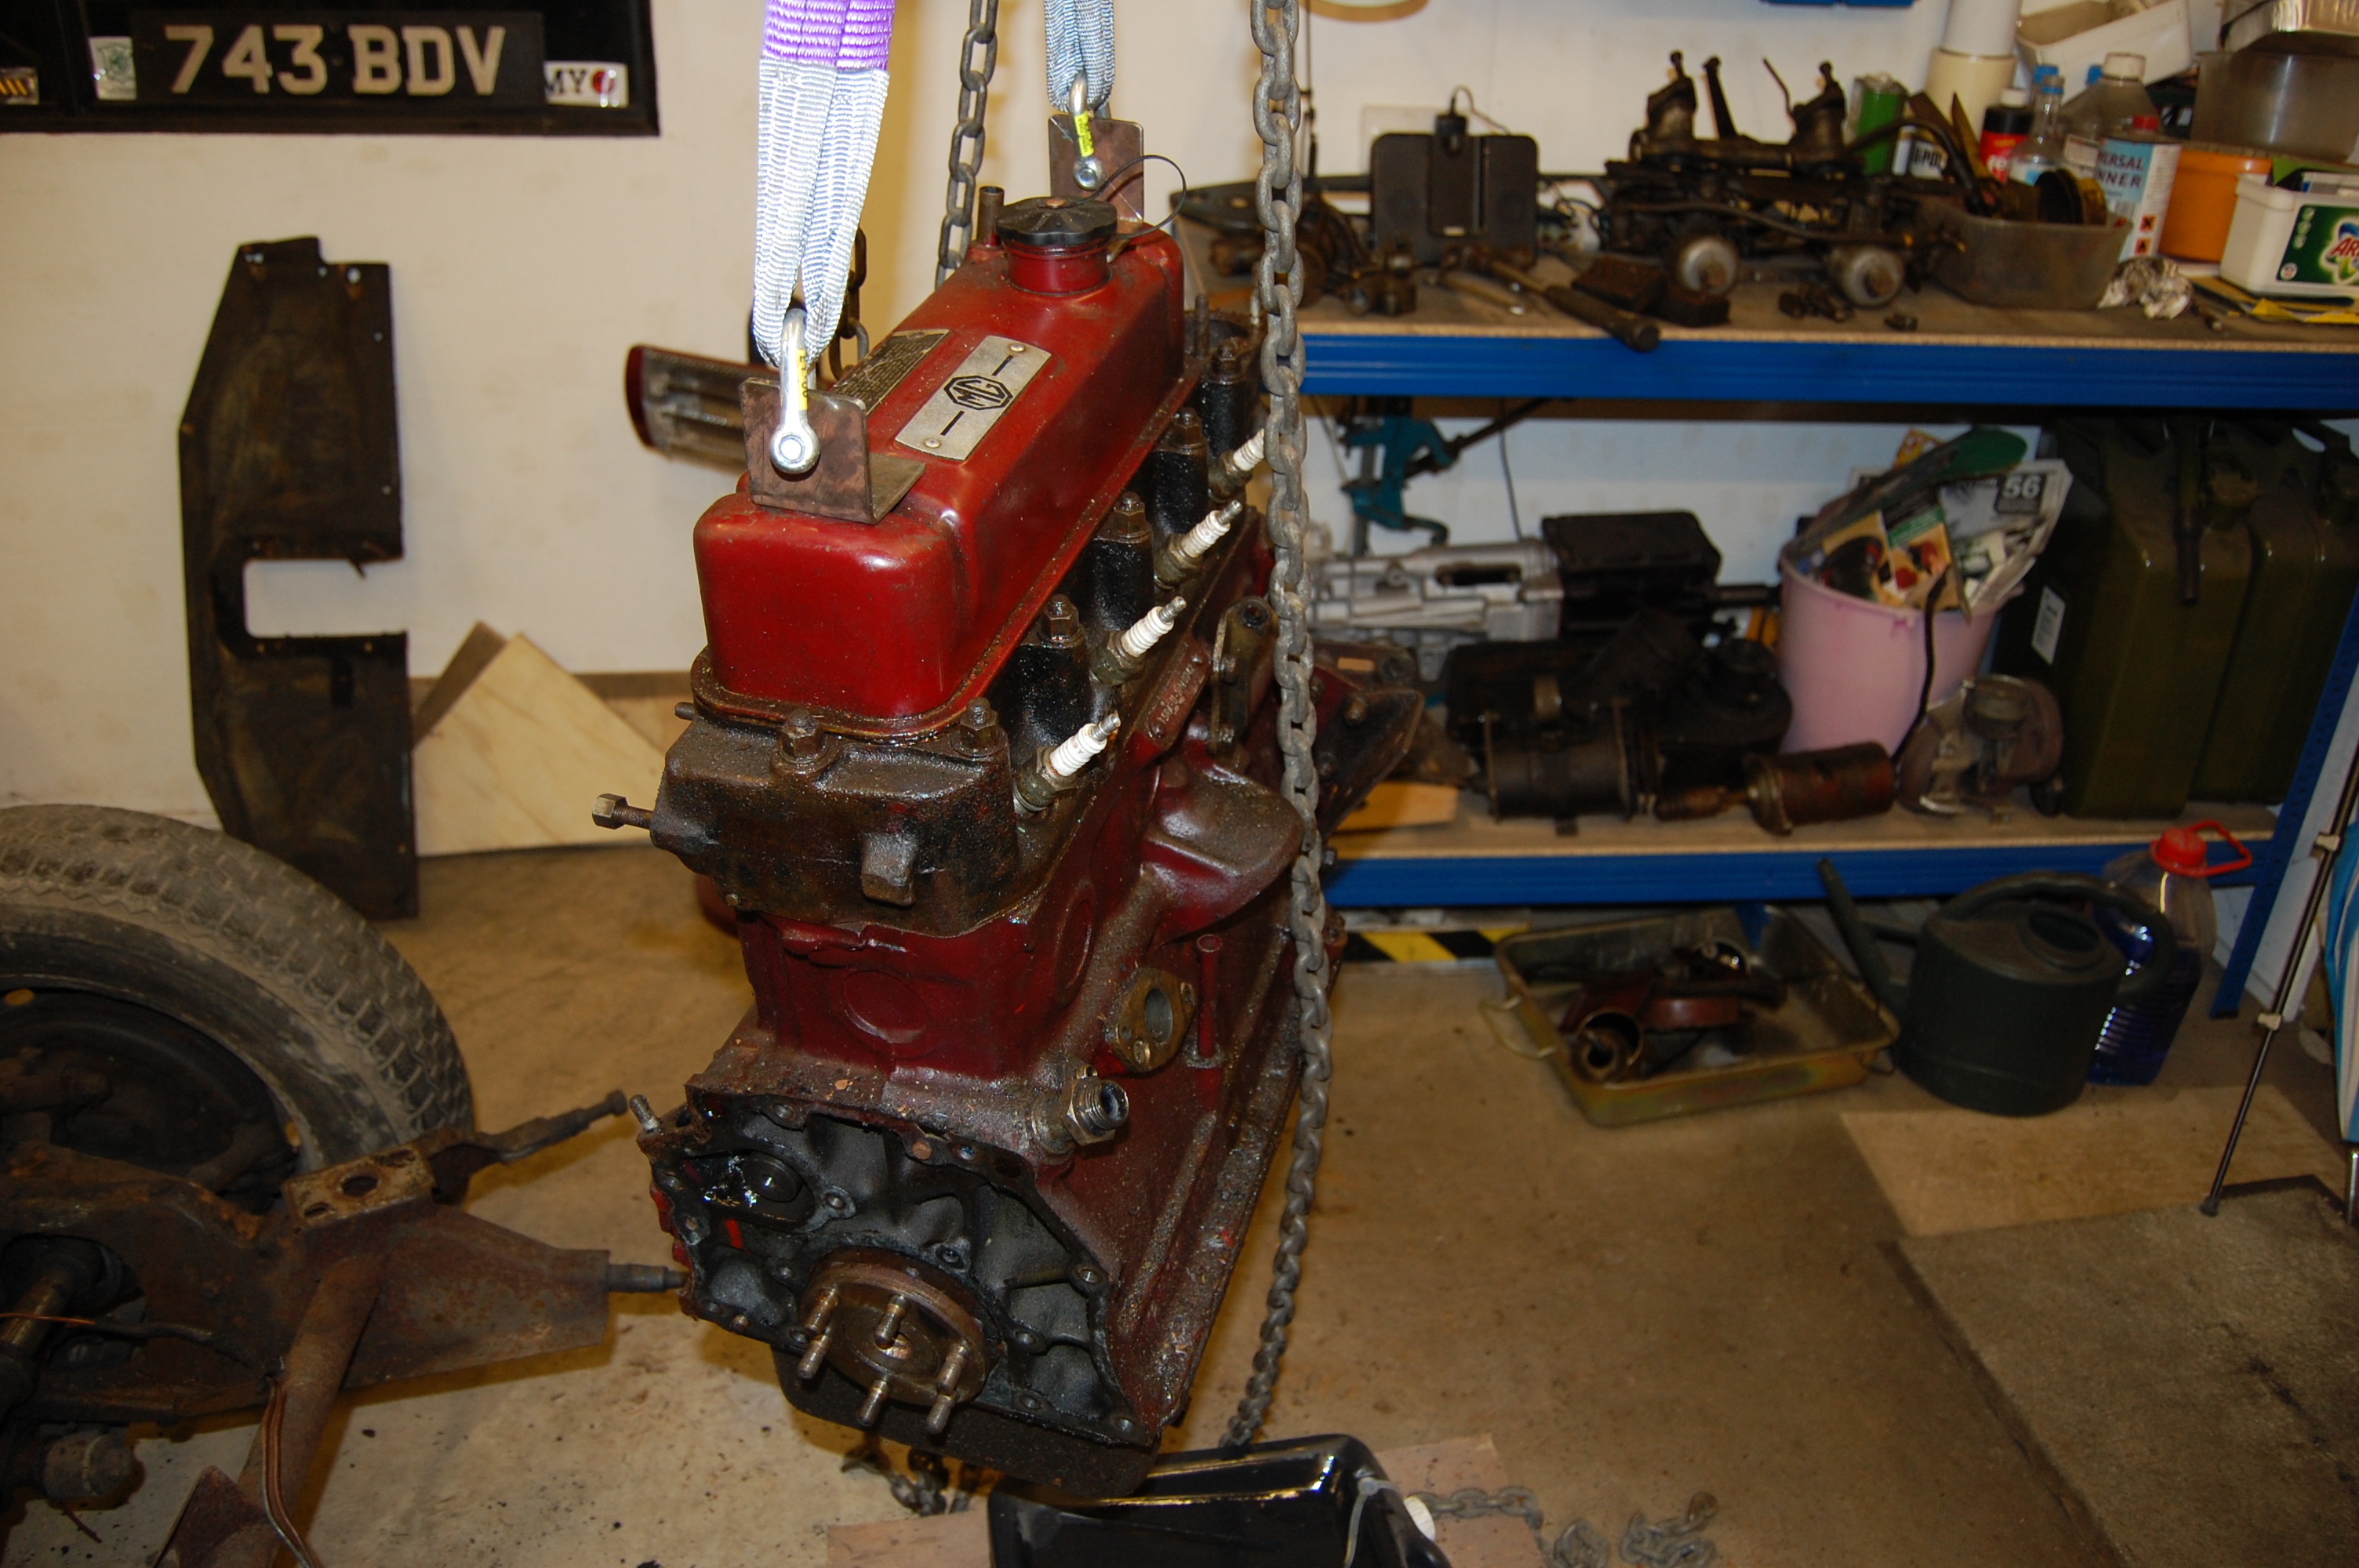
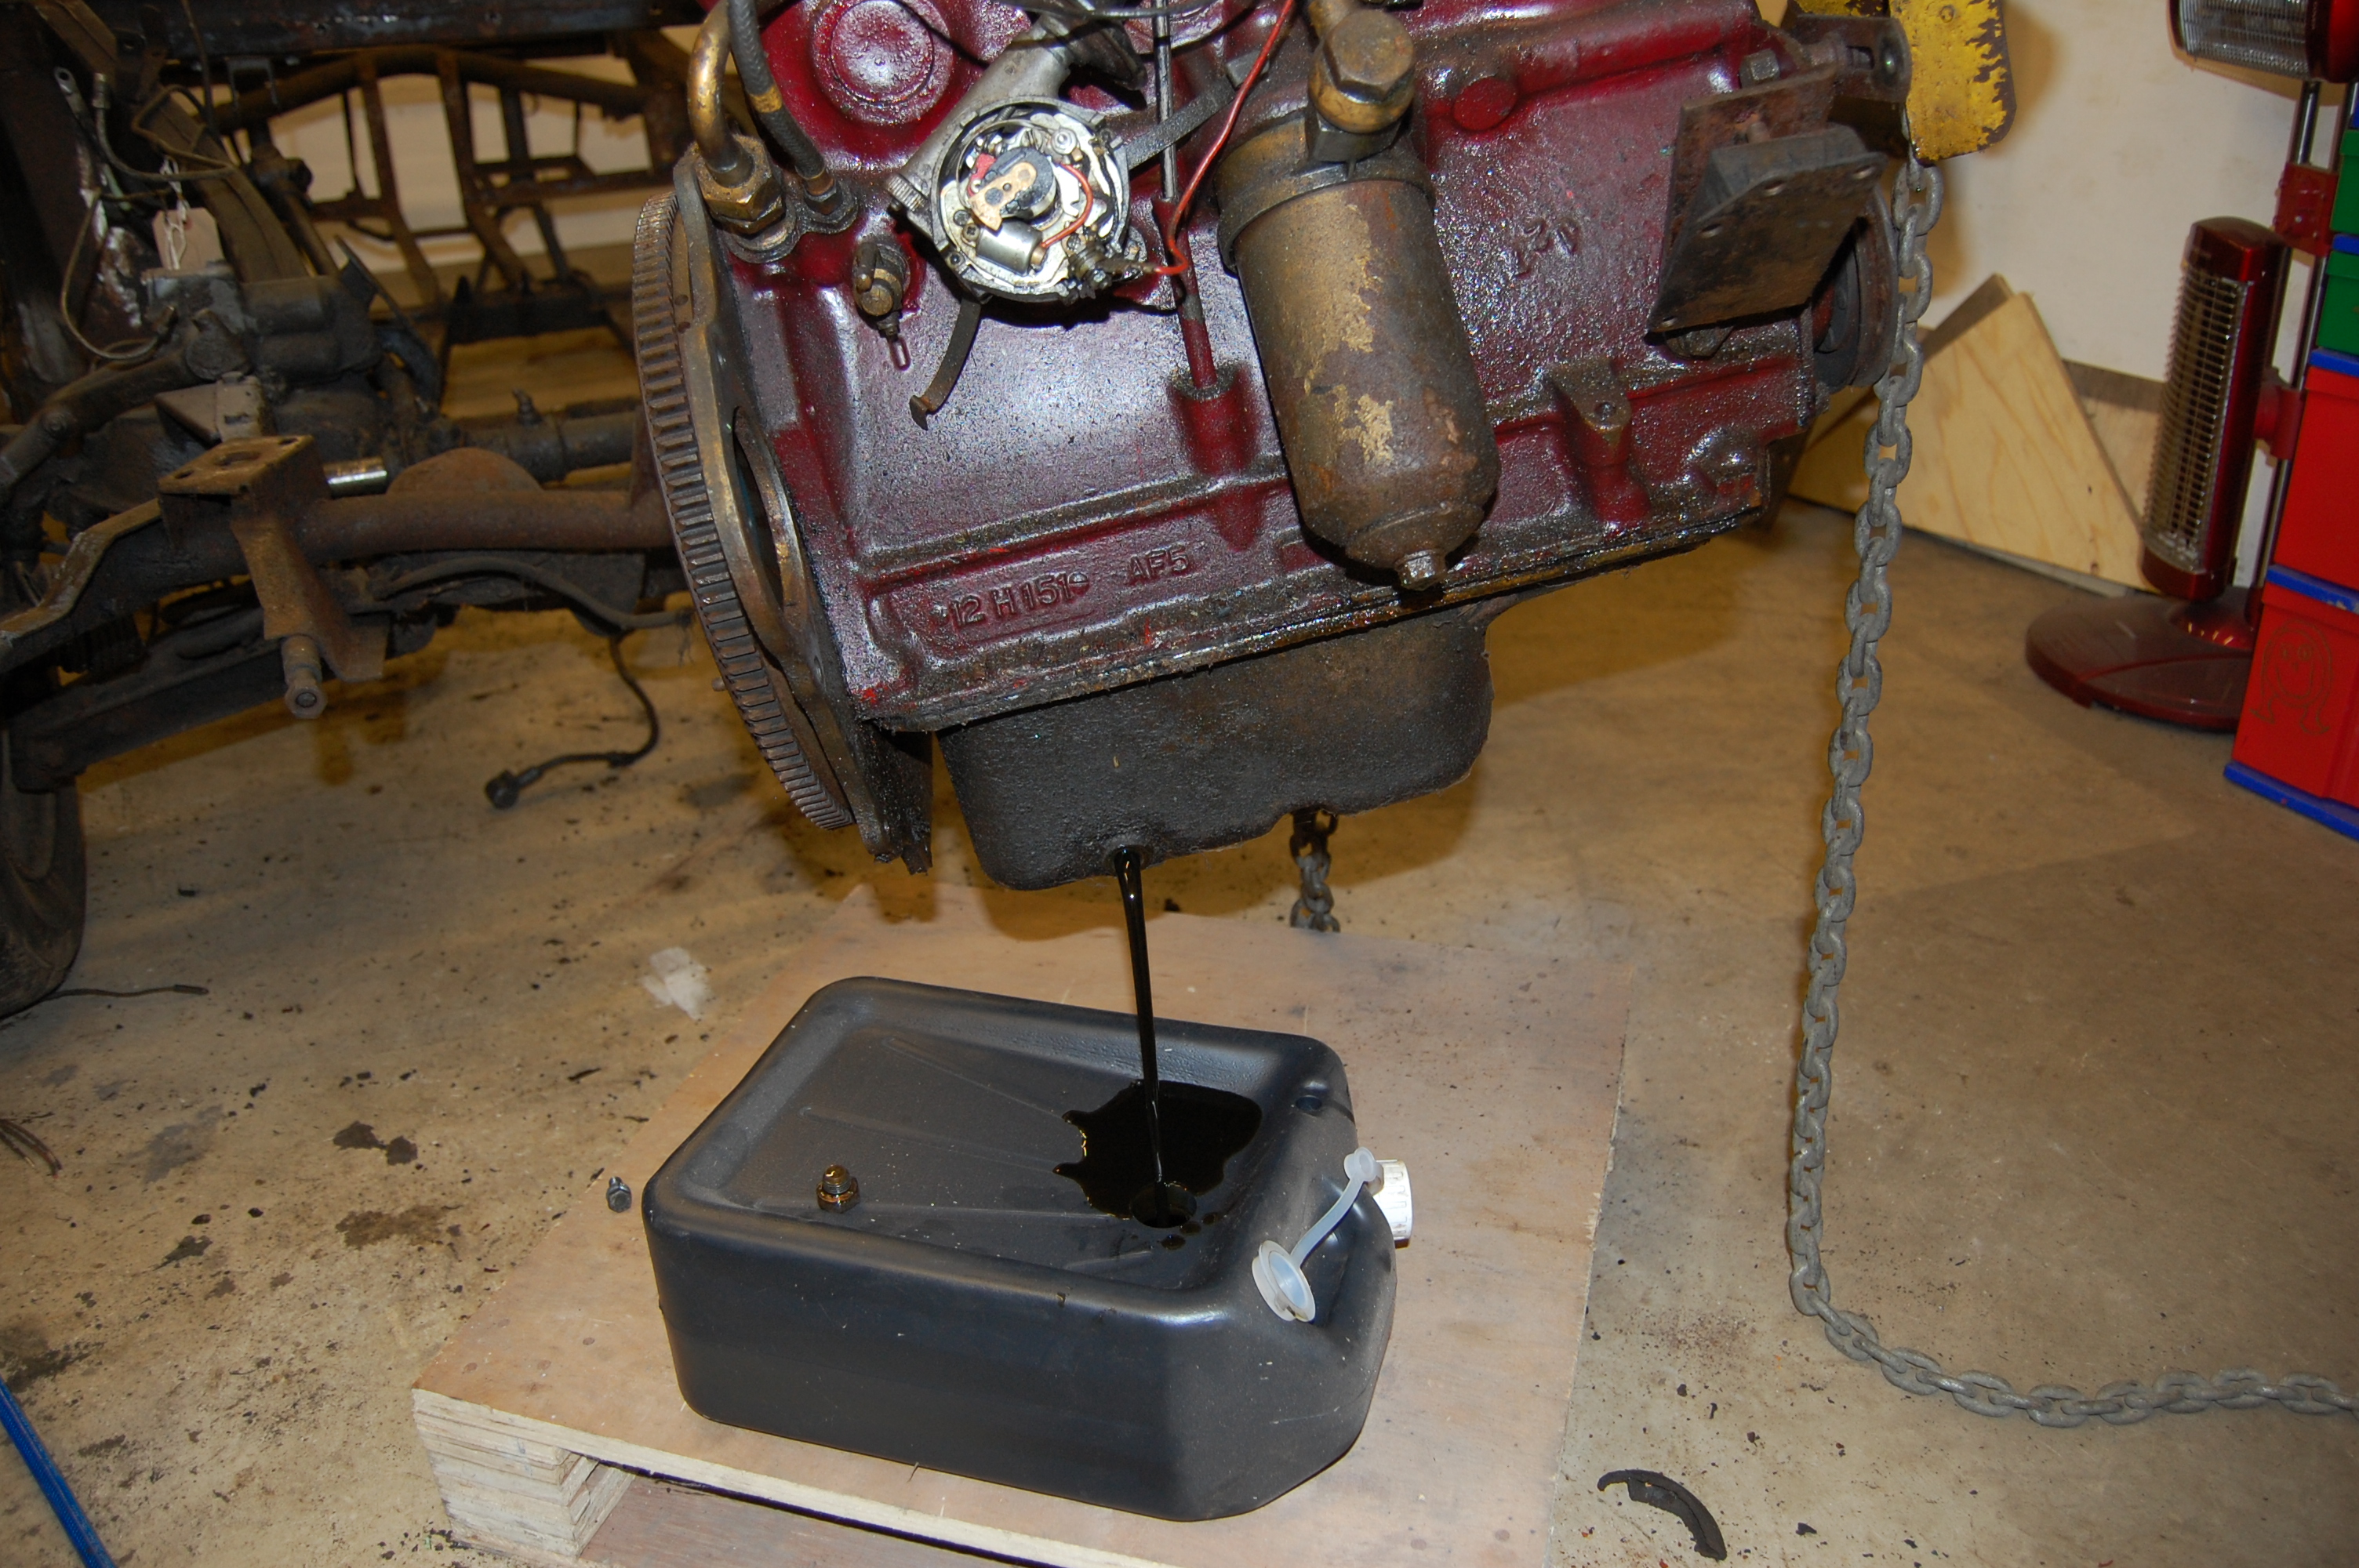
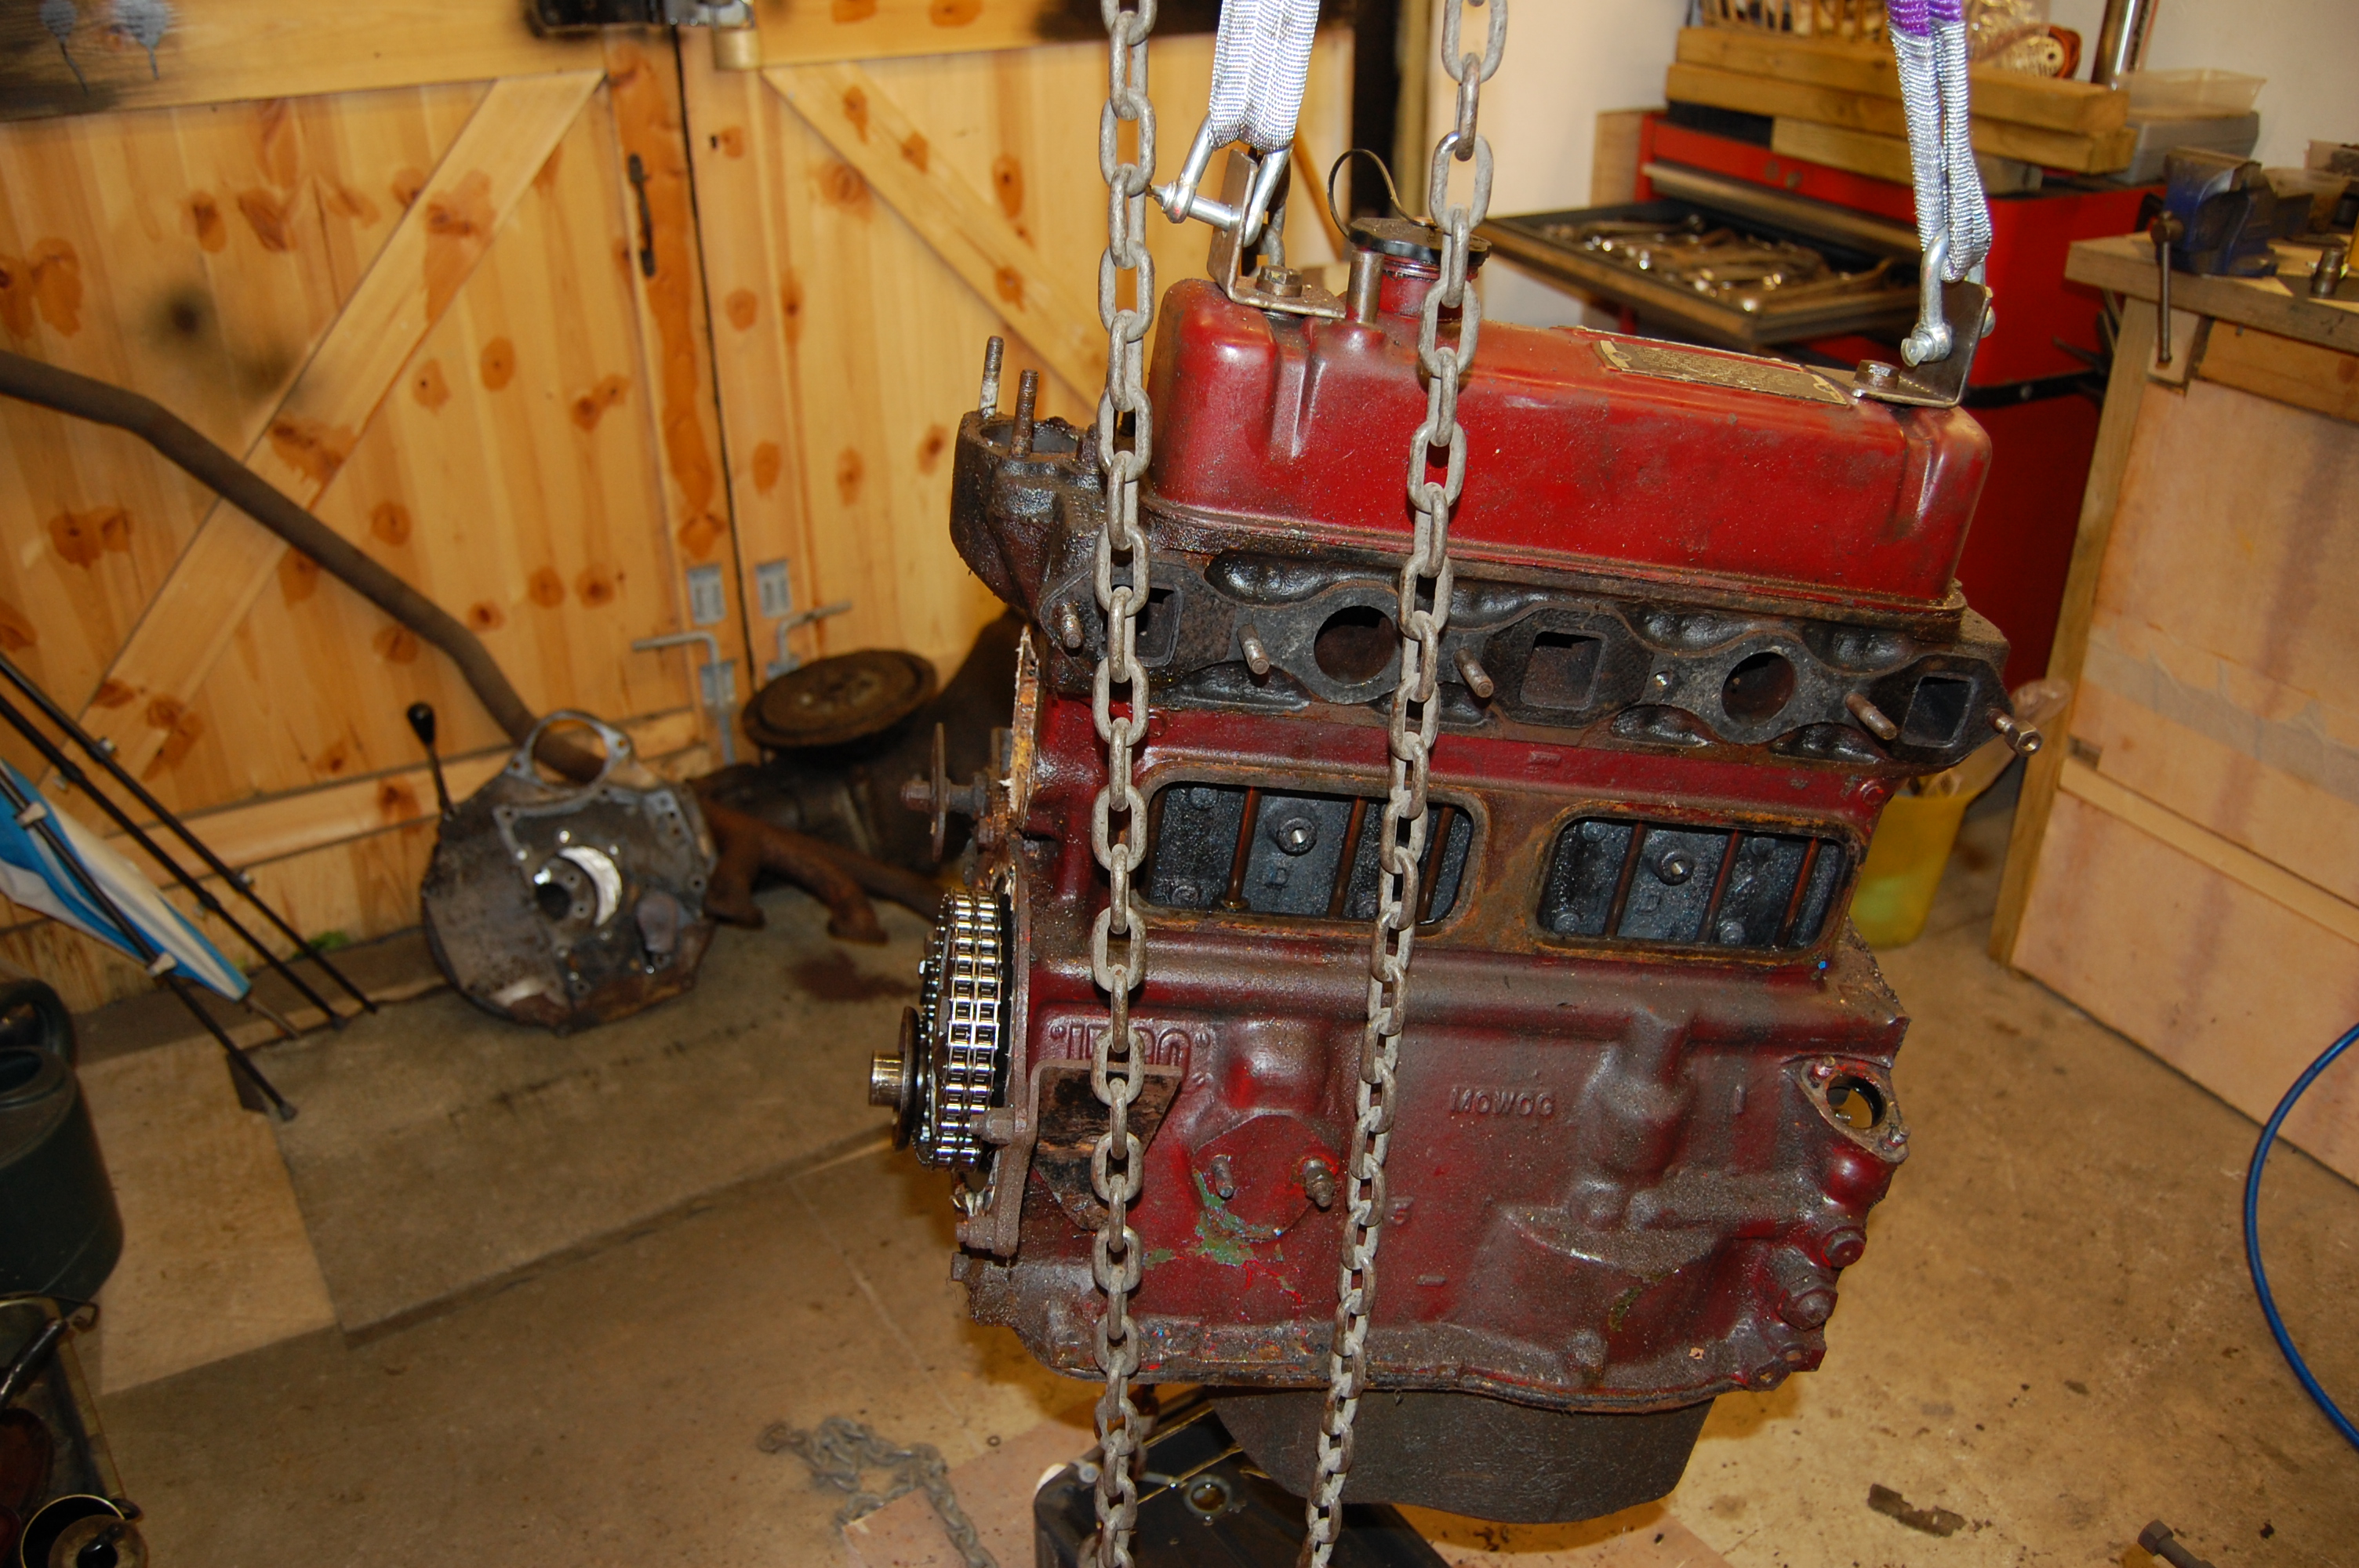
While the engine was suspended, I took the opportunity to remove as many ancilliaaries as possible and drain the oil/diesel mixture that it had been filled with. Note the oil filter bowl and pipe still in gold from the previous ‘Gold Seal’ engine
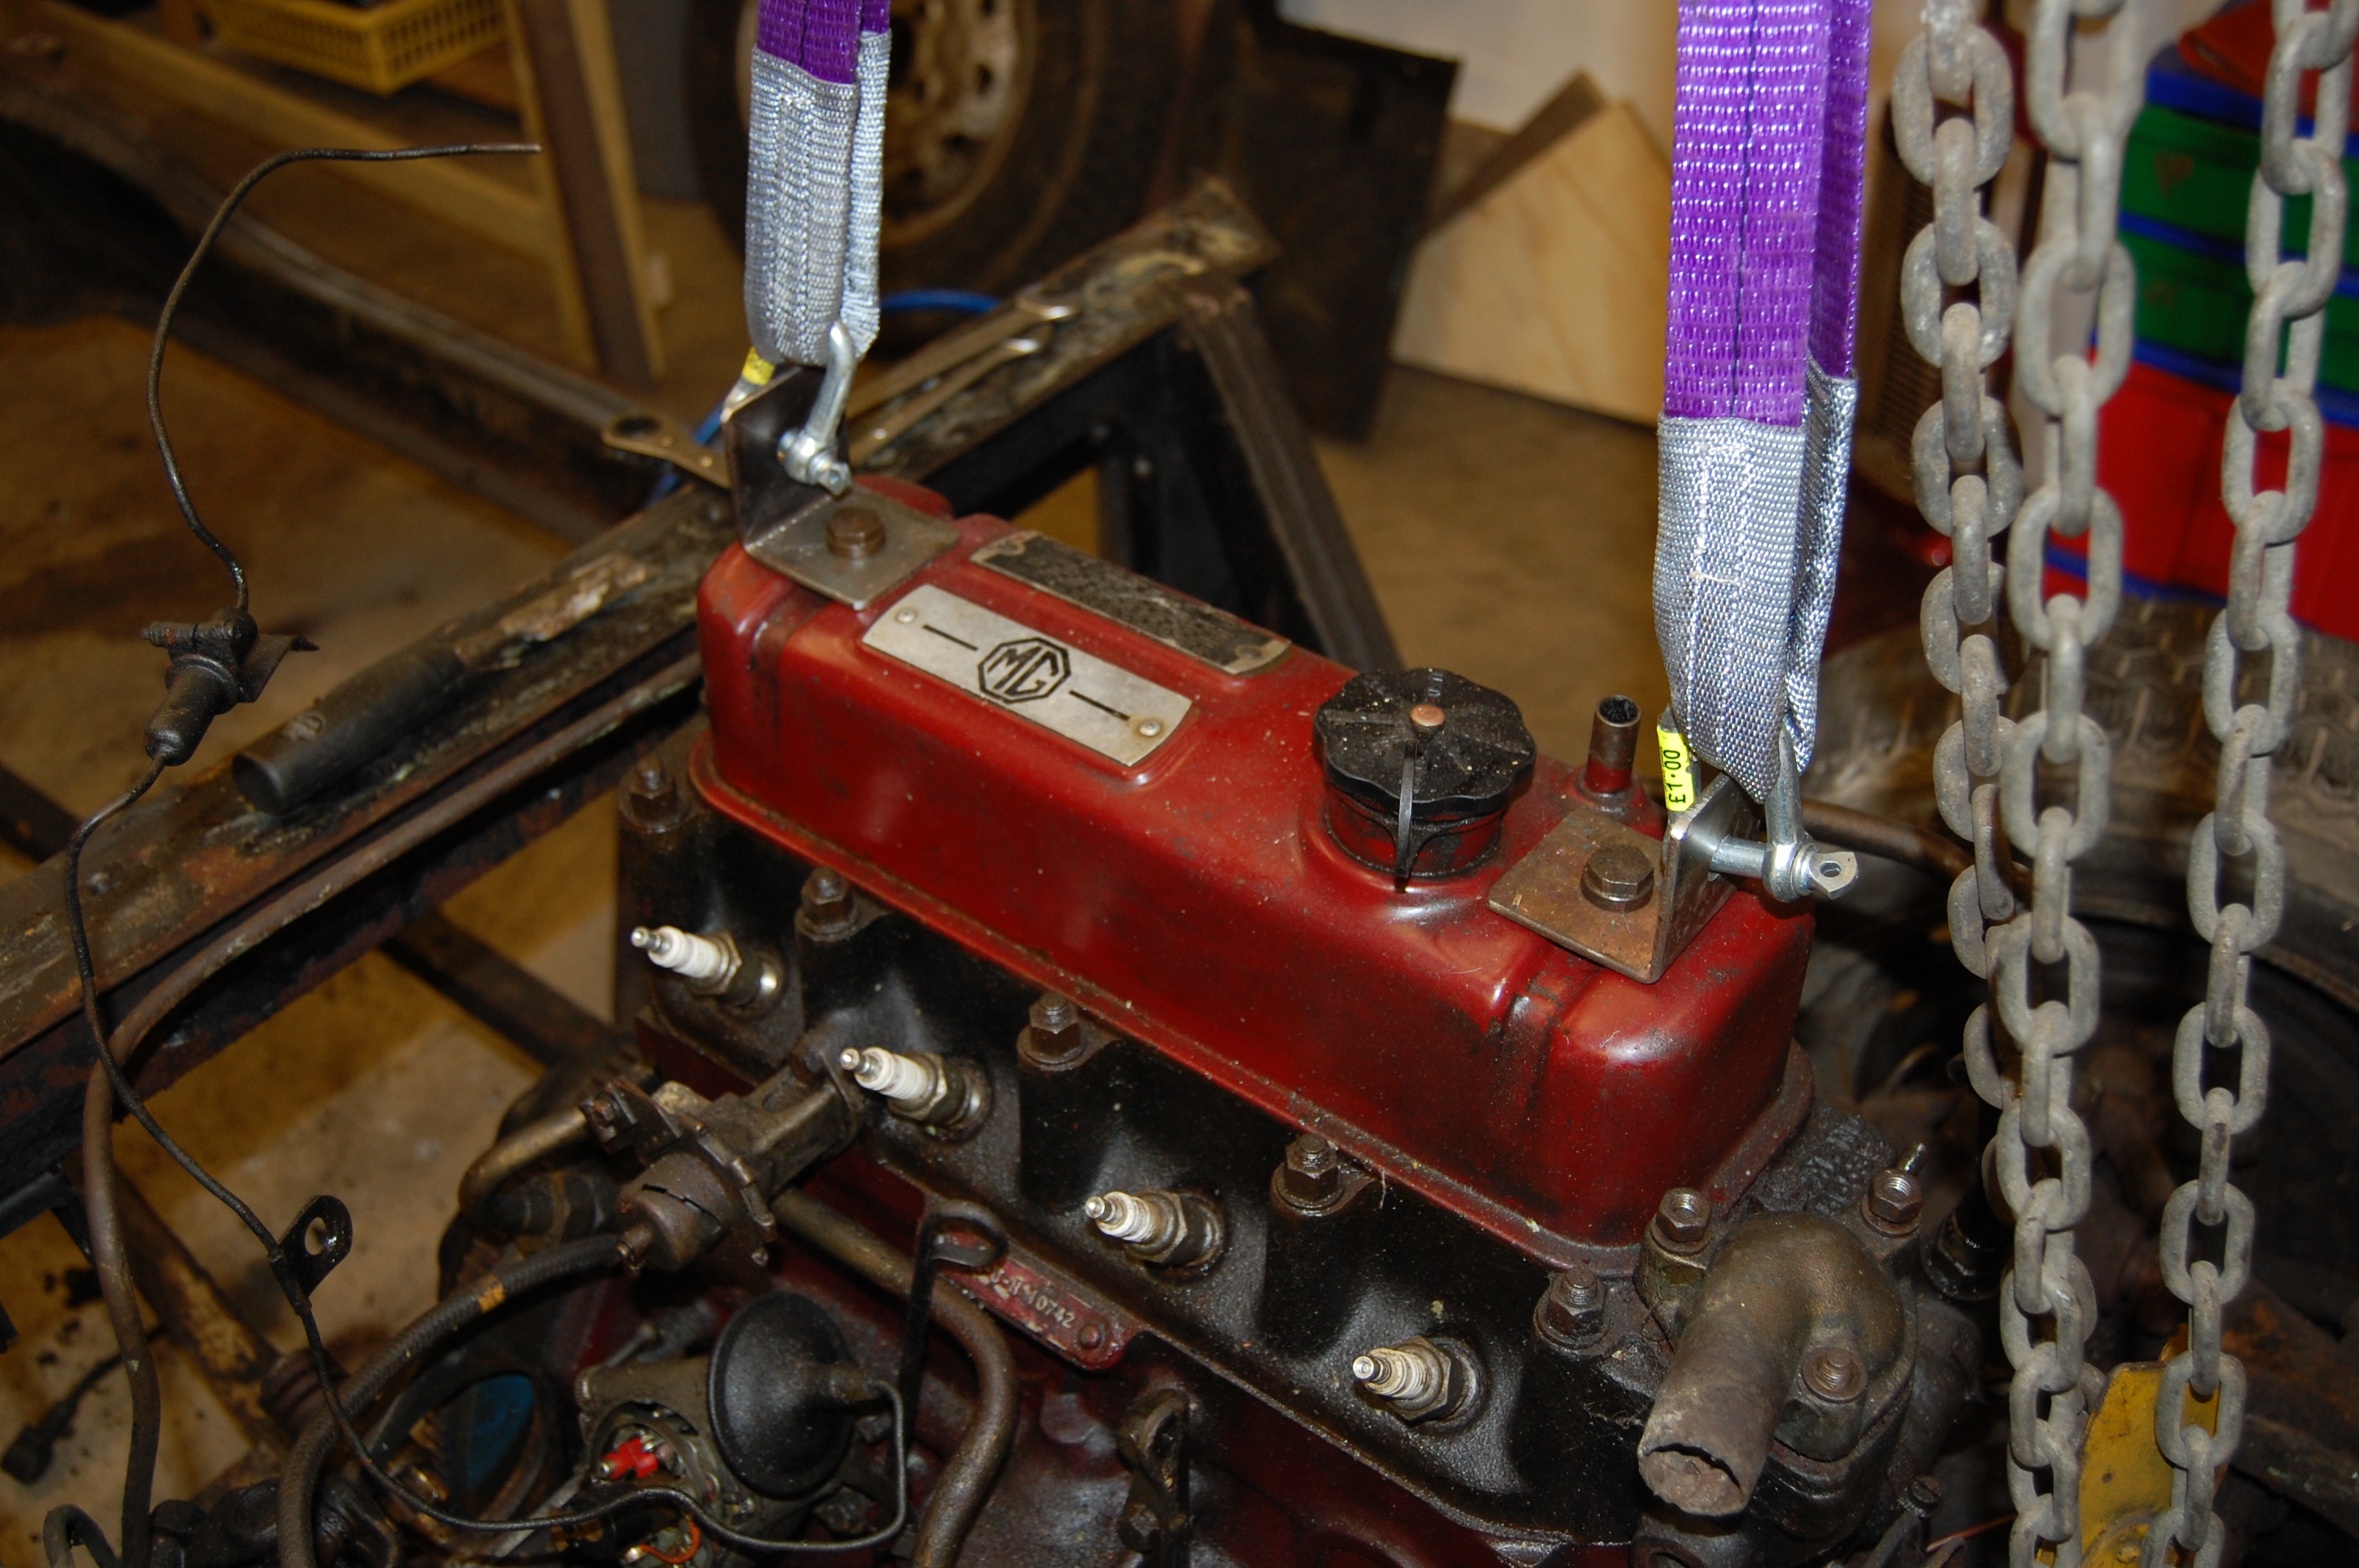
Home fabricated lifting brackets.
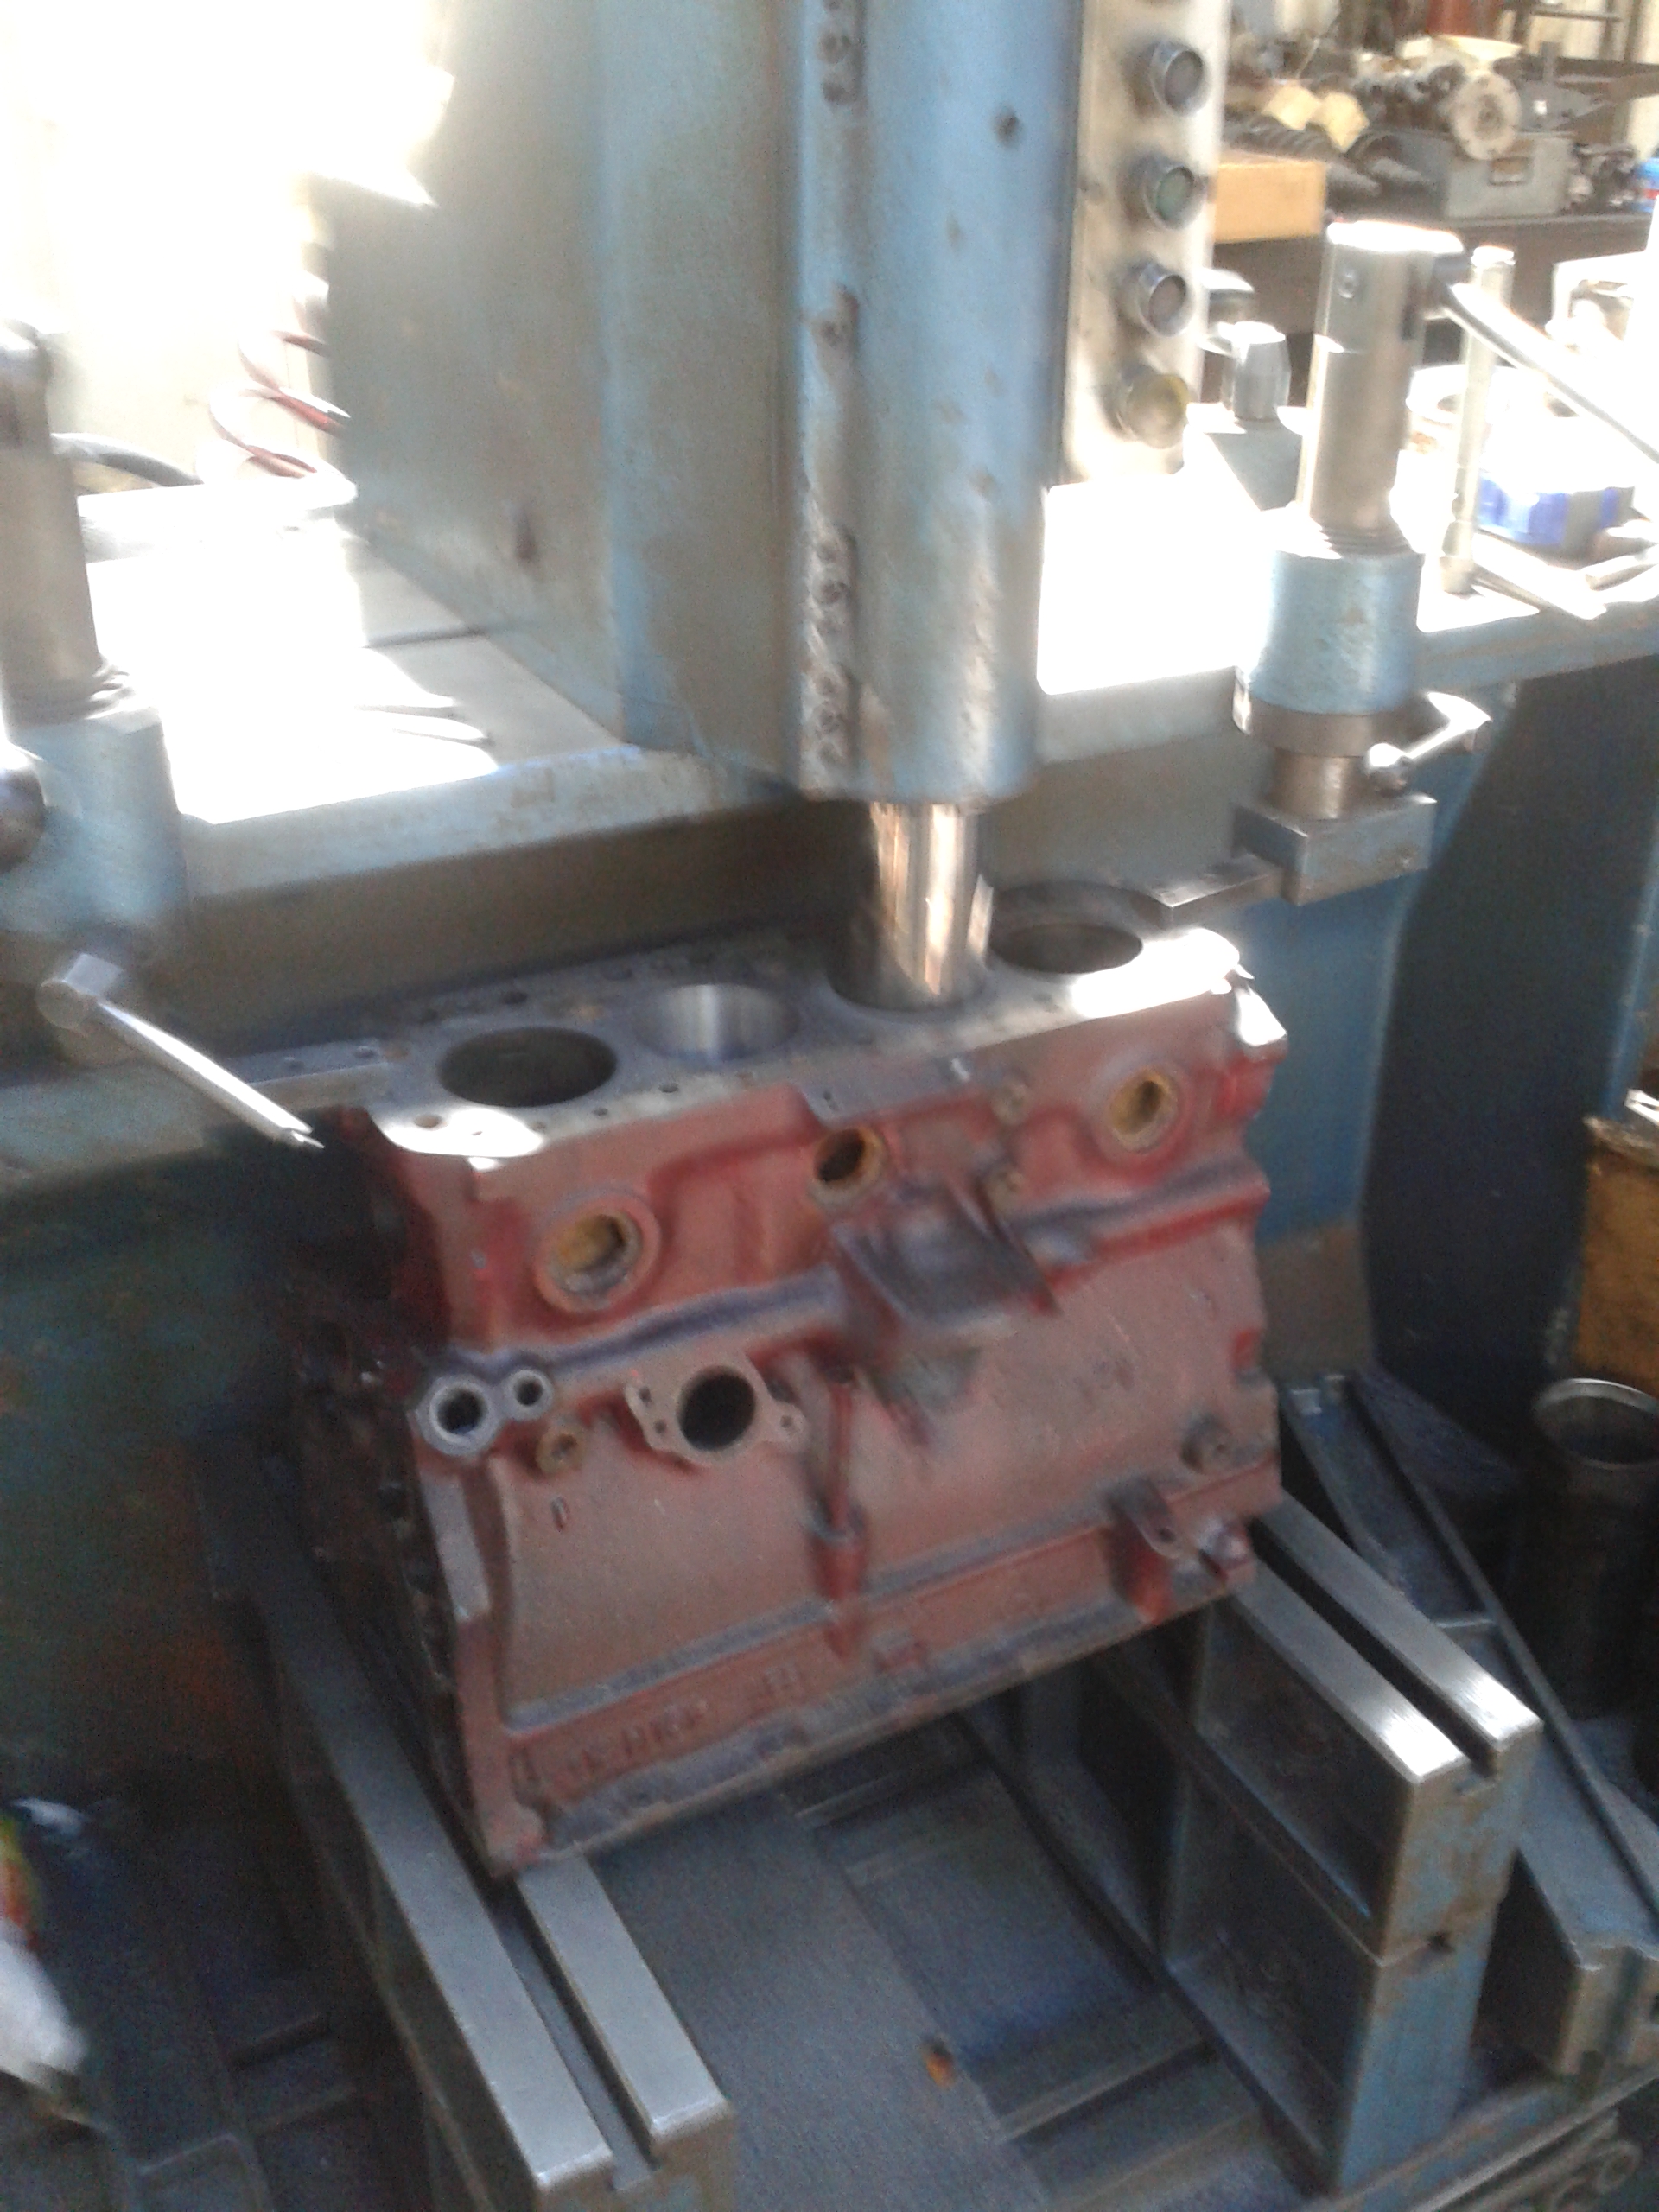
Crankshaft will be polished and crack tested at same time as cylinder rebore.
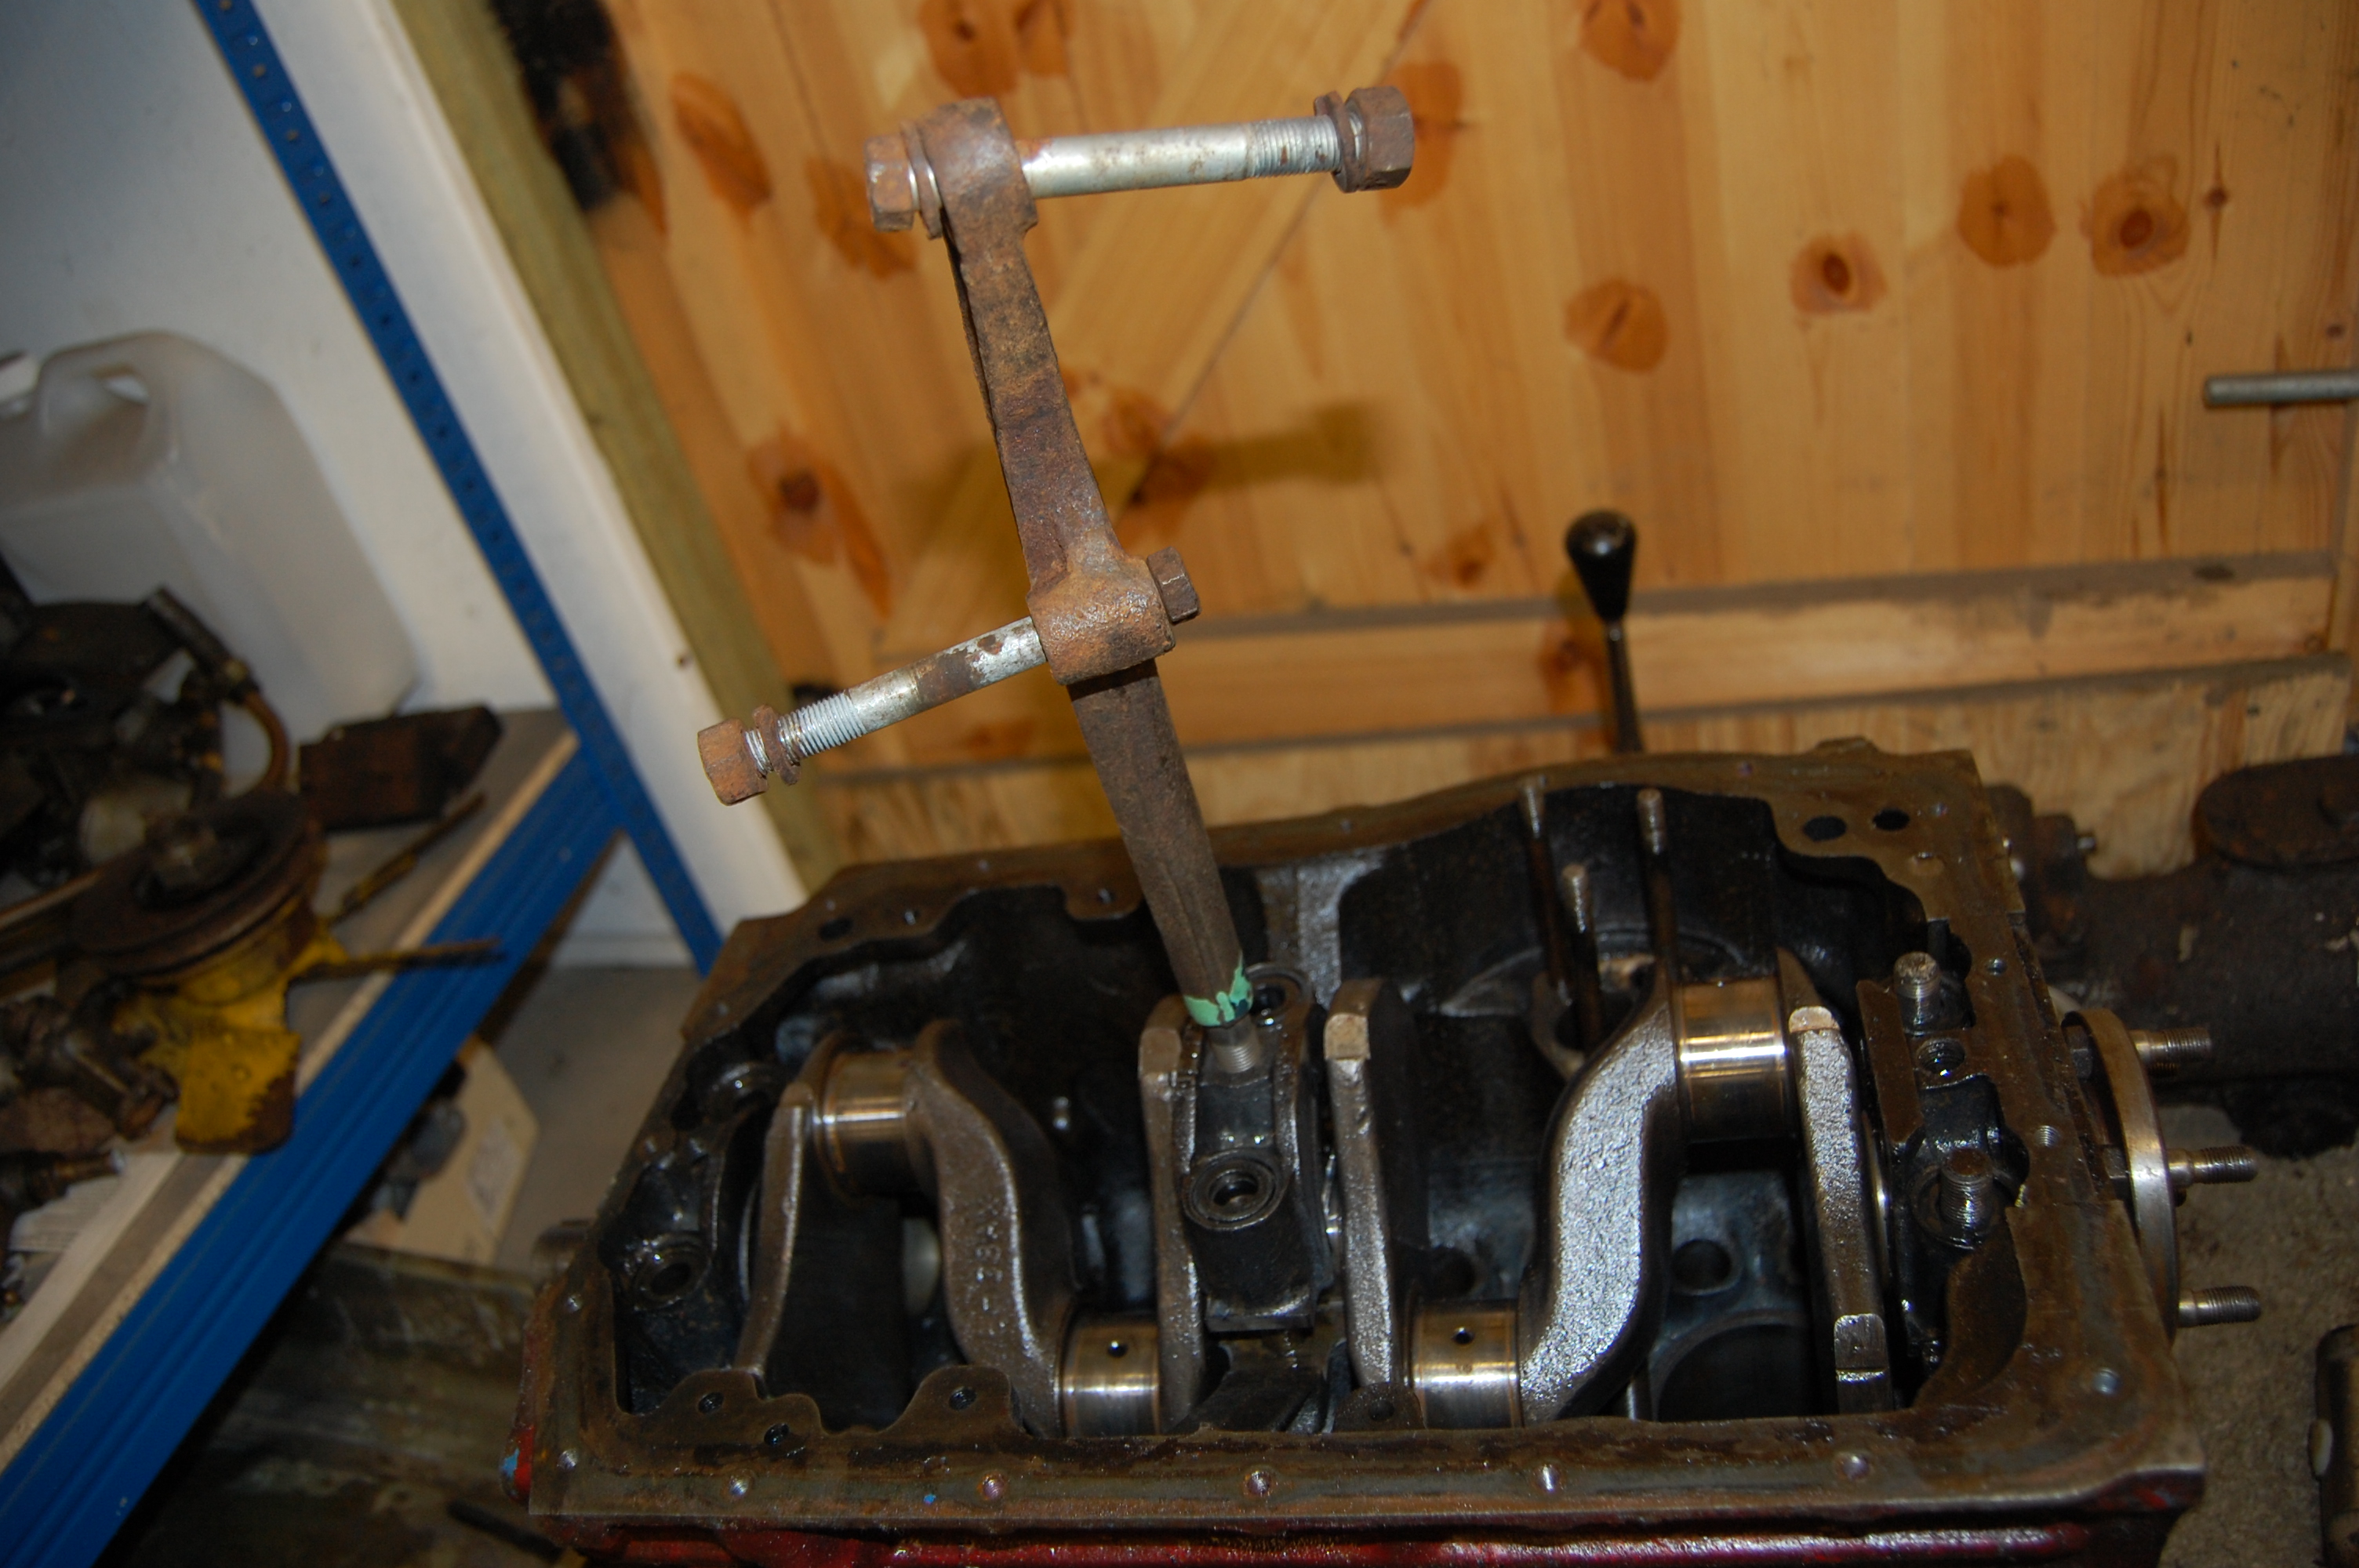
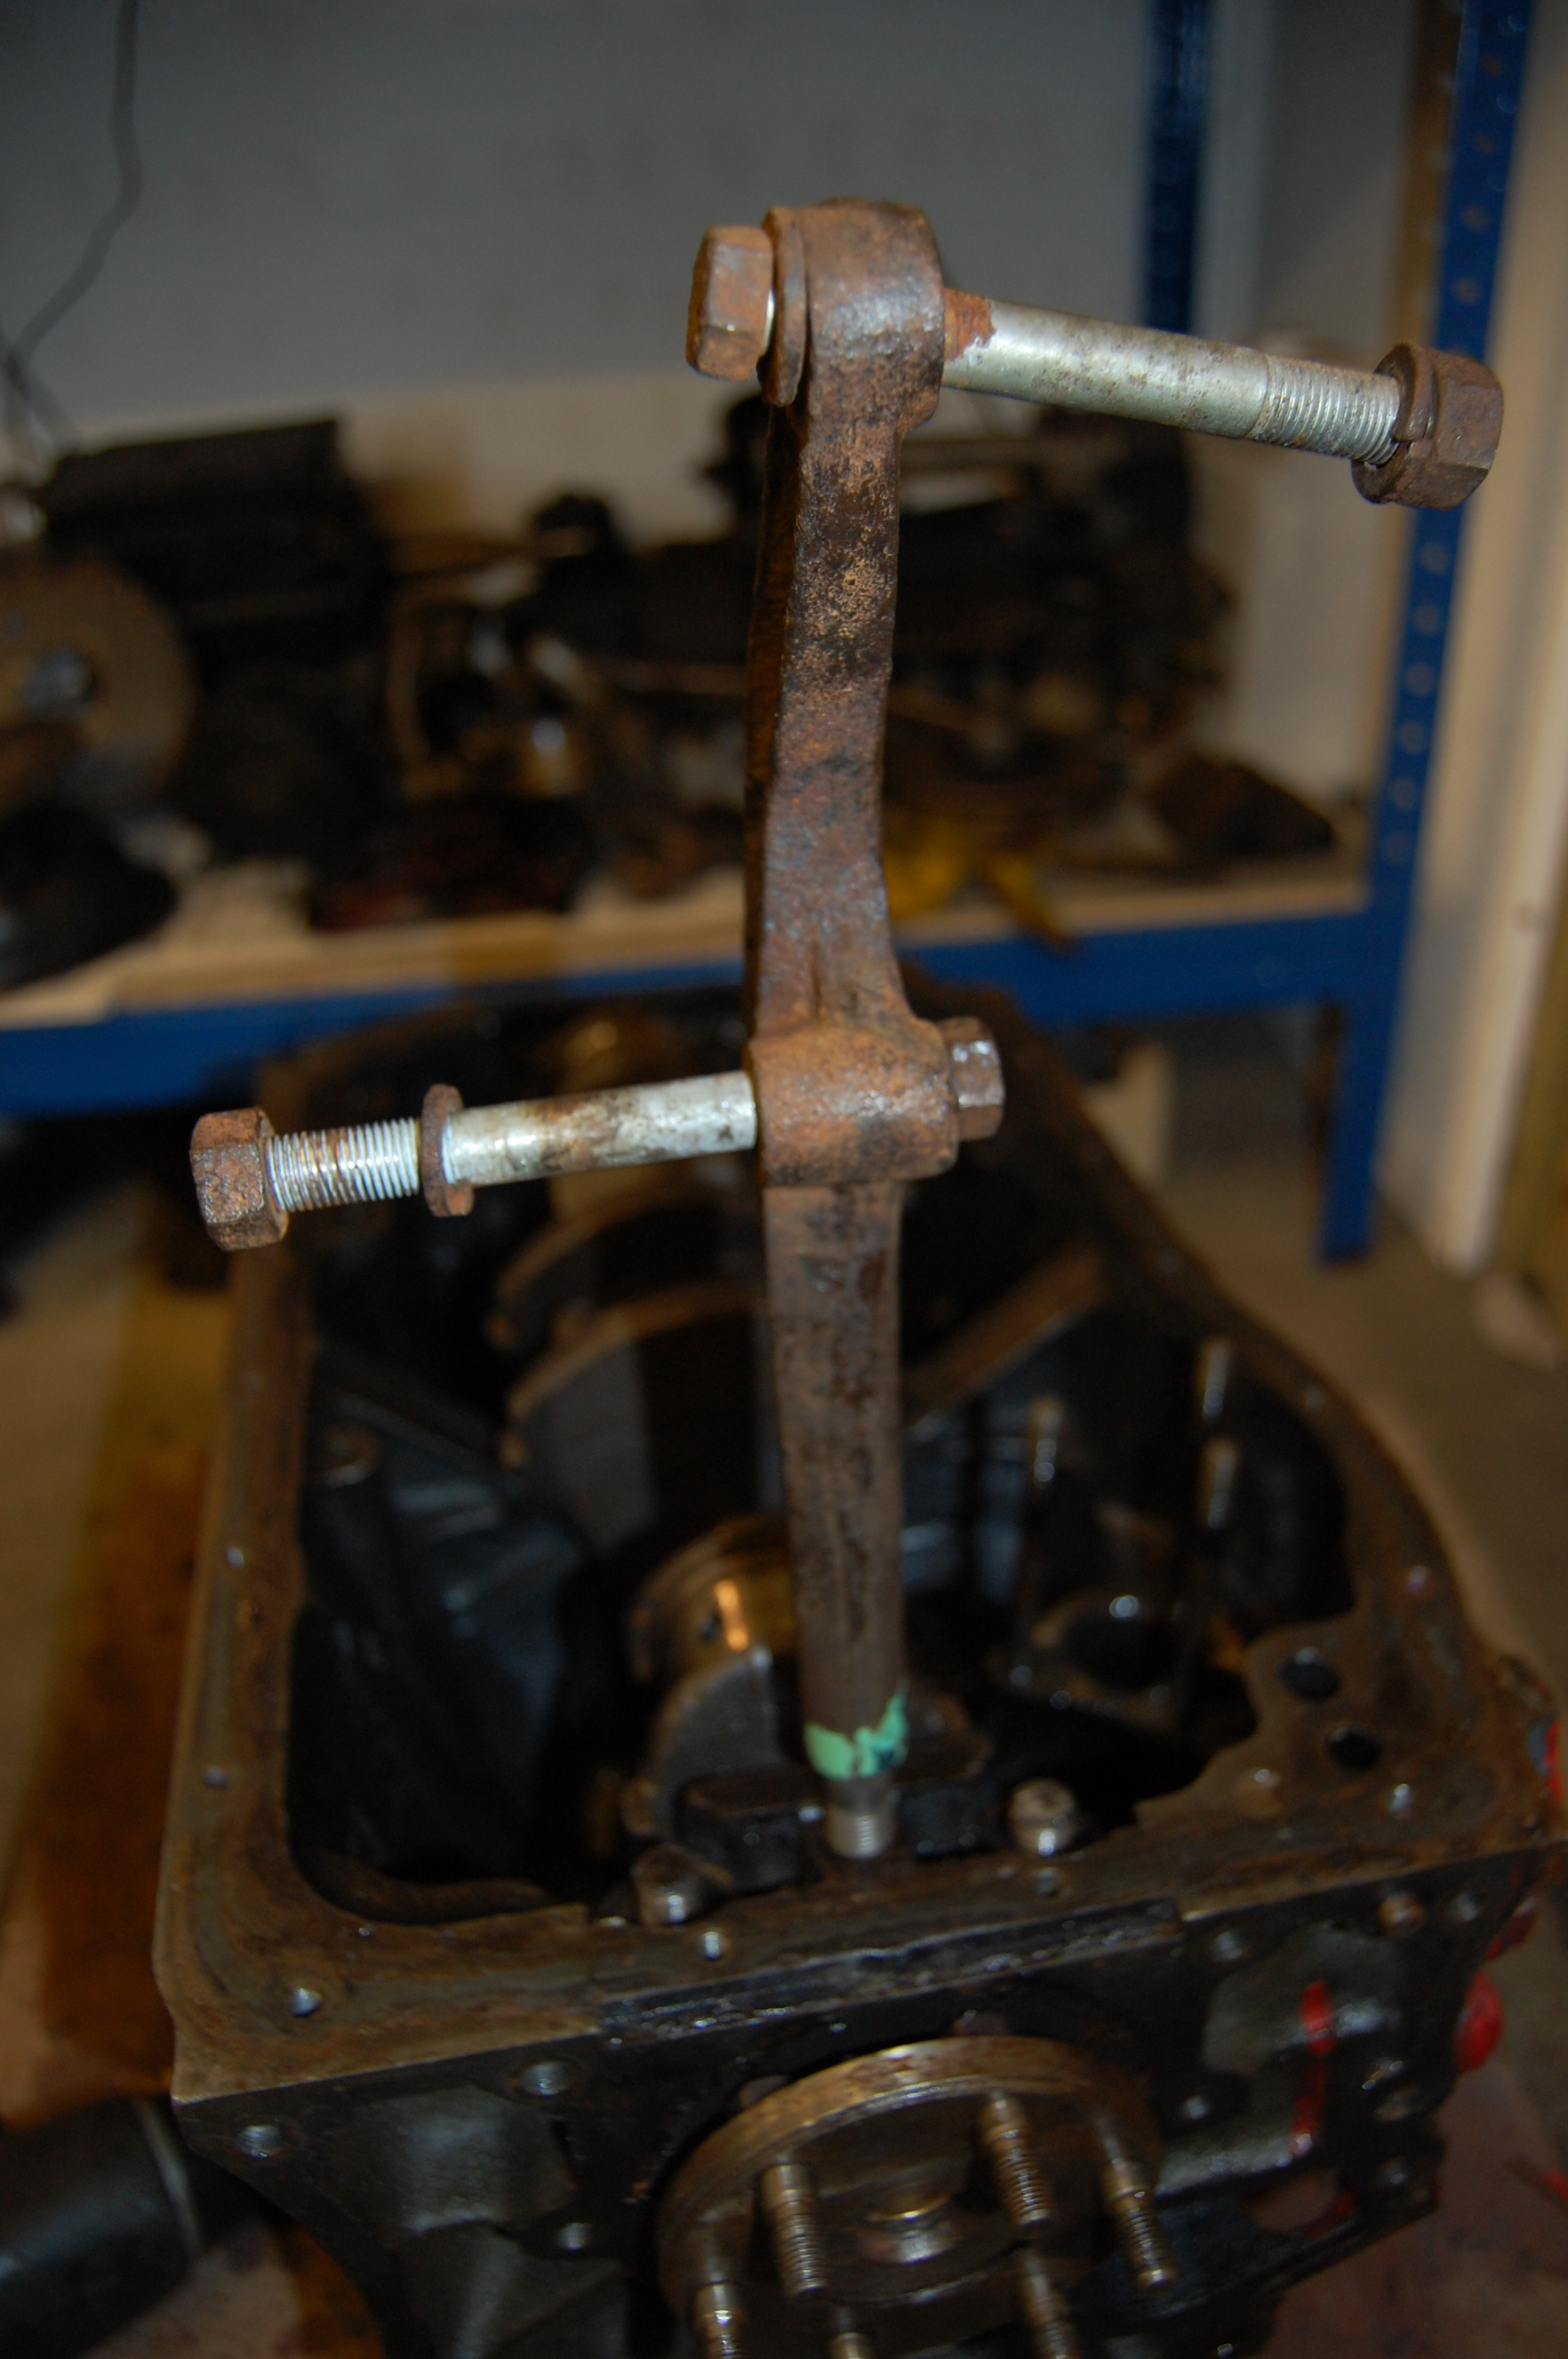
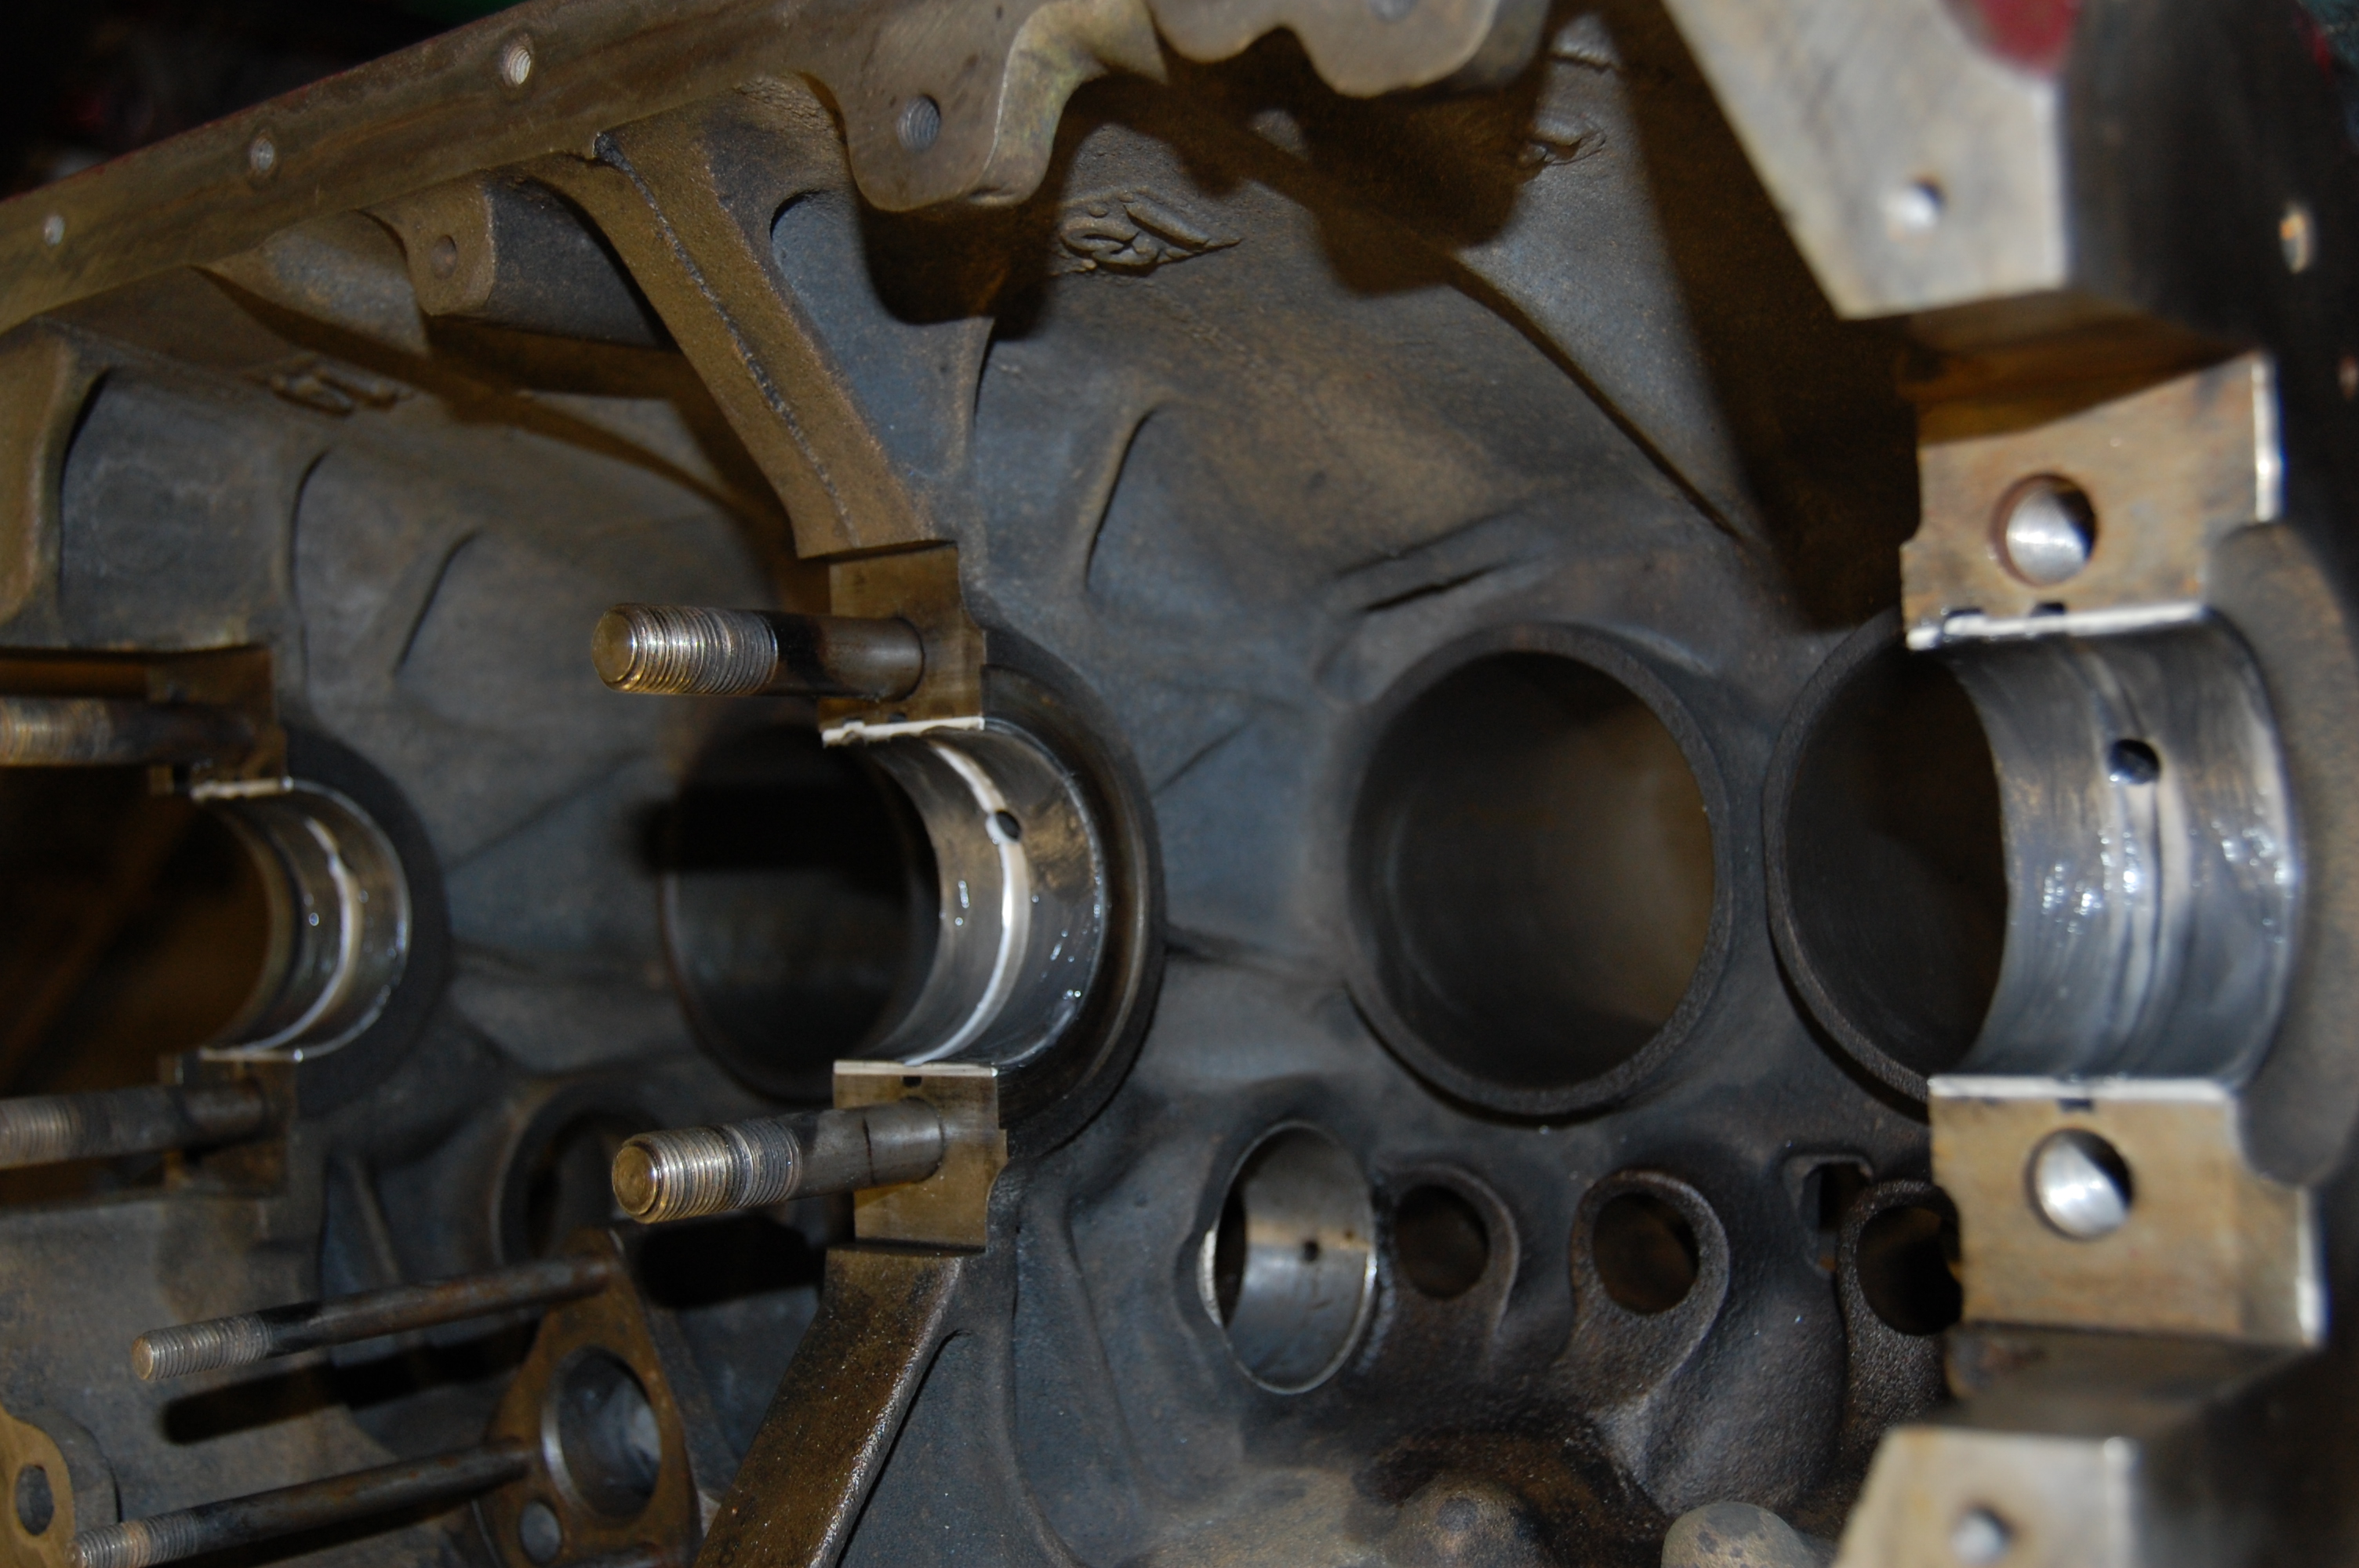
Purists, look away now! To remove the main bearing caps, a slide-hammer should be used. As I don’t have one, I looked everywhere in my workshop for an alternative and by chance I tried the rear bumper bracket for size and the thread matched. It worked a treat, being solid, having two ‘handles’ and a useful lump to engage with a plastic mallet. Necessity, the mother of invention!
See Barney Gaylord’s ‘Grapes of Wrath’ section on his MGA Guru technical site – mgaguru.com
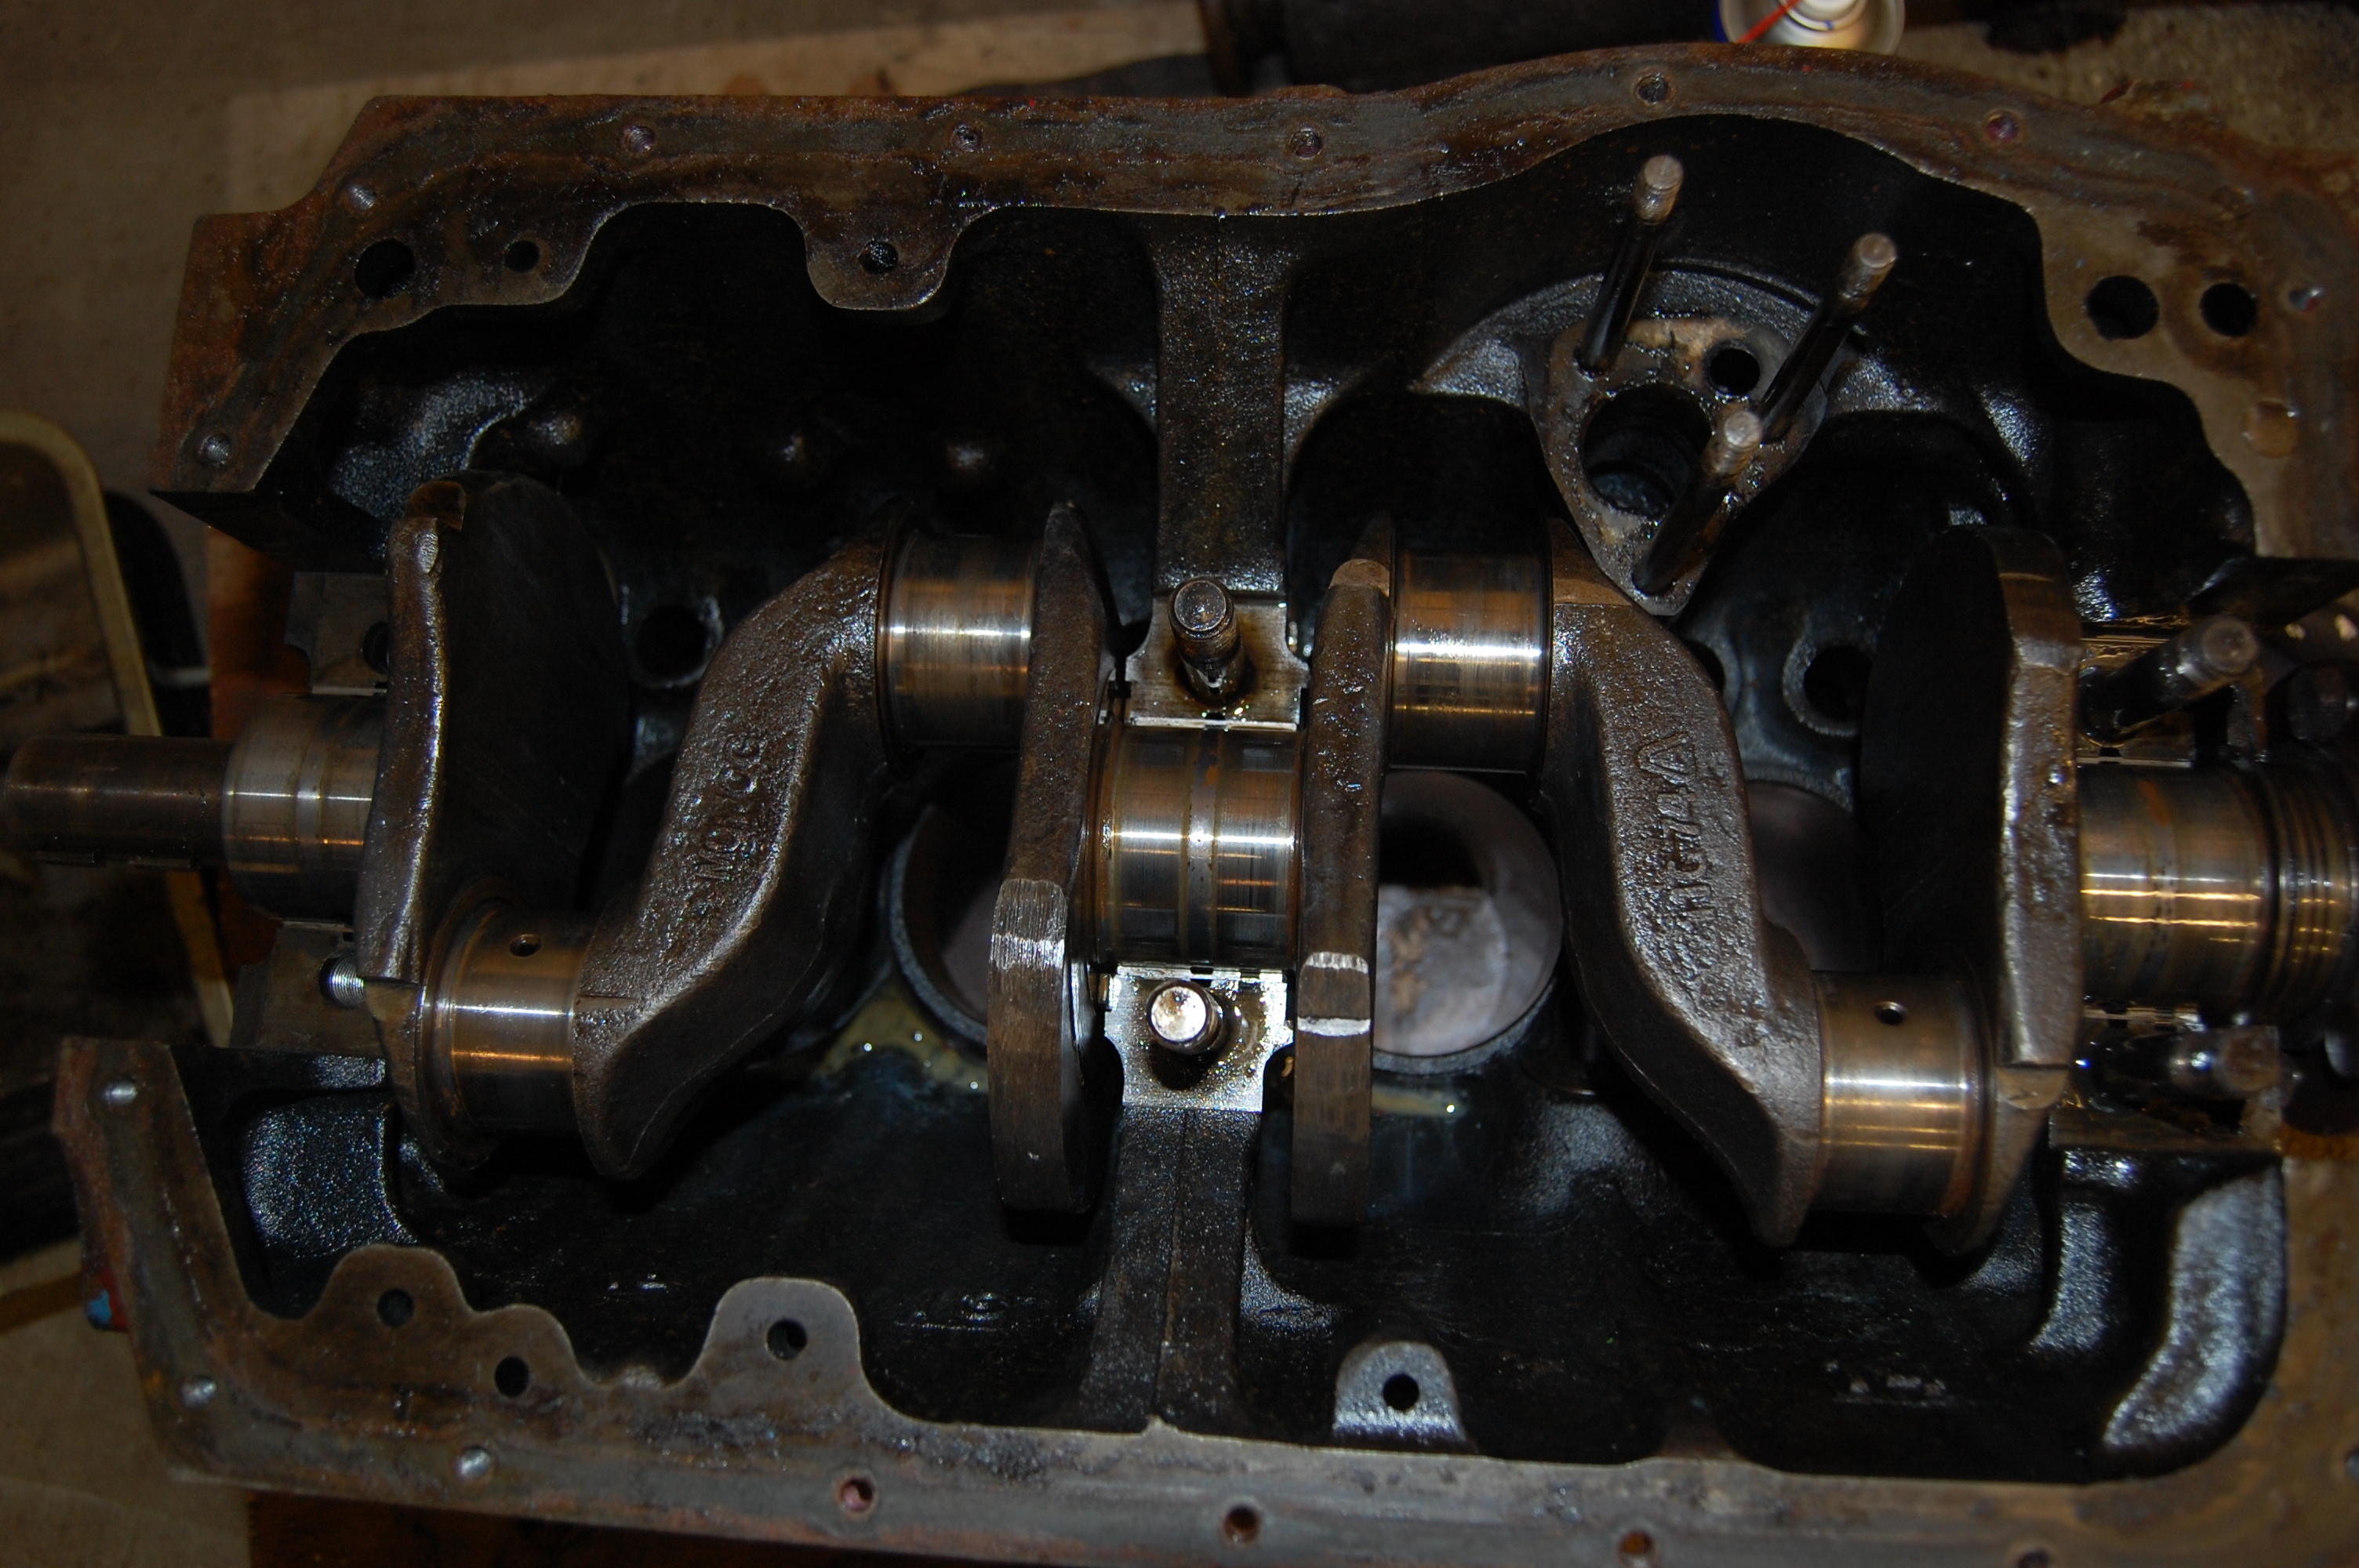
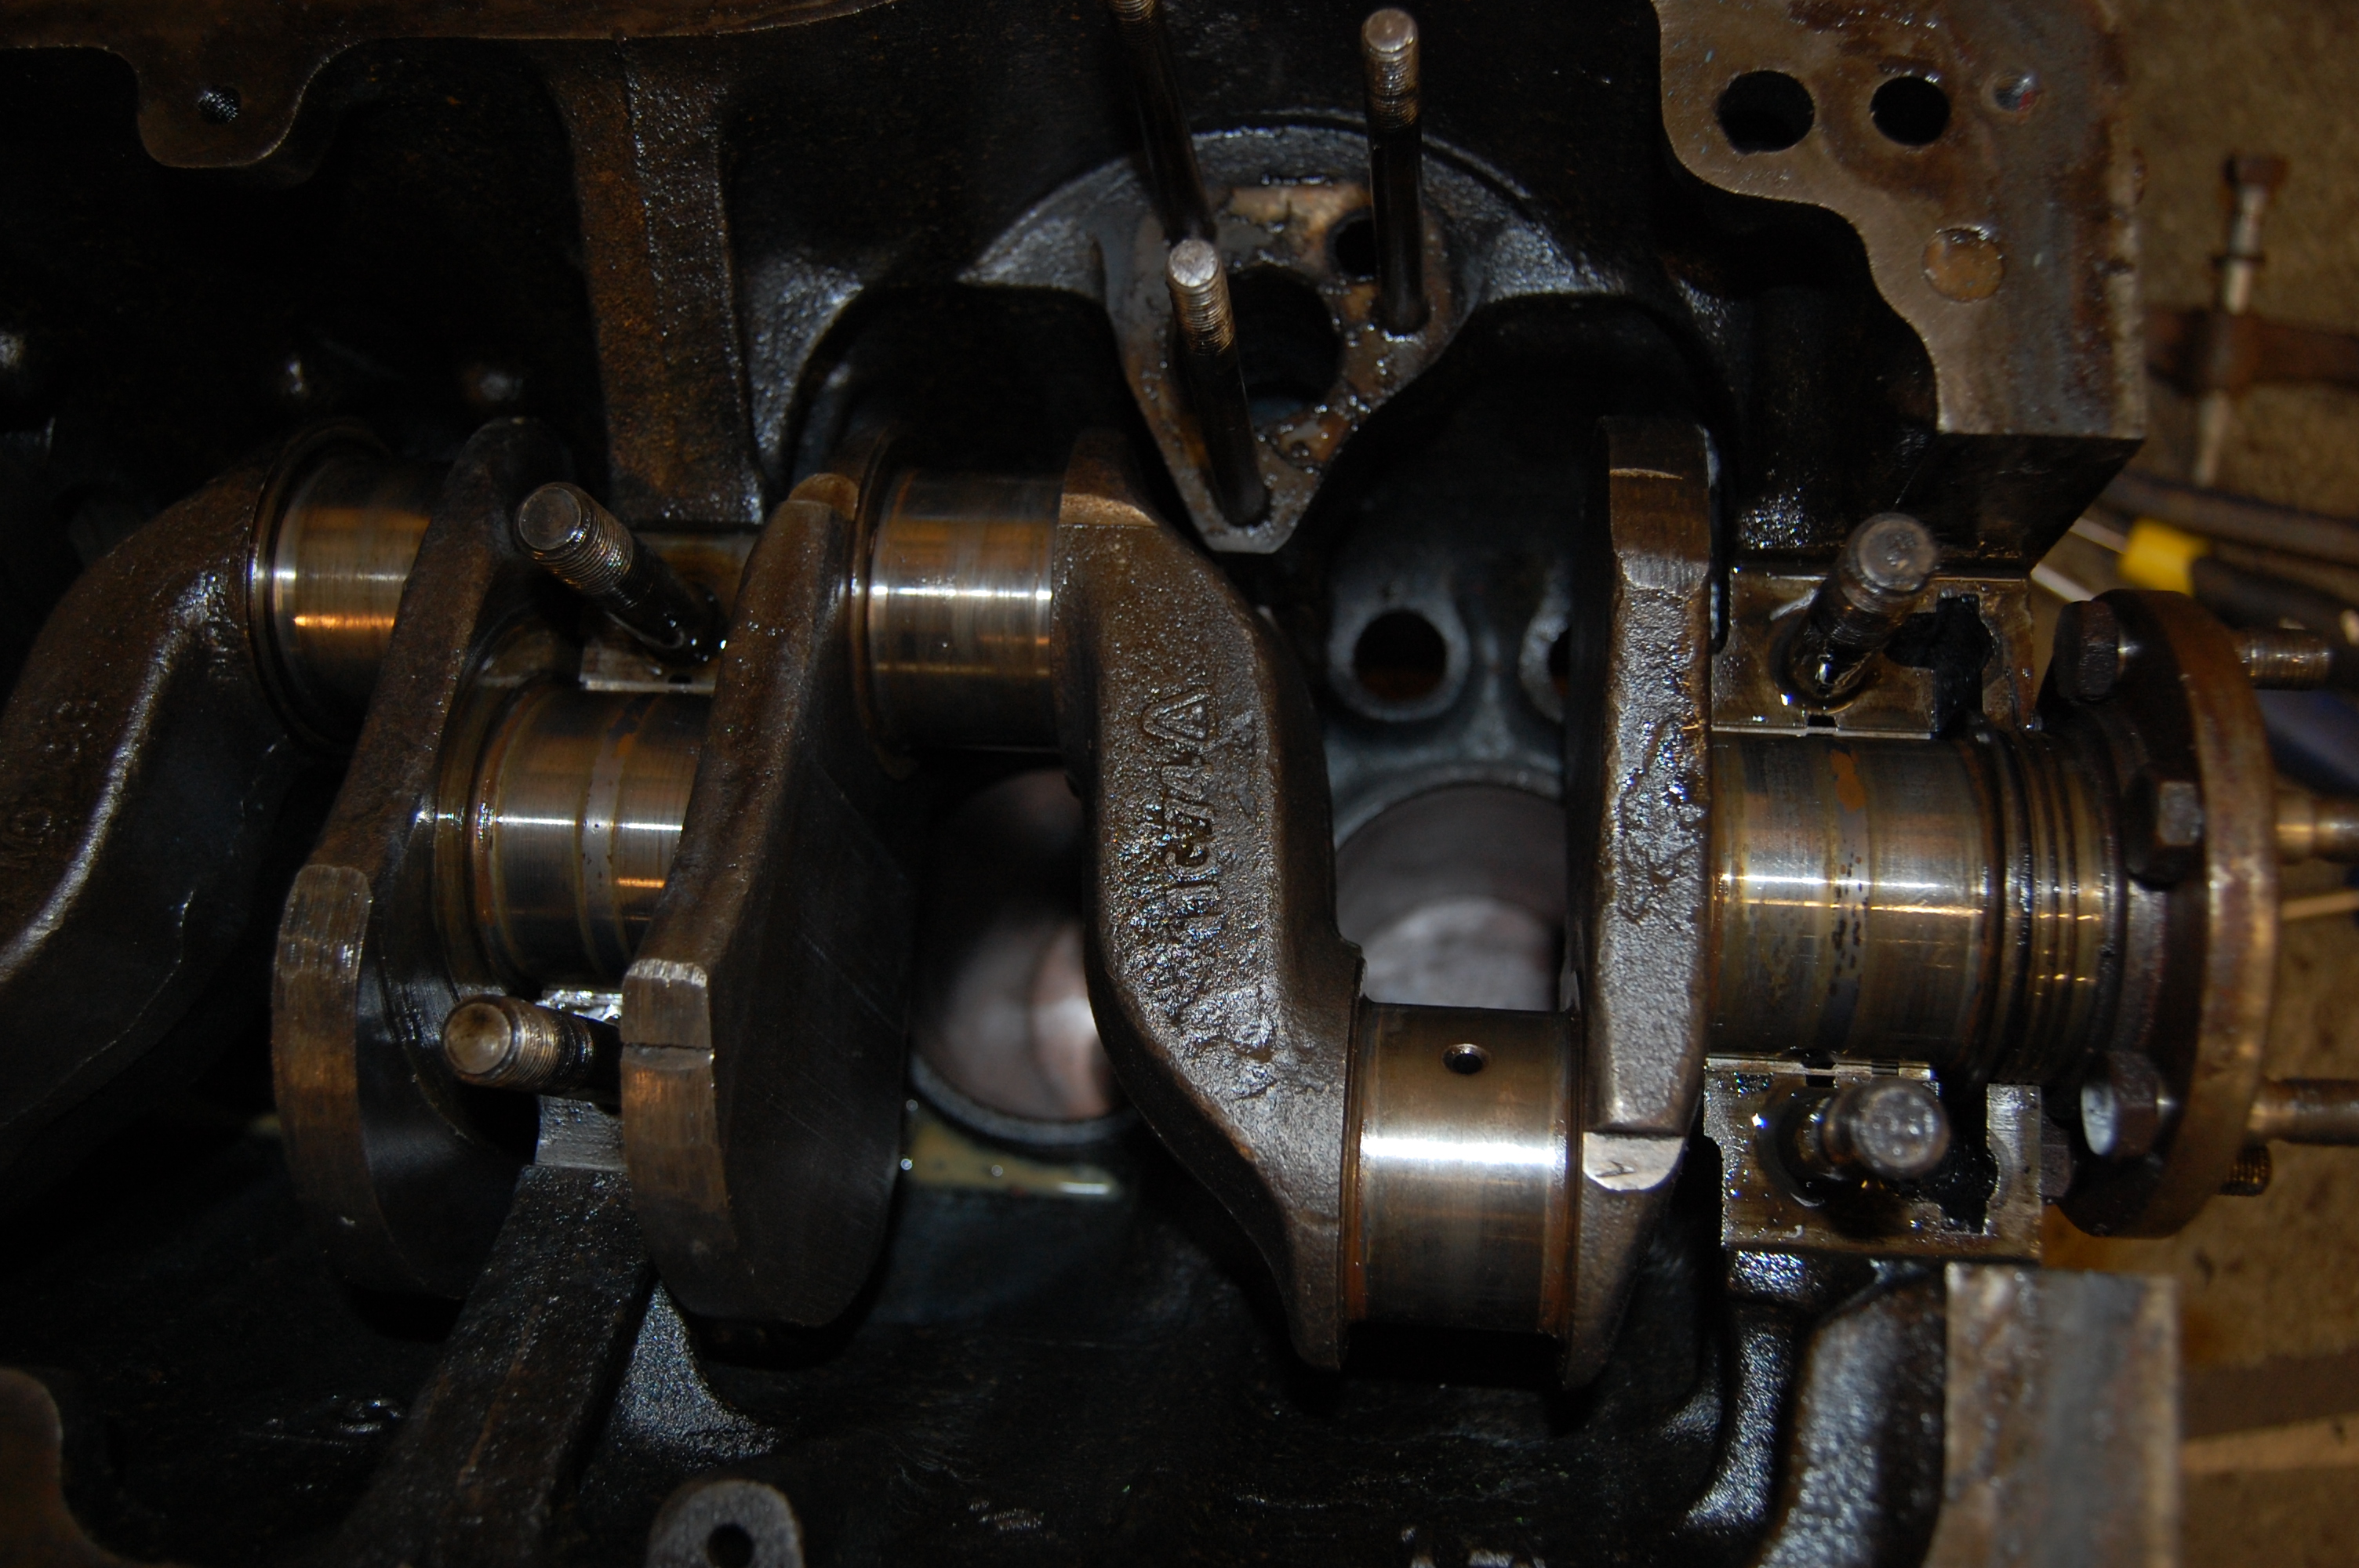
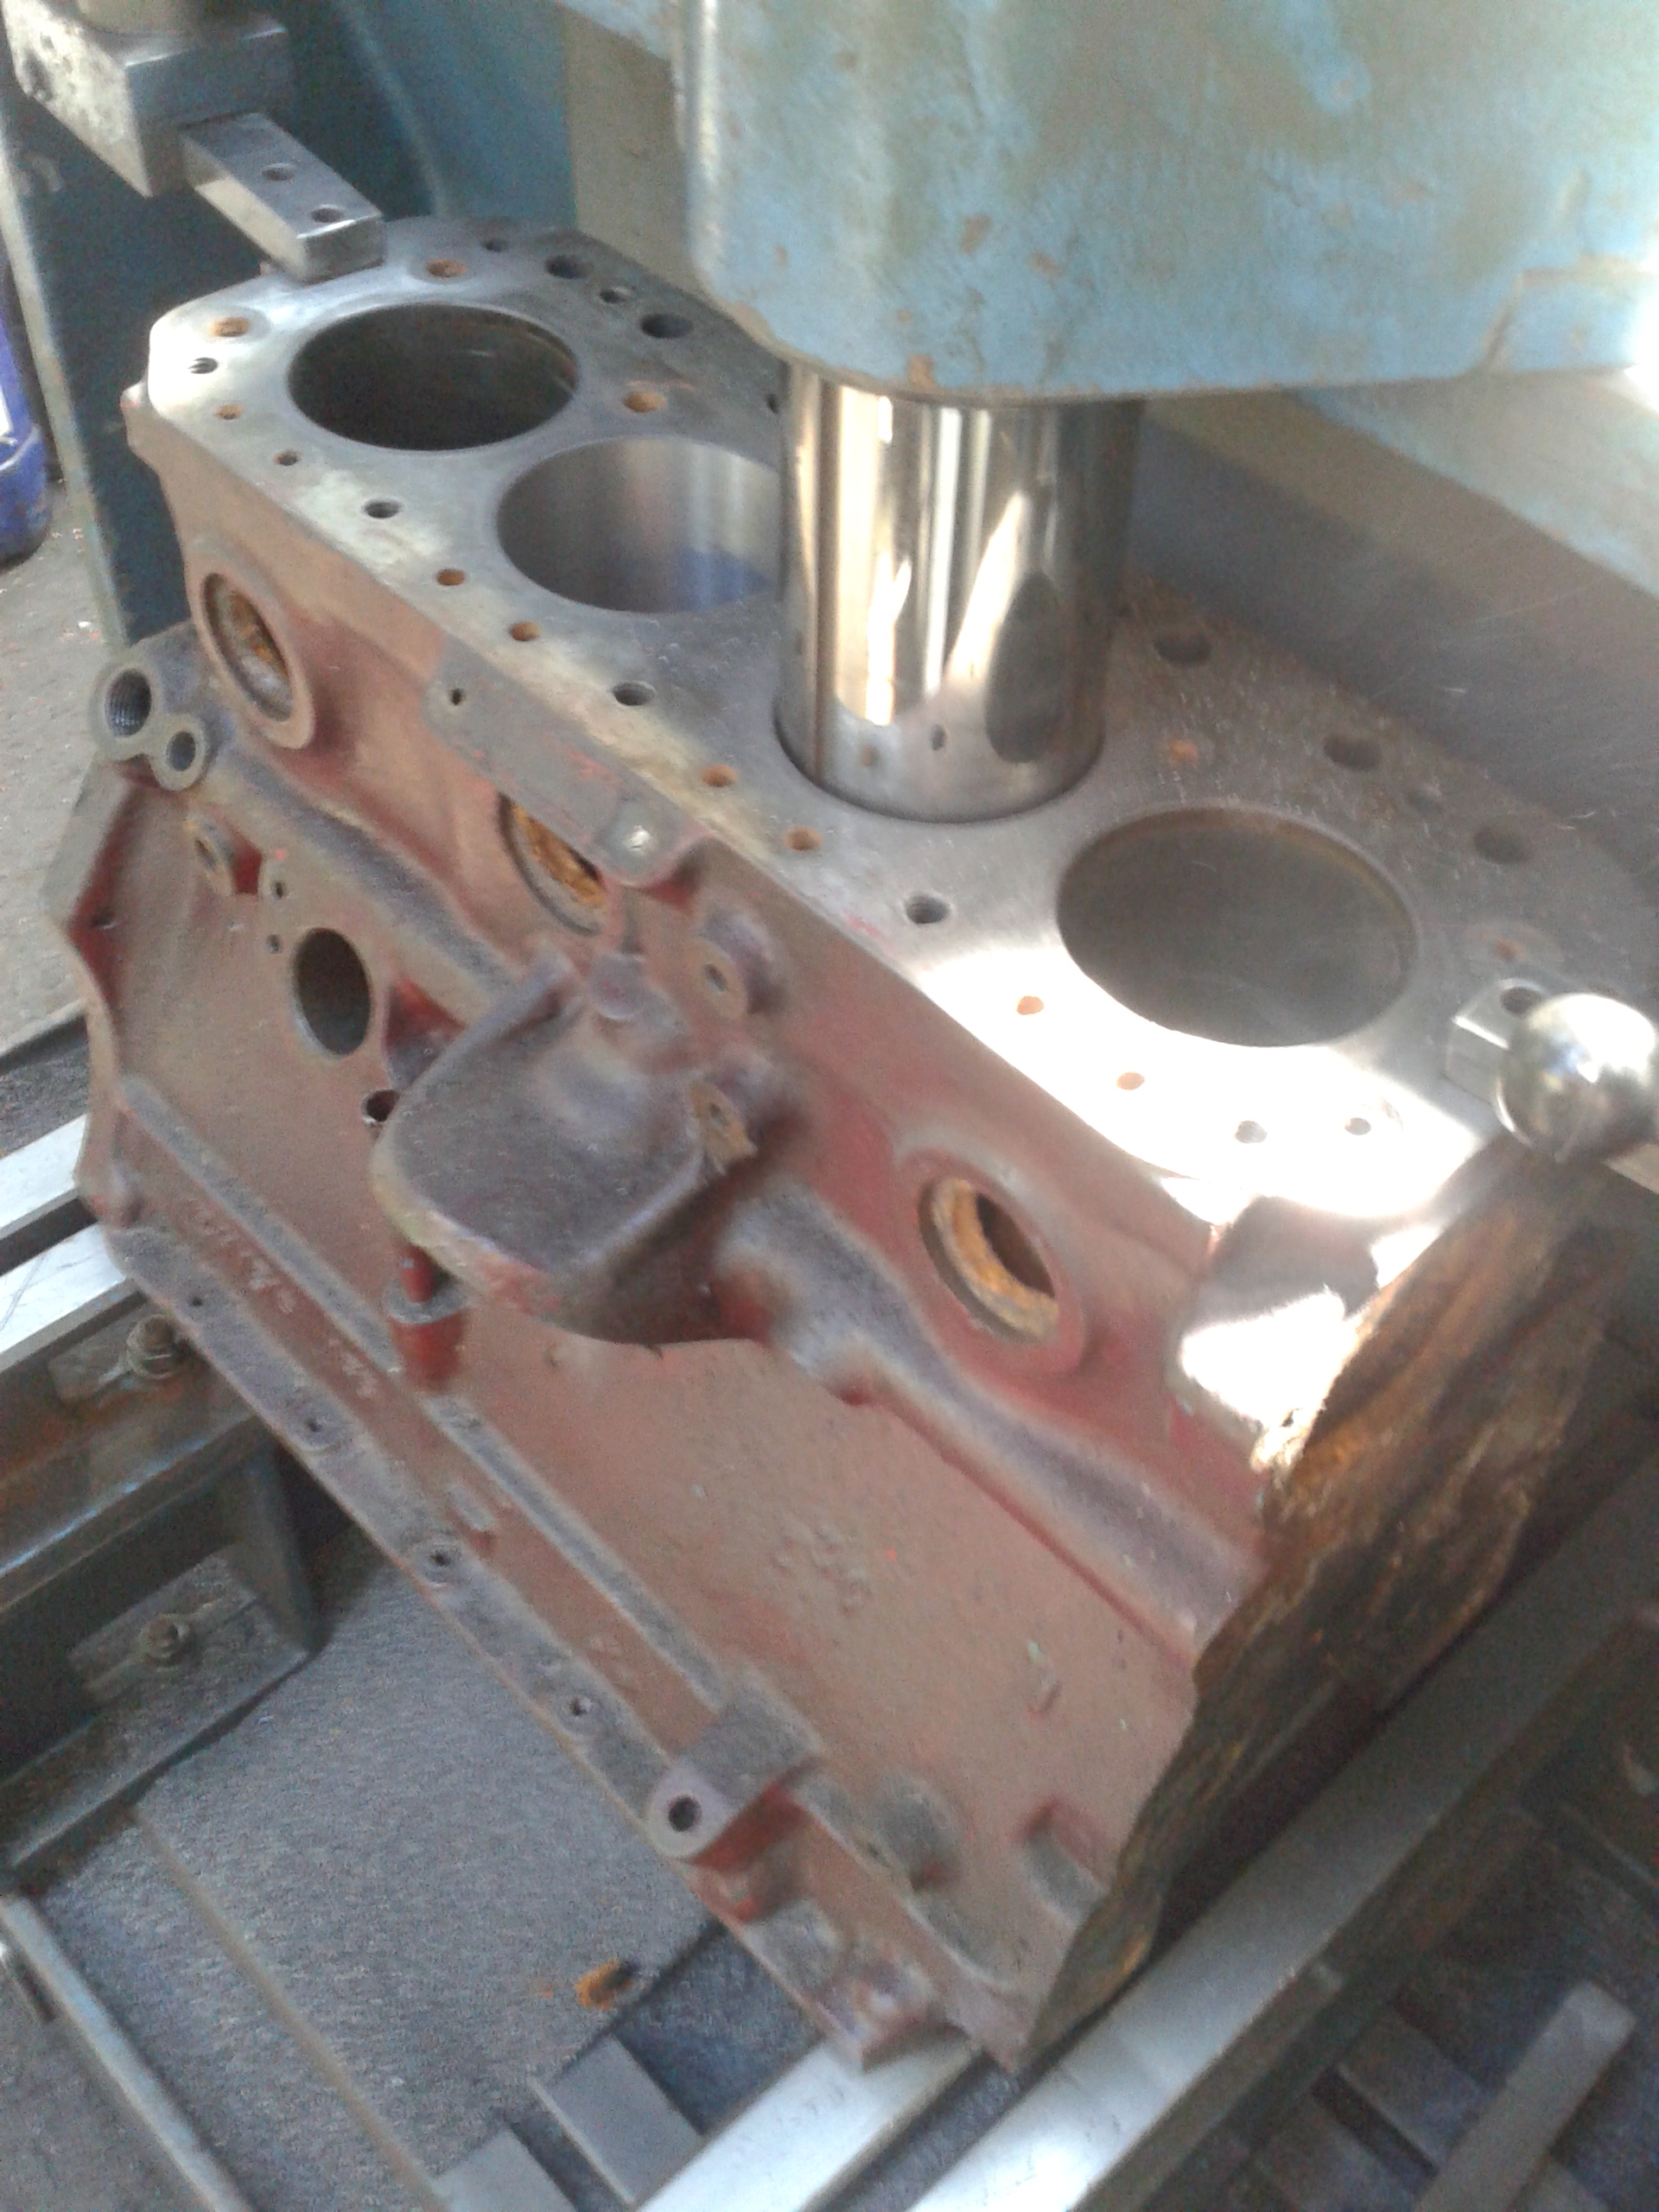
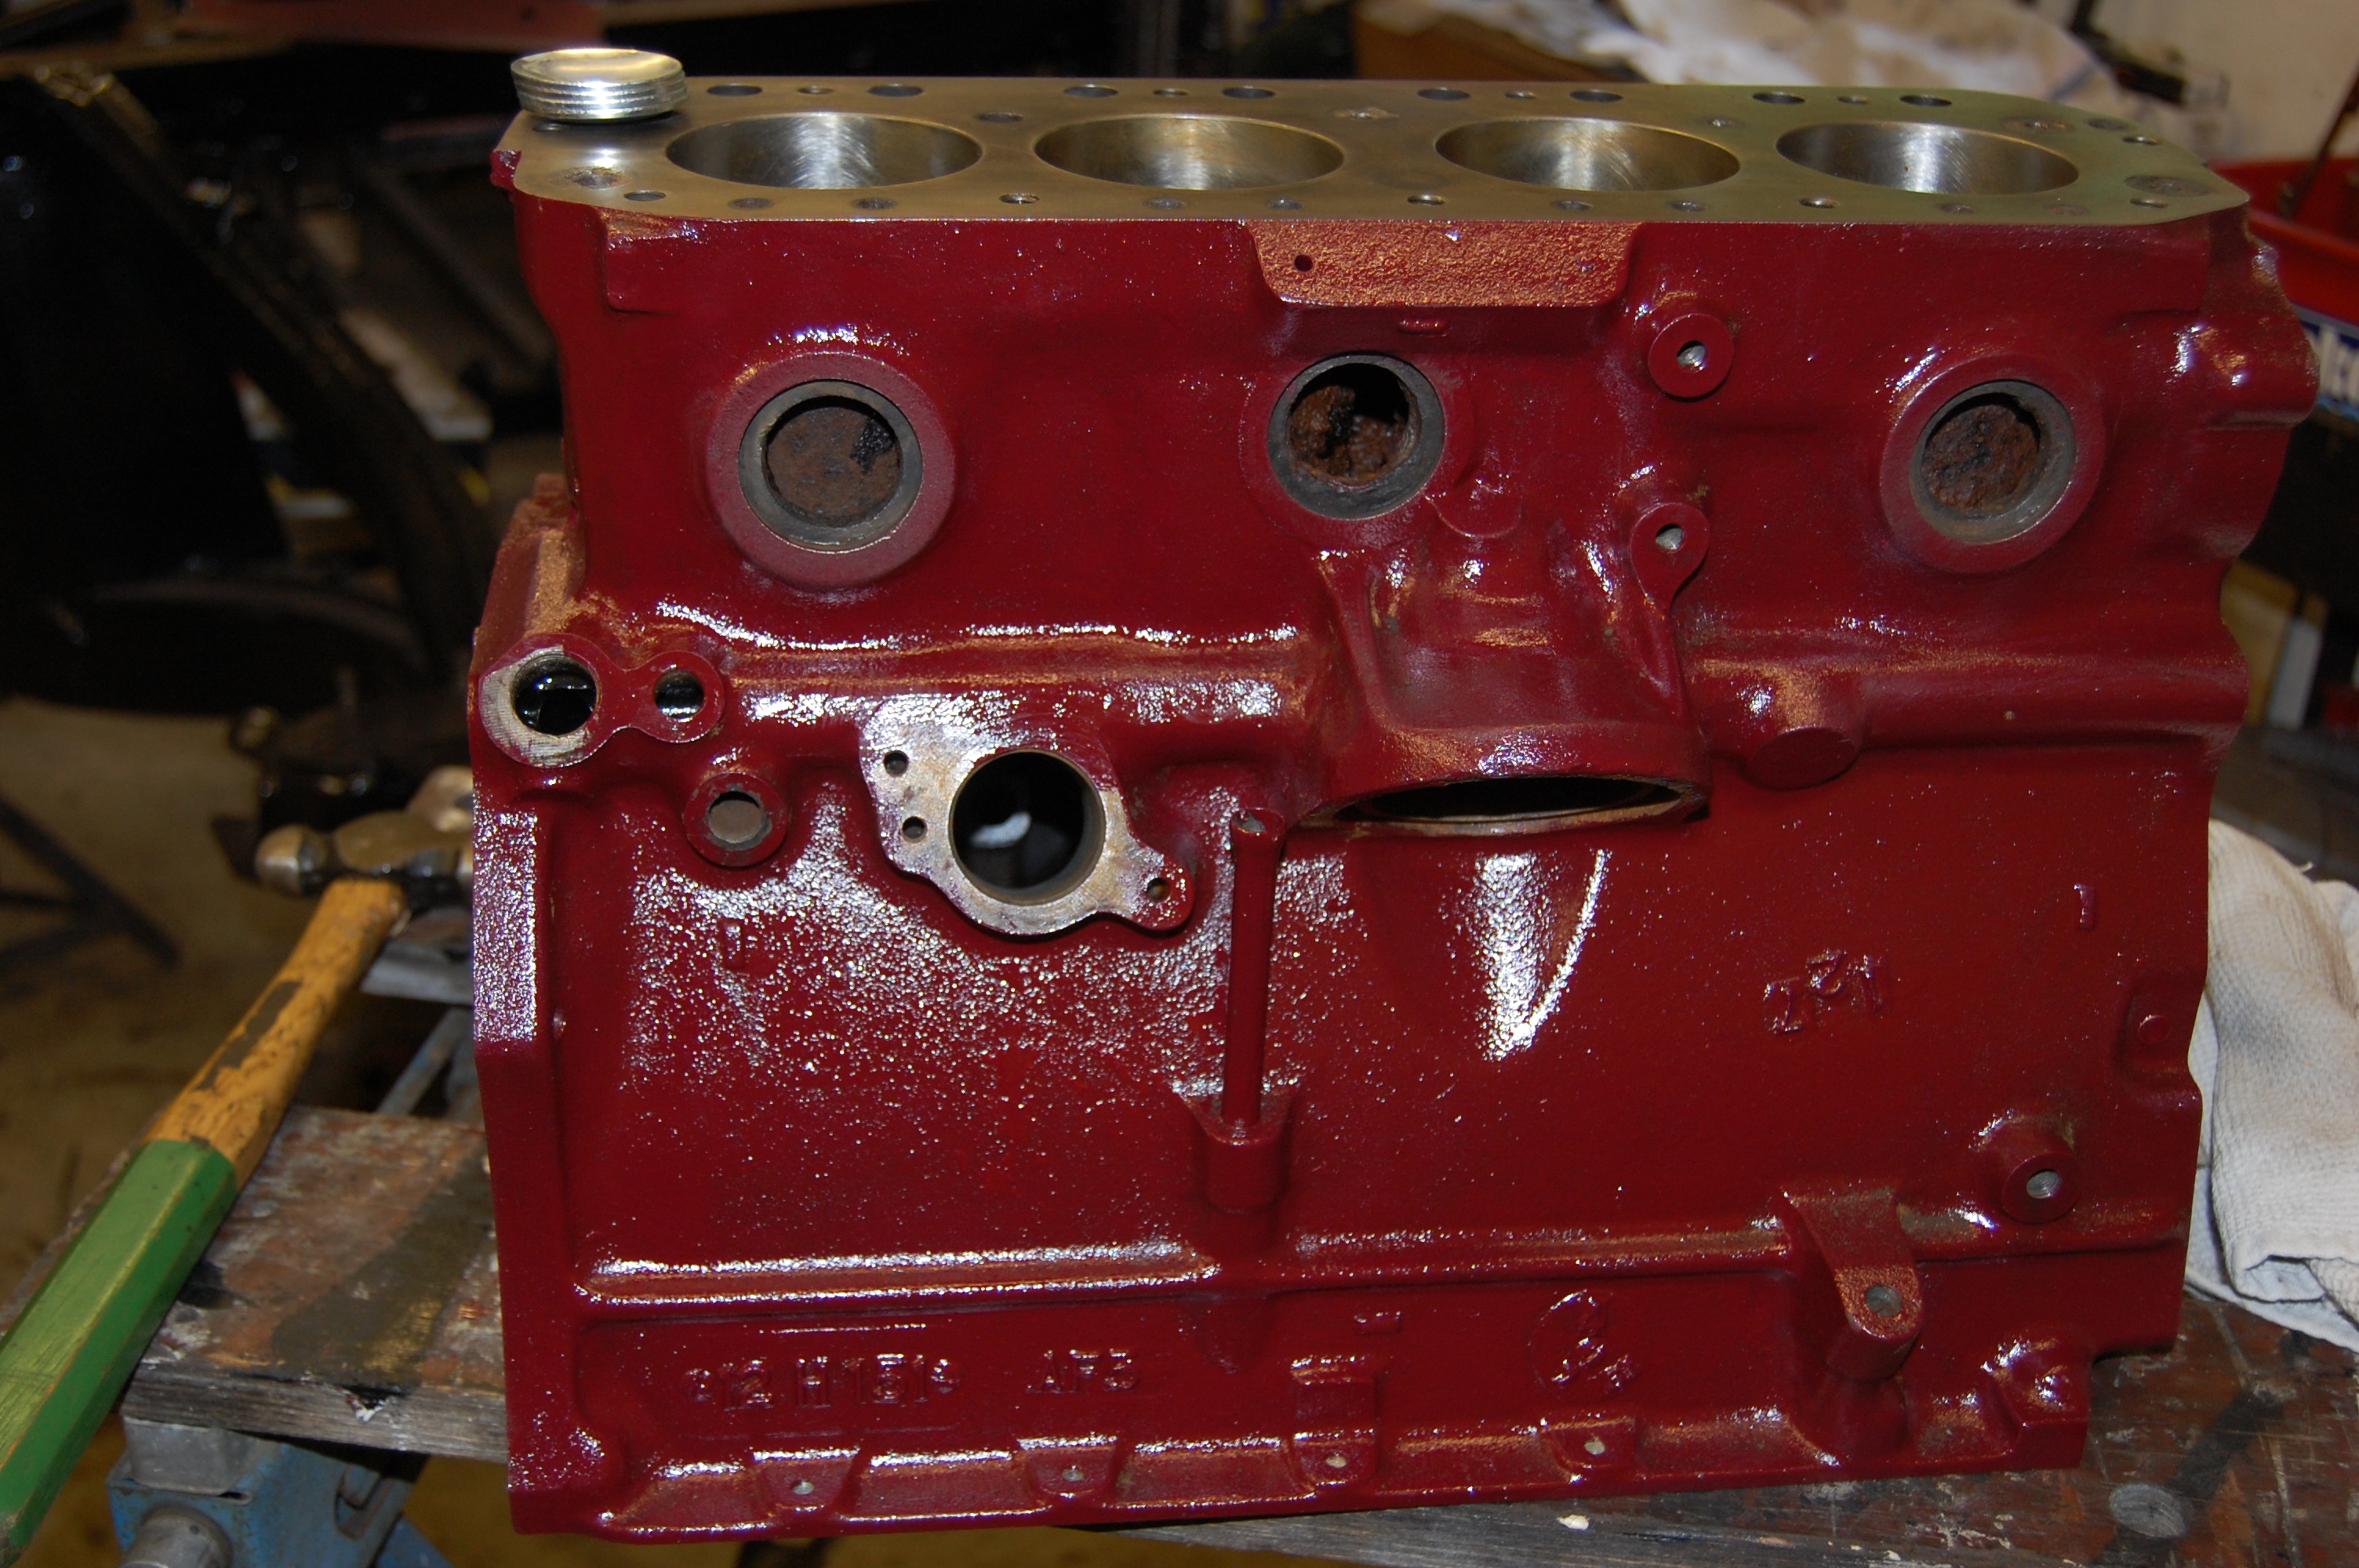
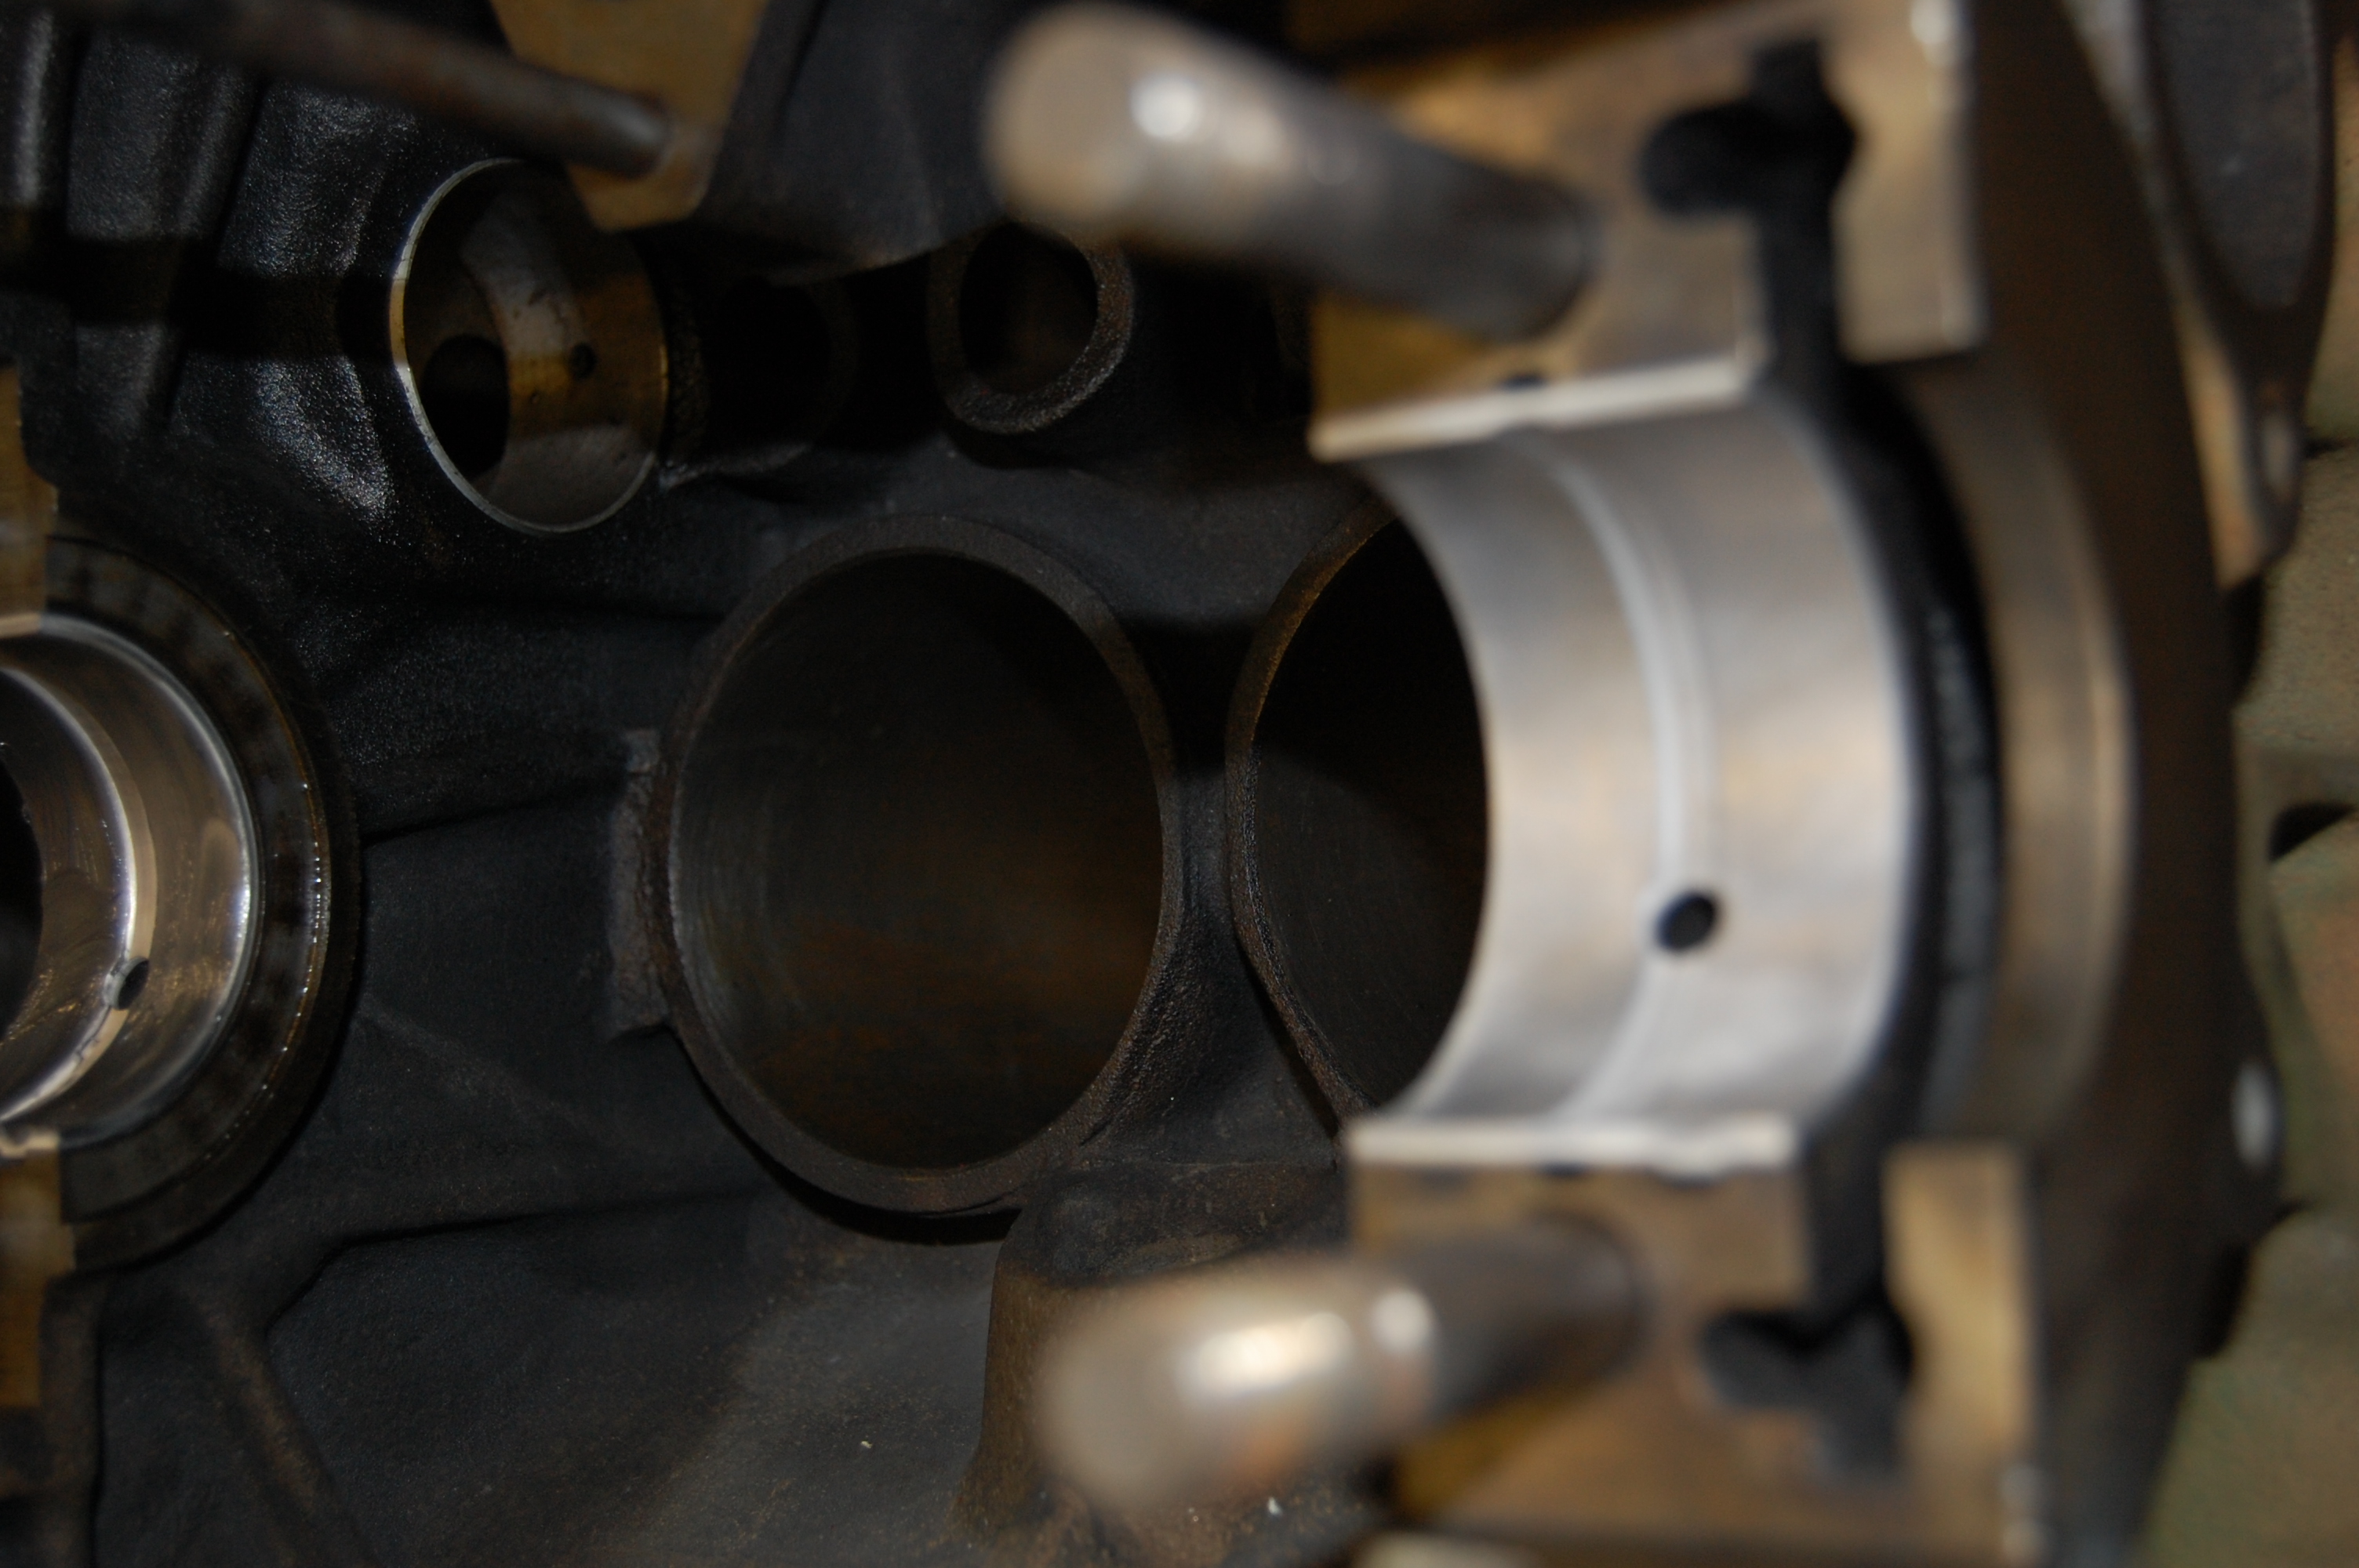
Pistons, big ends and crankshaft are all good and hopefully will be ok with just cleaning and new big-end and main bearing shells. Evidence of lightening/balancing of con-rods can be seen on the bigend shoulders. Unfortunately, having sought a second opinion on the cylinder bores, it was decided that a rebore and new pistons was advisable. Pistons are currently + 040, so the last shot is + 060 before resleeving back to standard.
As it turned out, the block needed re-boring.
The camshaft was 1/2 race and as can be seen, has no machined end to take the rev counter drive. The condition of the cam and followers is good, the engine having only been run for a few thousand miles, however, new followers will be fitted to be sure. Now having doubts on whether or not to go back to a standard camshaft!
As it turned out, I fitted the standard road cam.
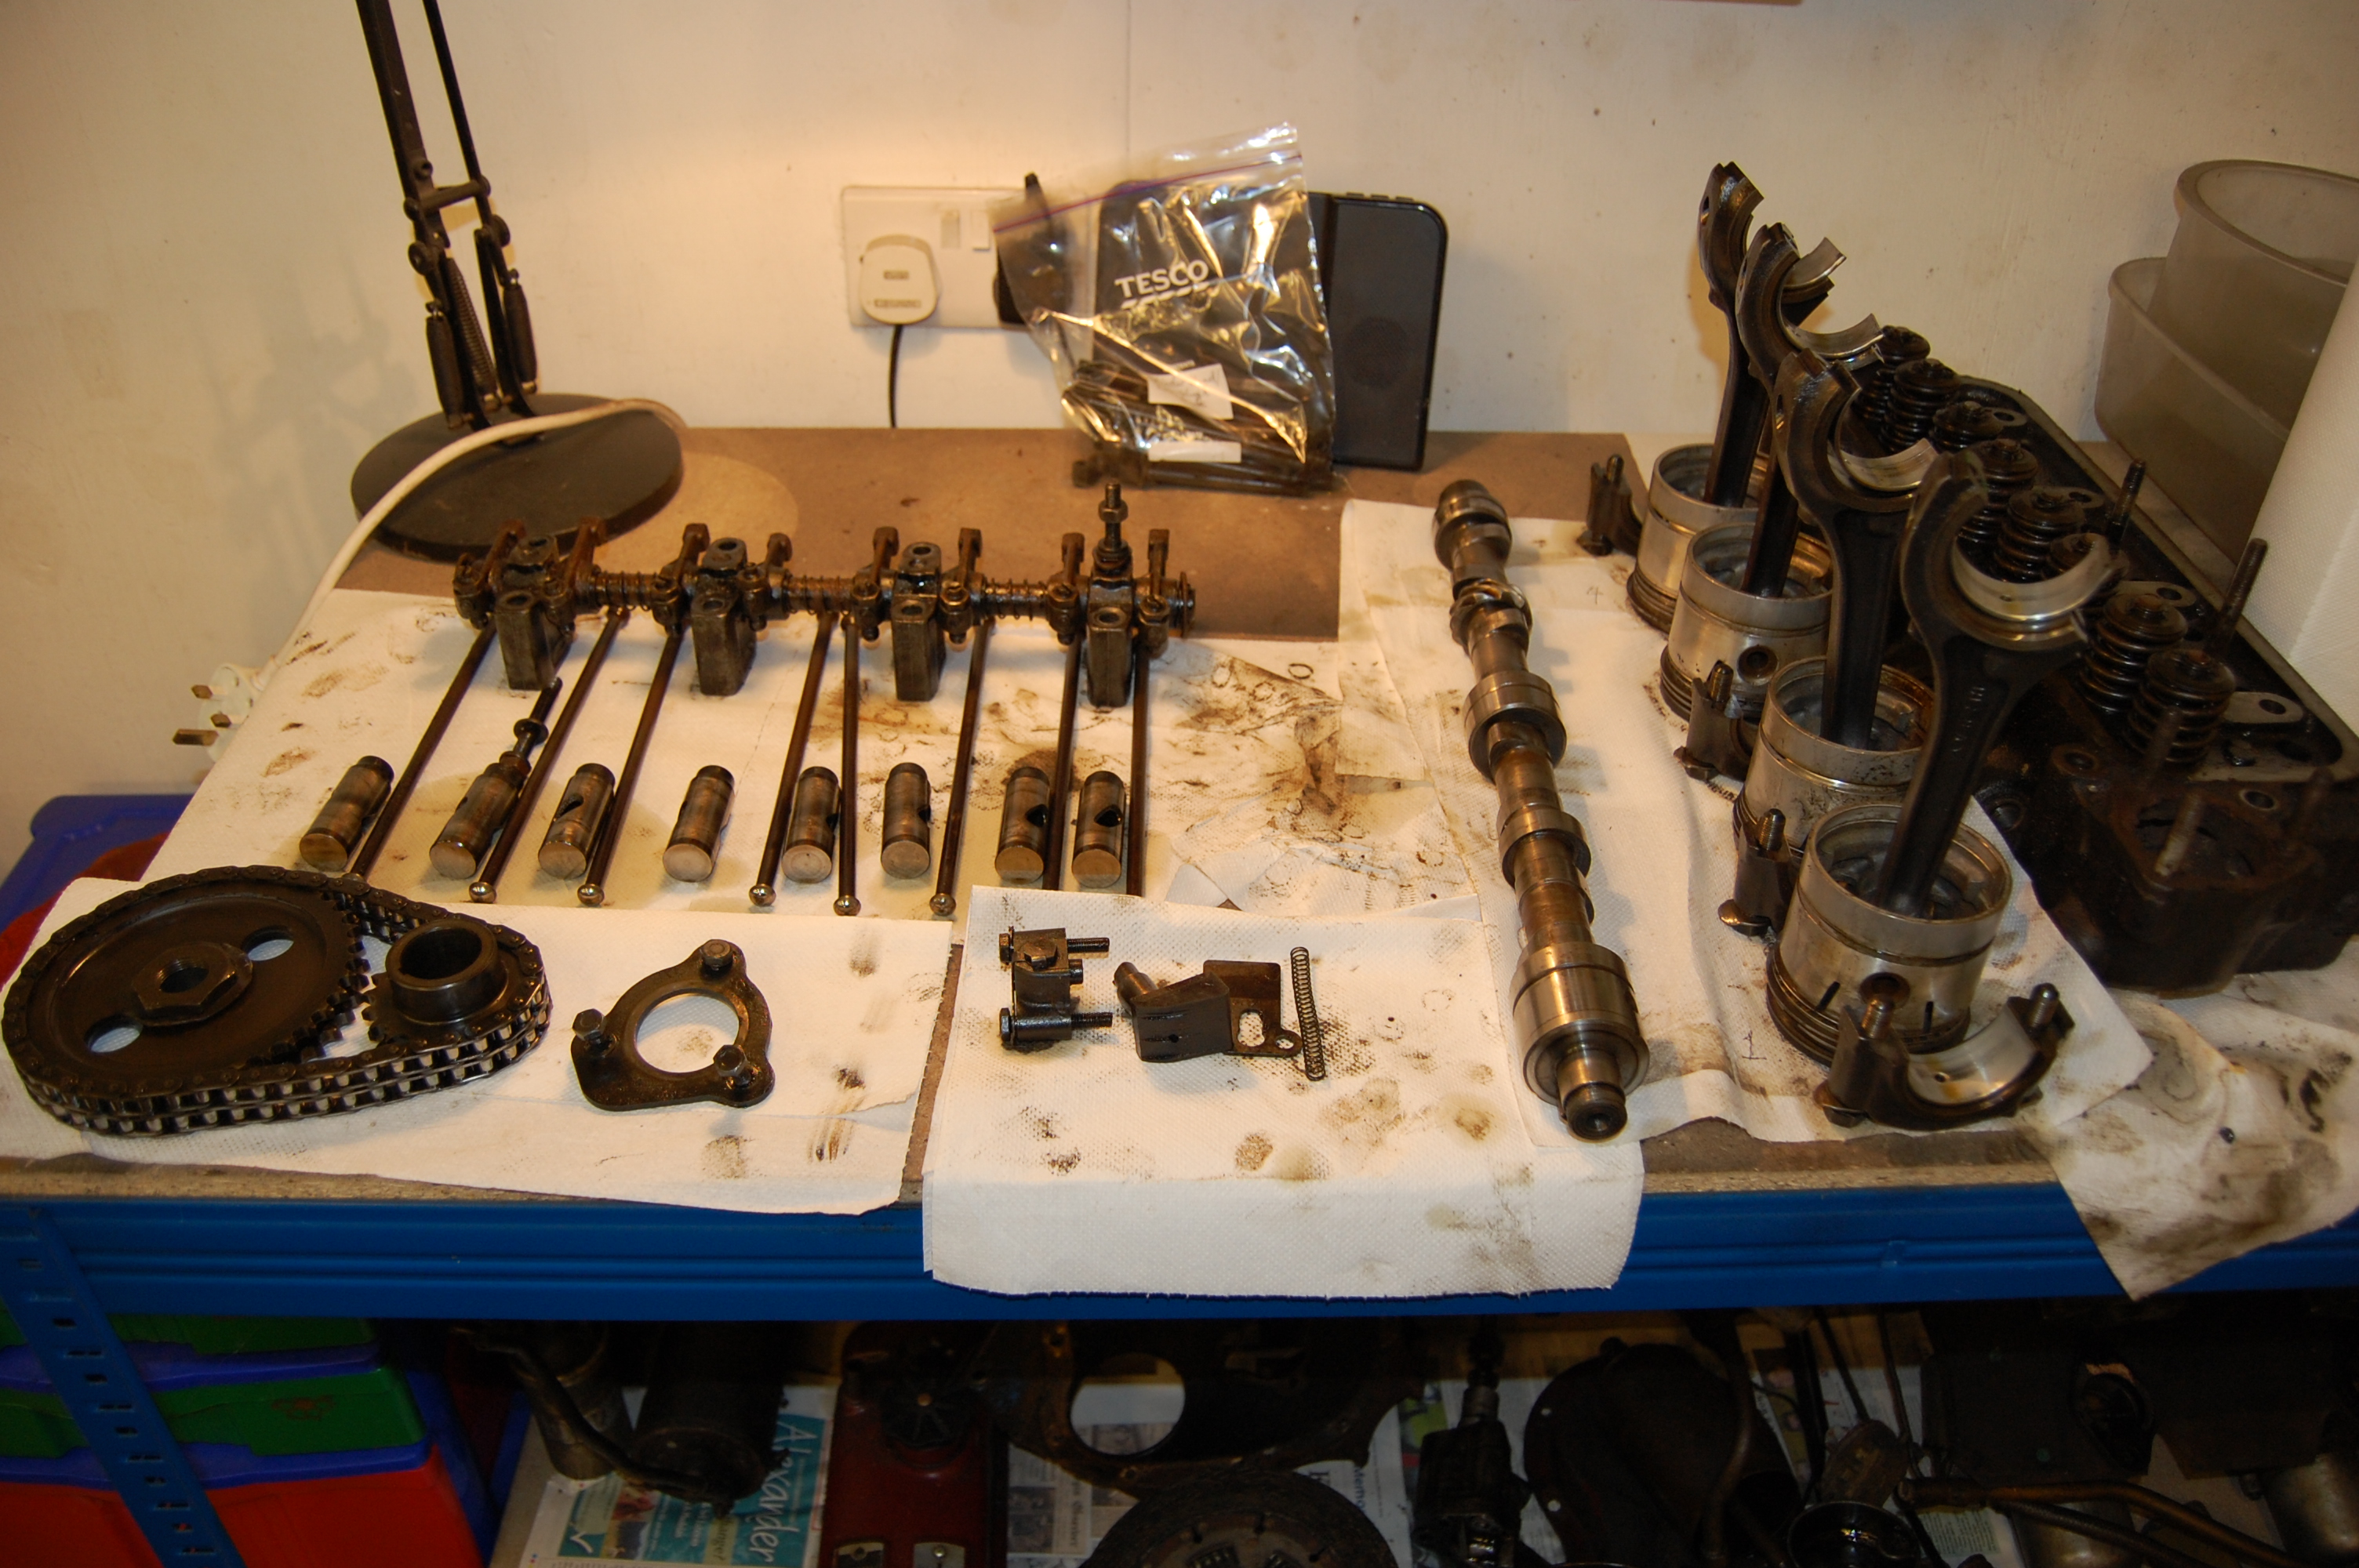
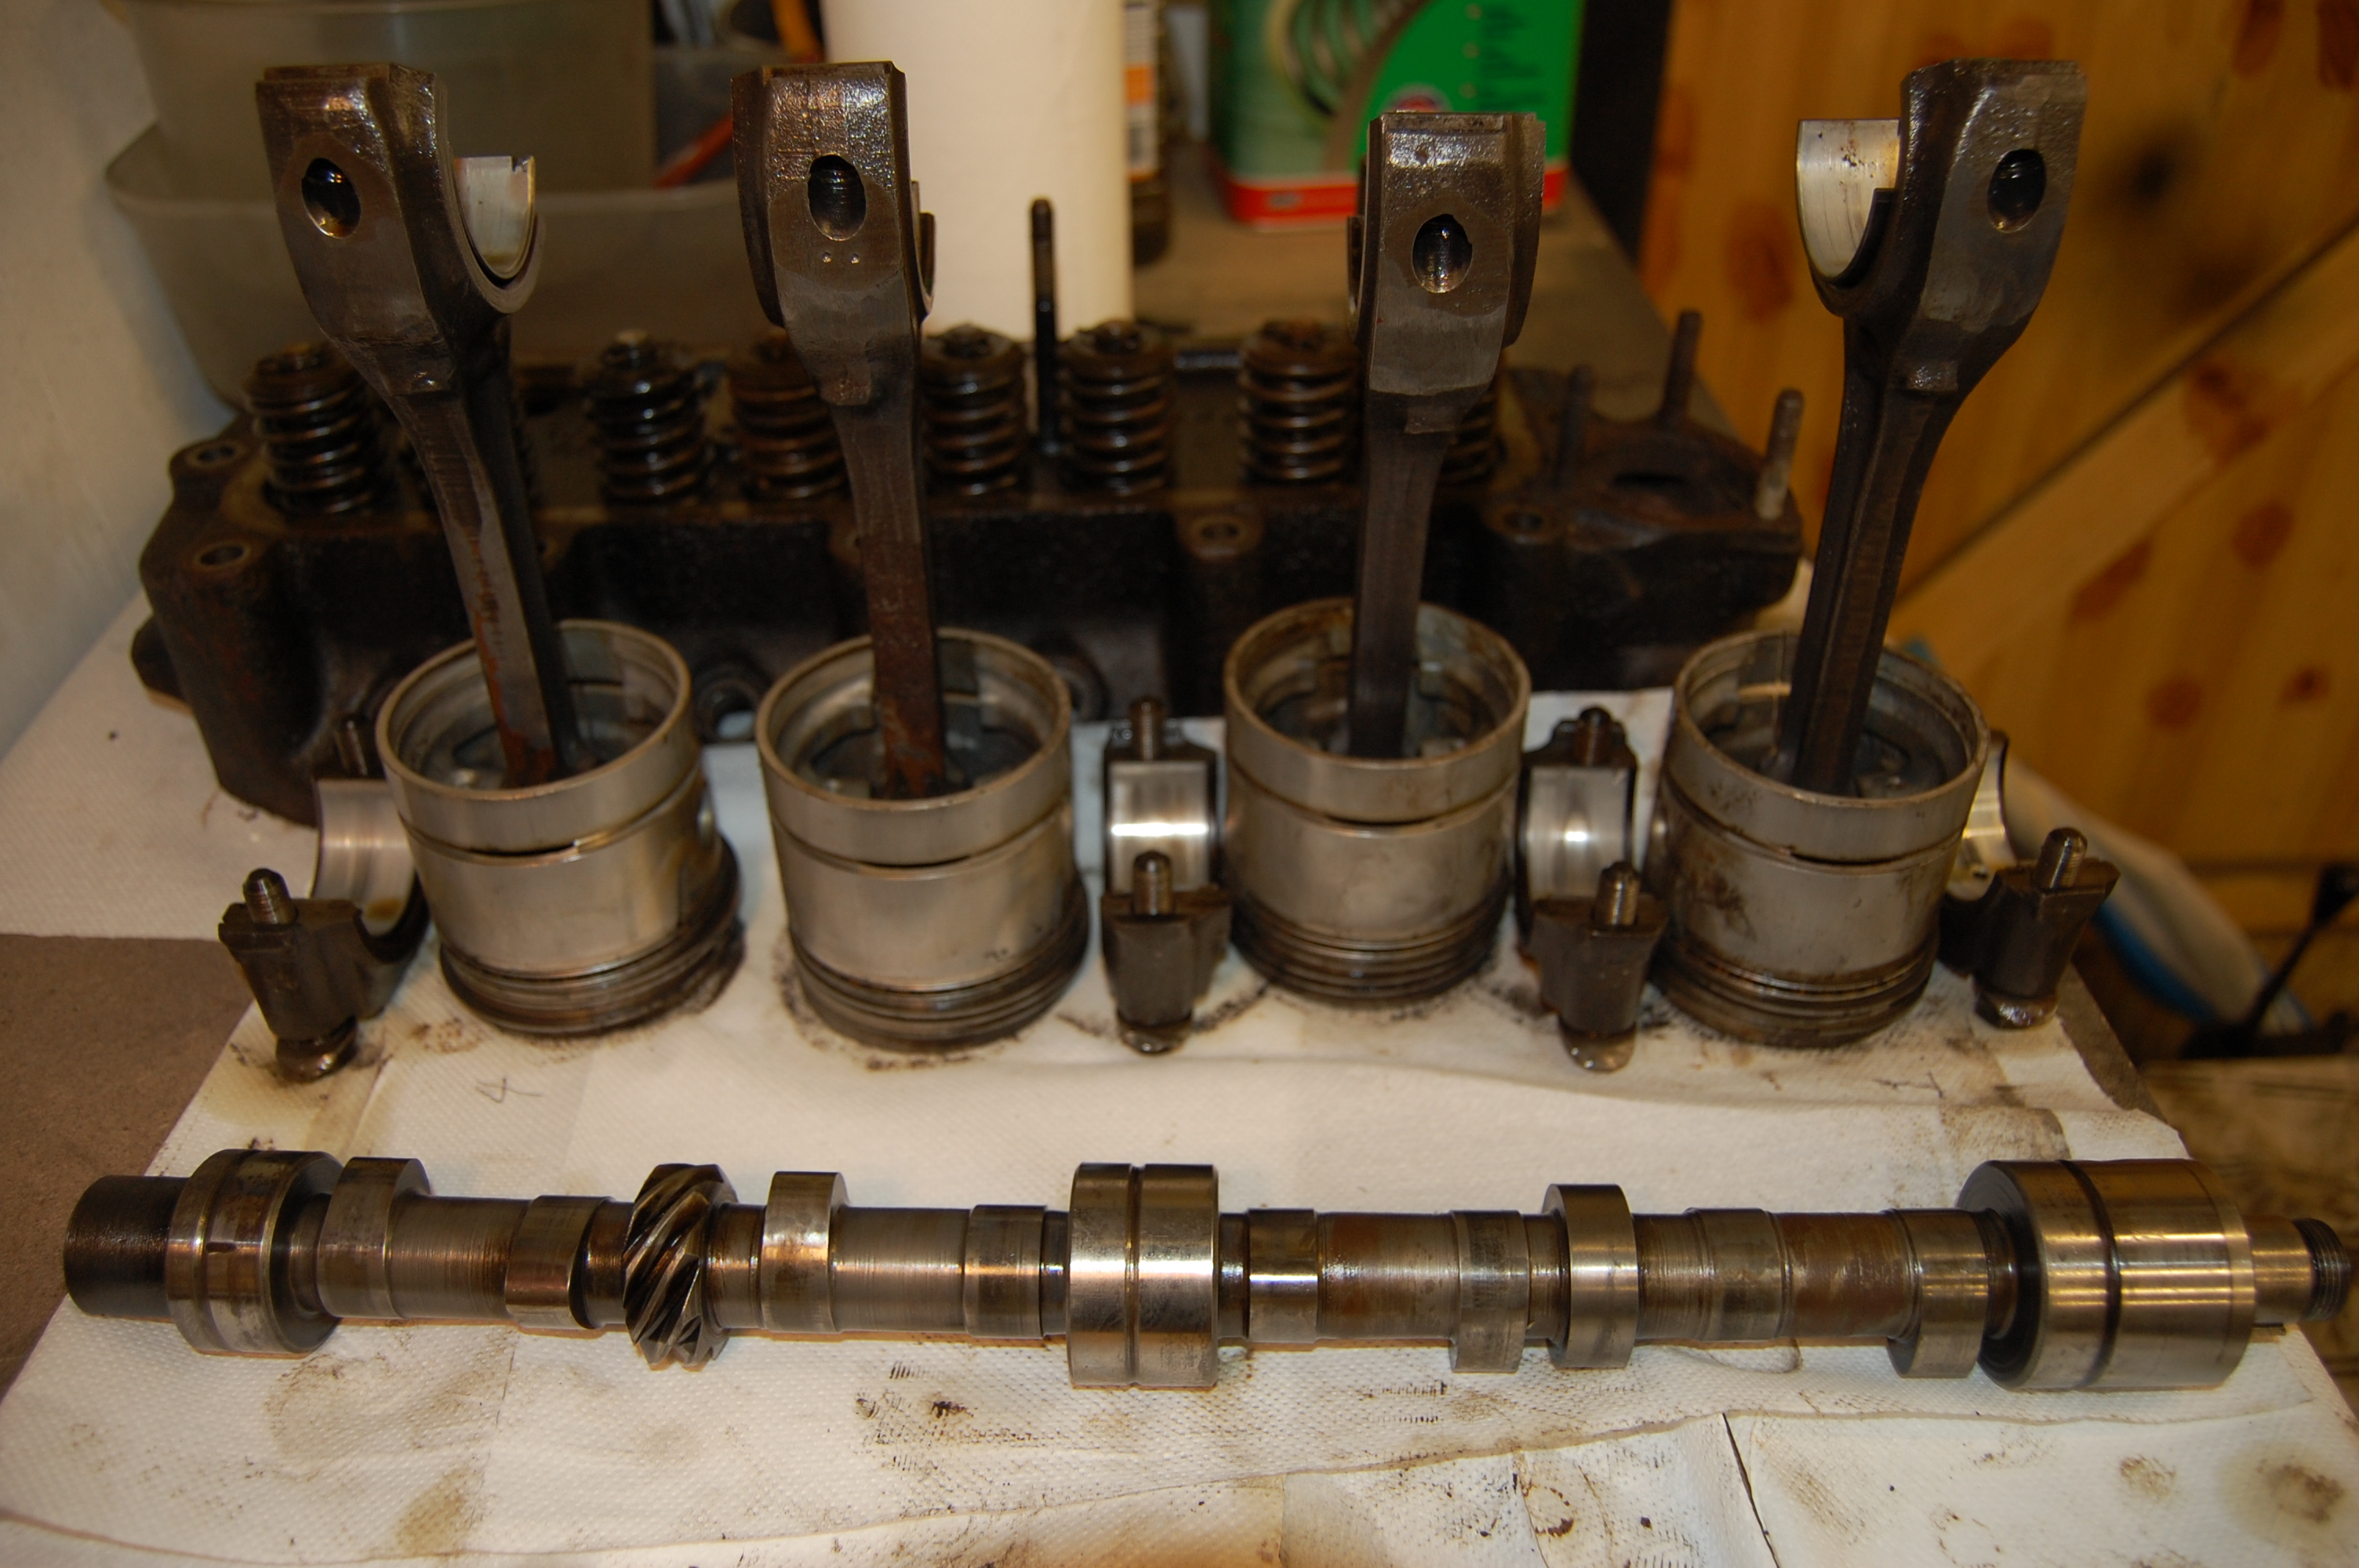
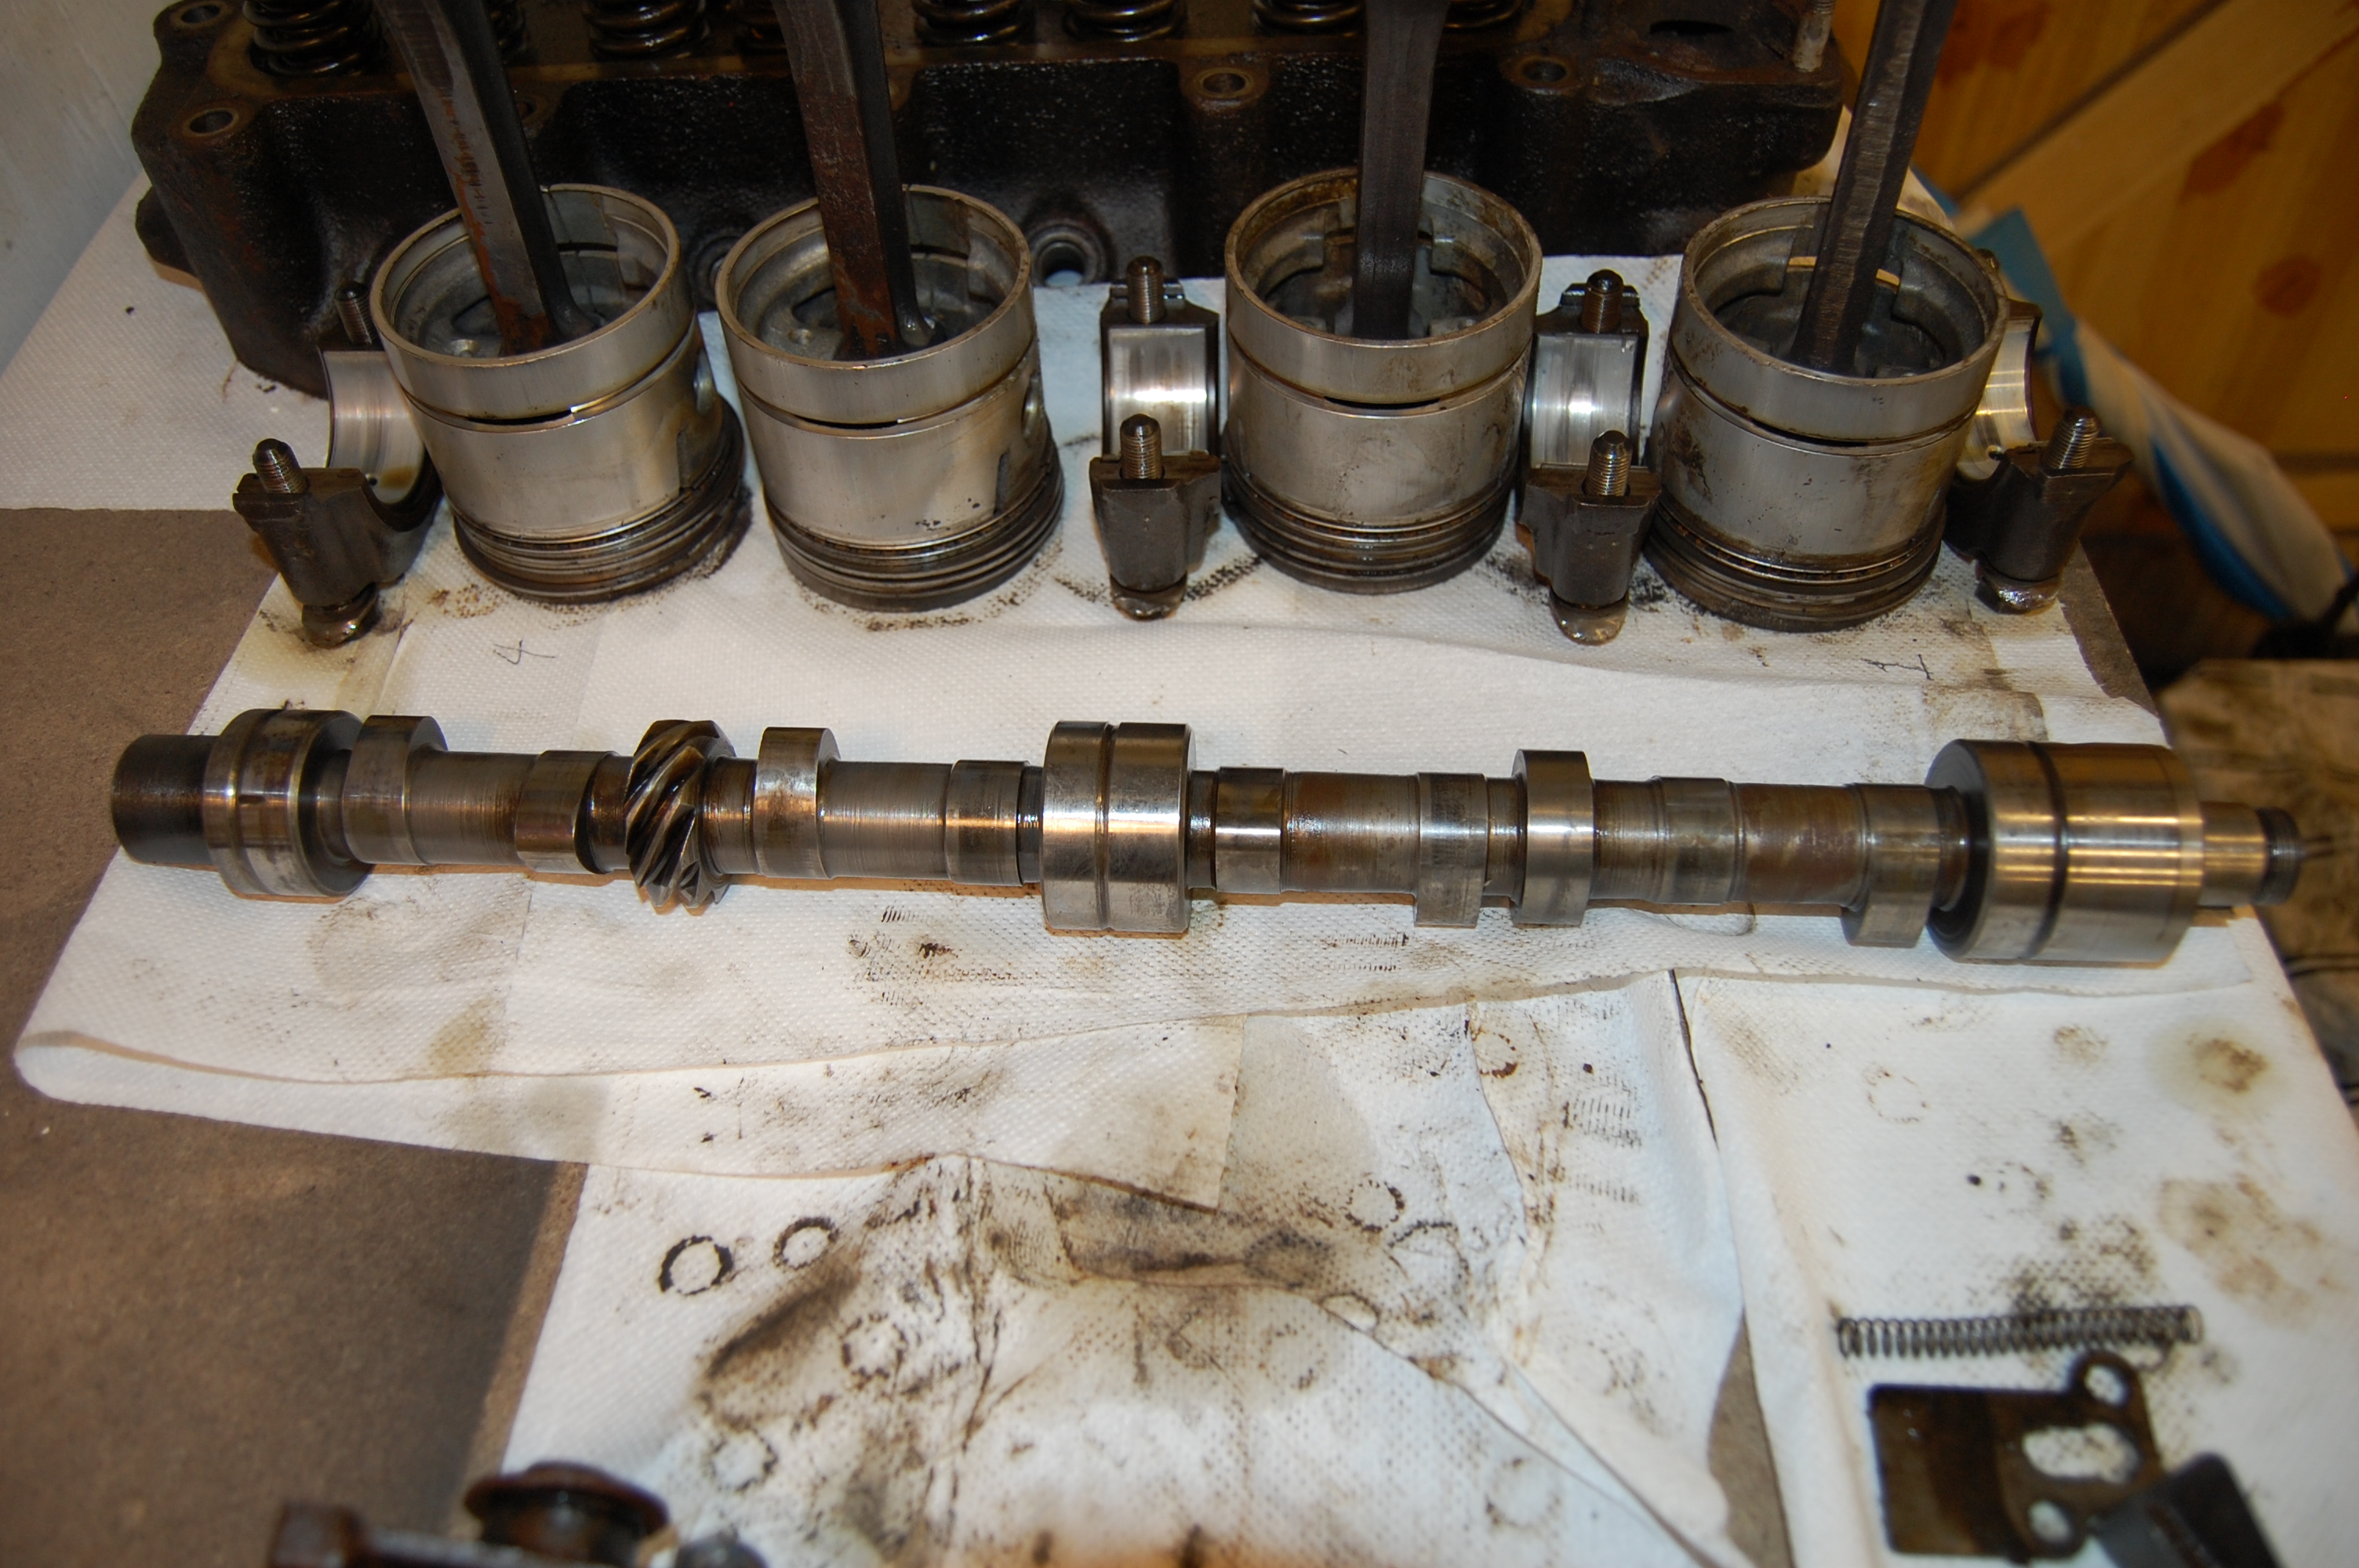
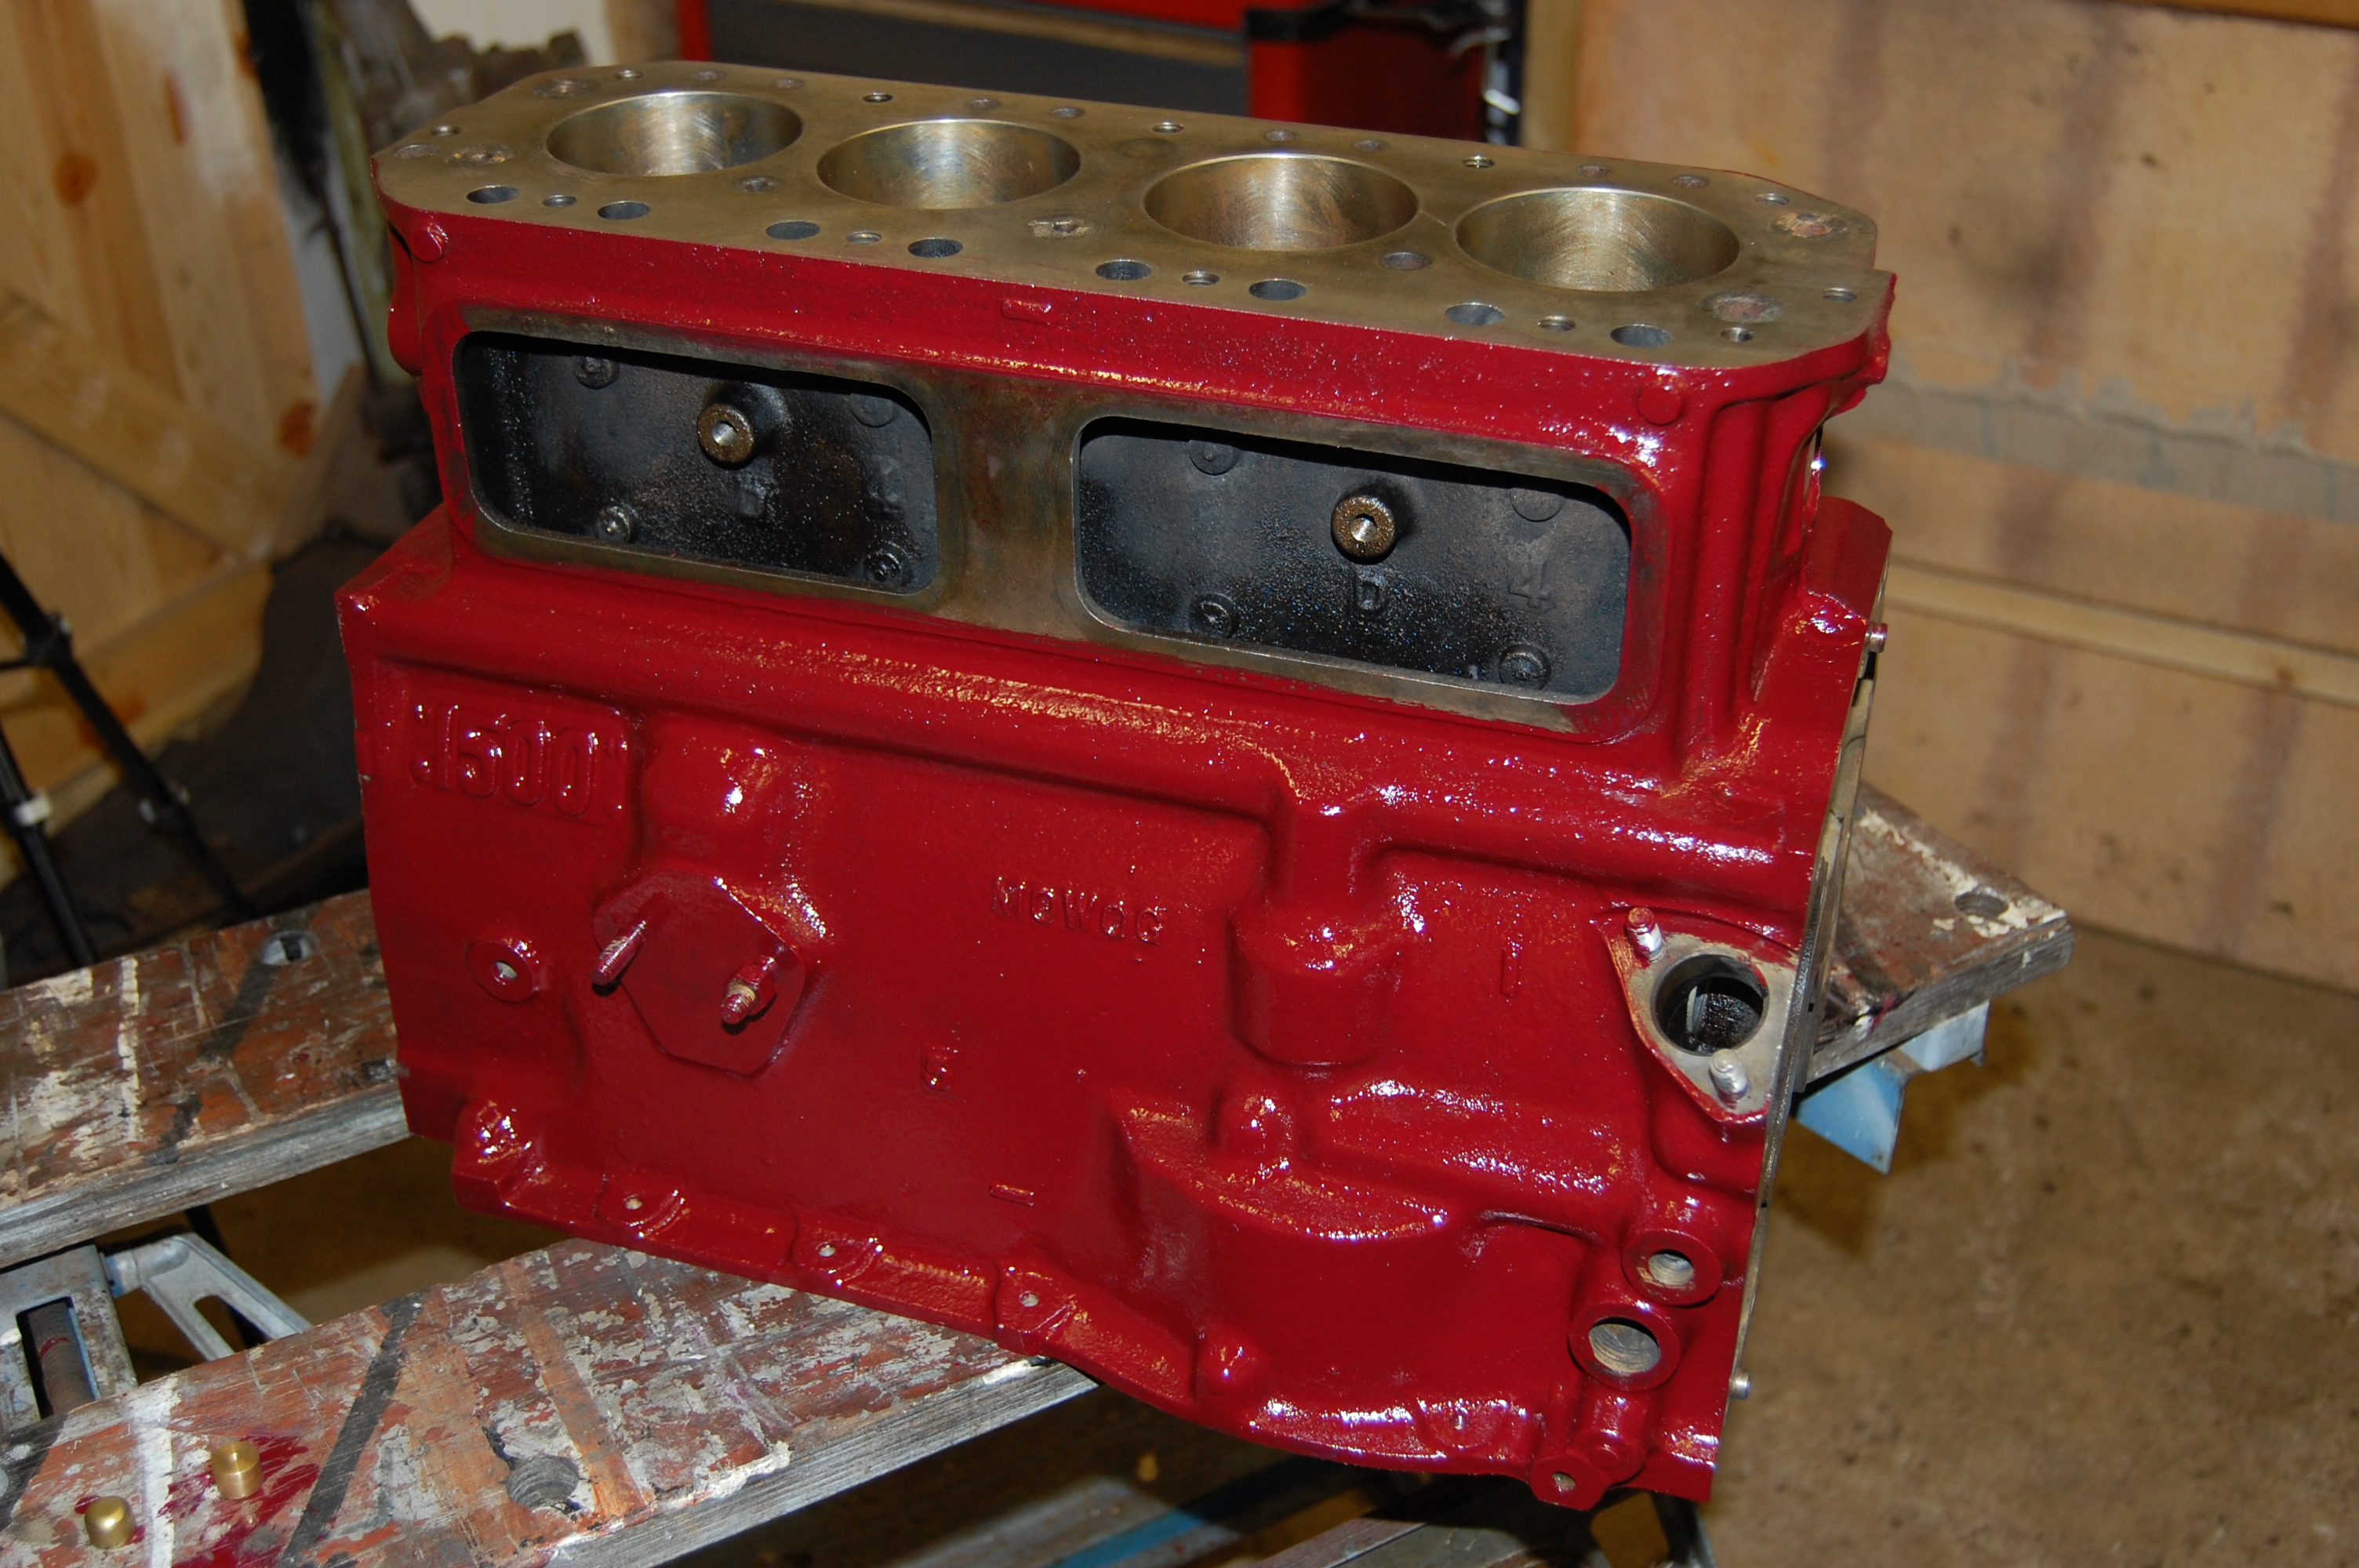
Everything set out in order as I intend to use as much original as possible.
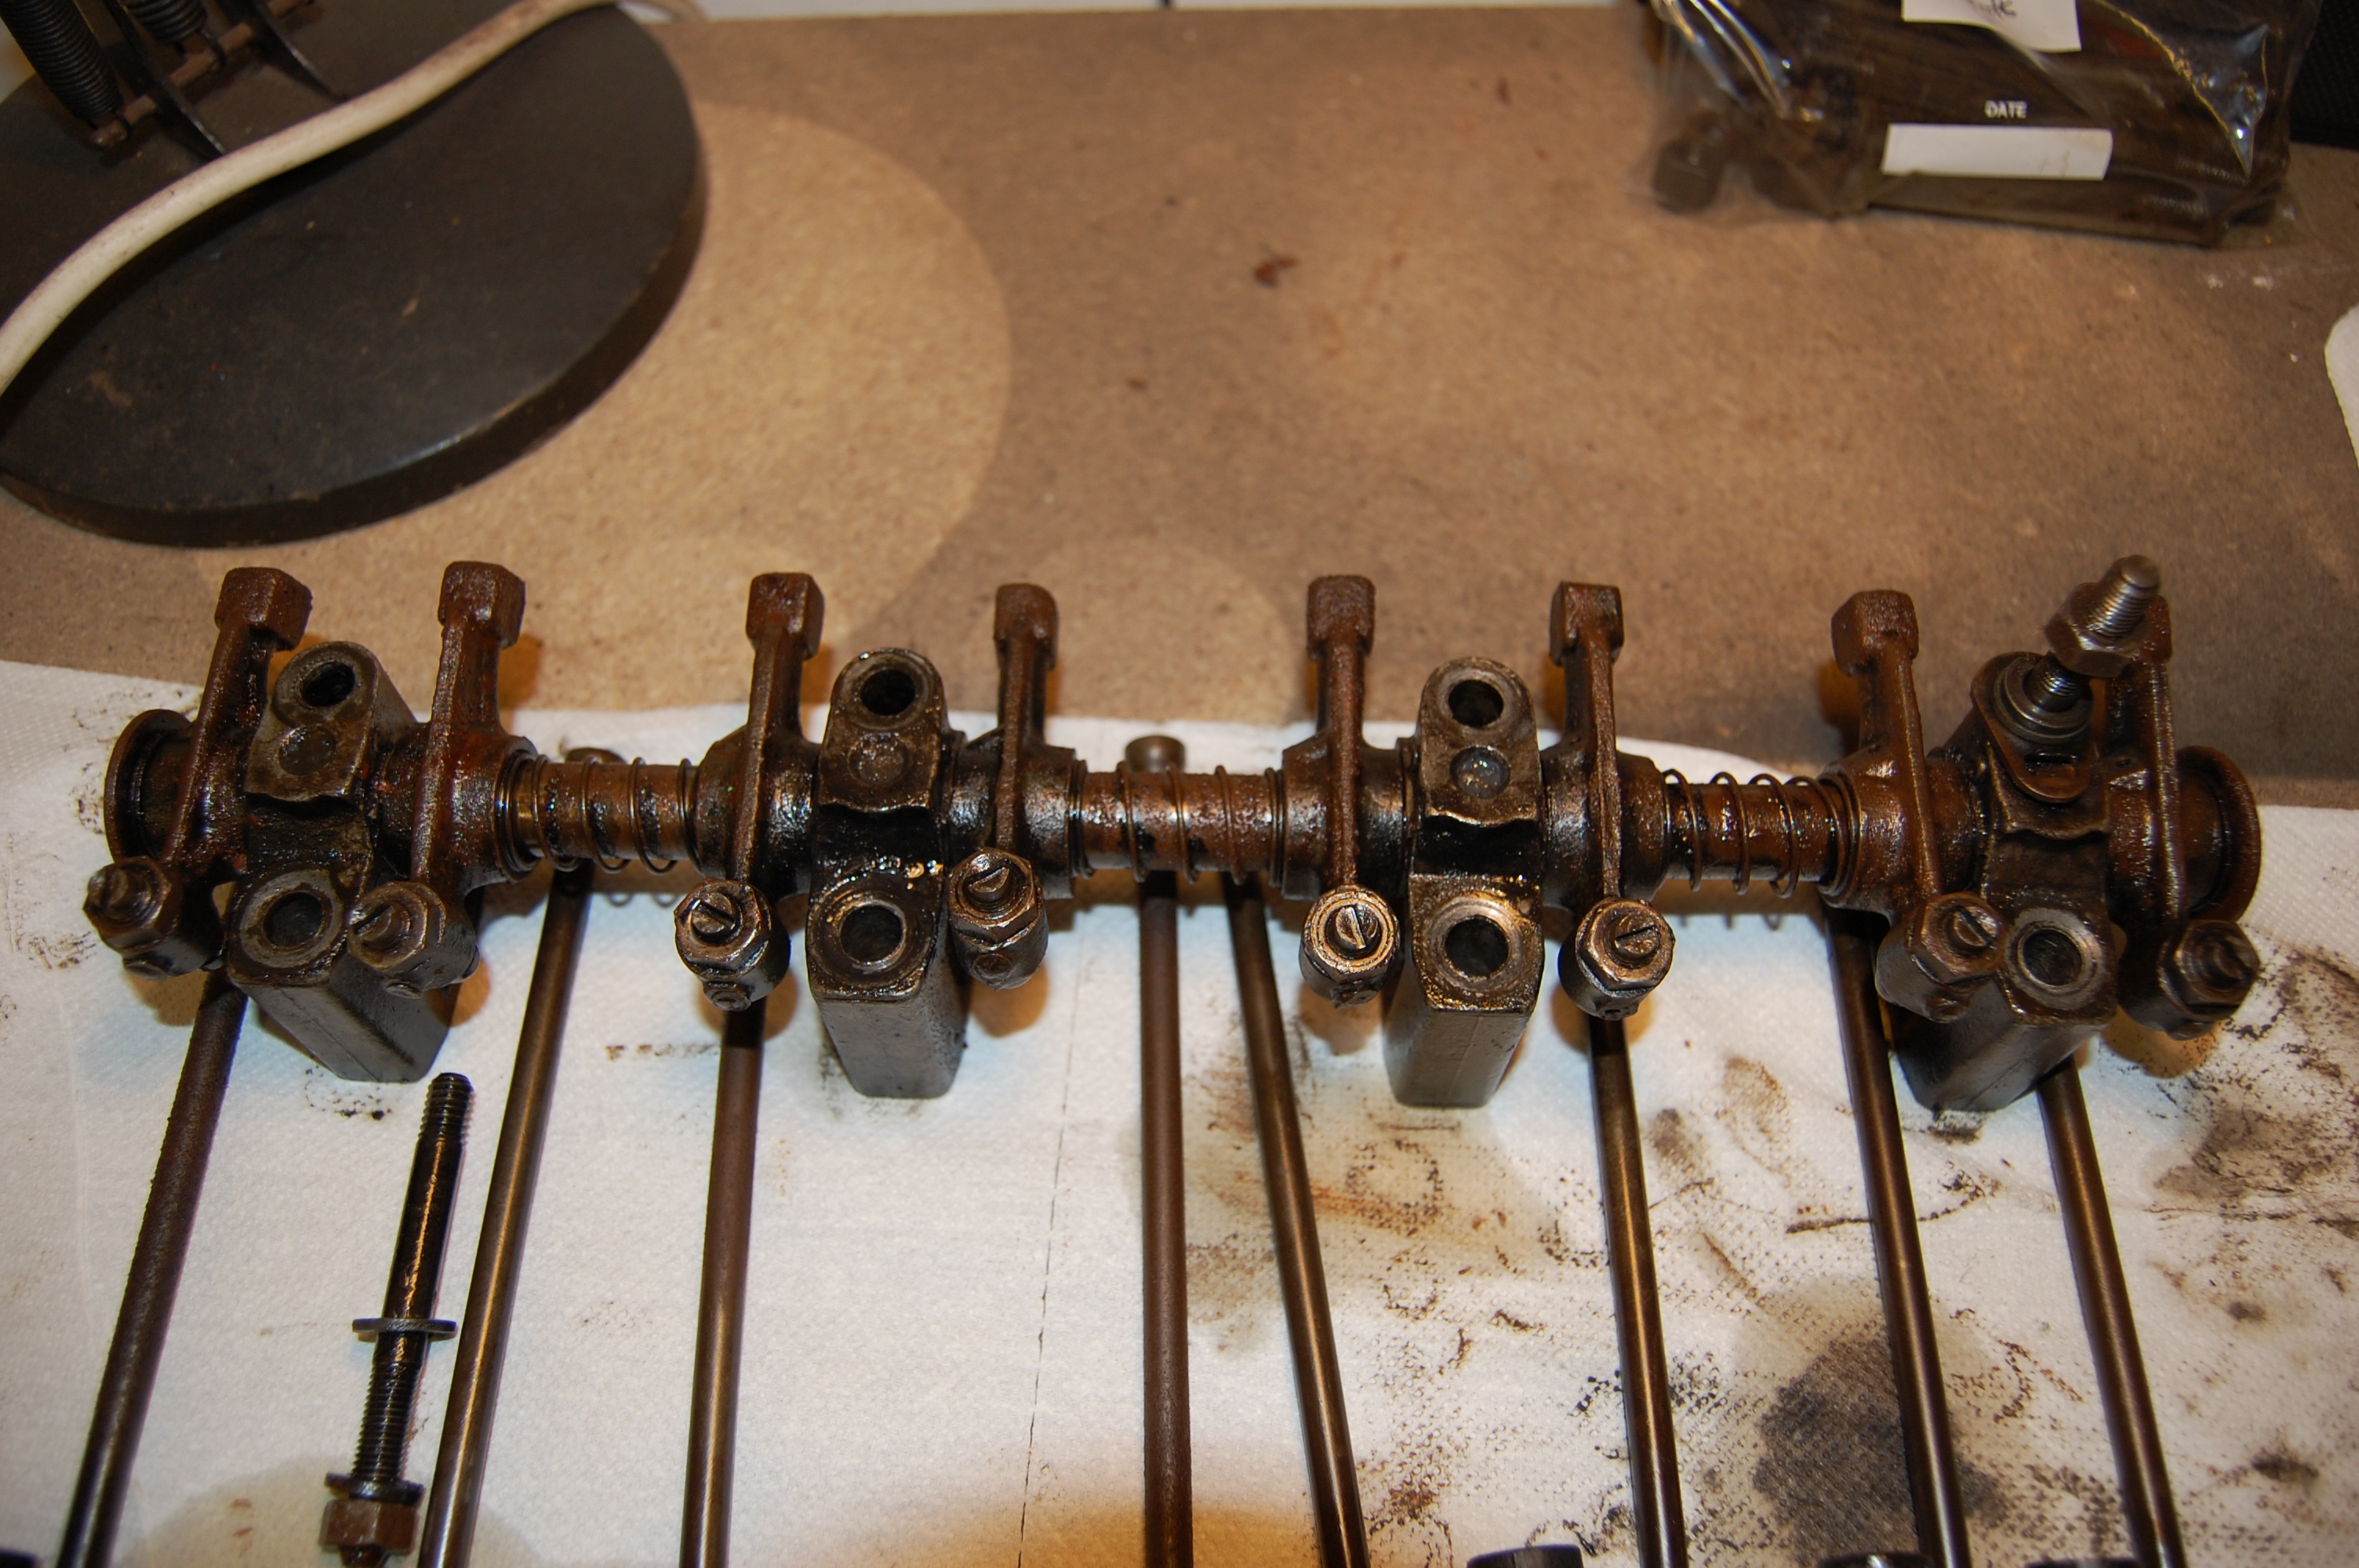
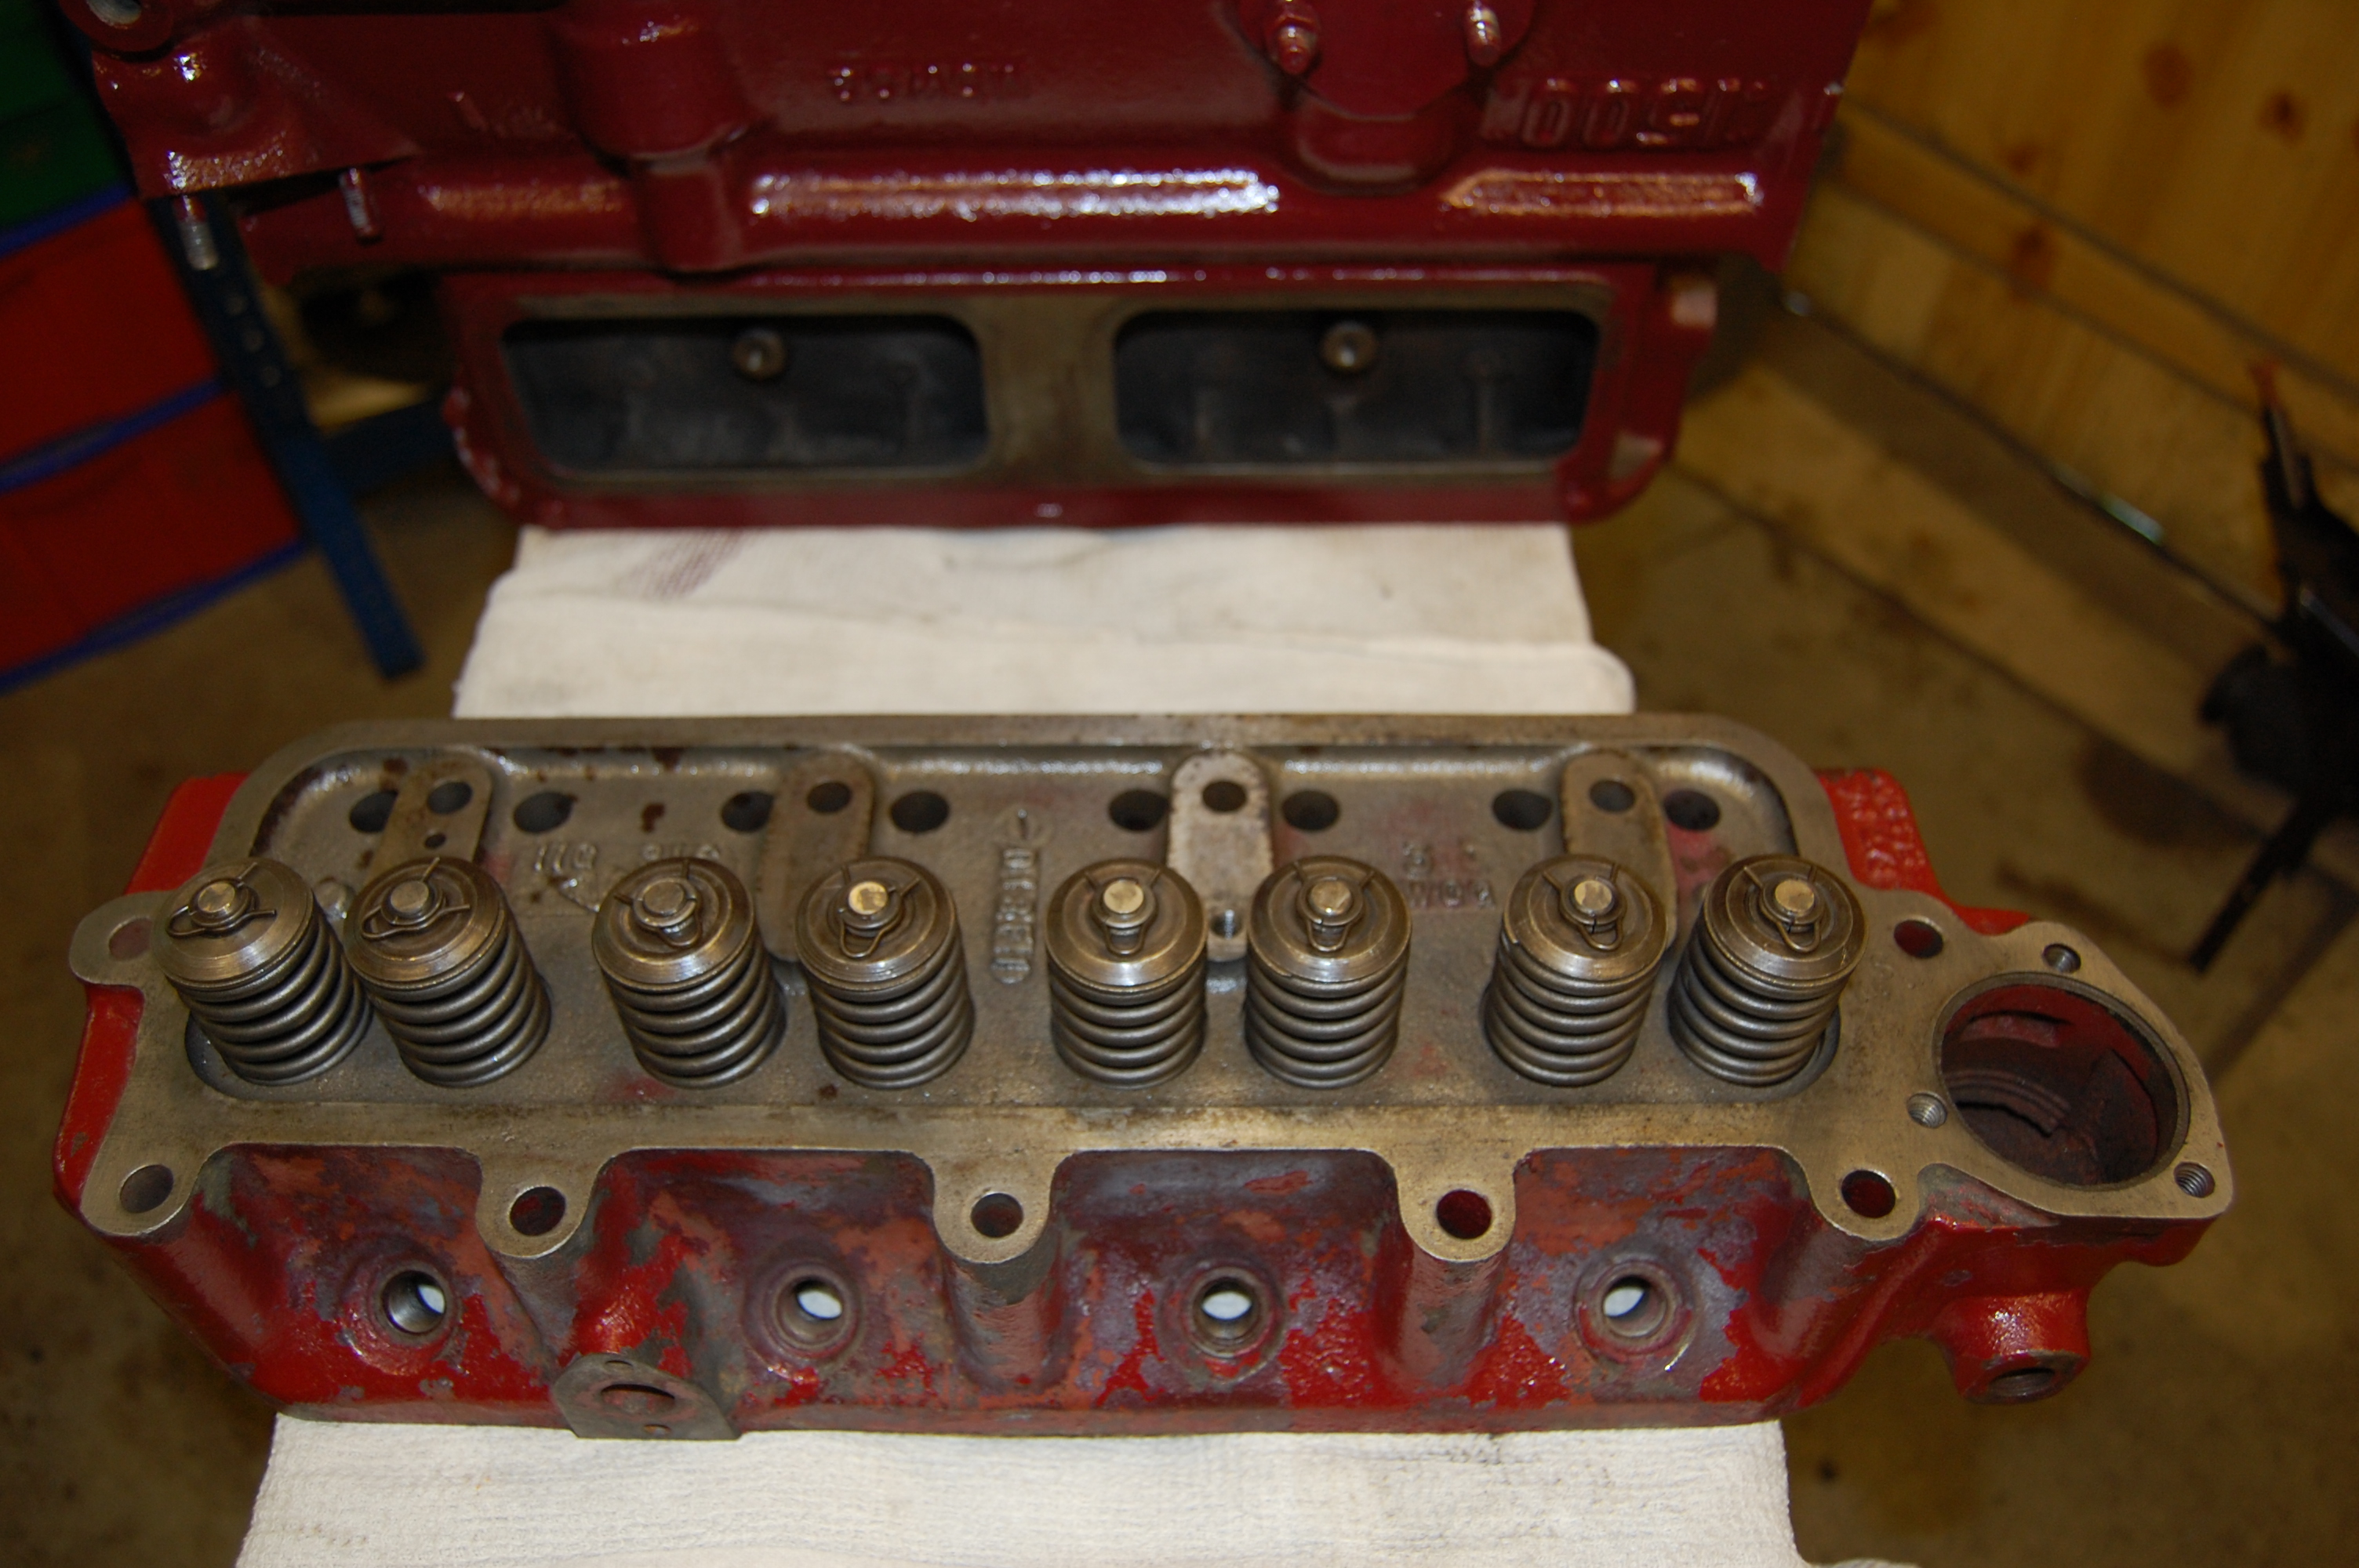
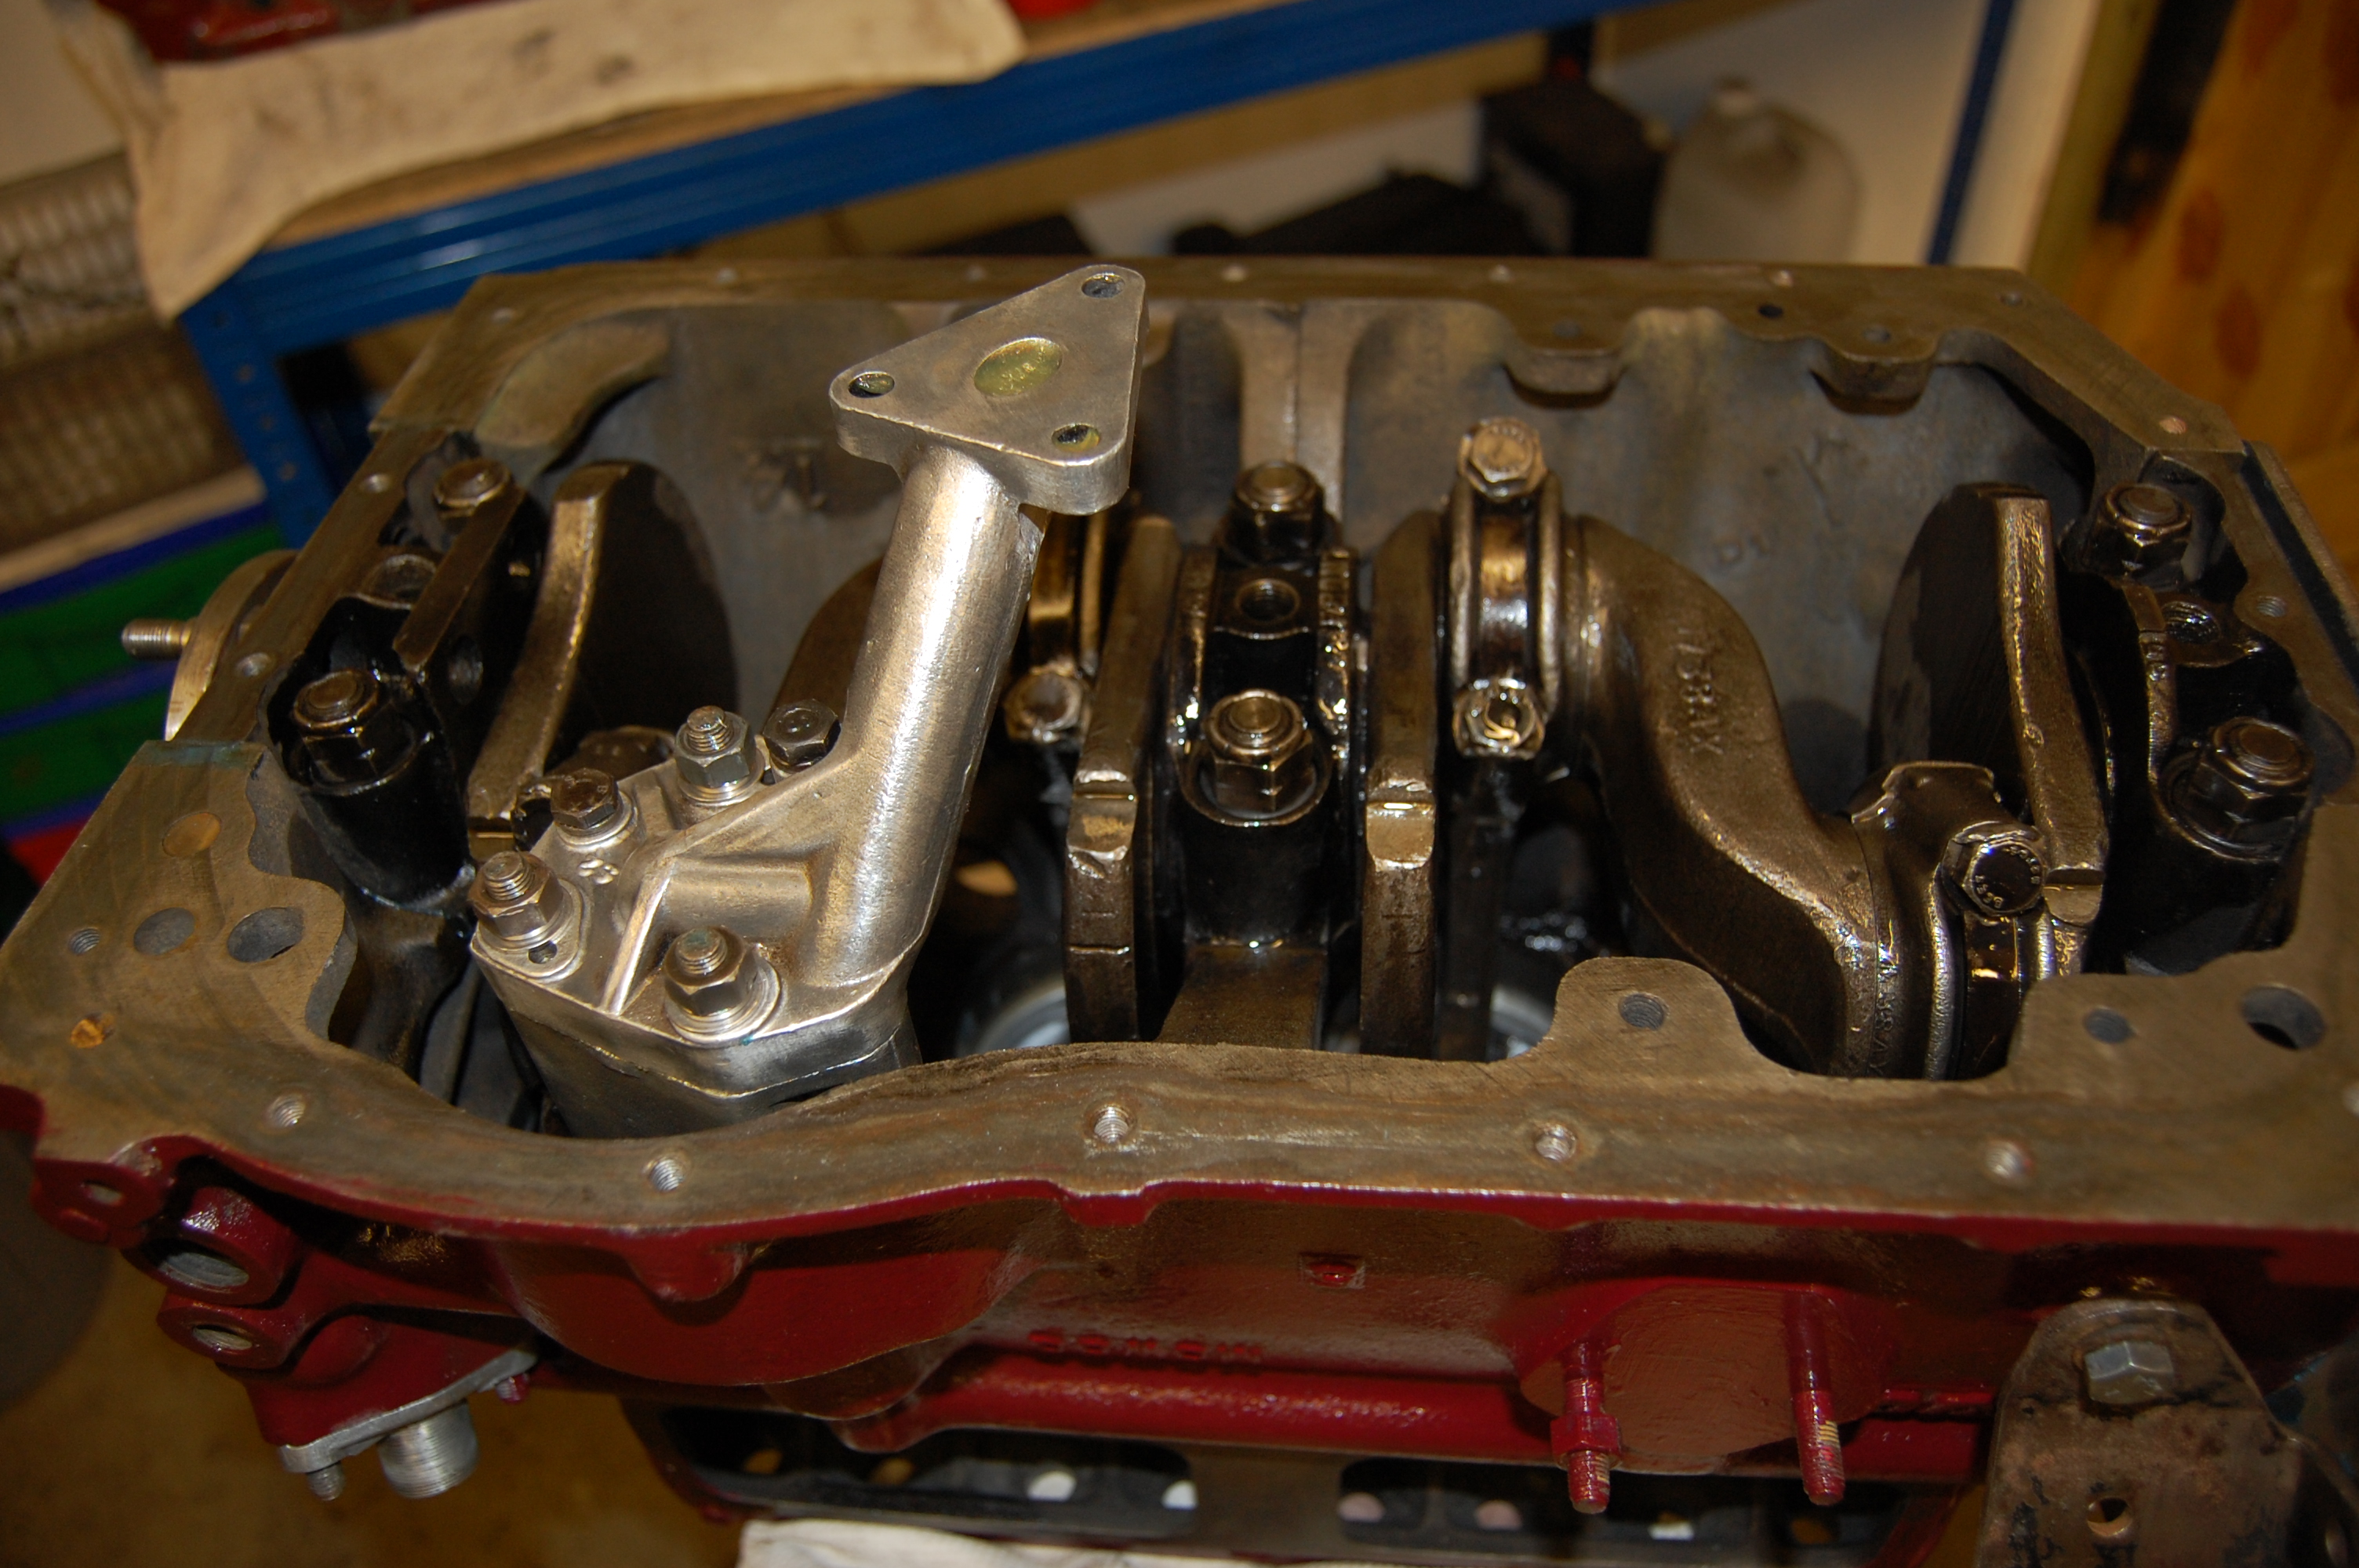
The rocker gear has not faired too well, unlike the pistons and bottom-end, which was immersed in oil and diesel for many years. The complete assembly will have to be be replaced.
Cylinder reboring – Saunders Motor Engineers, Cadnum, Southampton, Hampshire. 0023 8081 2101enquiries@saundersmotorworks.co.uk
Rebore was out to +060″ which is the maximum – beyond this, sleeving is required to take it back to standard.
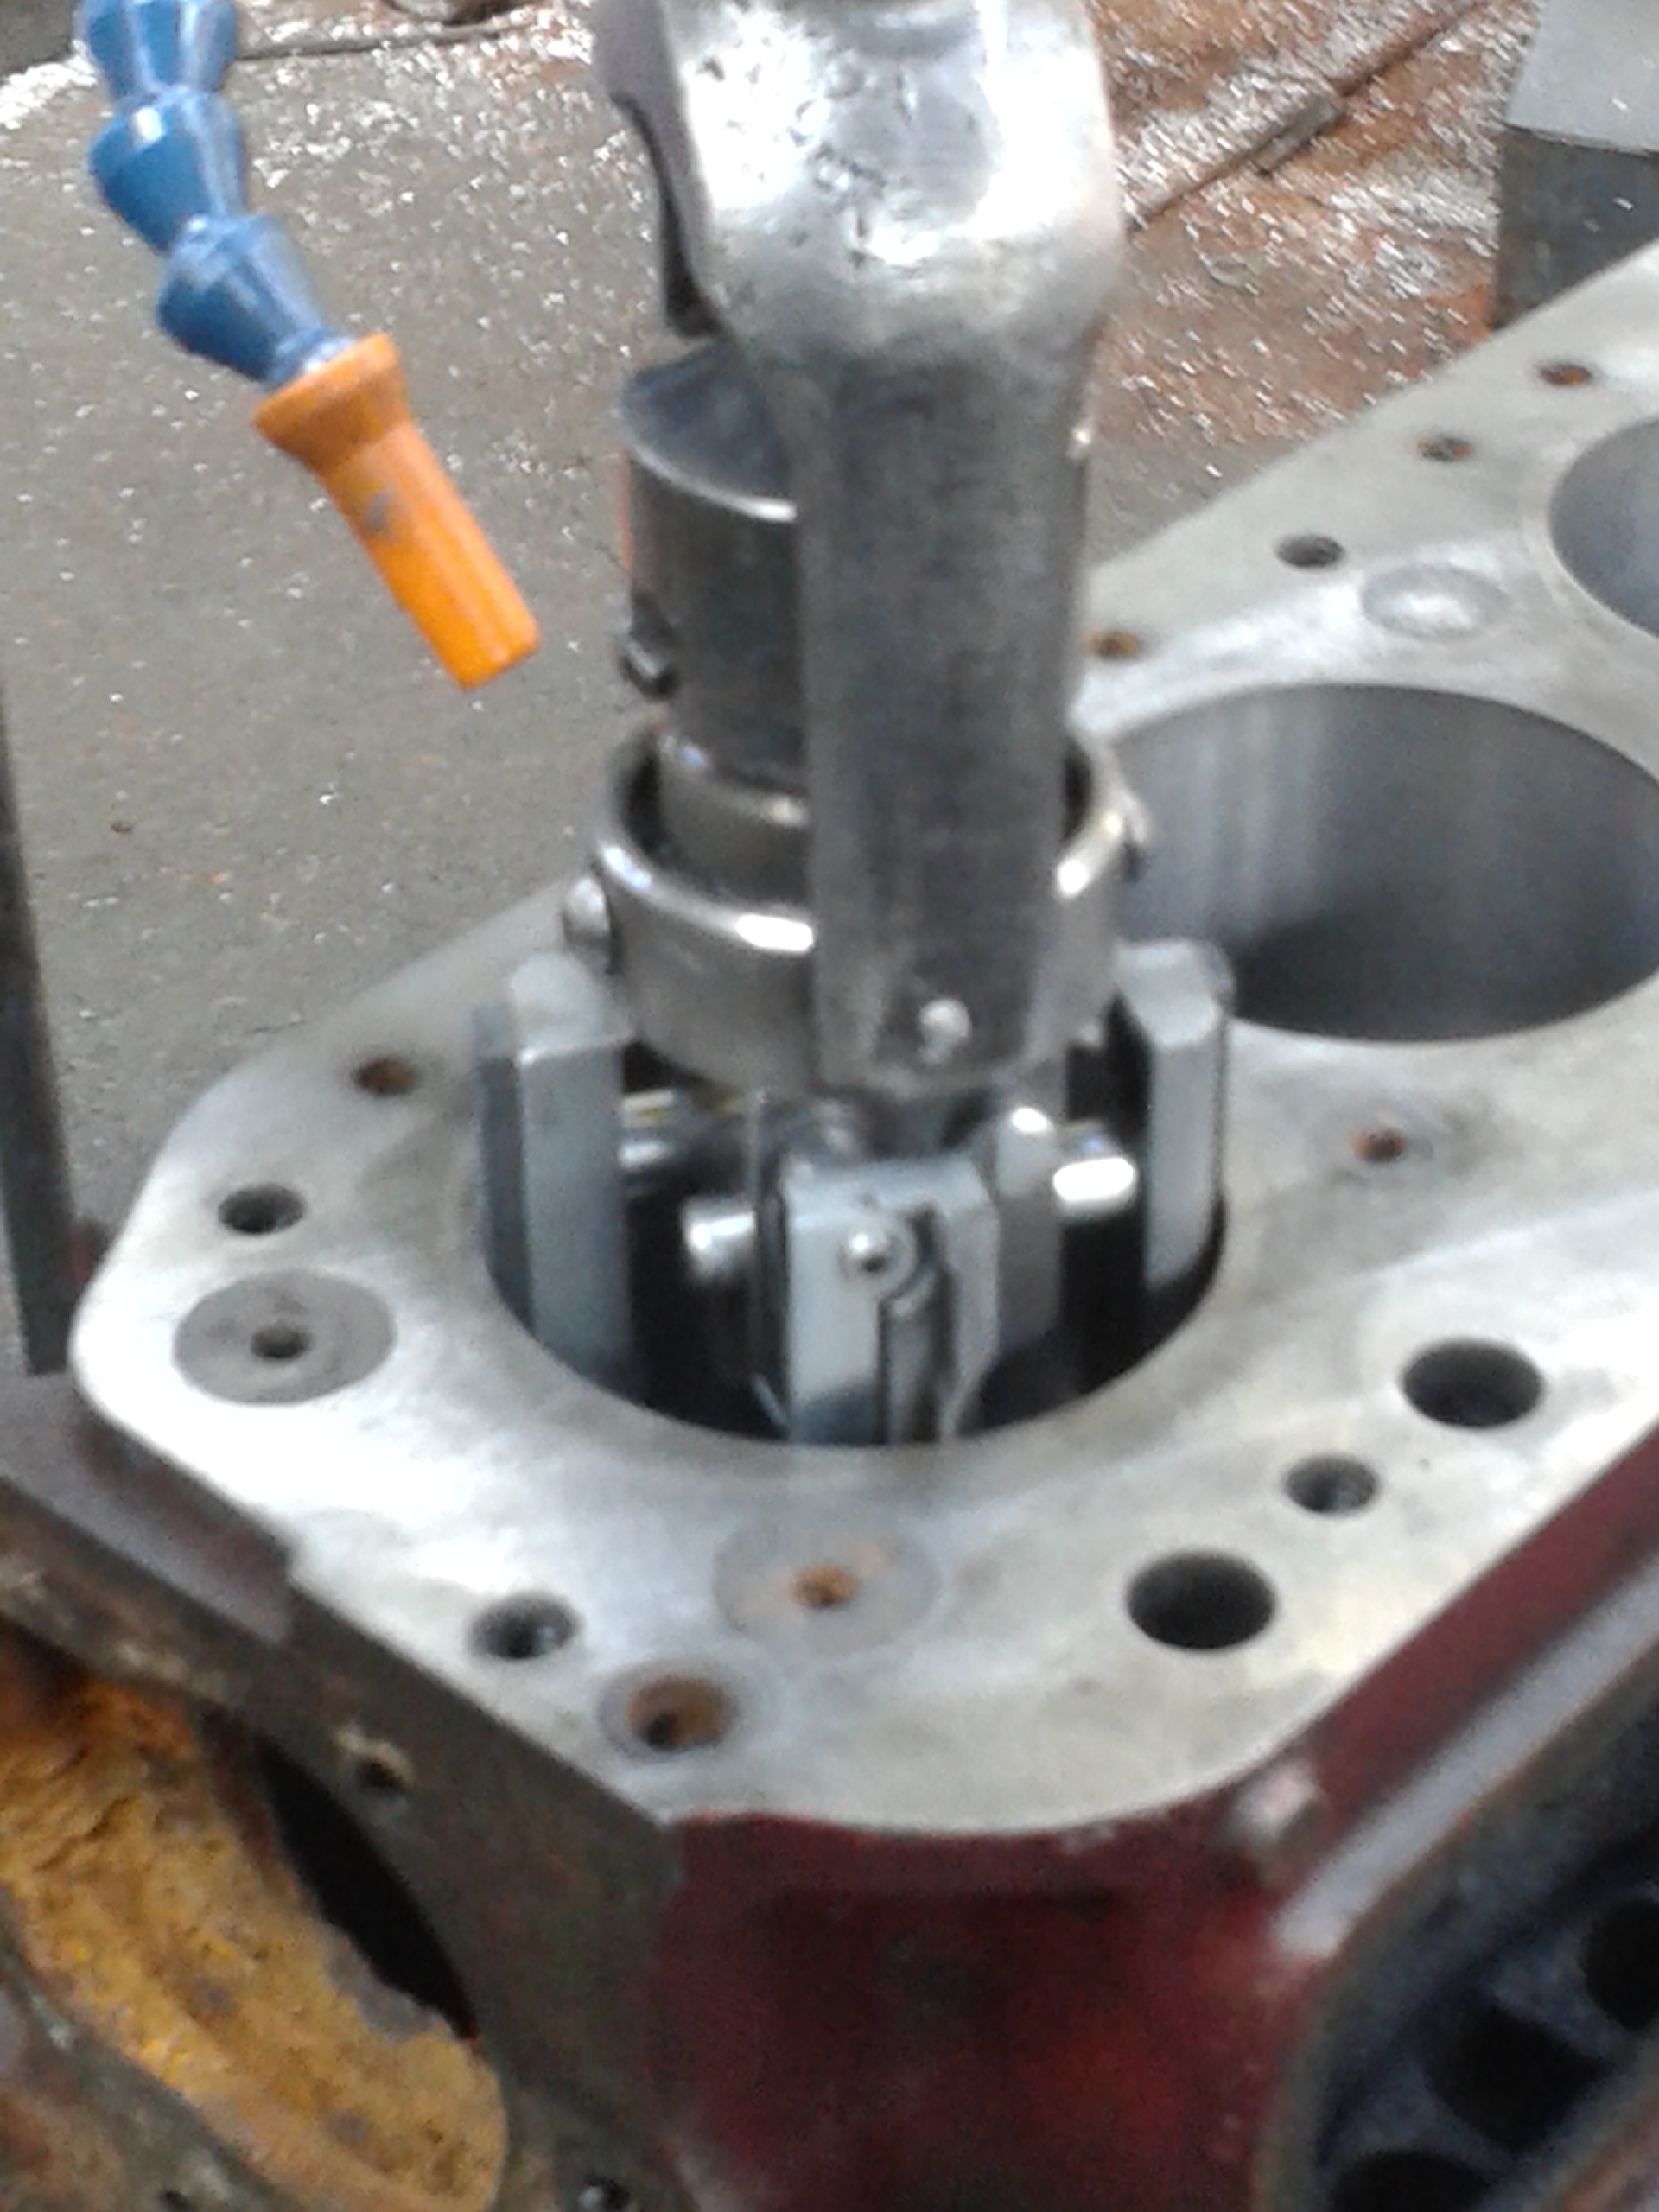
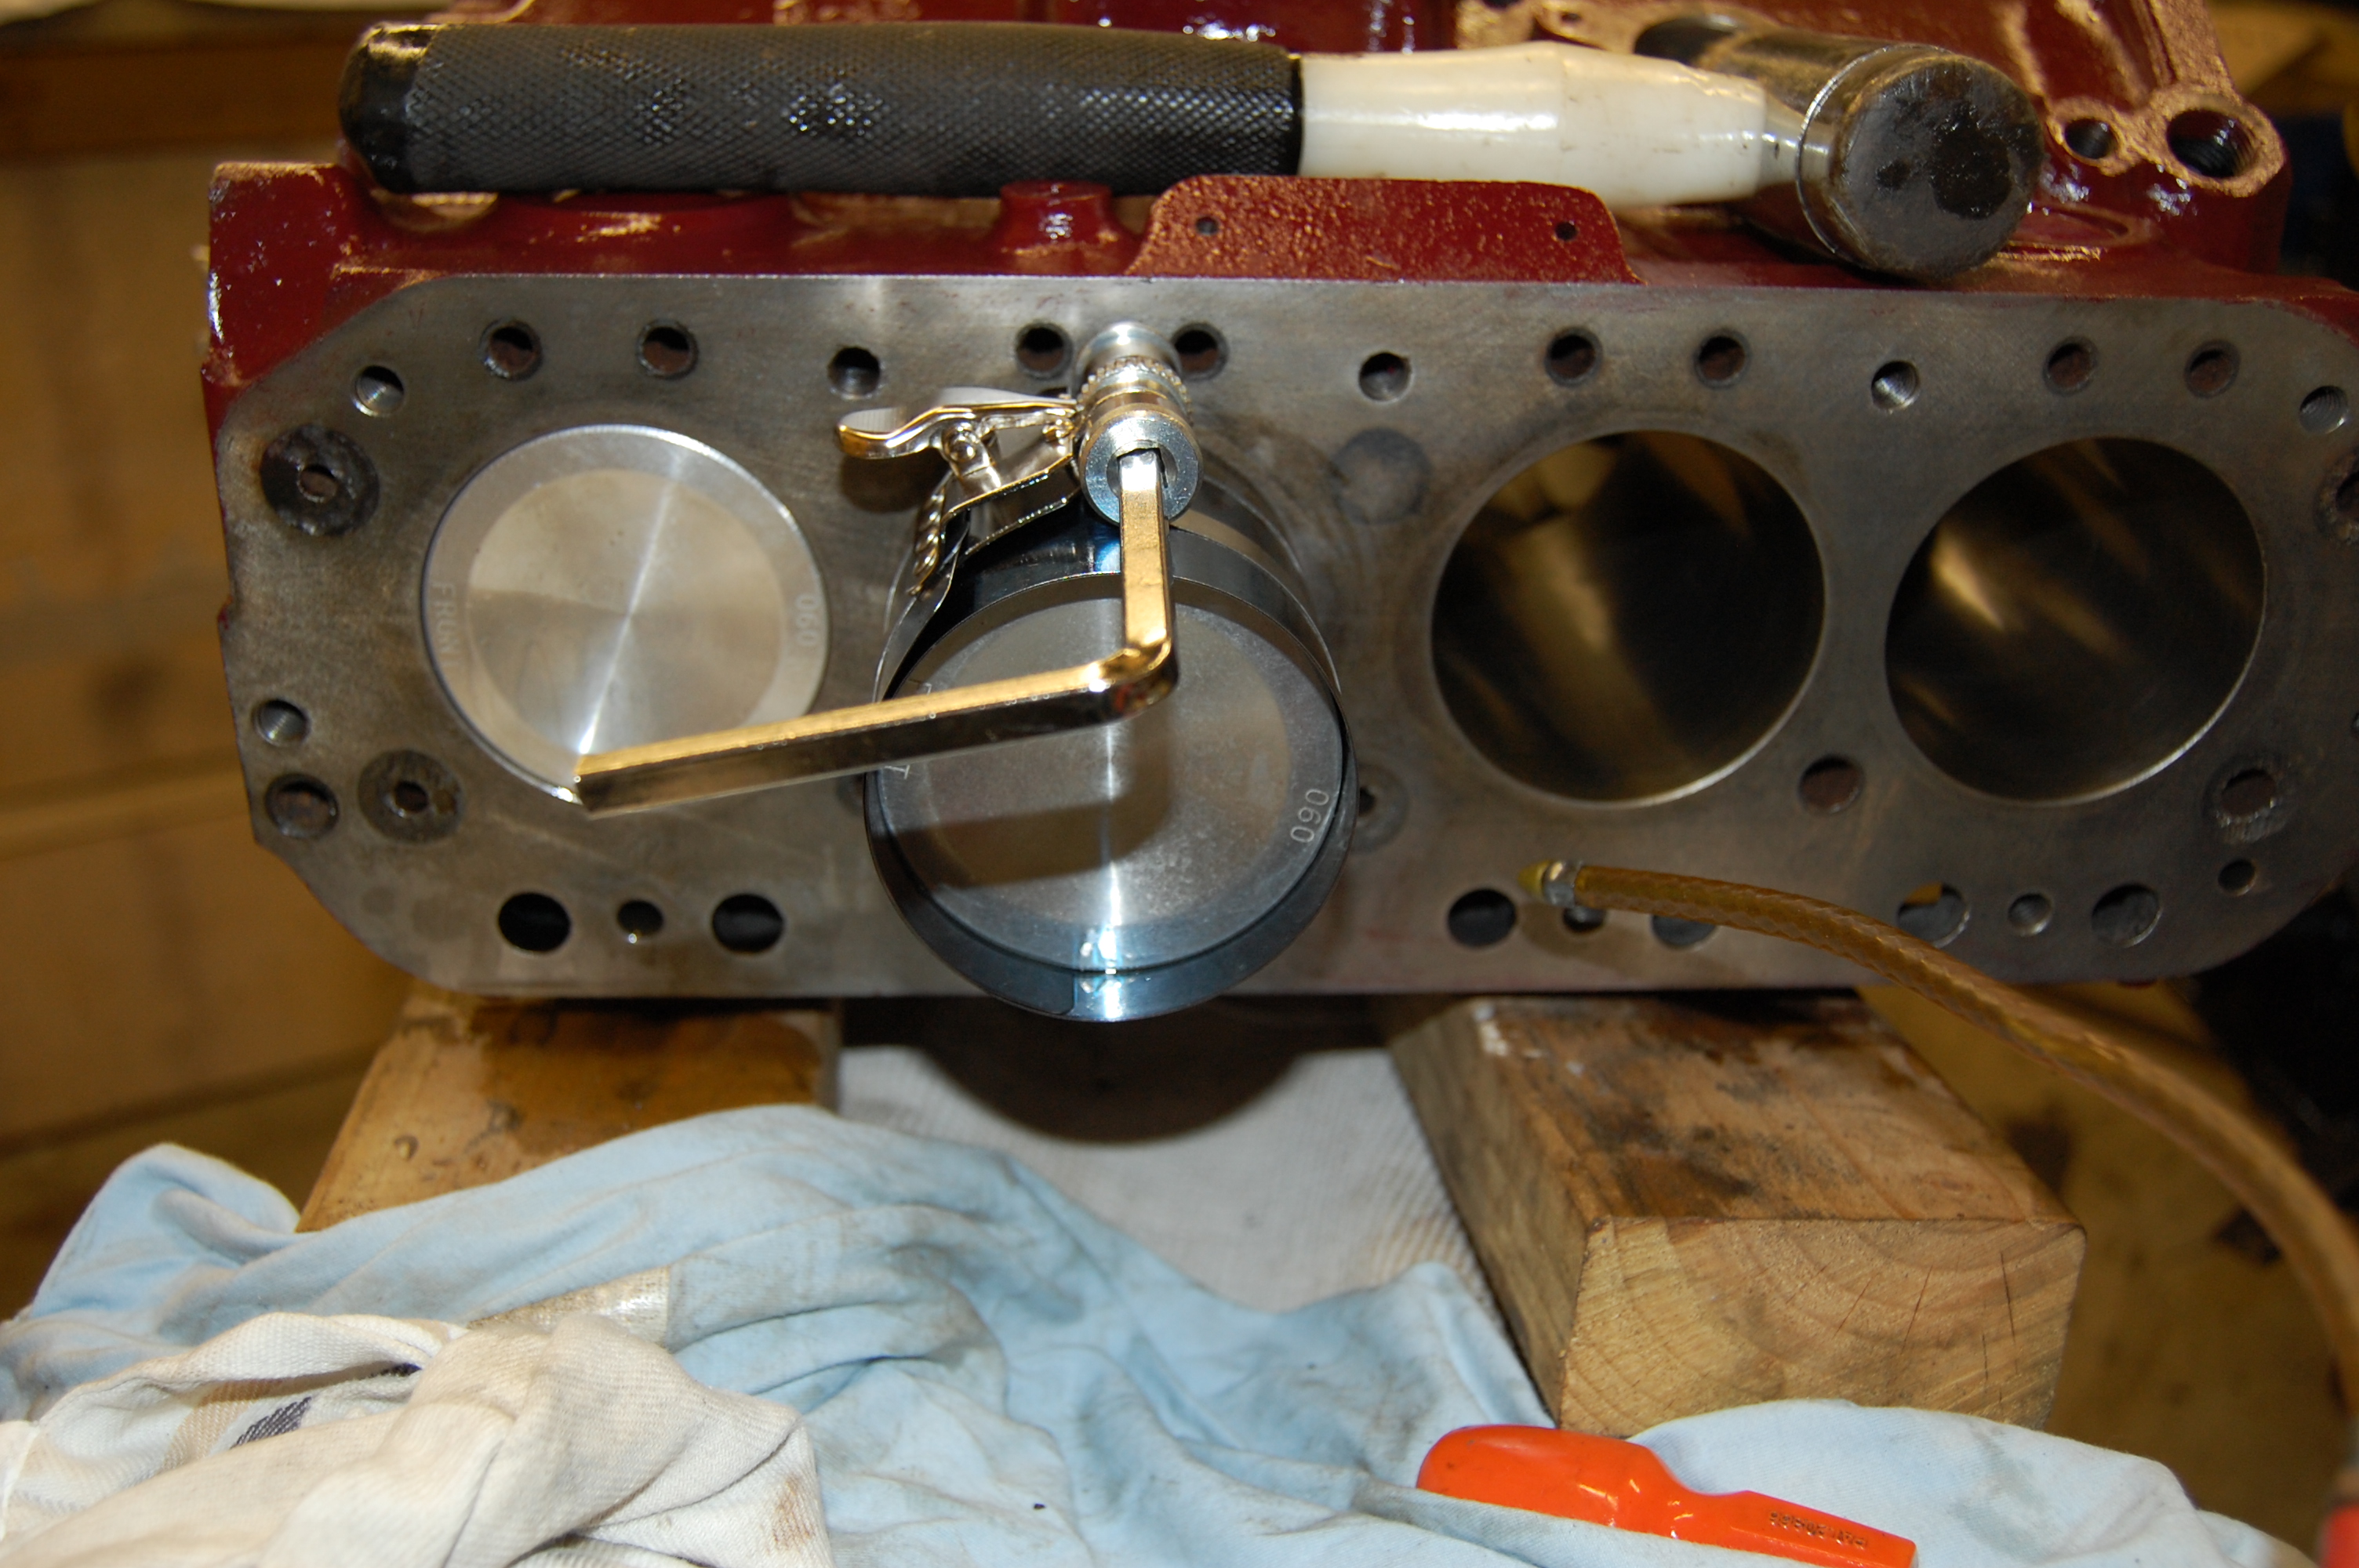
Honing the bore.
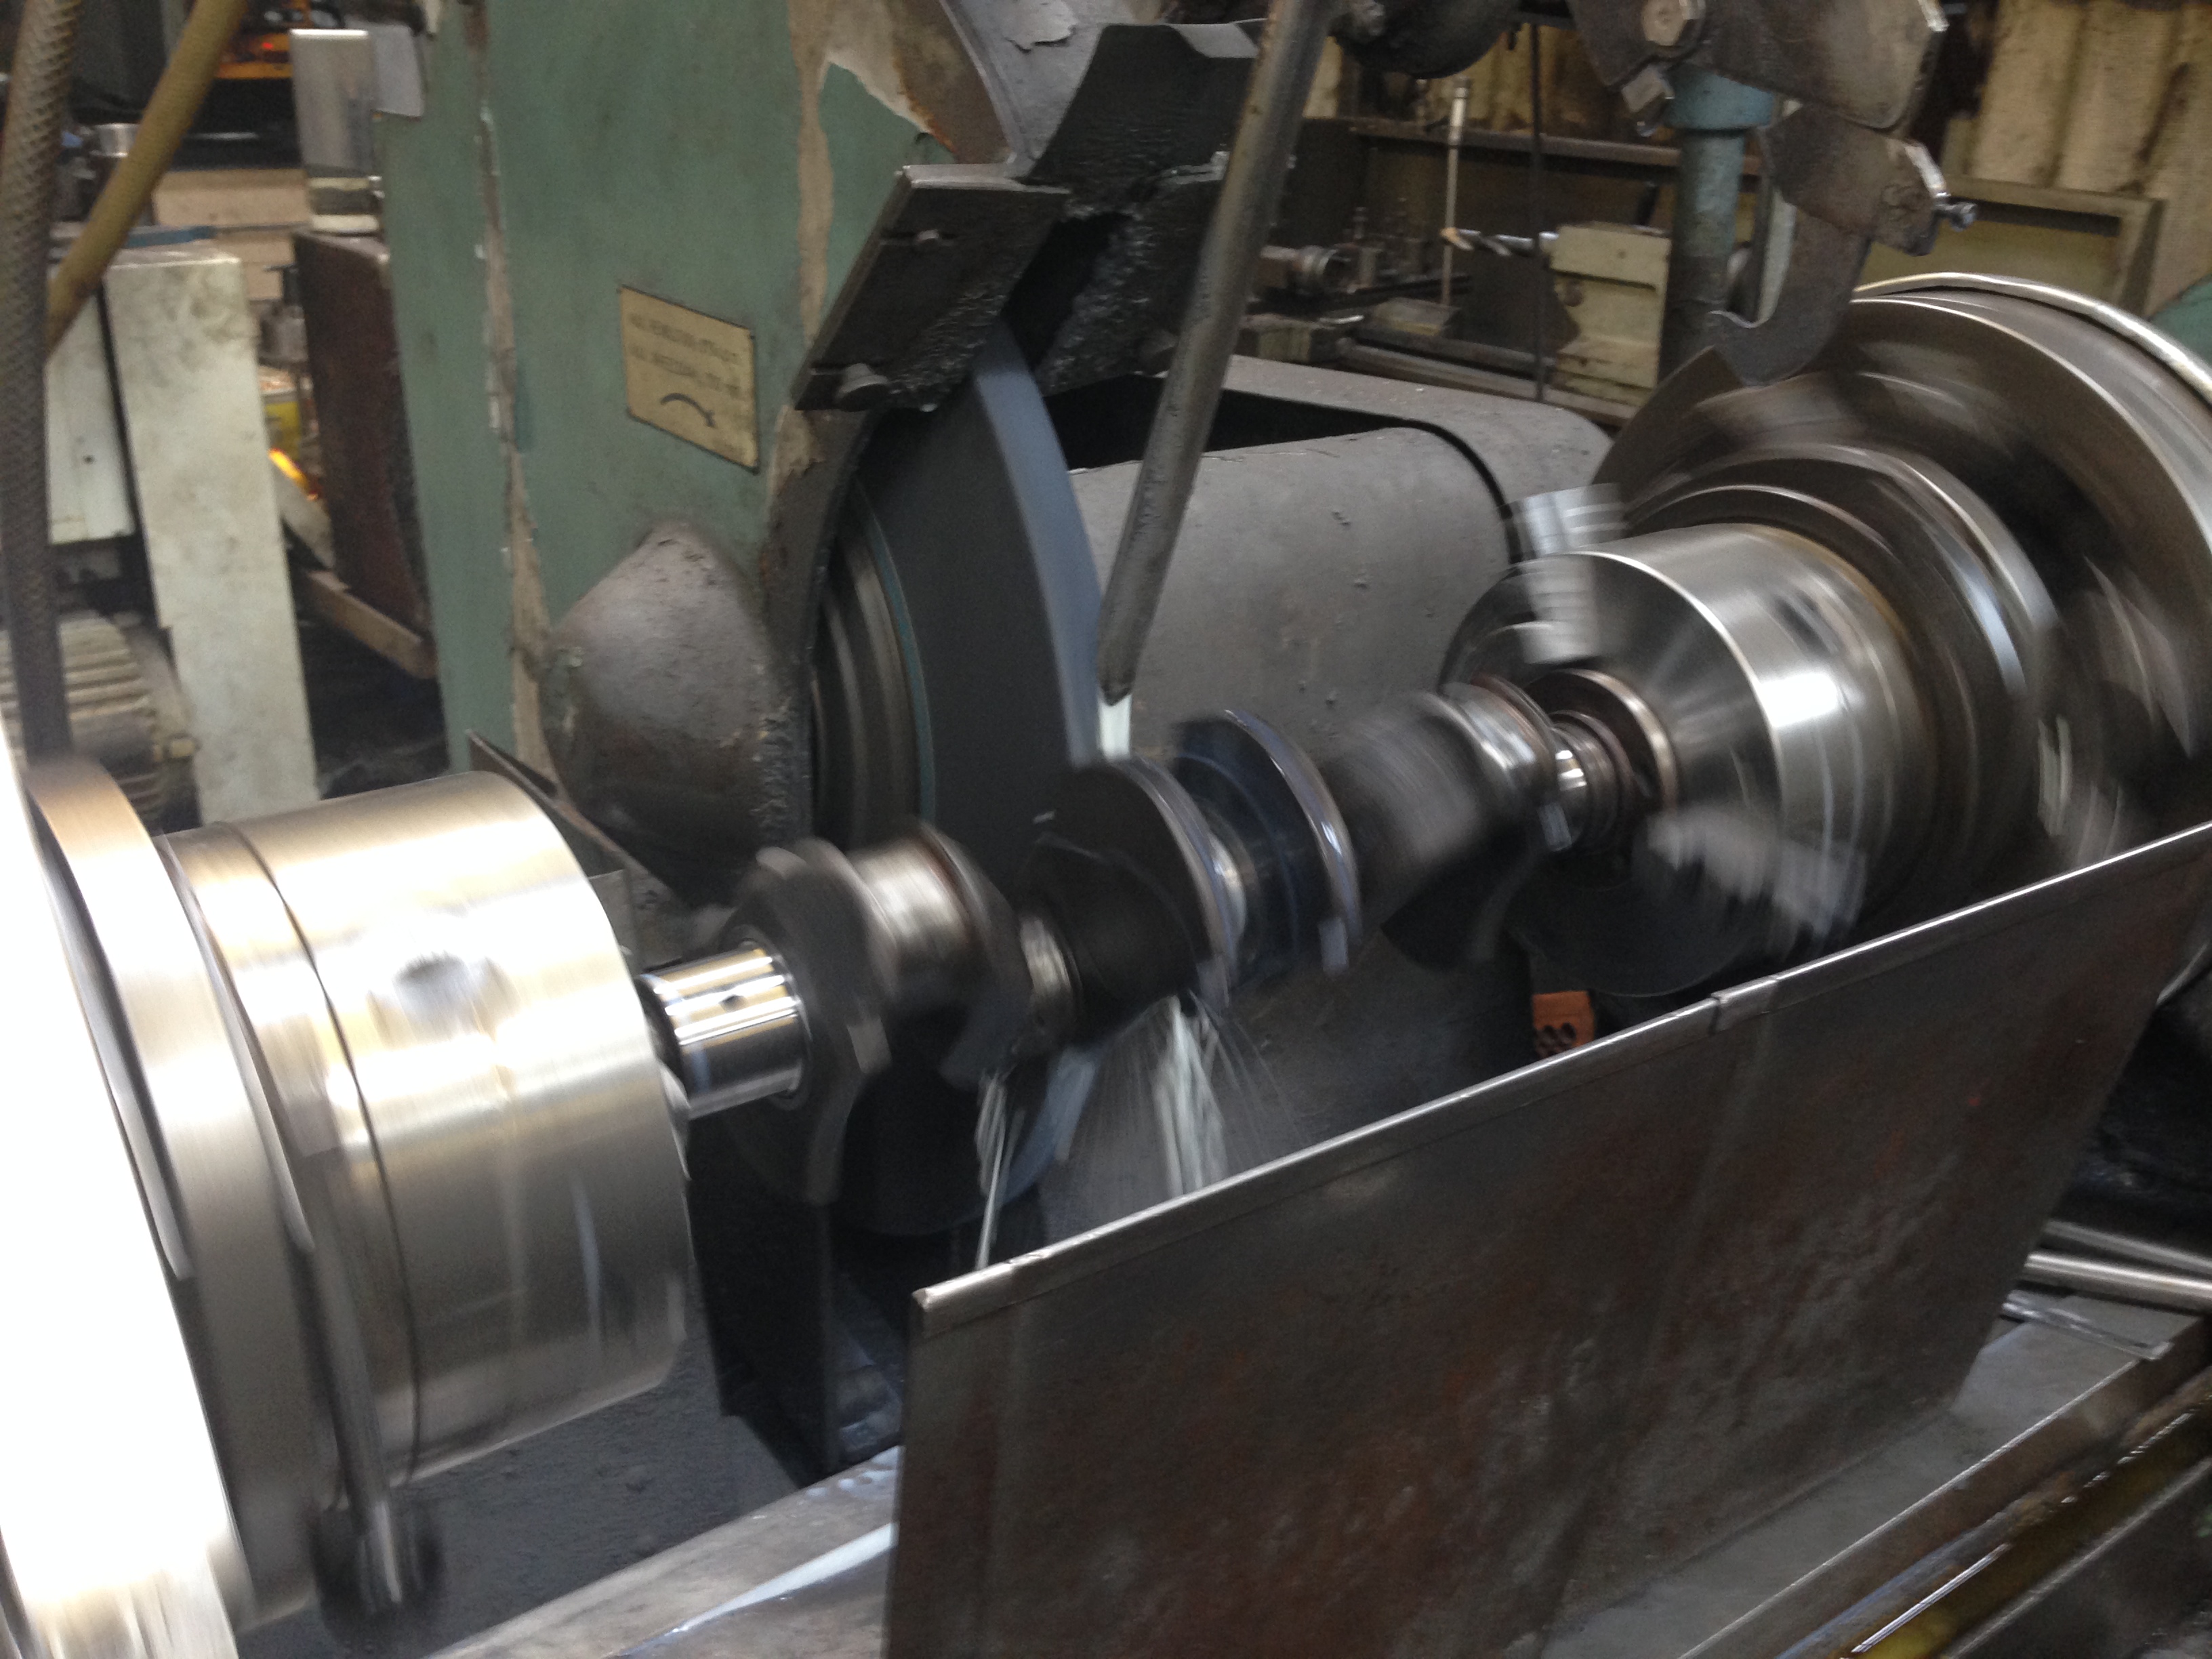
Crankshaft grind – all seven journals down -020″
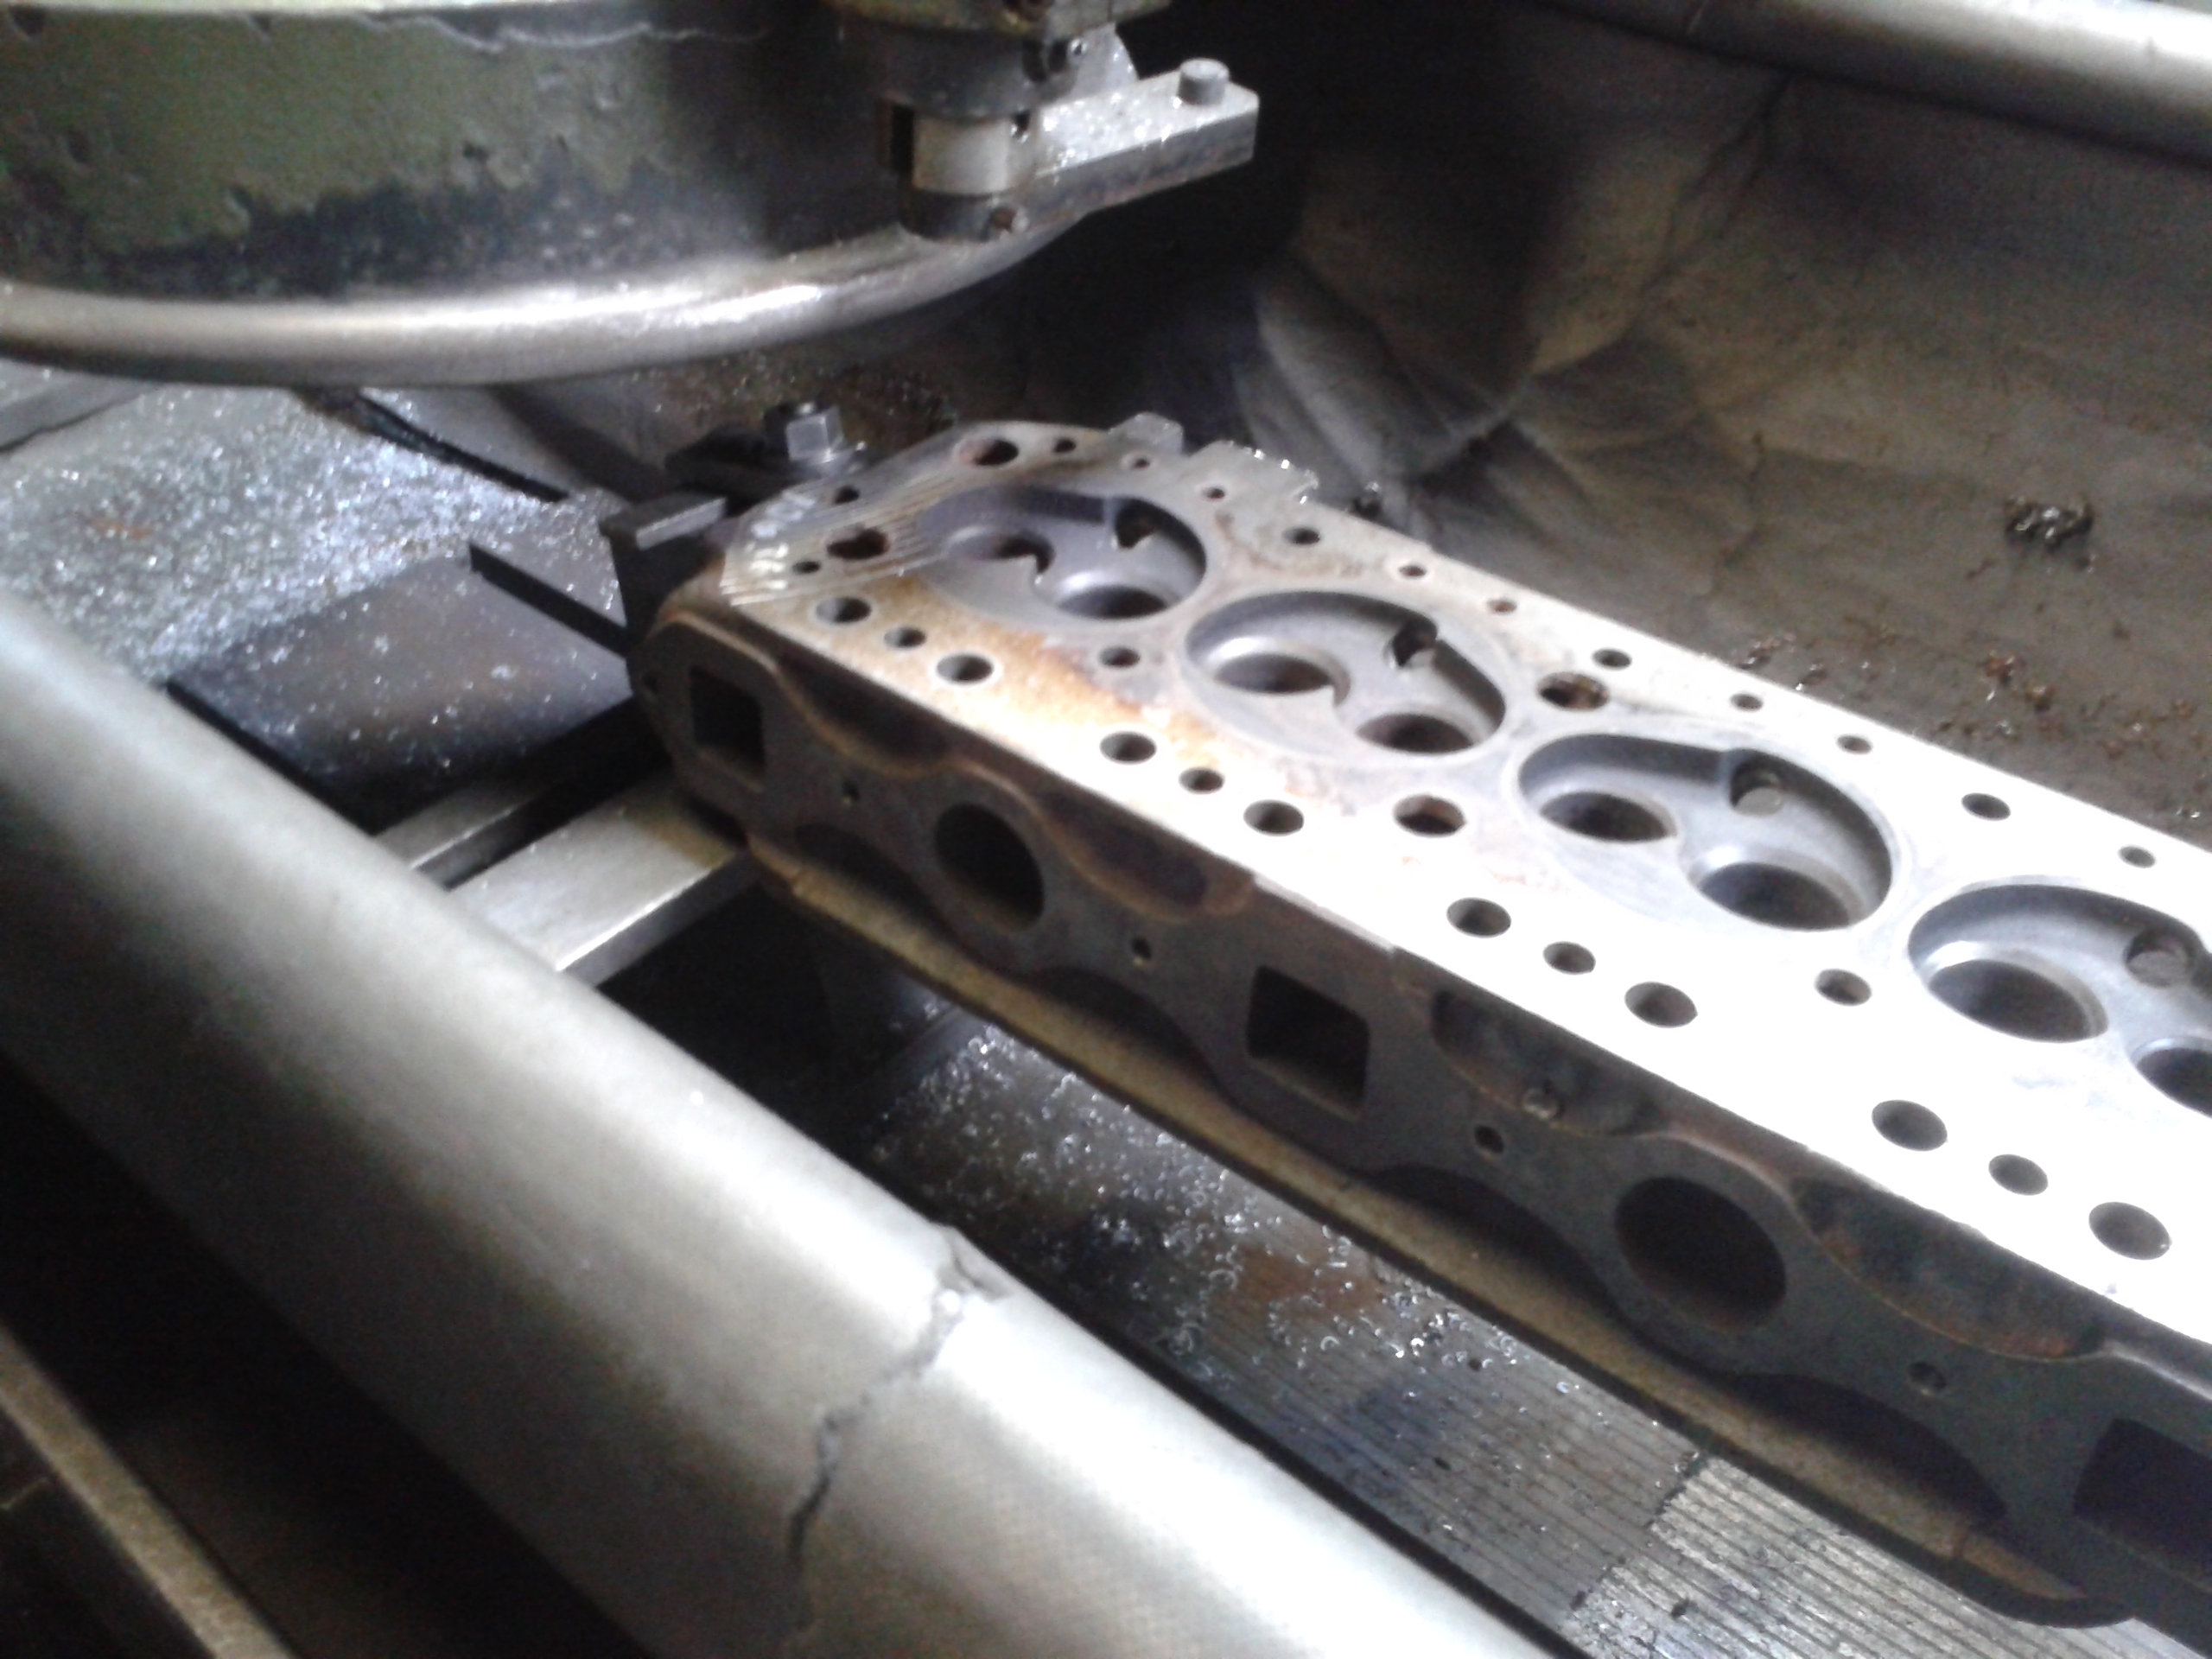
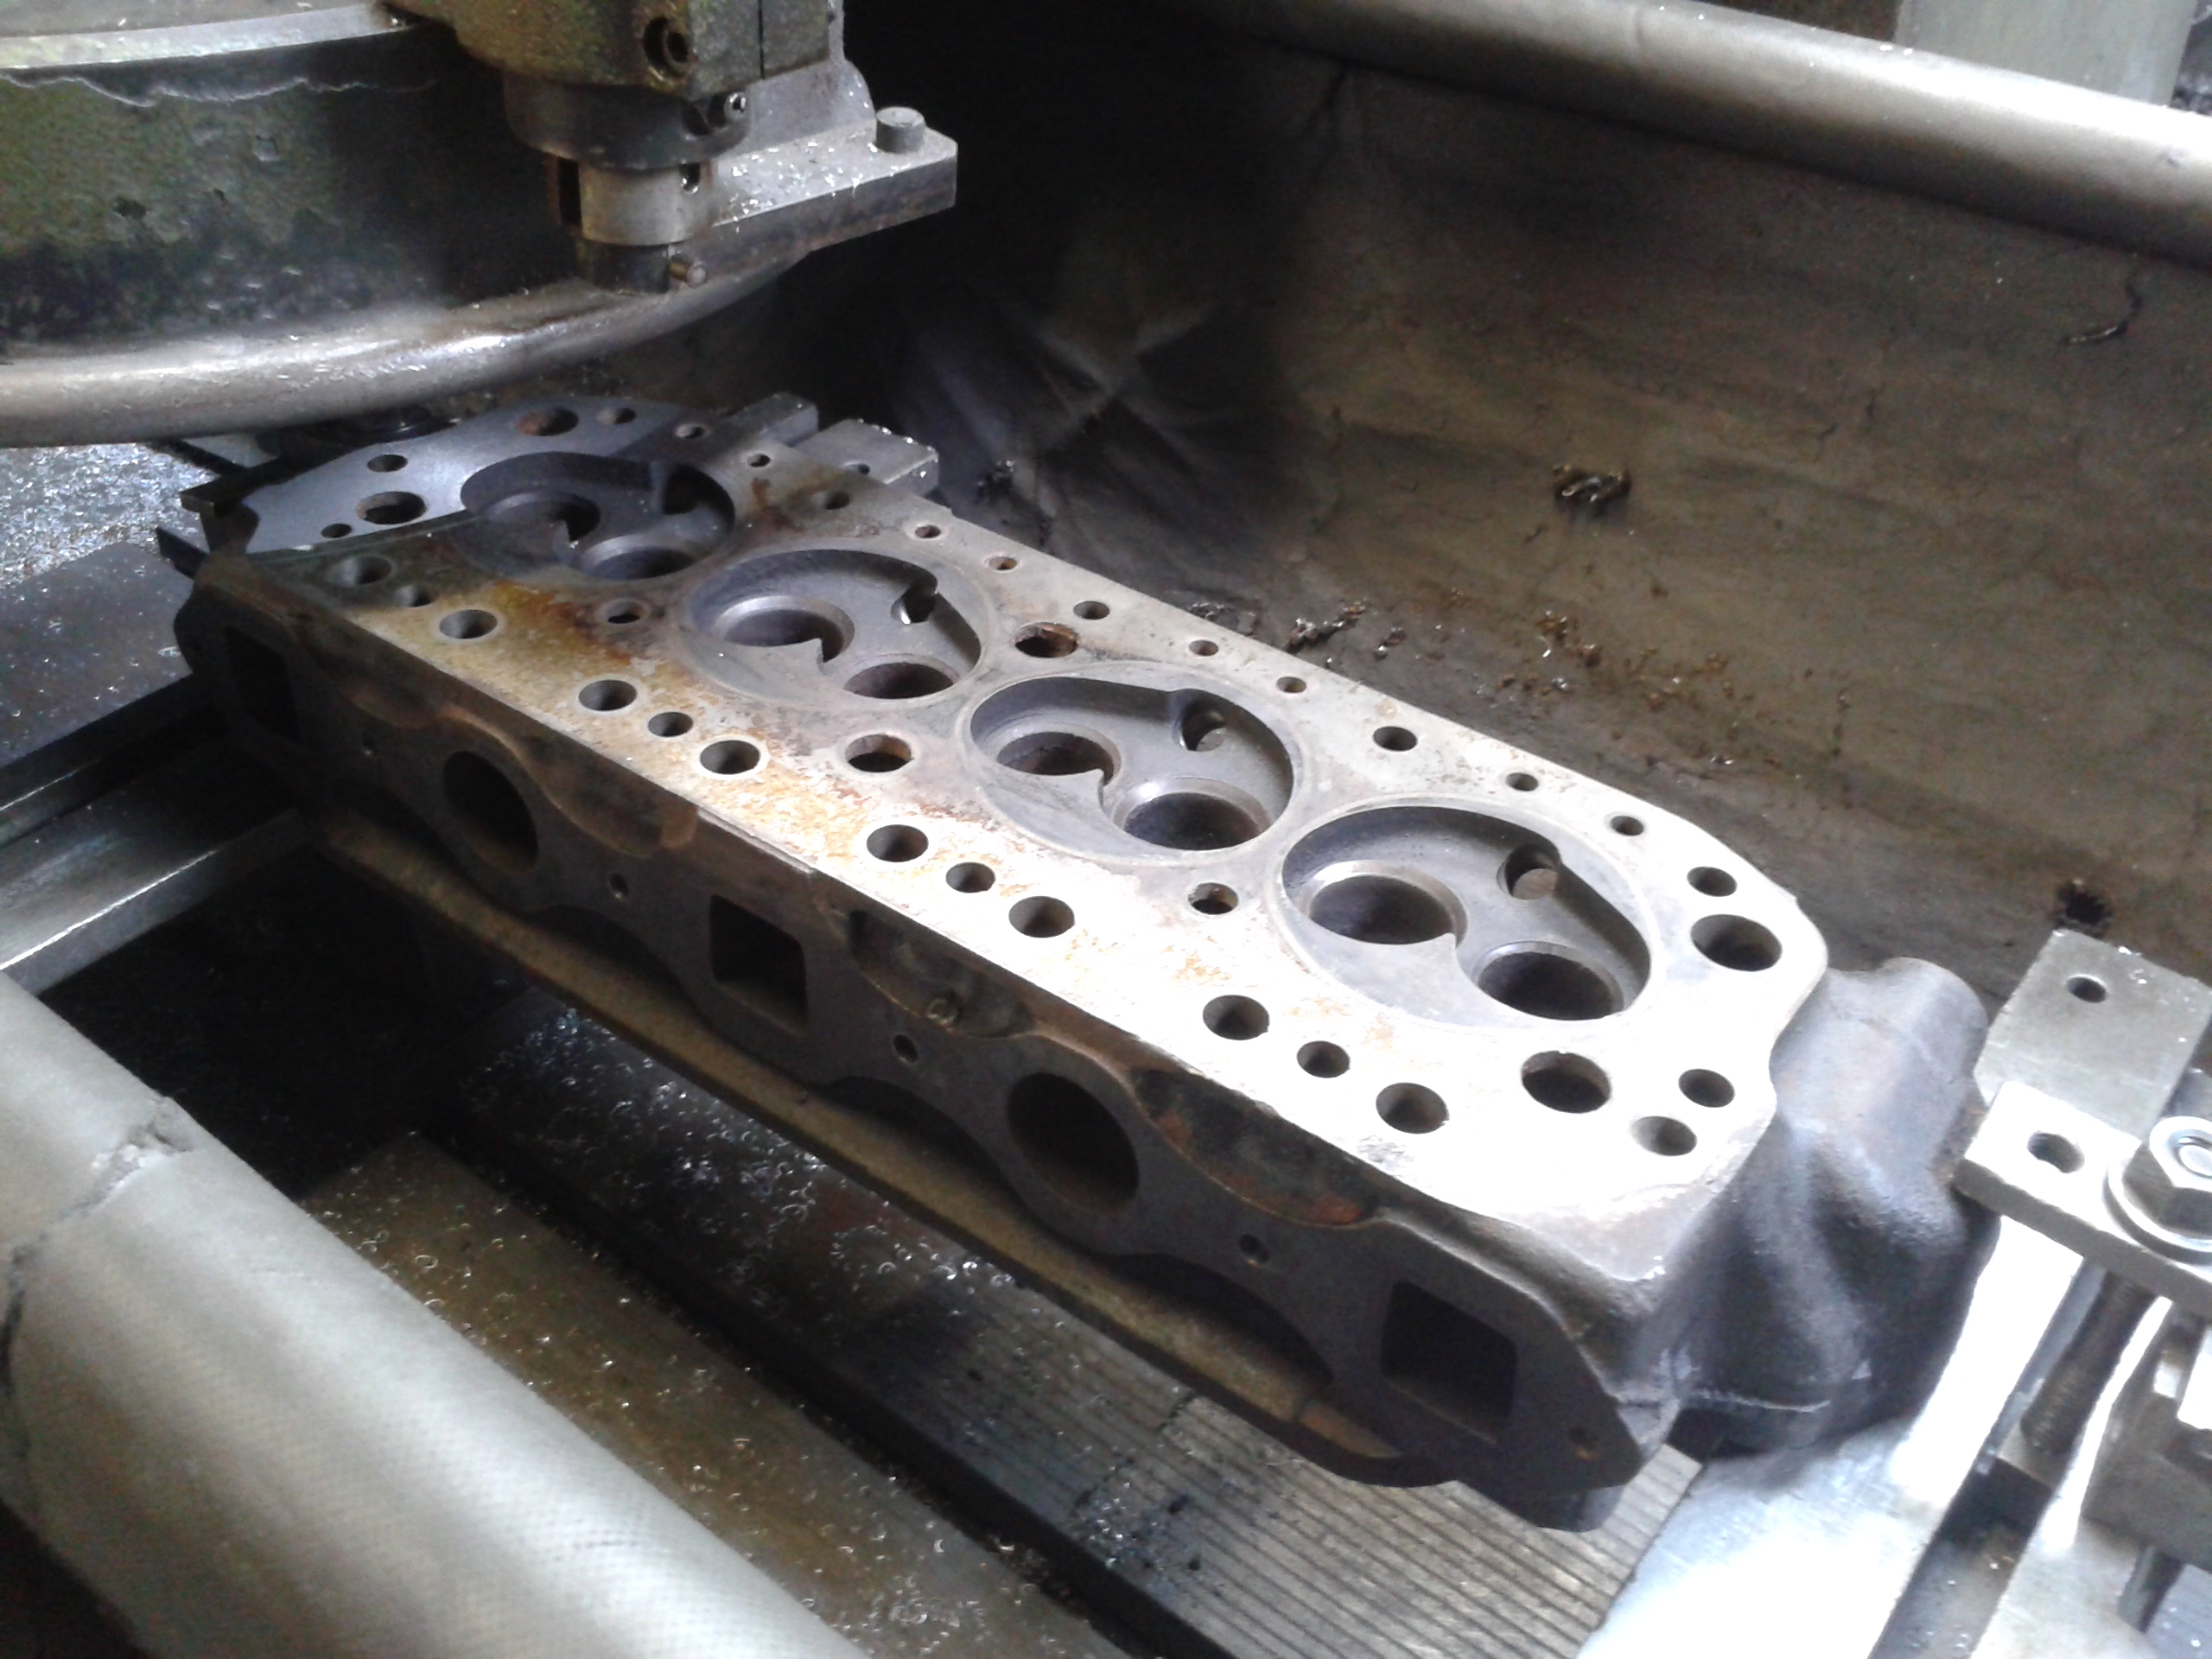
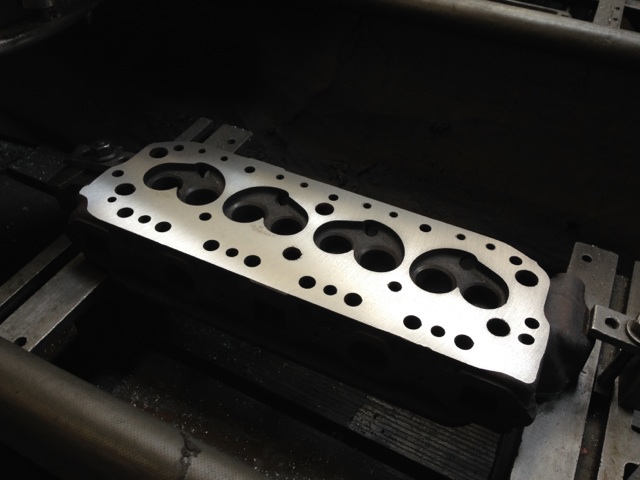
Skimming the head face 0.006″
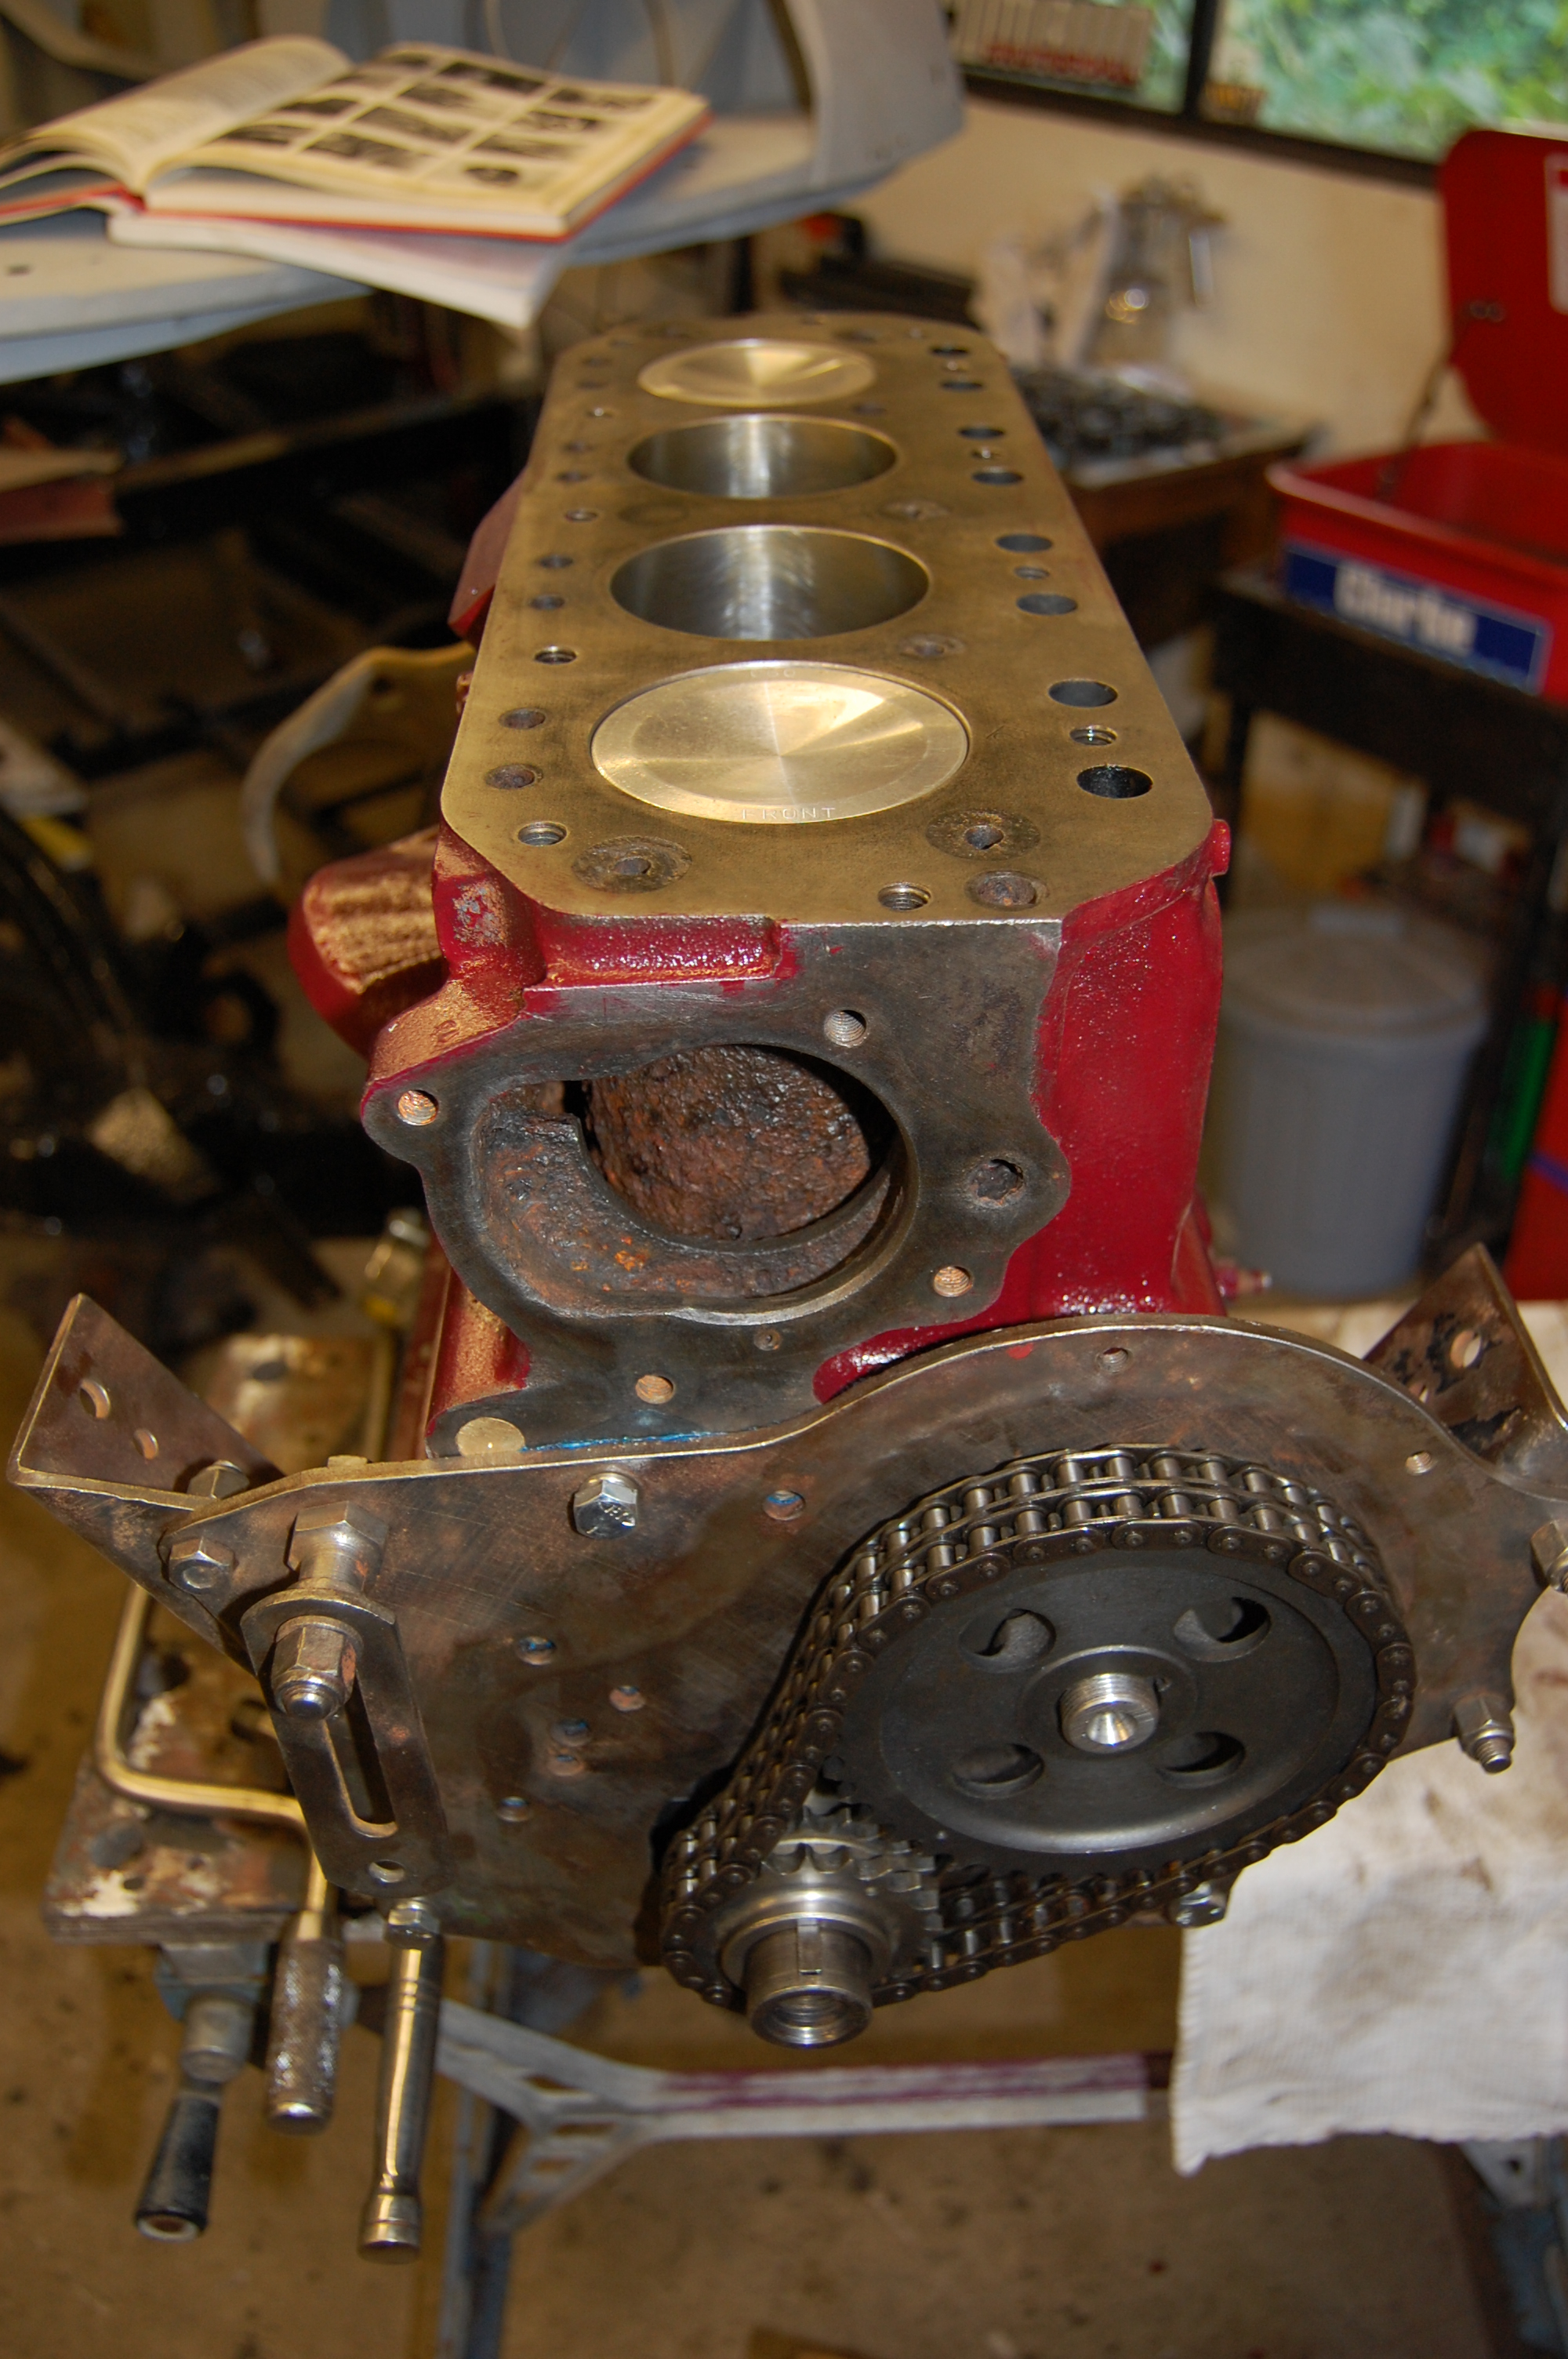
Fitting Core Plugs.
The block was hot tanked at the machine shop, but on return it was cleaned again and then pressure blasted to remove all crud from waterways and oil galleries. Core plugs and main oil gallery plugs were removed before hot tanking. The water jacket behind no 4 cylinder is notorious for clagging and its worth spending time chipping out as much as can be reached. Also careful cleaning of all water ways is worthwhile to help avoiding over-heating problems in service.
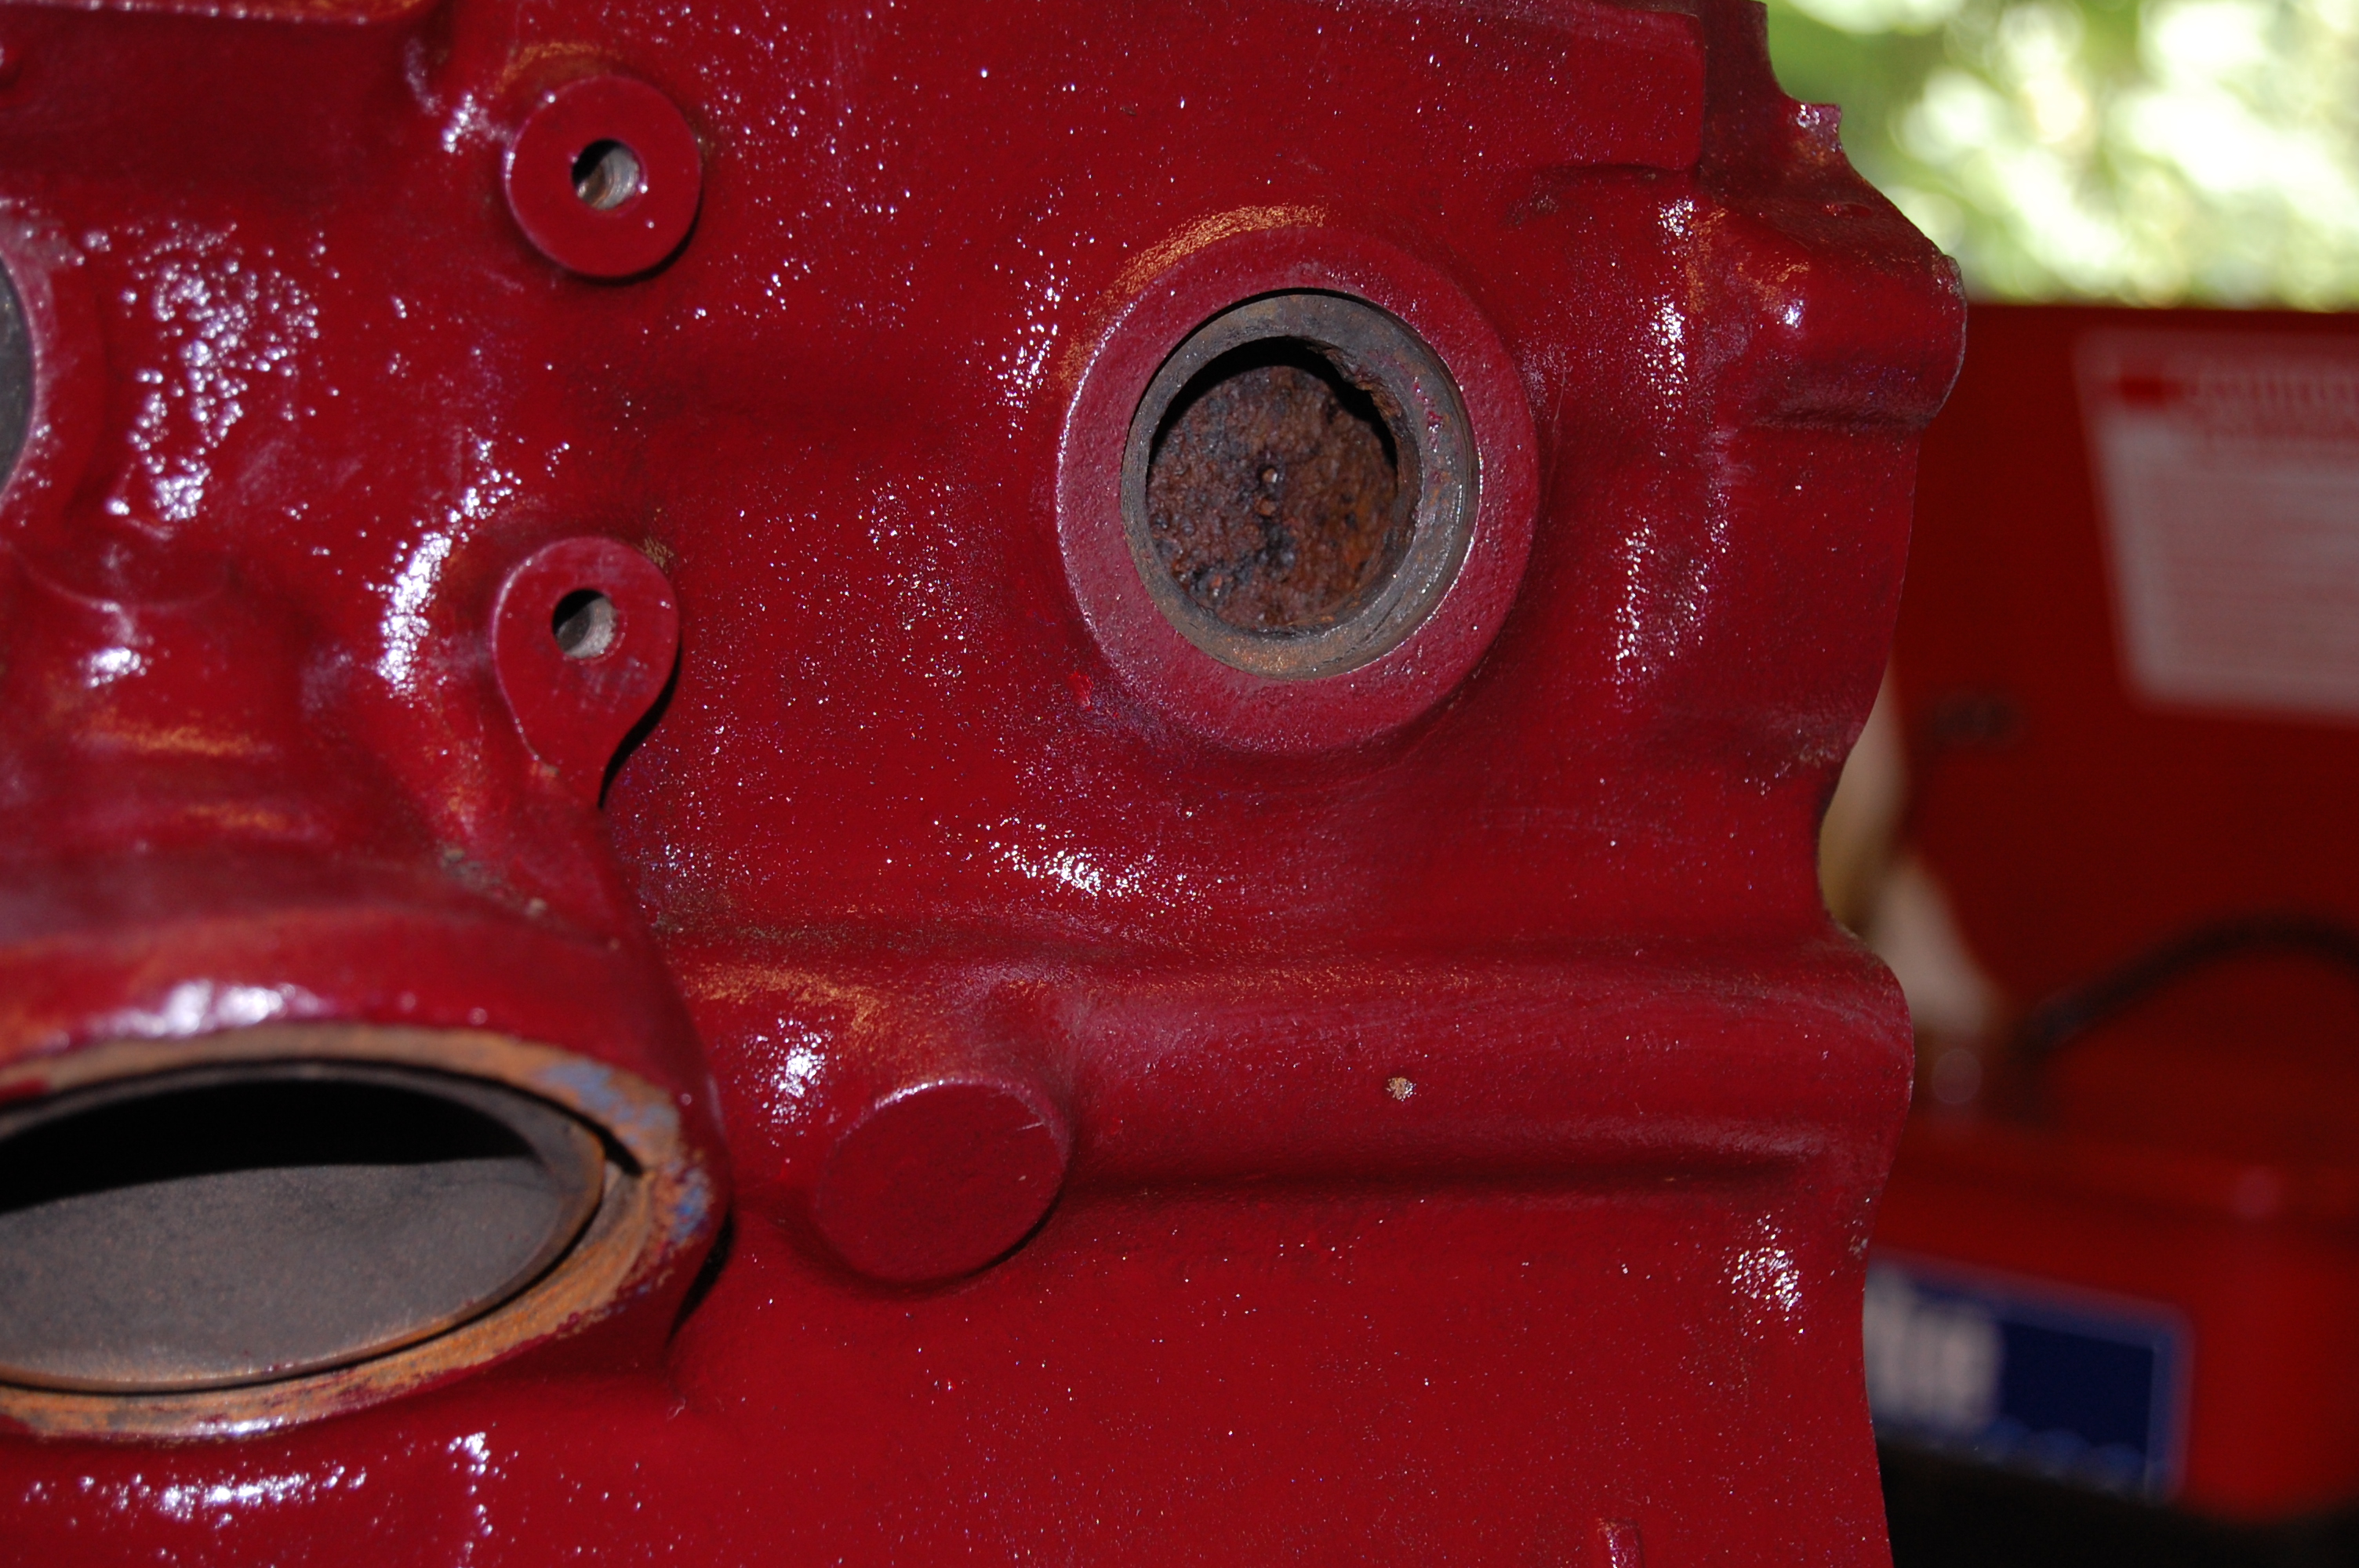
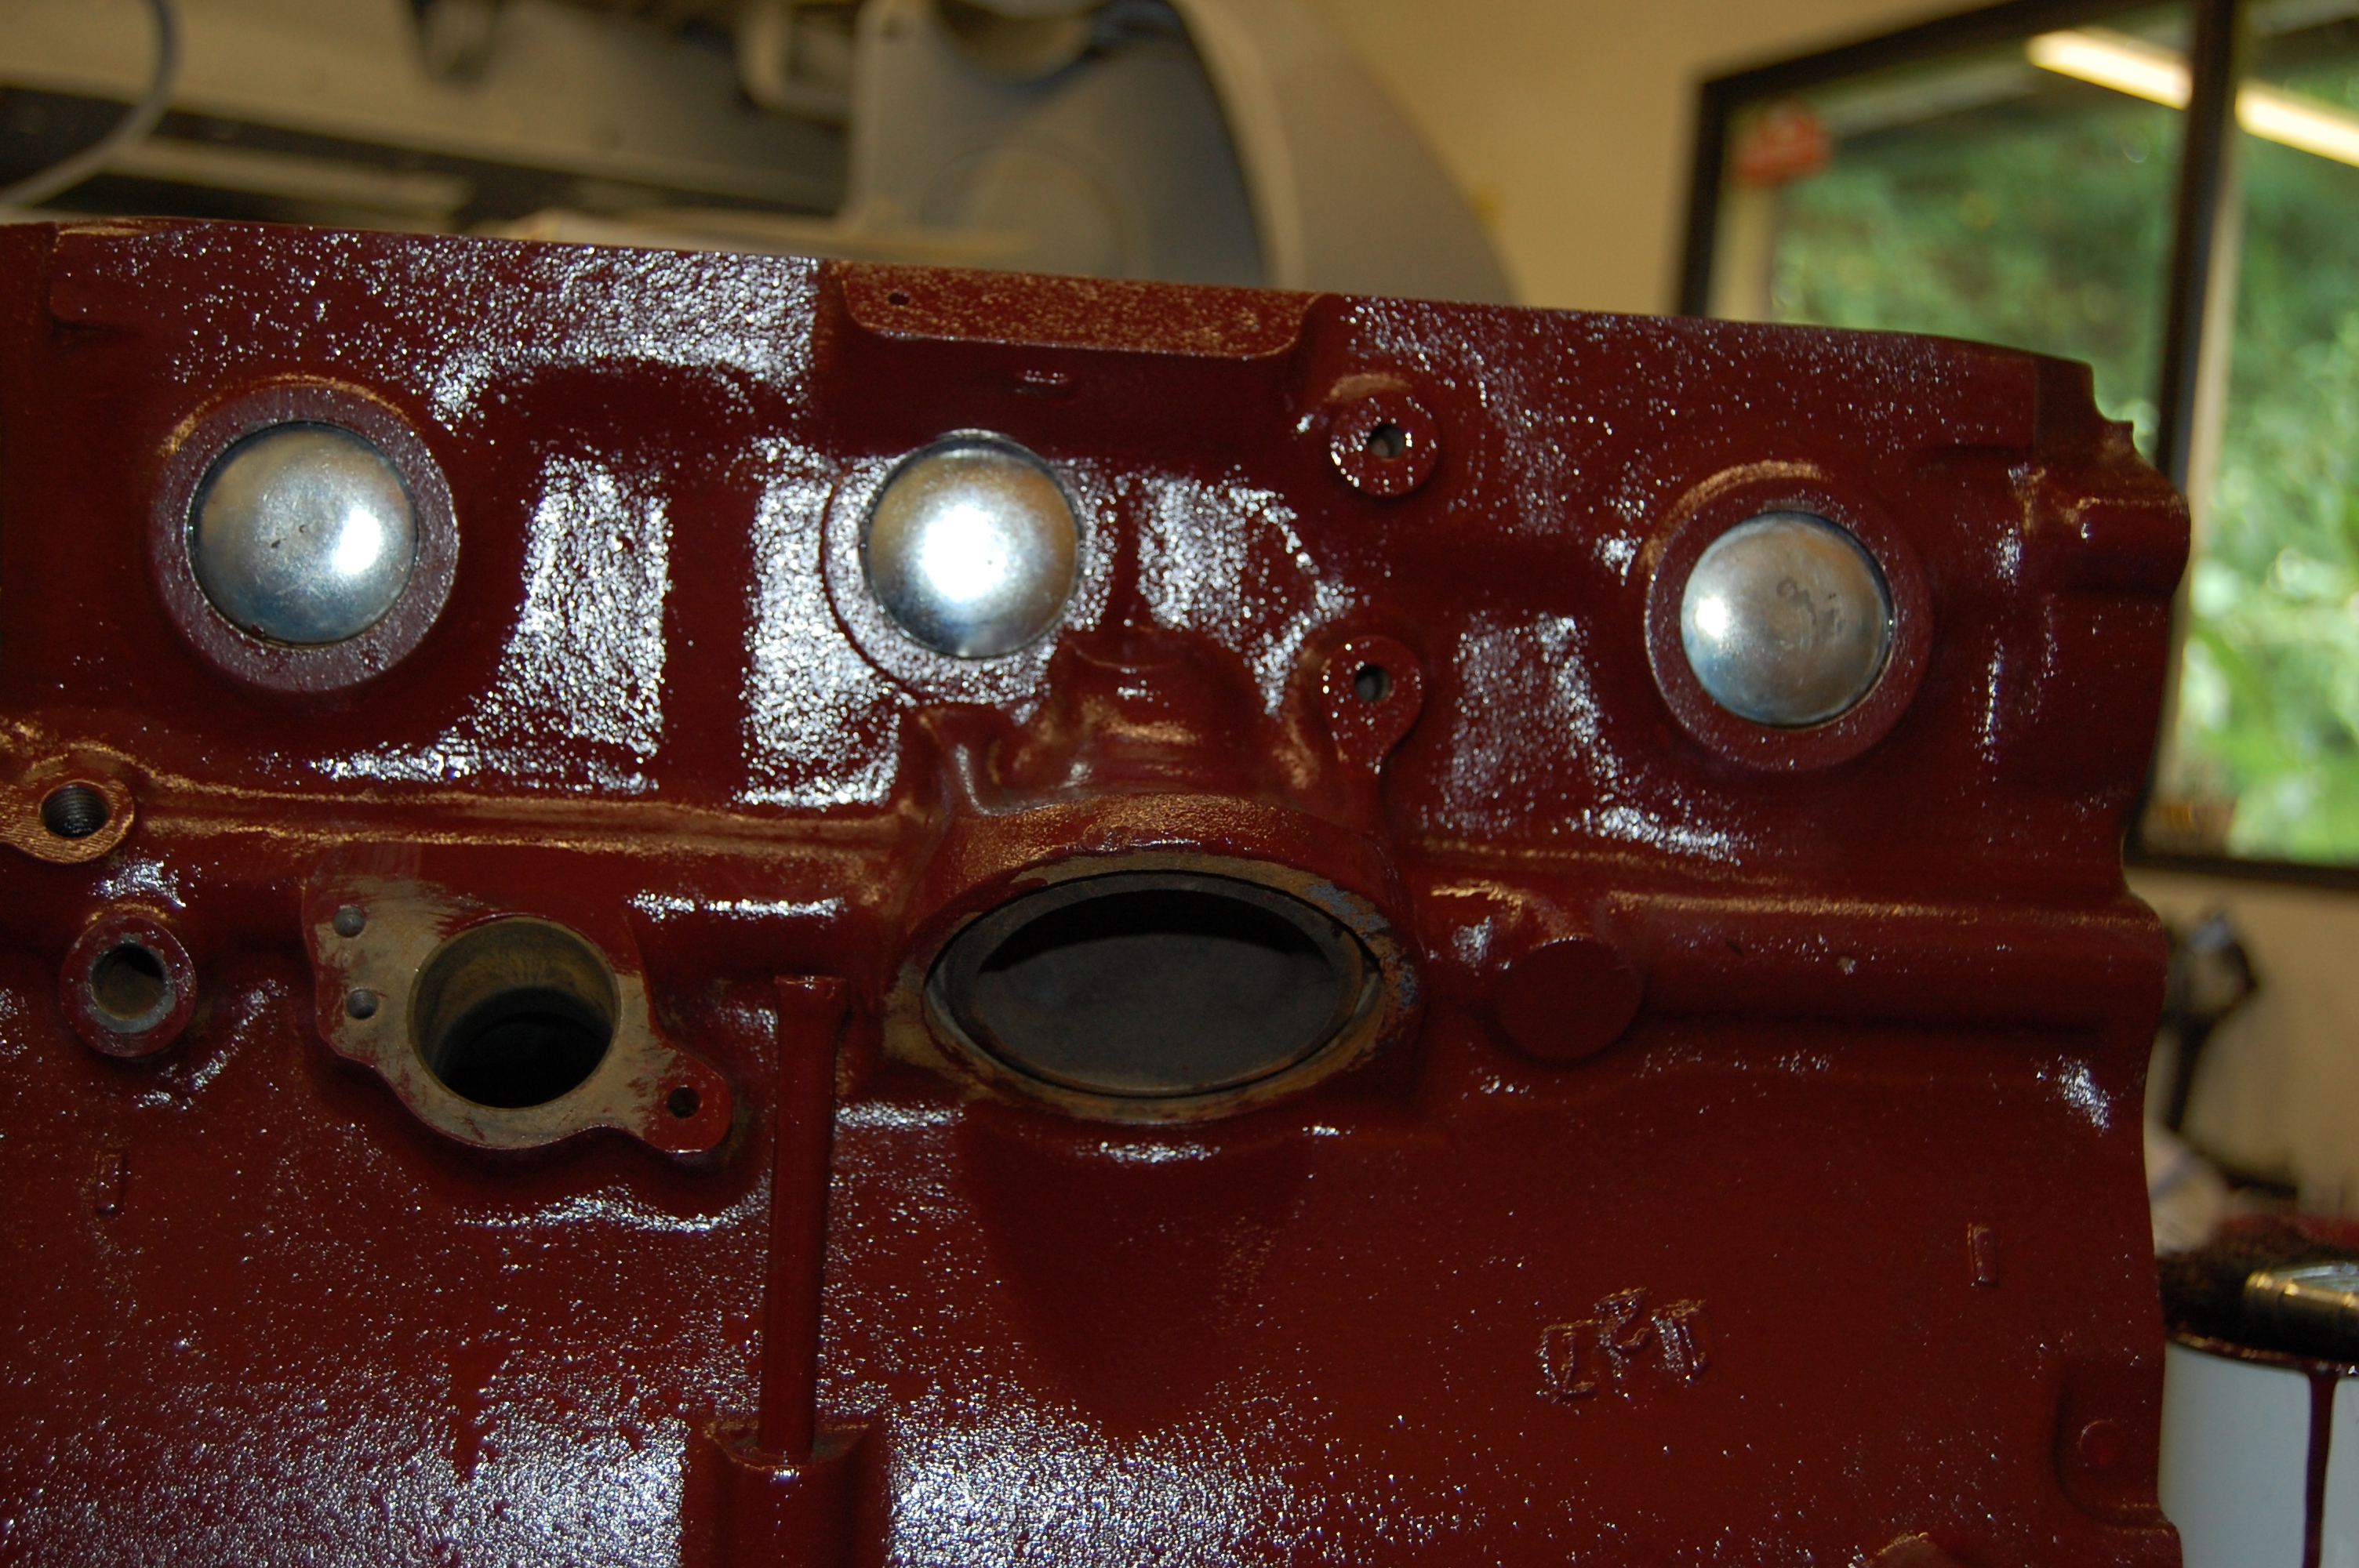
Core plug recess cleaned up and ready for new plug. A single coat of engine paint was applied to halt any surface rusting..
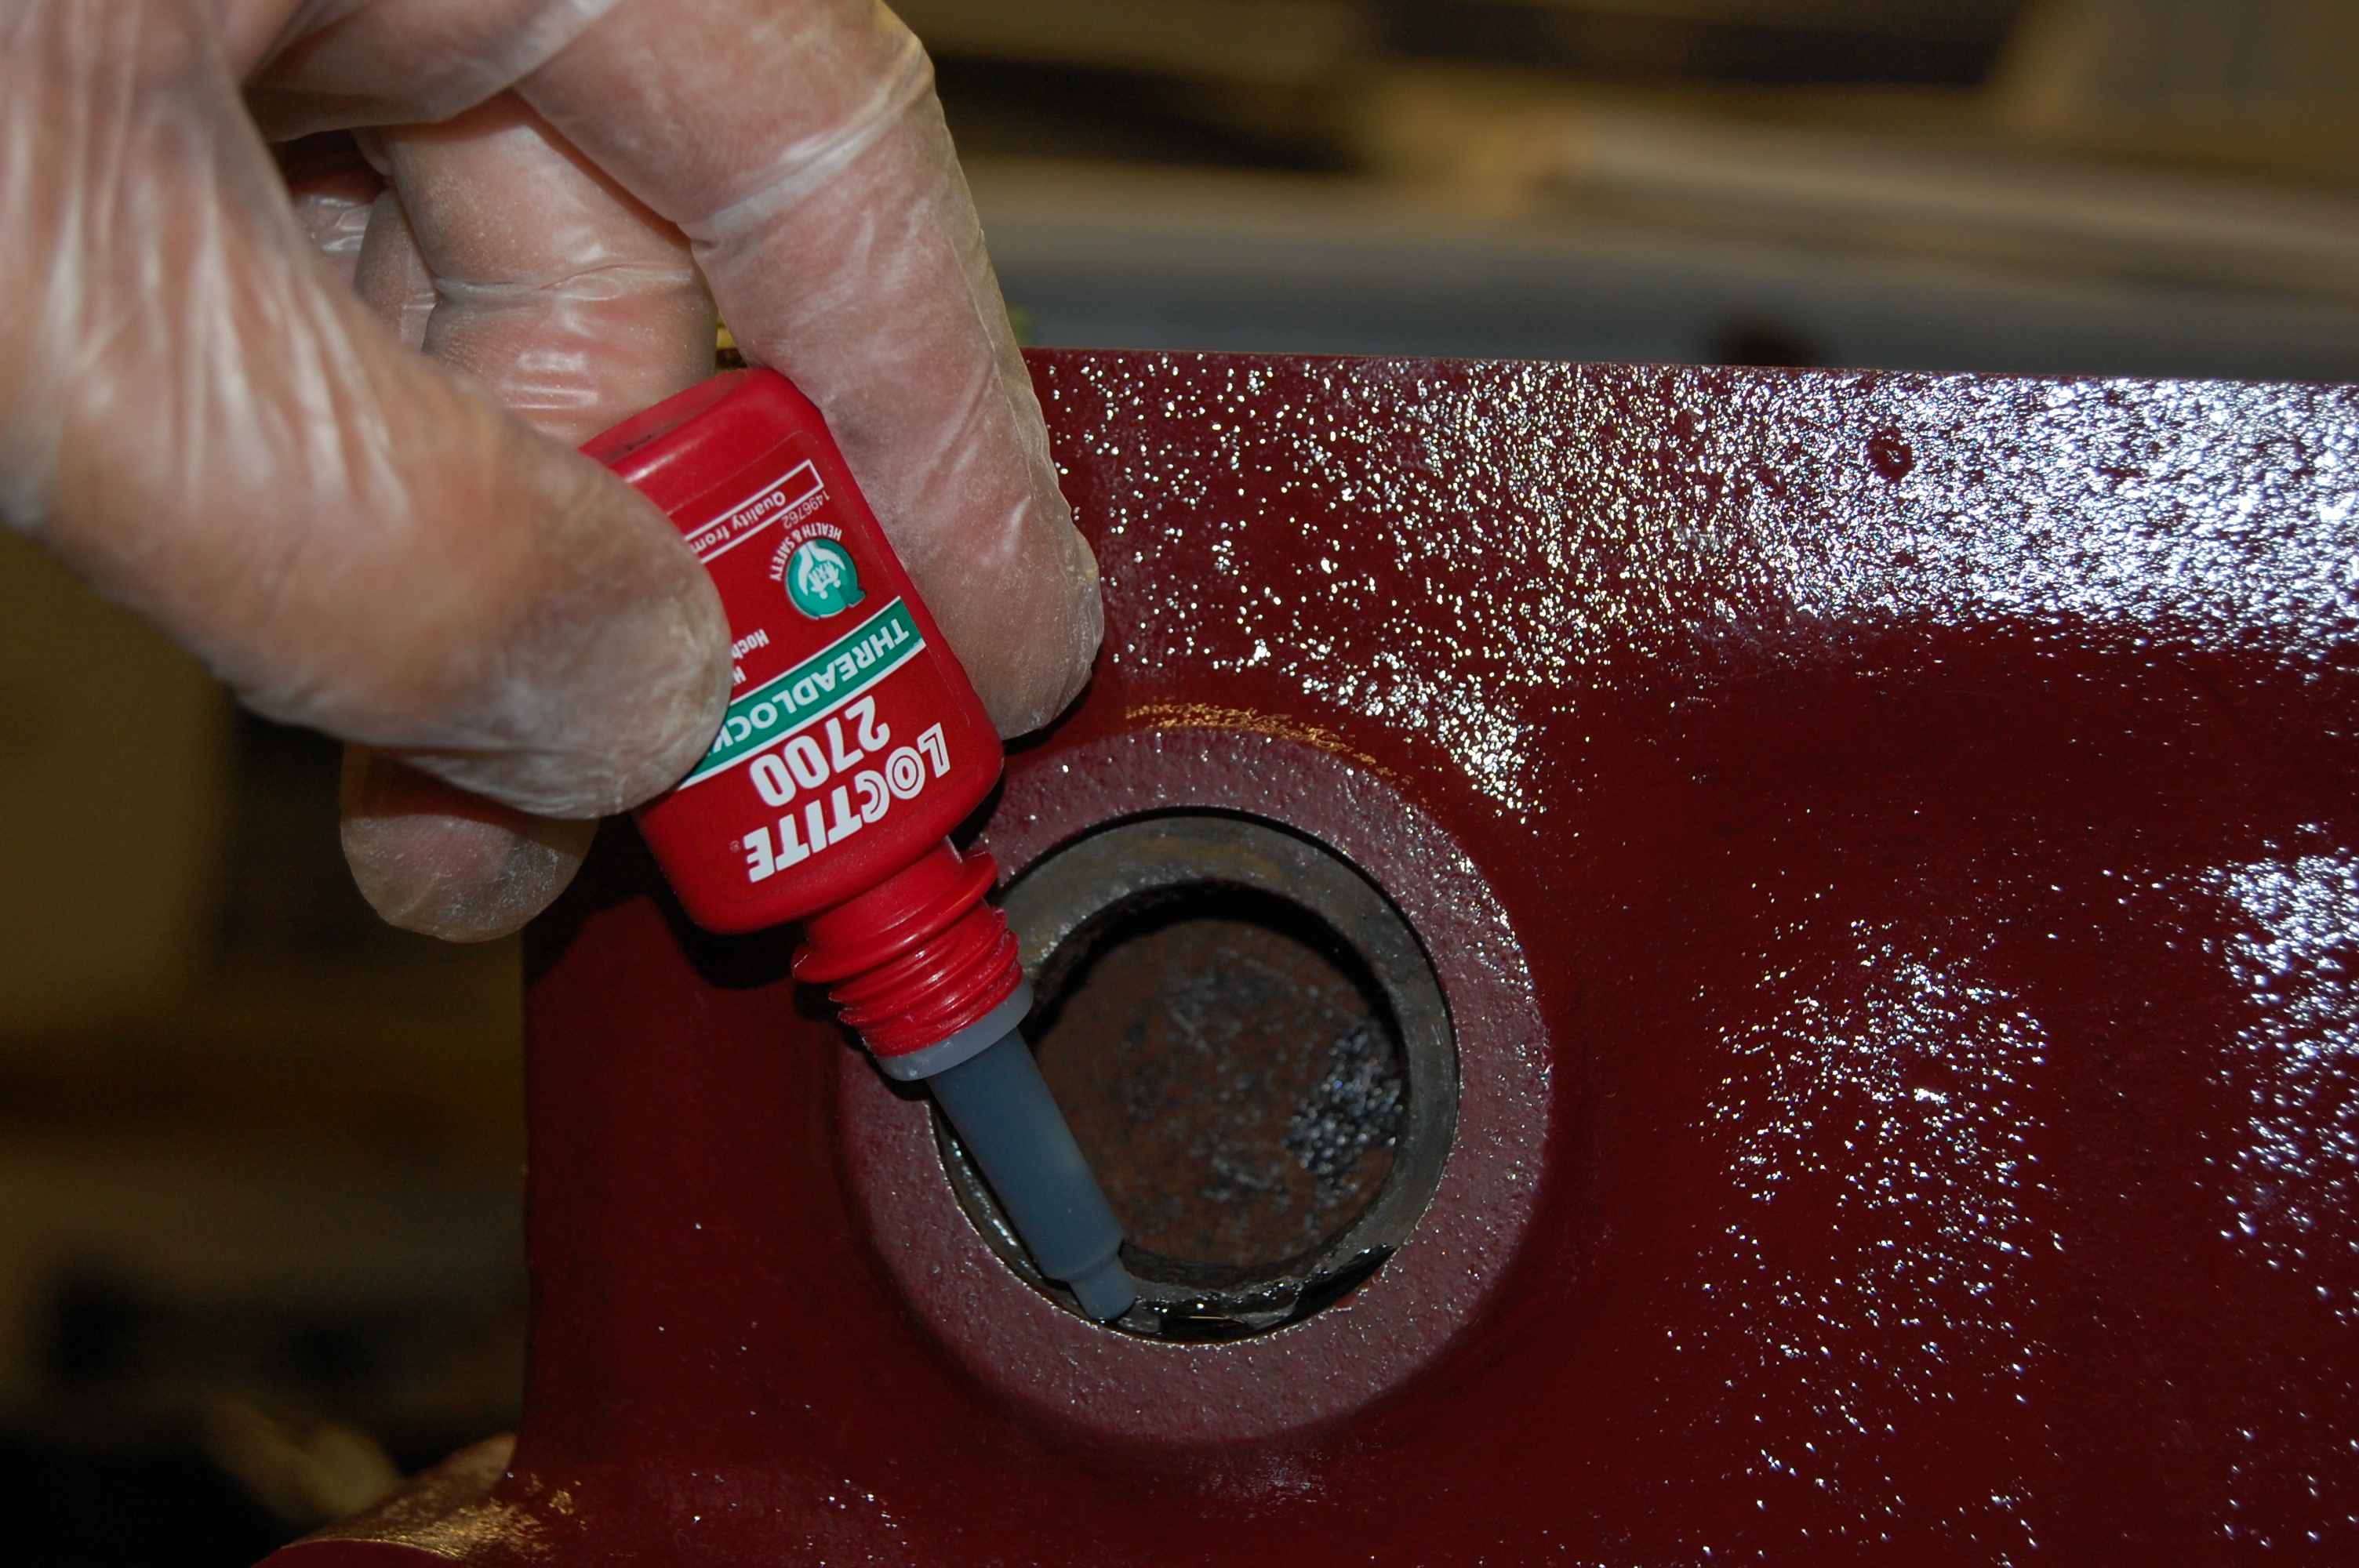
Opinions differ as to fitting plugs with or without sealant. I prefer belt and braces, so used Loctite Strong as I don’t intend to do the job again.
Fit the new plug and knock centre with a few good hammer blows to expand into recess.
Cleaning Oil Ways.
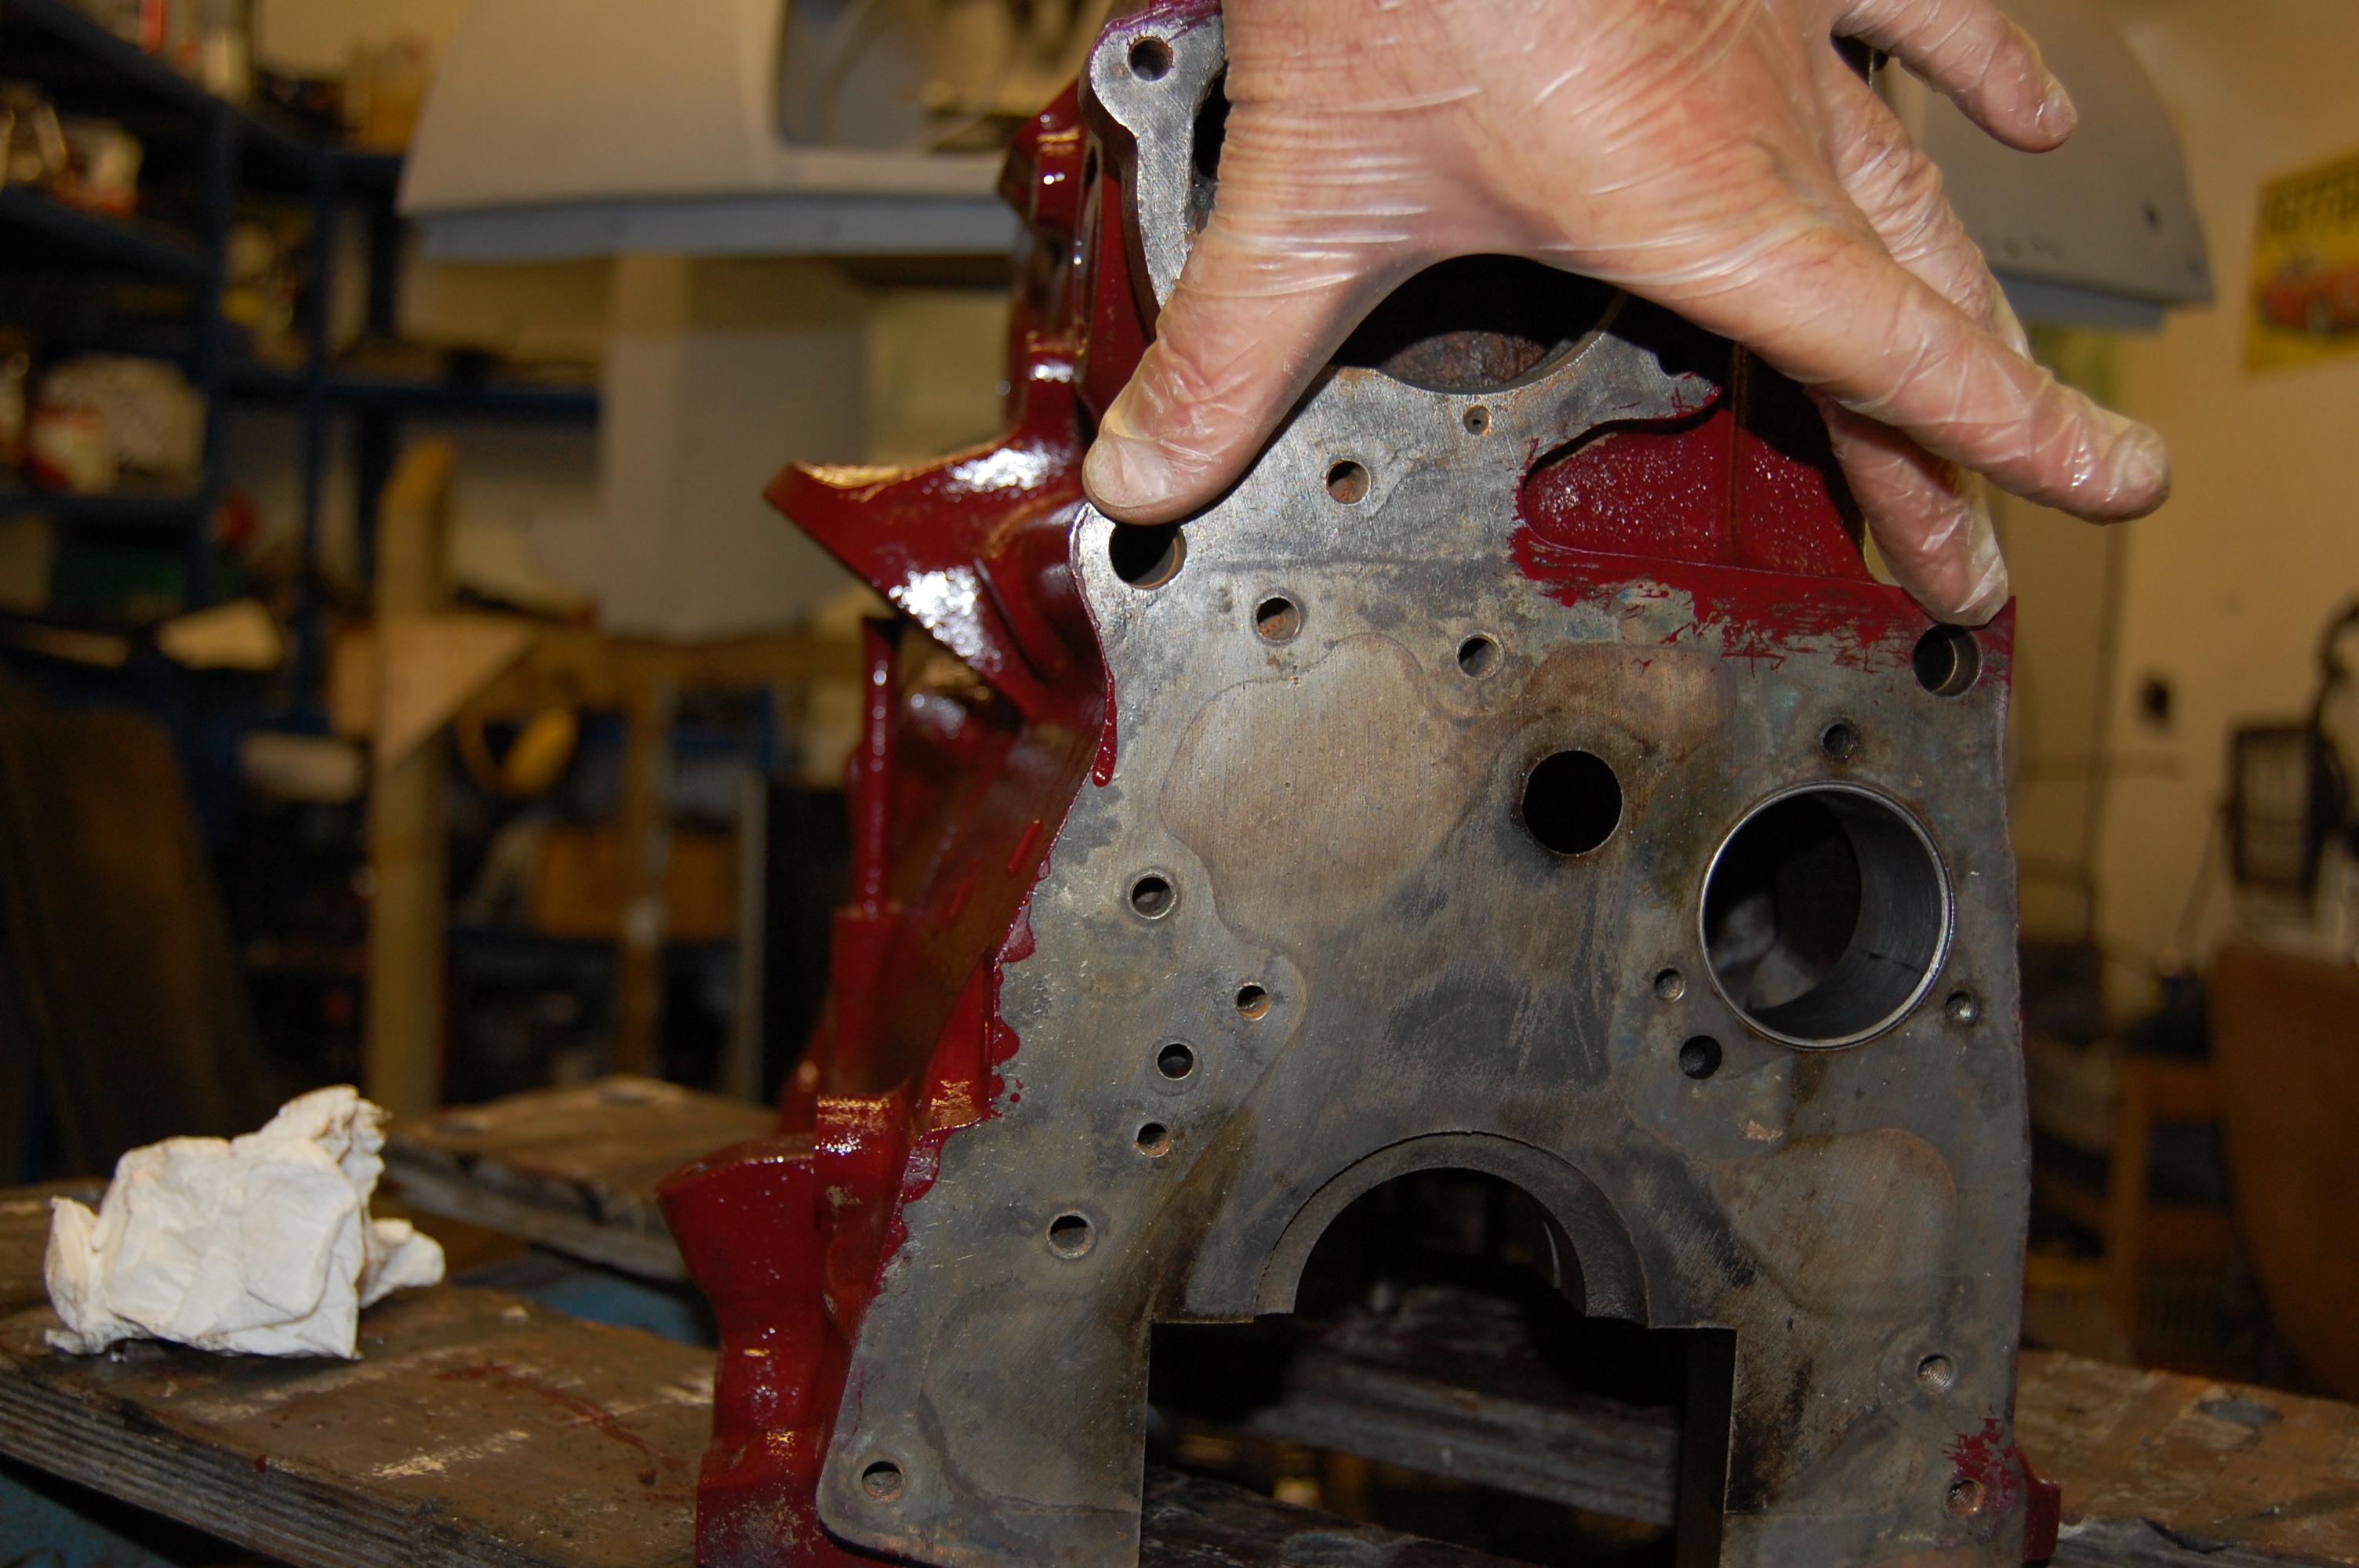
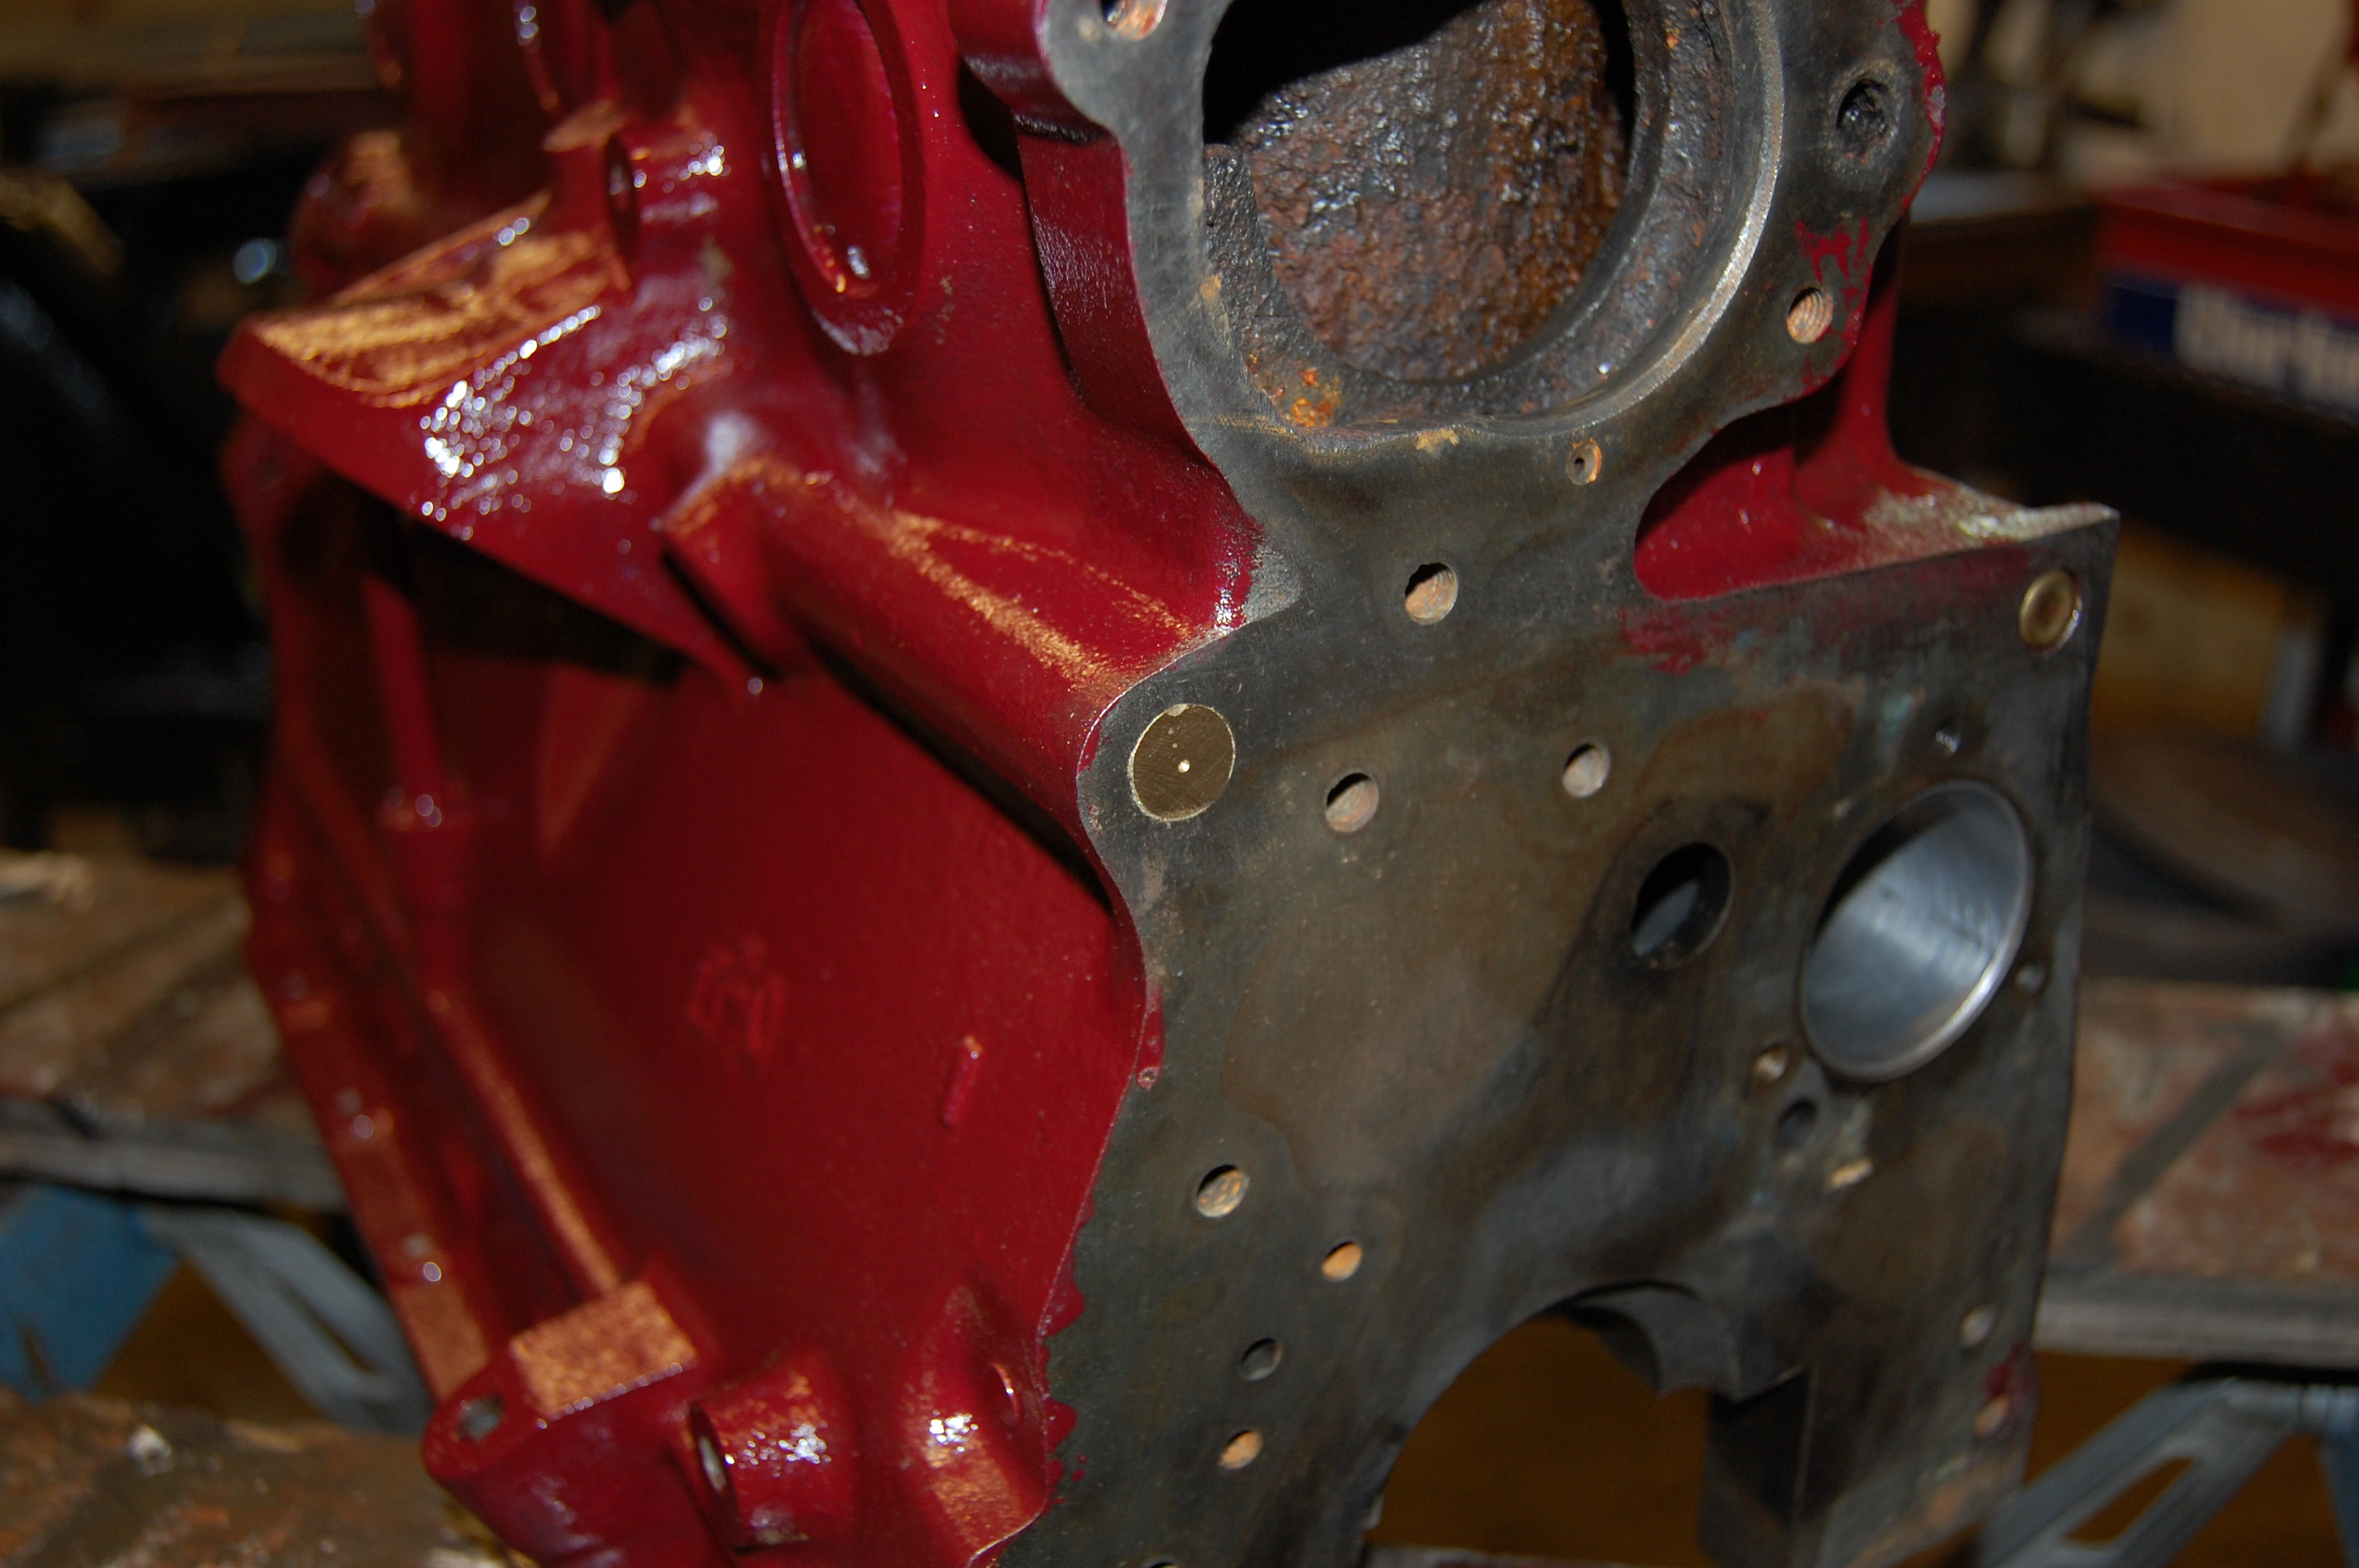
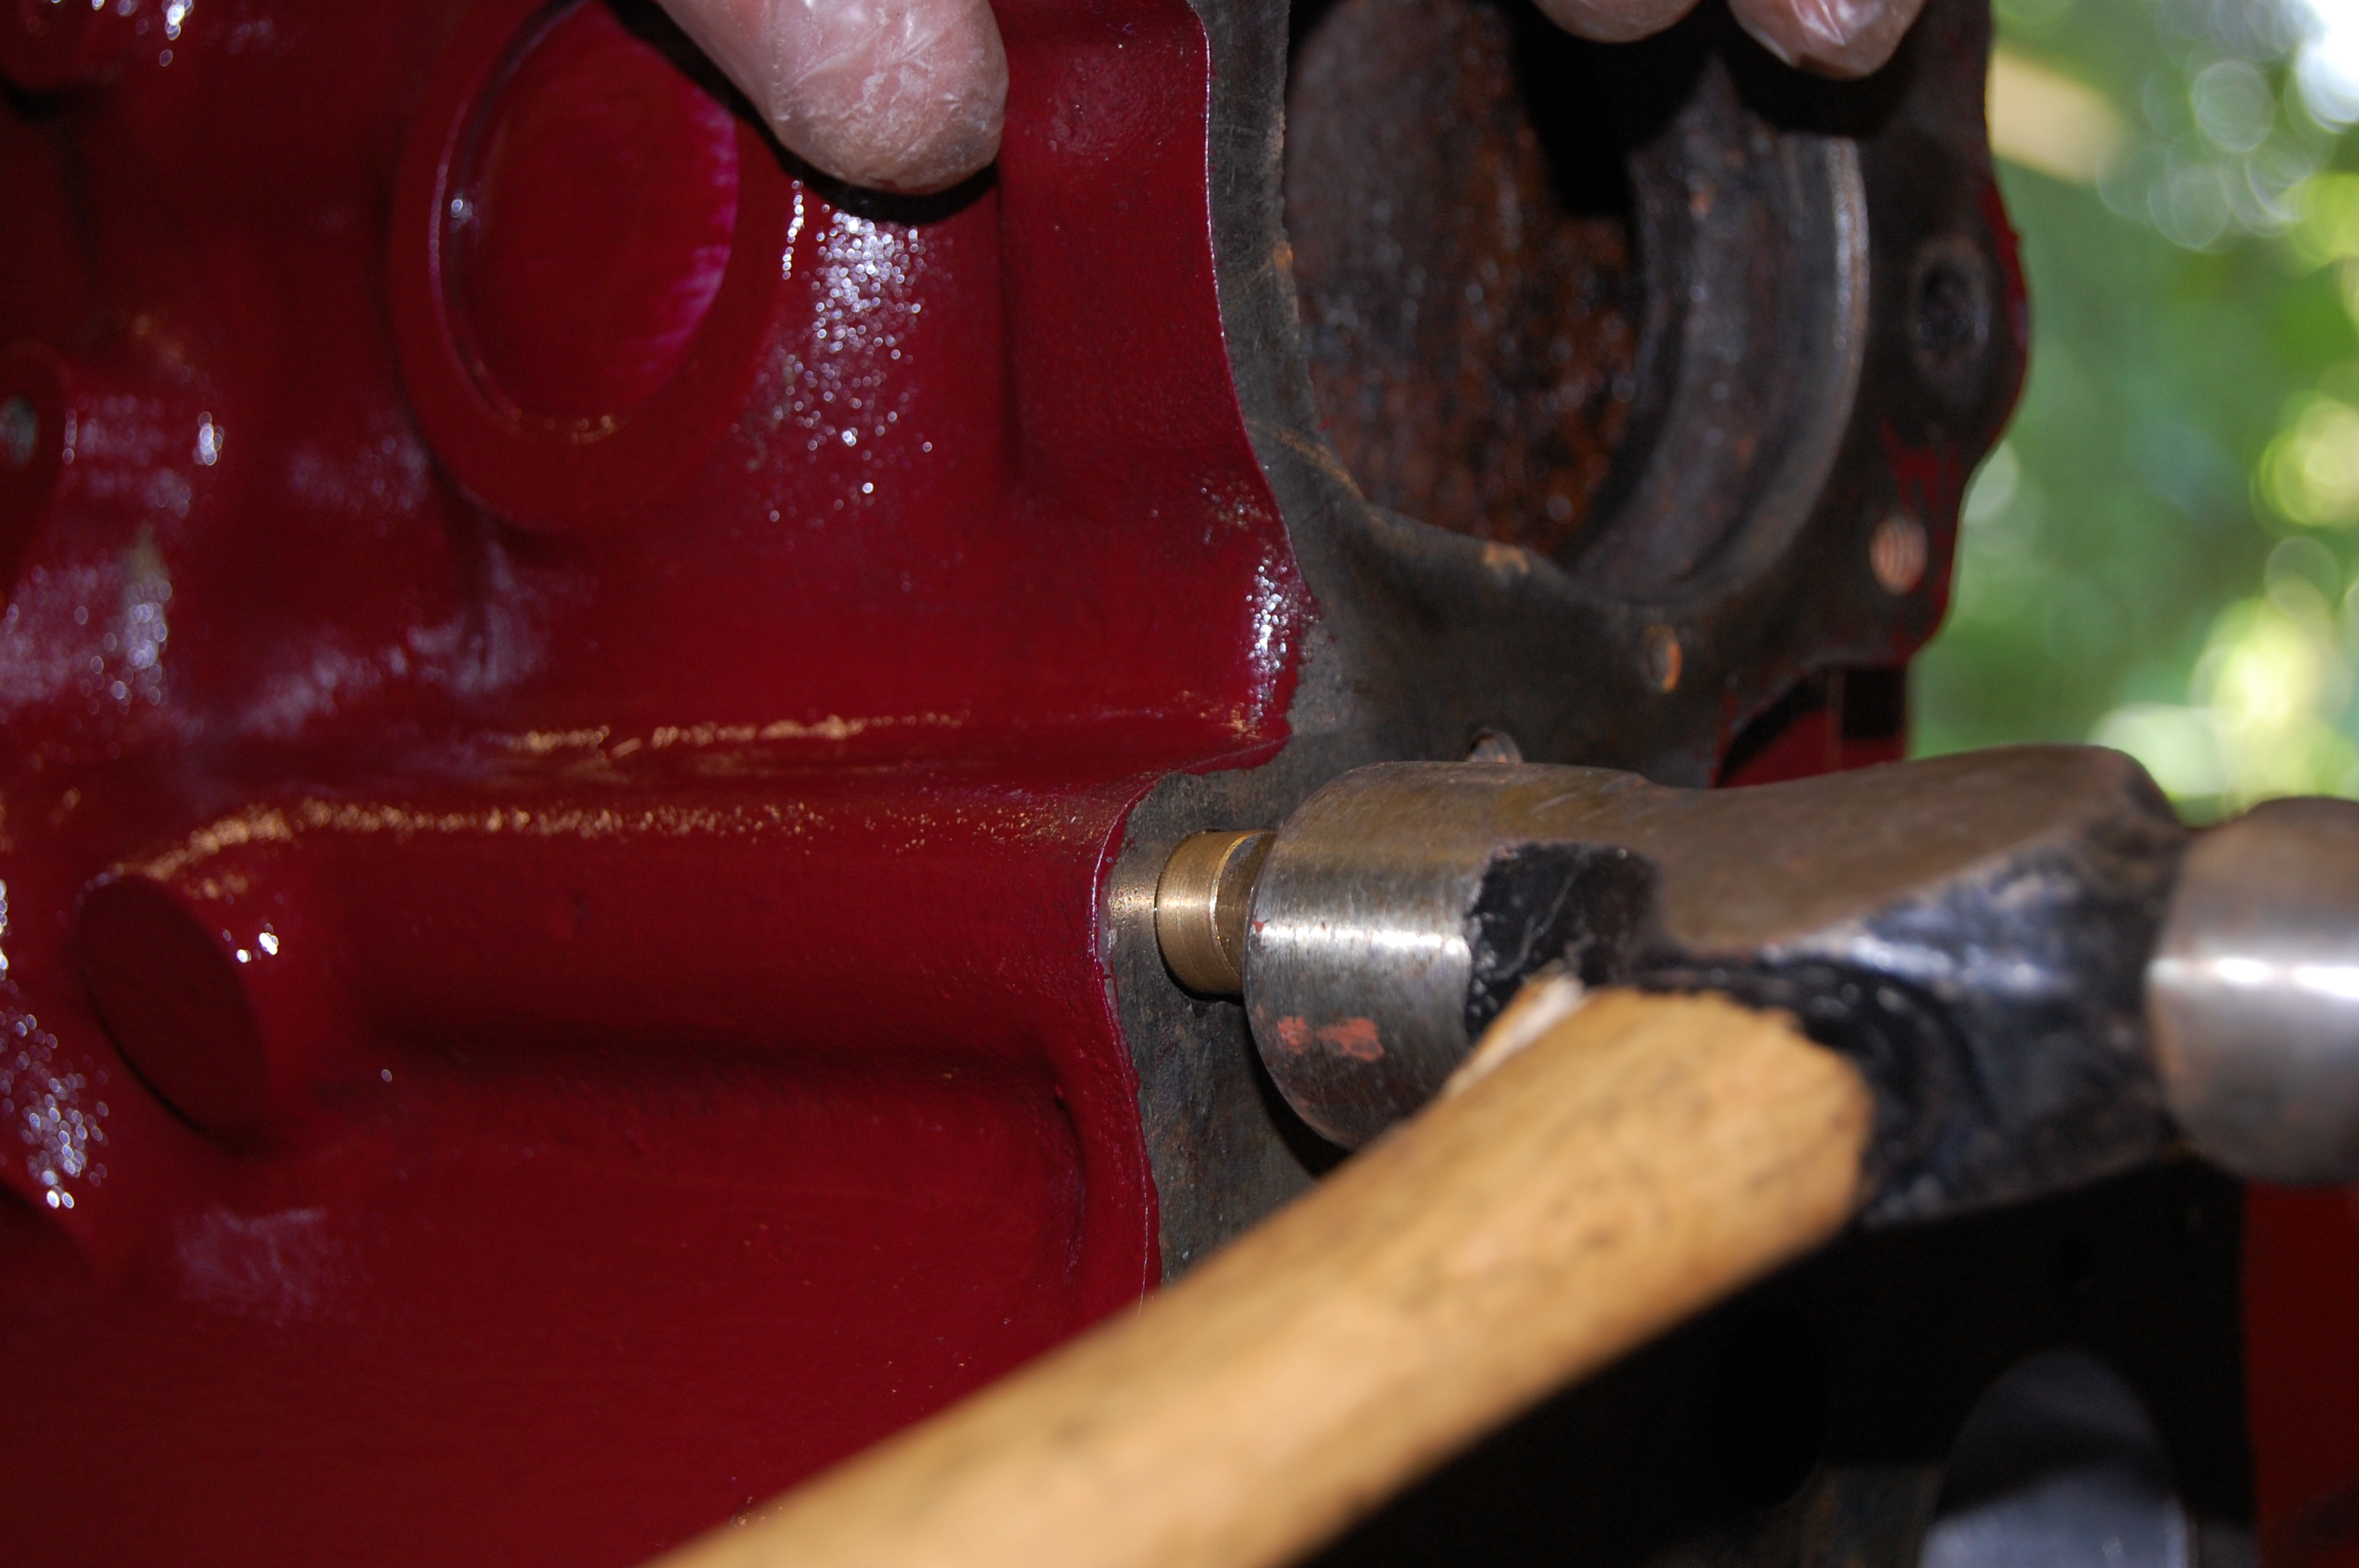
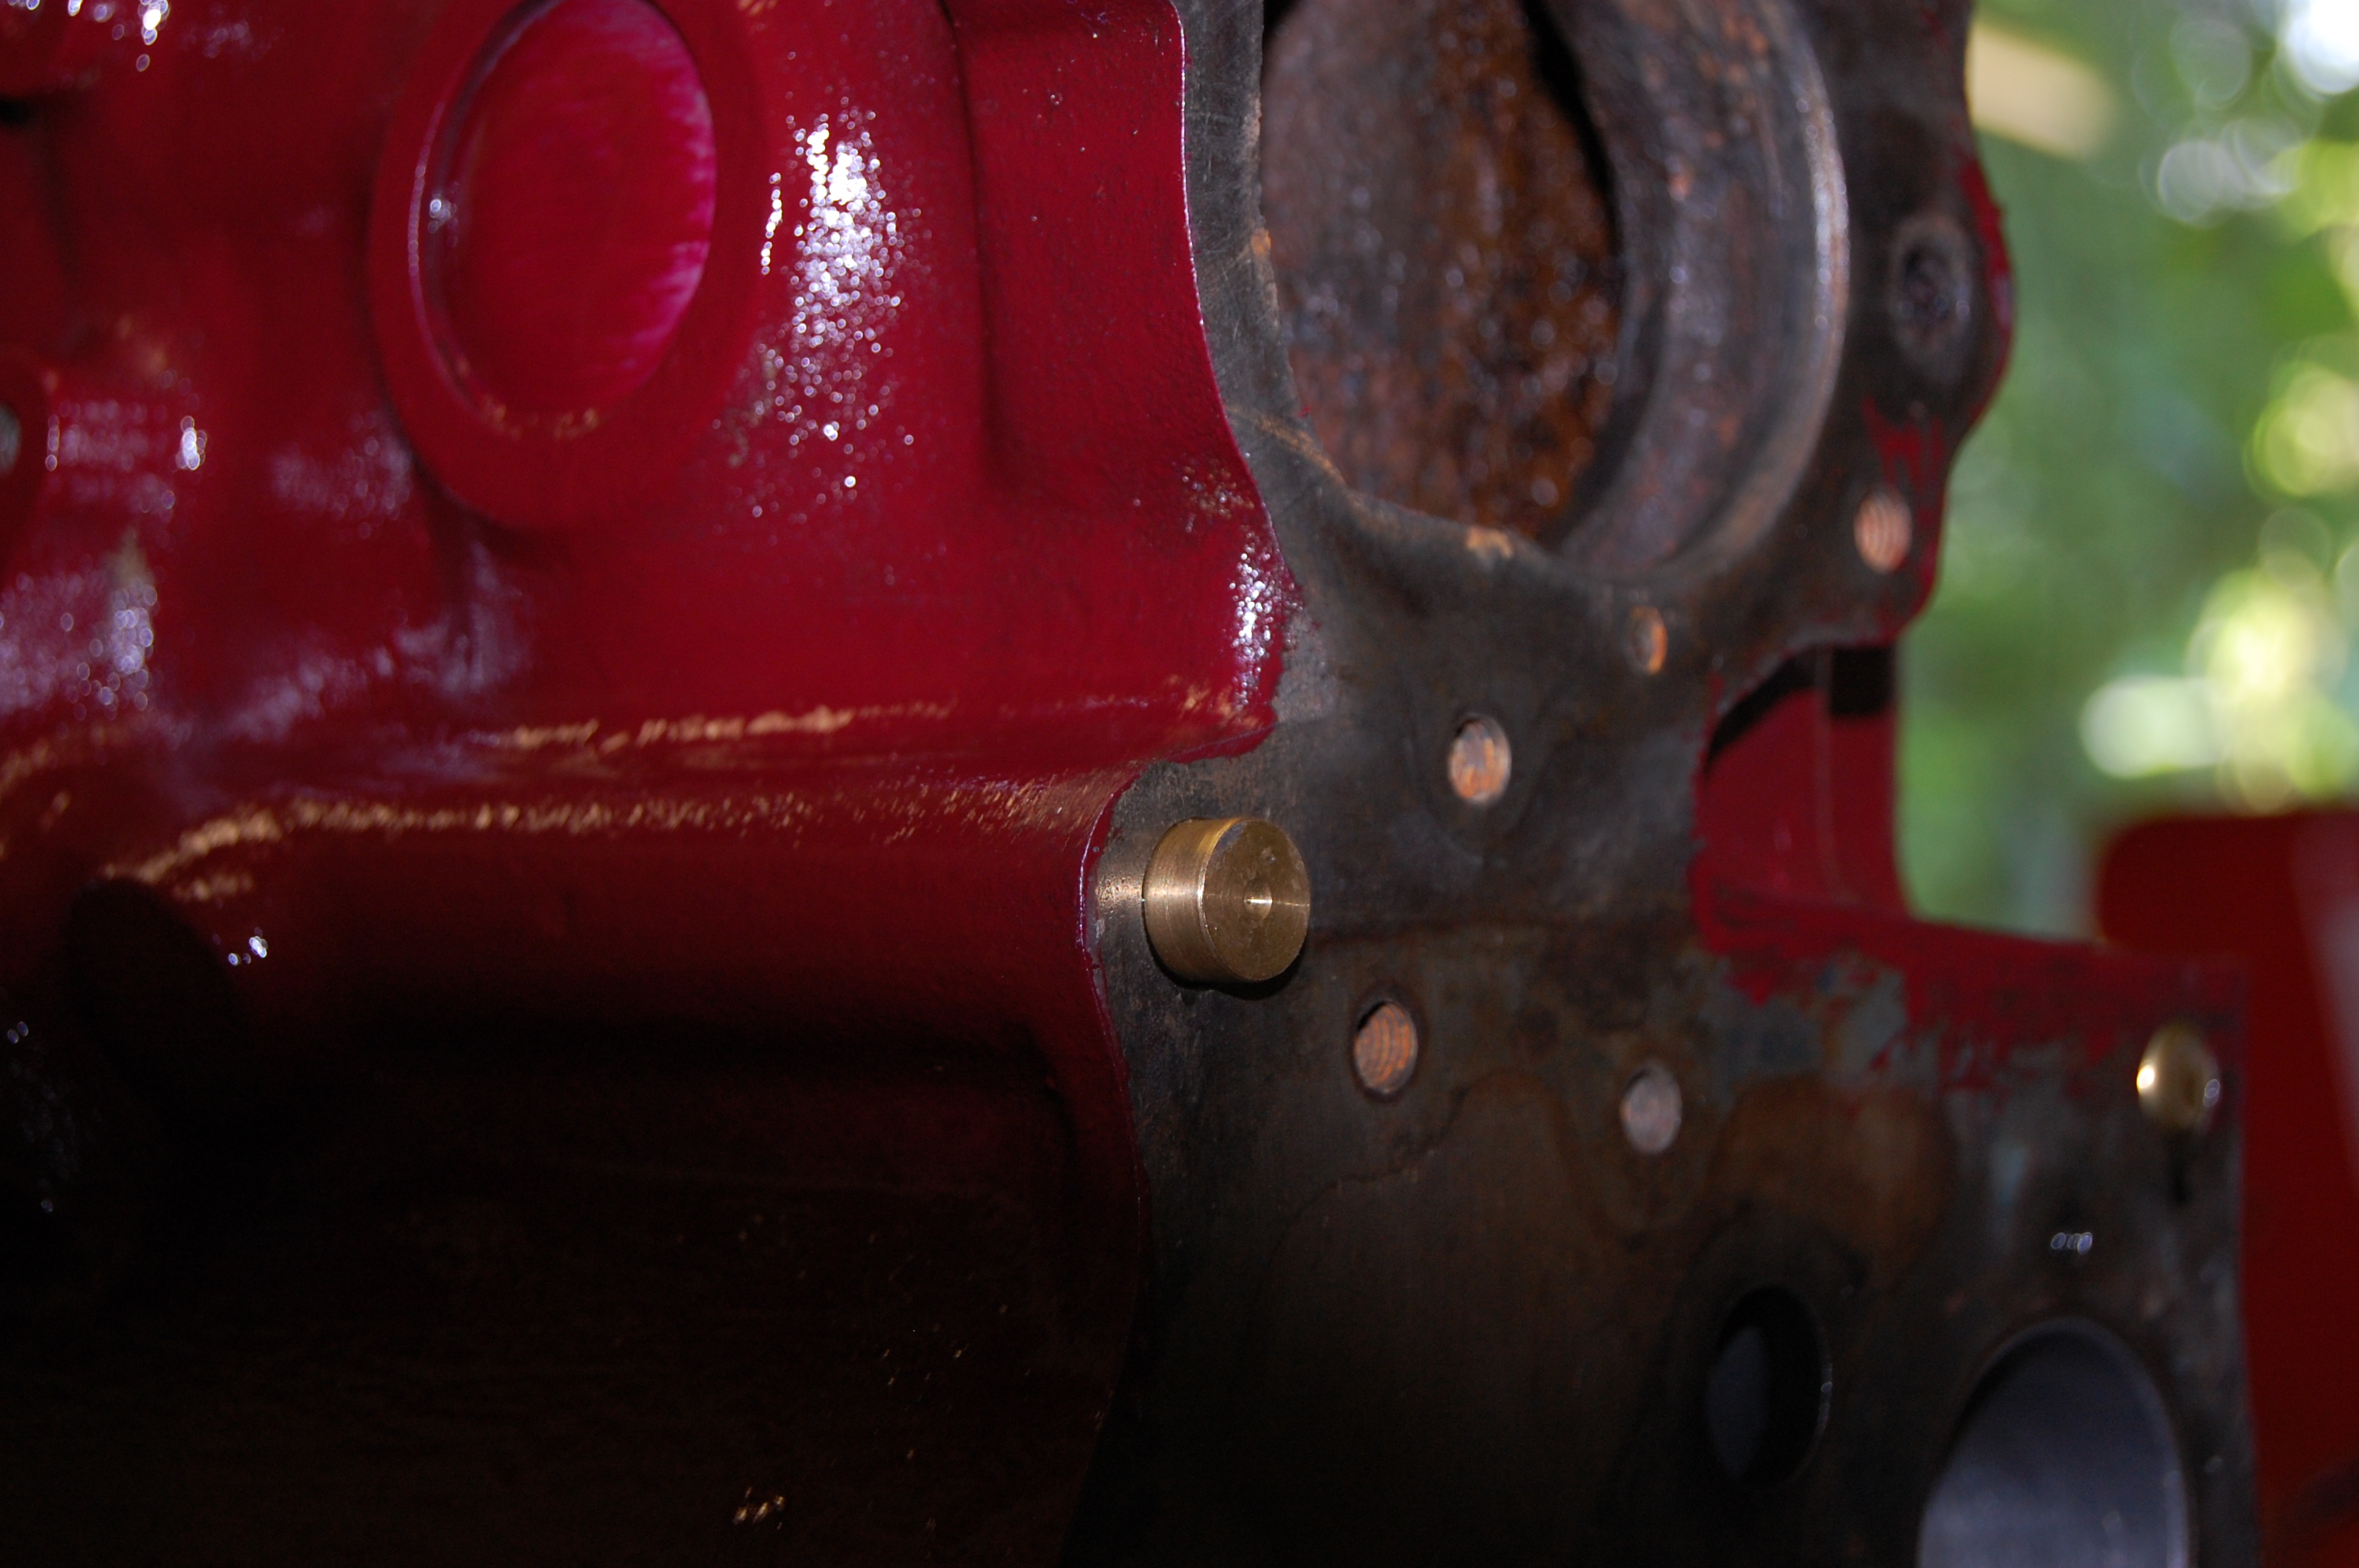
The two main oil galleries are plugged at both ends of the block. It makes good sense to remove the four plugs to ensure that all old oil sludge is completely removed – I cleaned them out with Jizer, followed by blasting through all oilways with my pressure hose. It was amazing what came out! The brass plugs drill out, but care must be taken not to damage the casting otherwise the new plug may not fit.
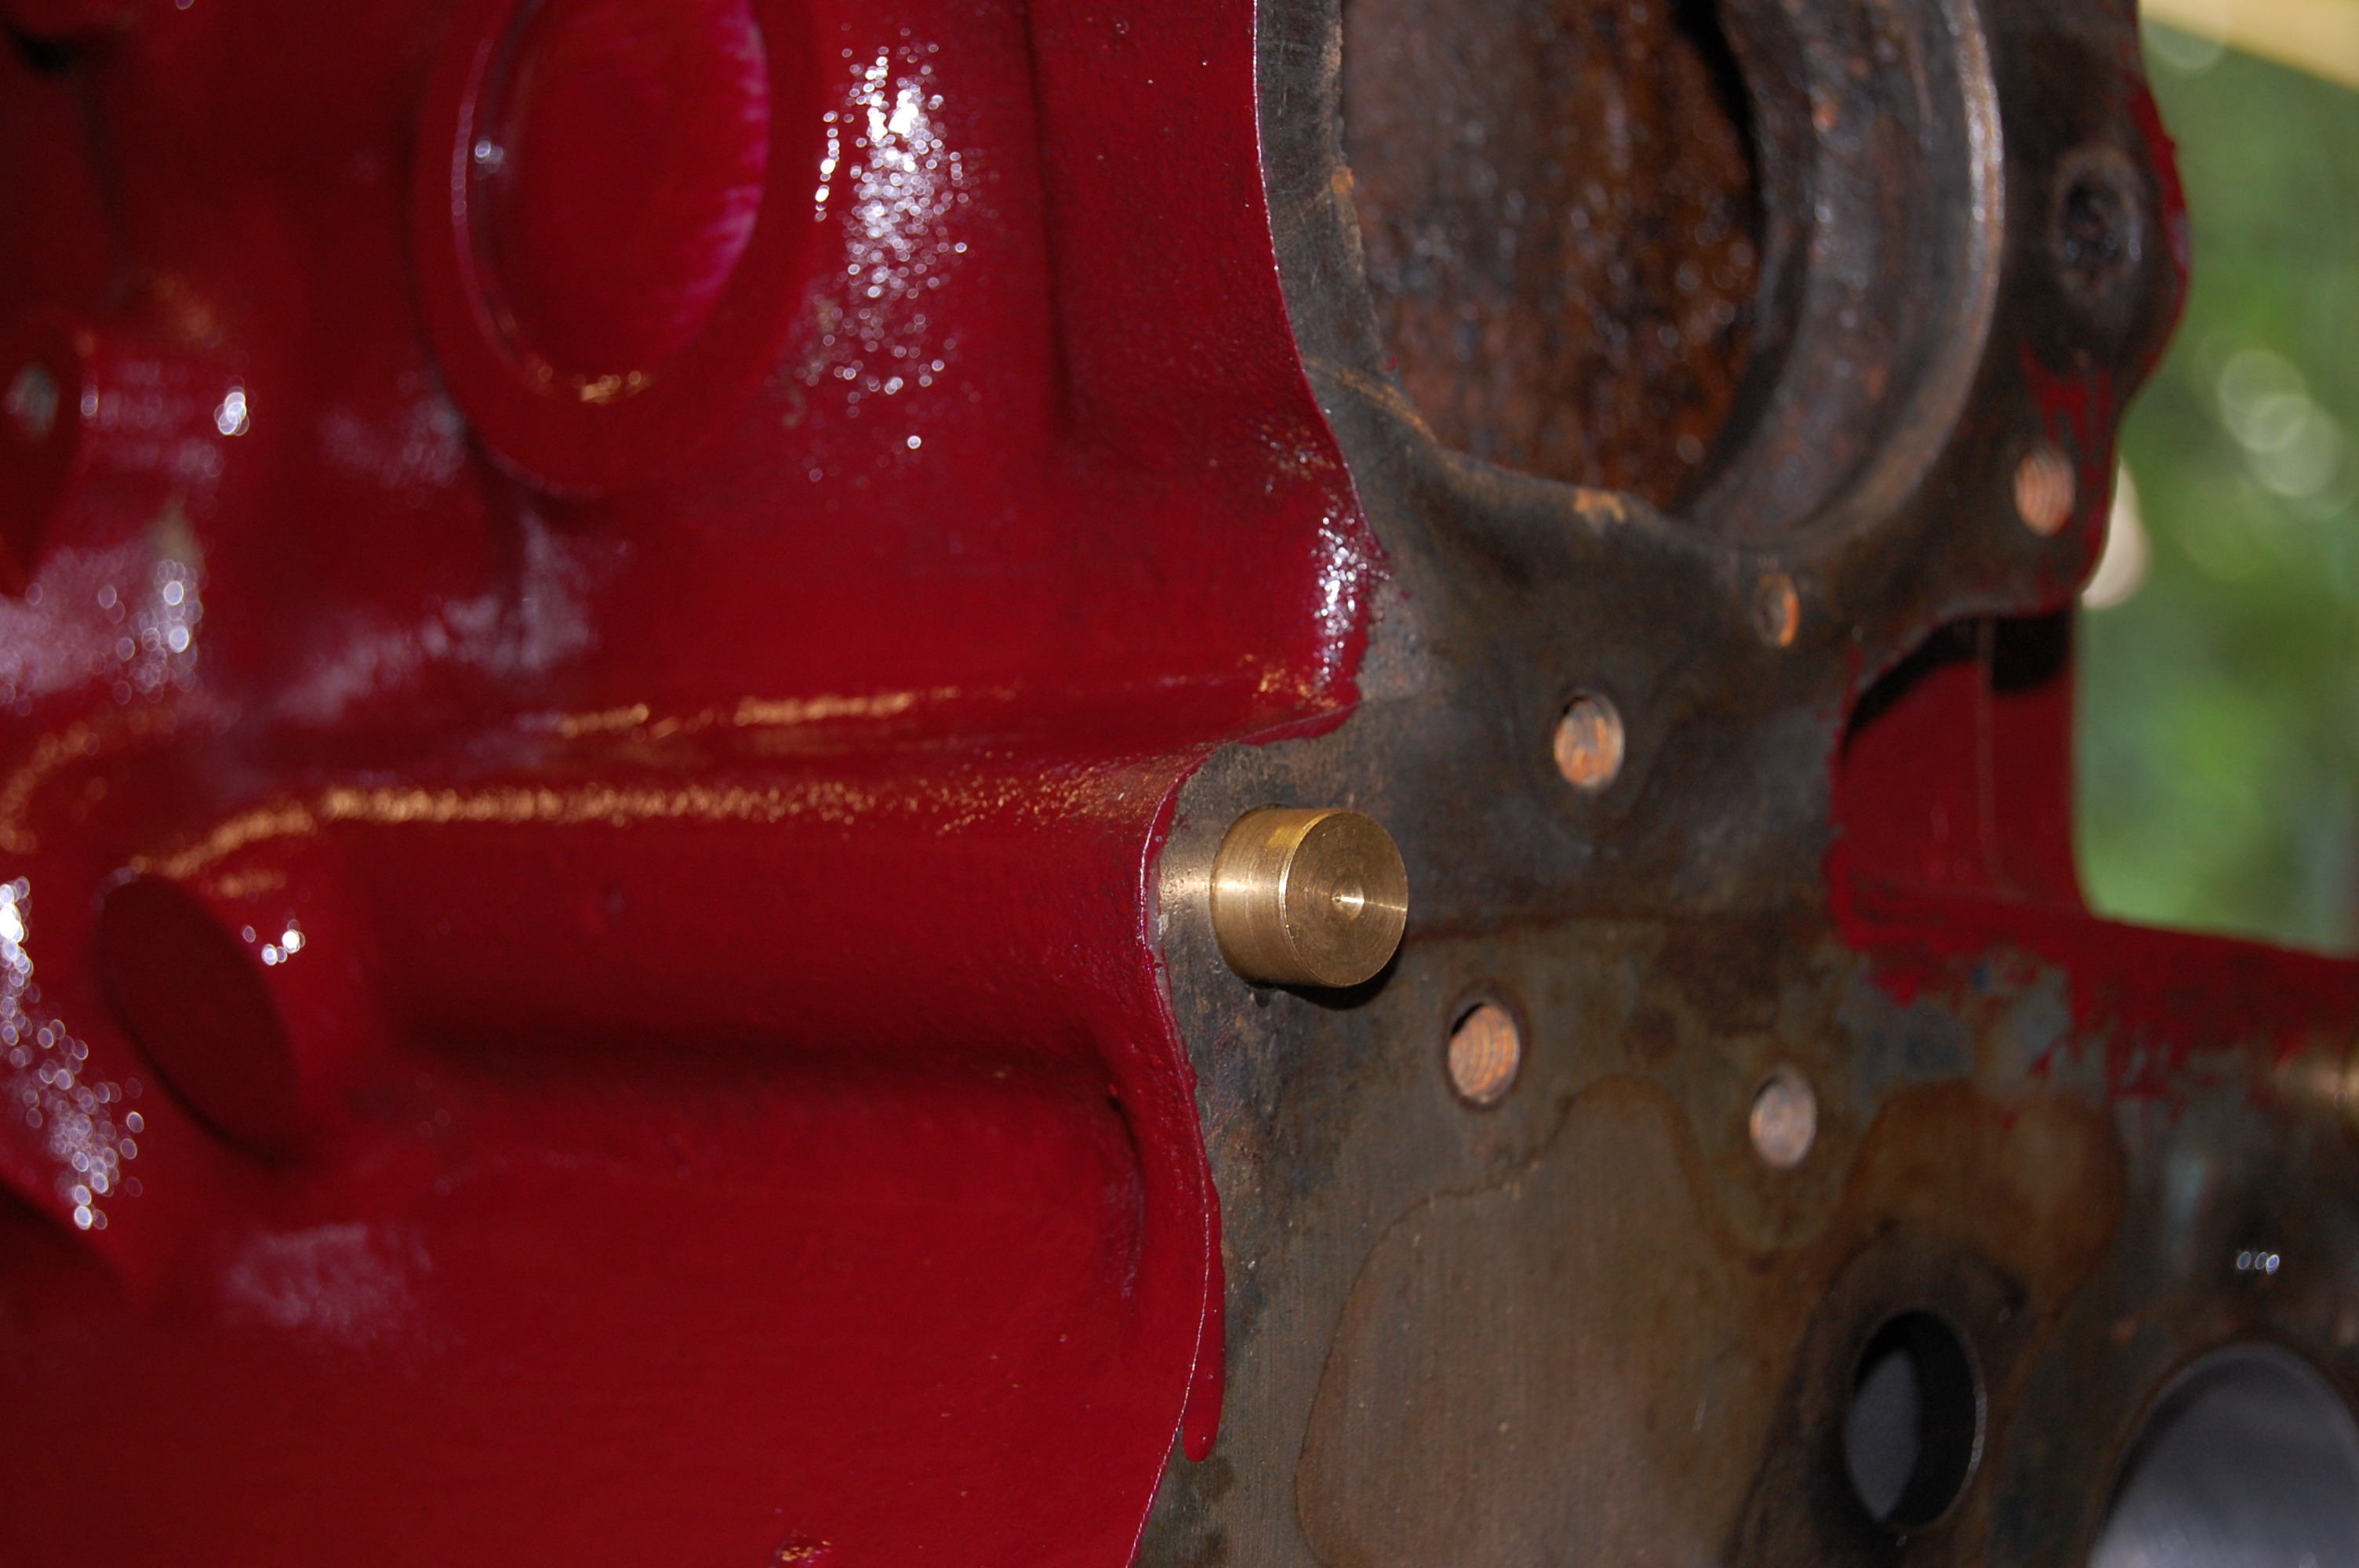
Brass plugs are interference fit and at both ends of the block, ultimately retained by the engine plates.
This shot shows the two types of plug available, the right hand being the inverted bucket type as opposed to the solid brass one on the left. I didn’t remove any of the other smaller plugs, as they don’t provide any increased access and in some cases were only there to block off casting holes. Having plugged all the holes, the engine rebuild can commence.
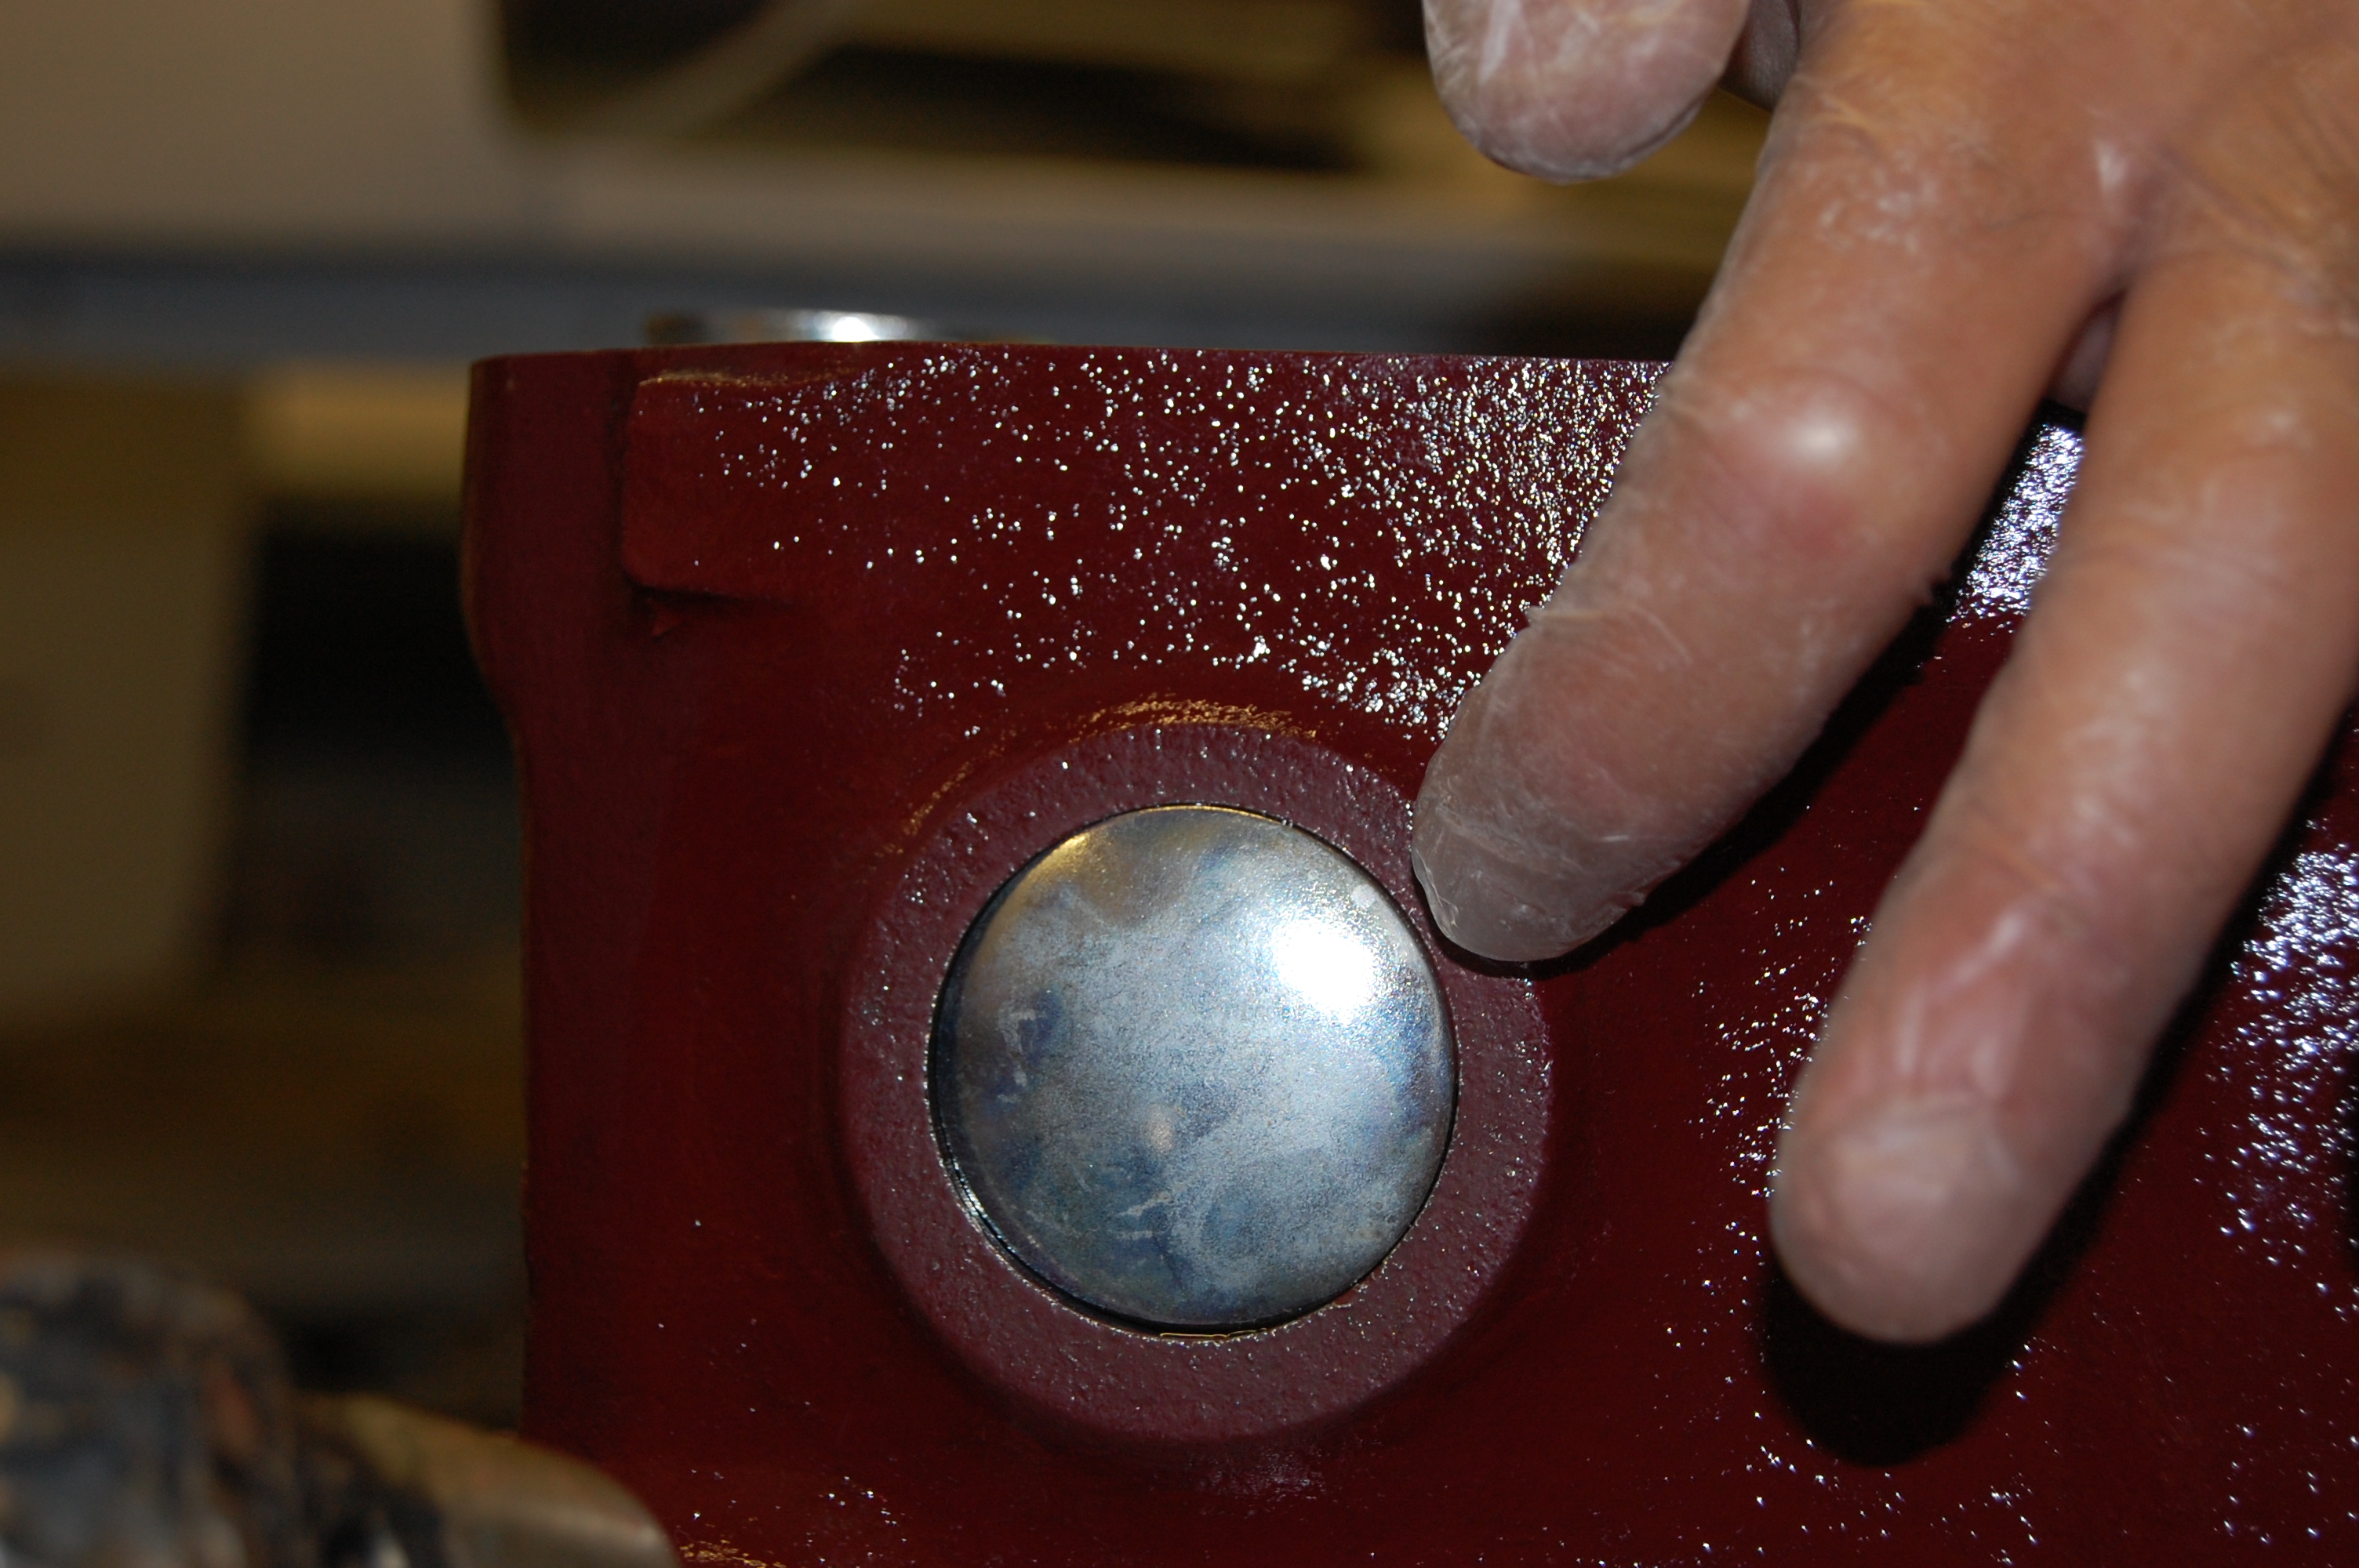
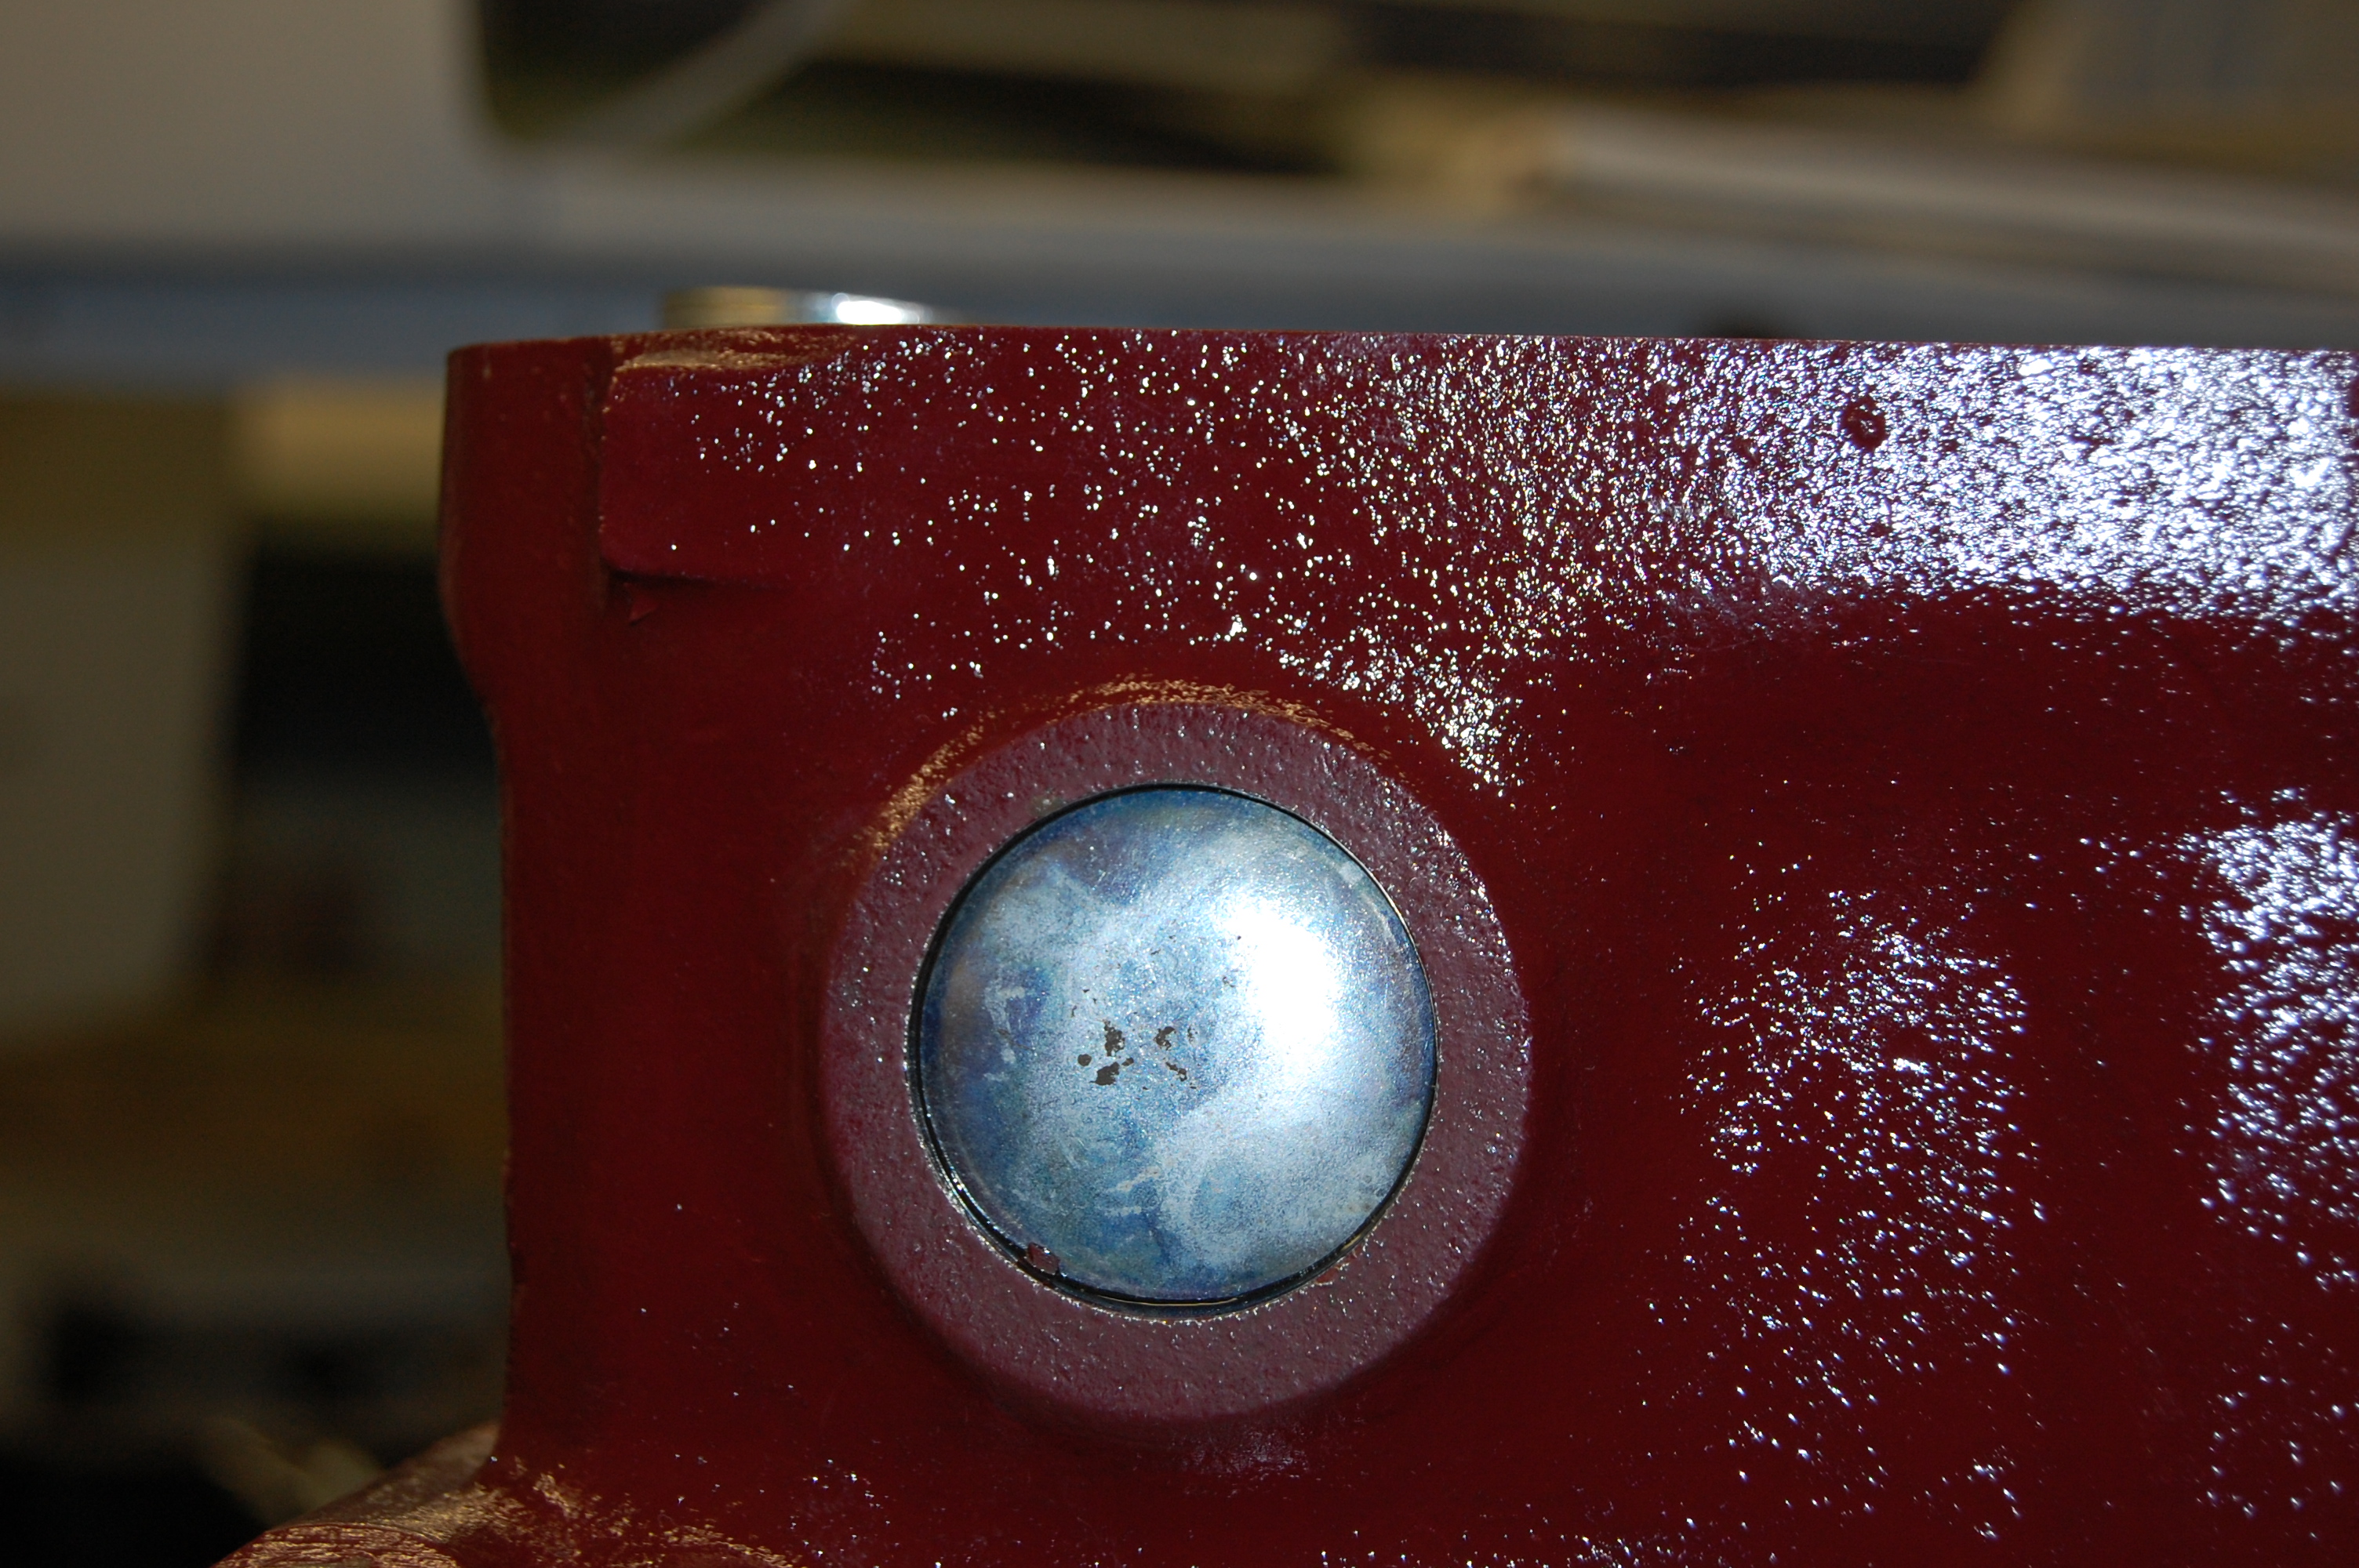
Having knocked the new plug into place, make sure that it is completely flush with the block face. In this case it was about 1mm proud and needed careful filing to make it flush.
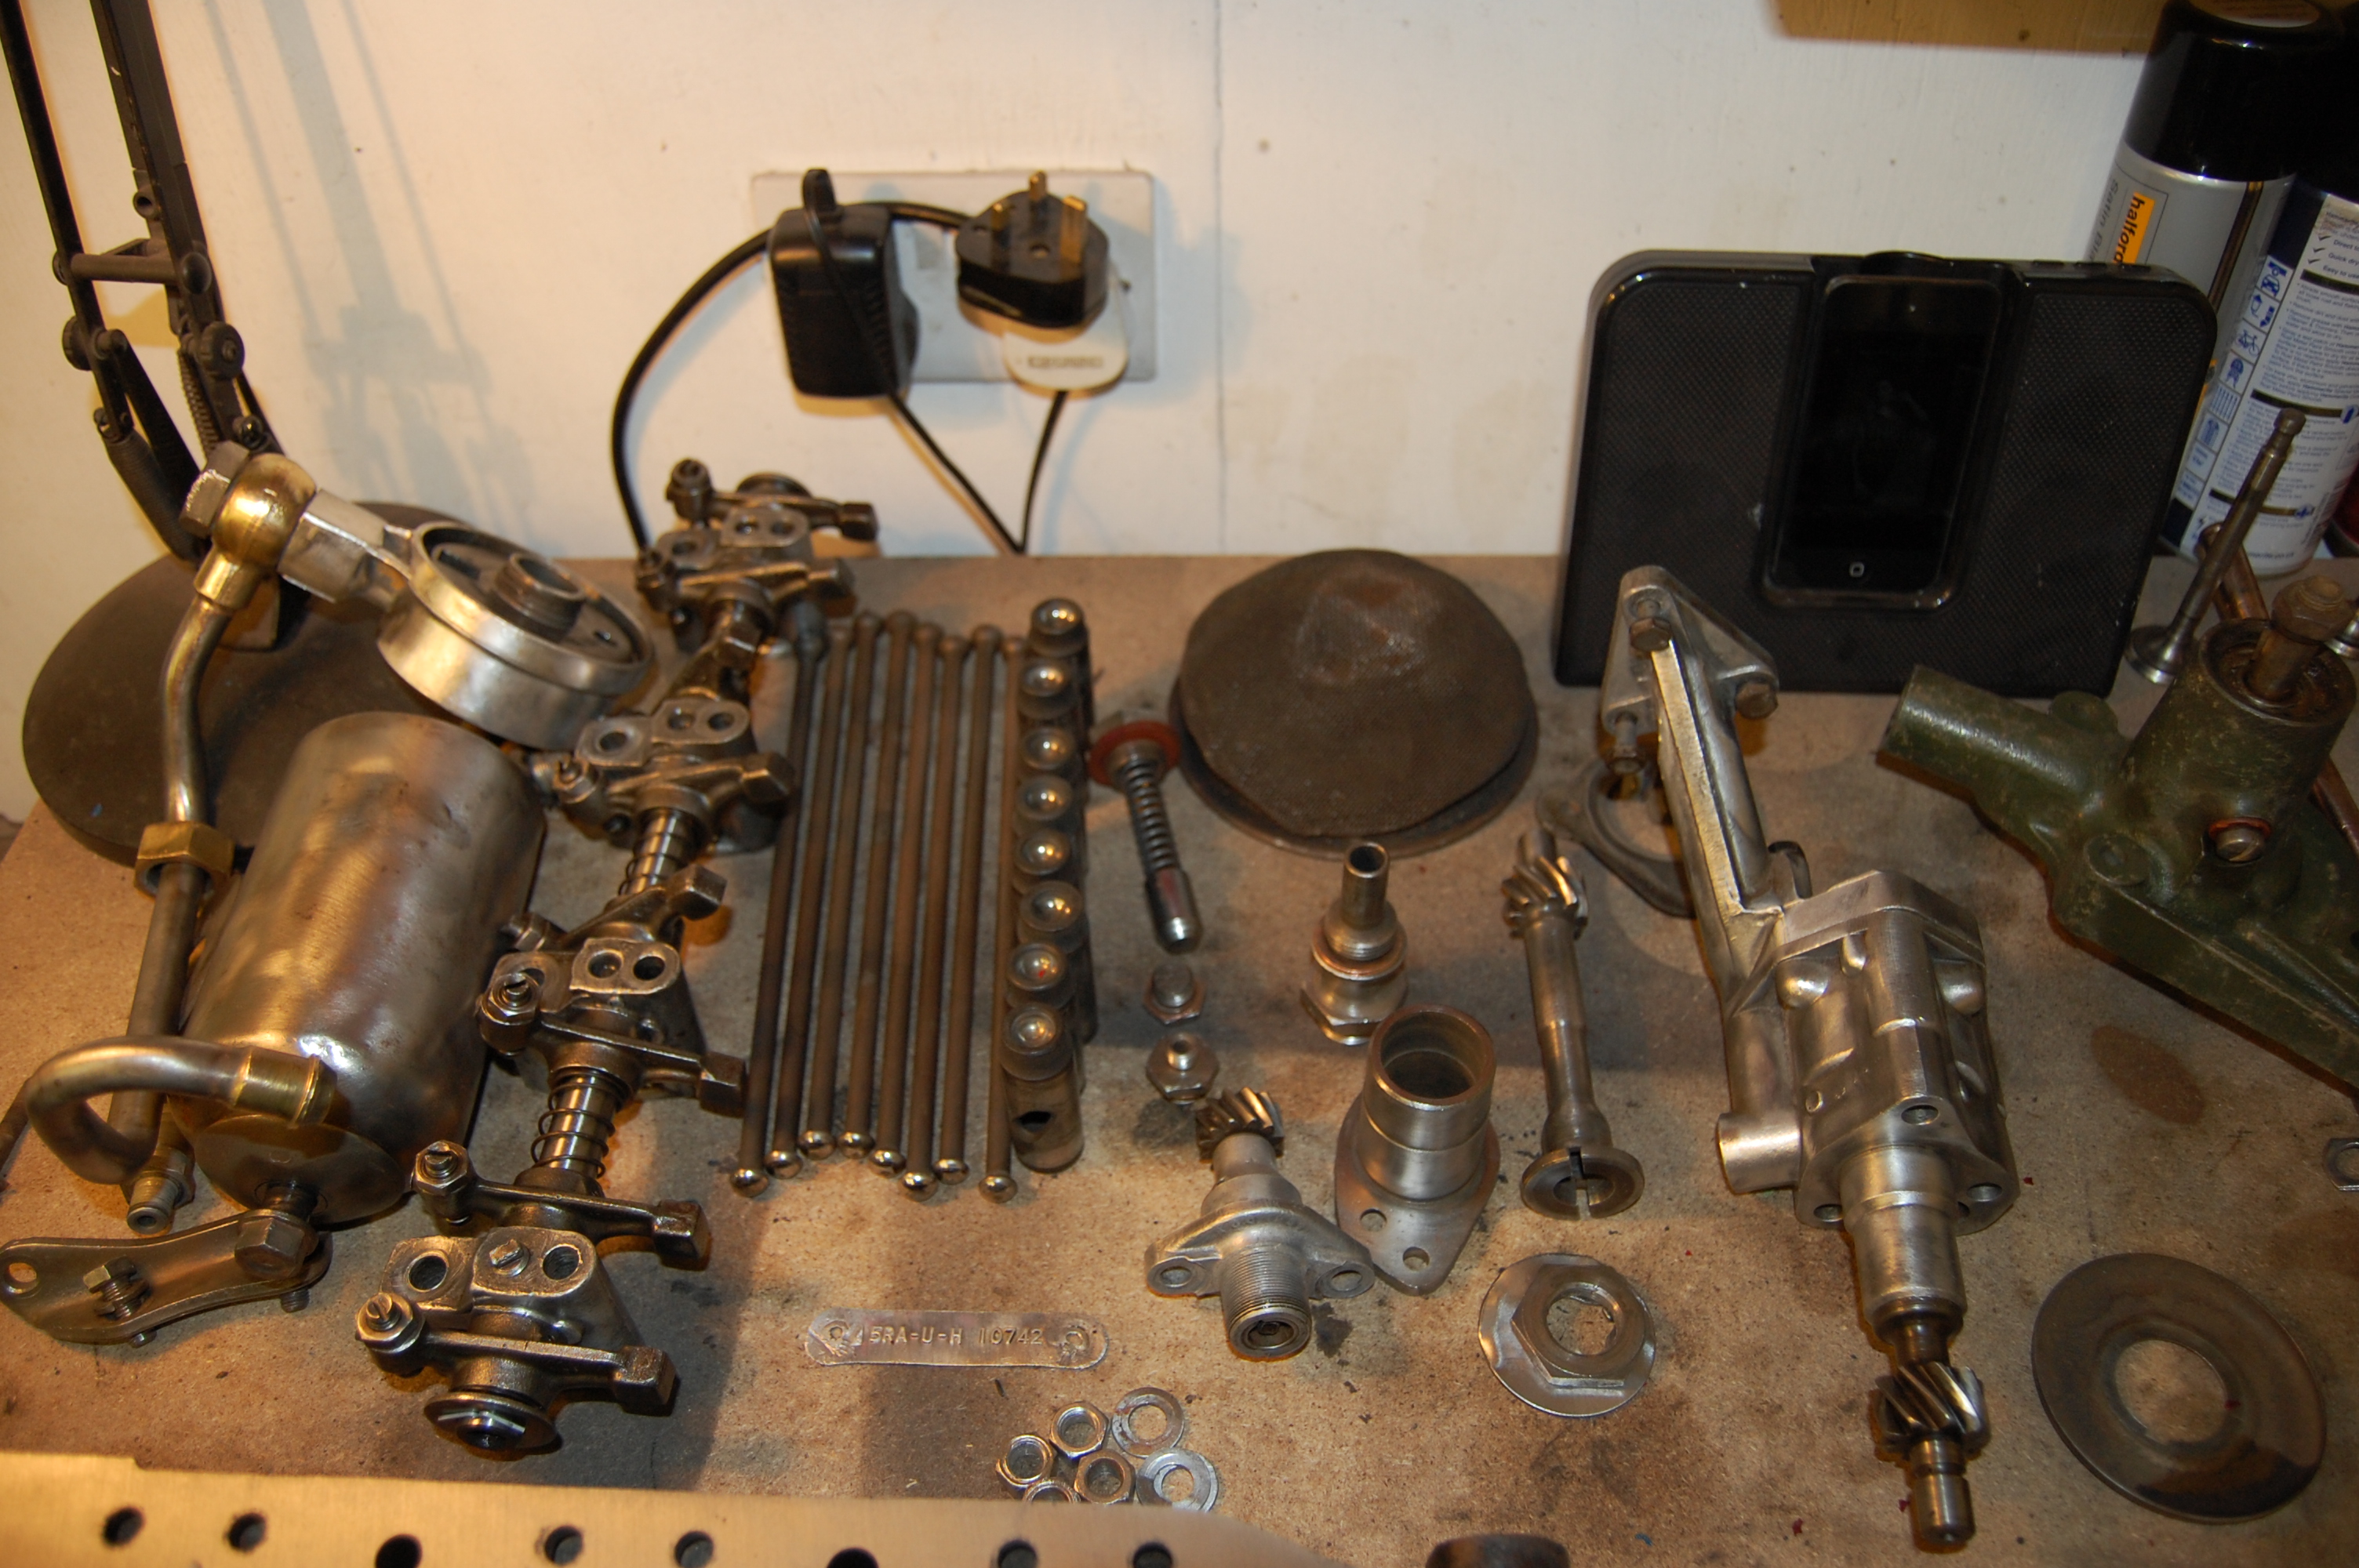
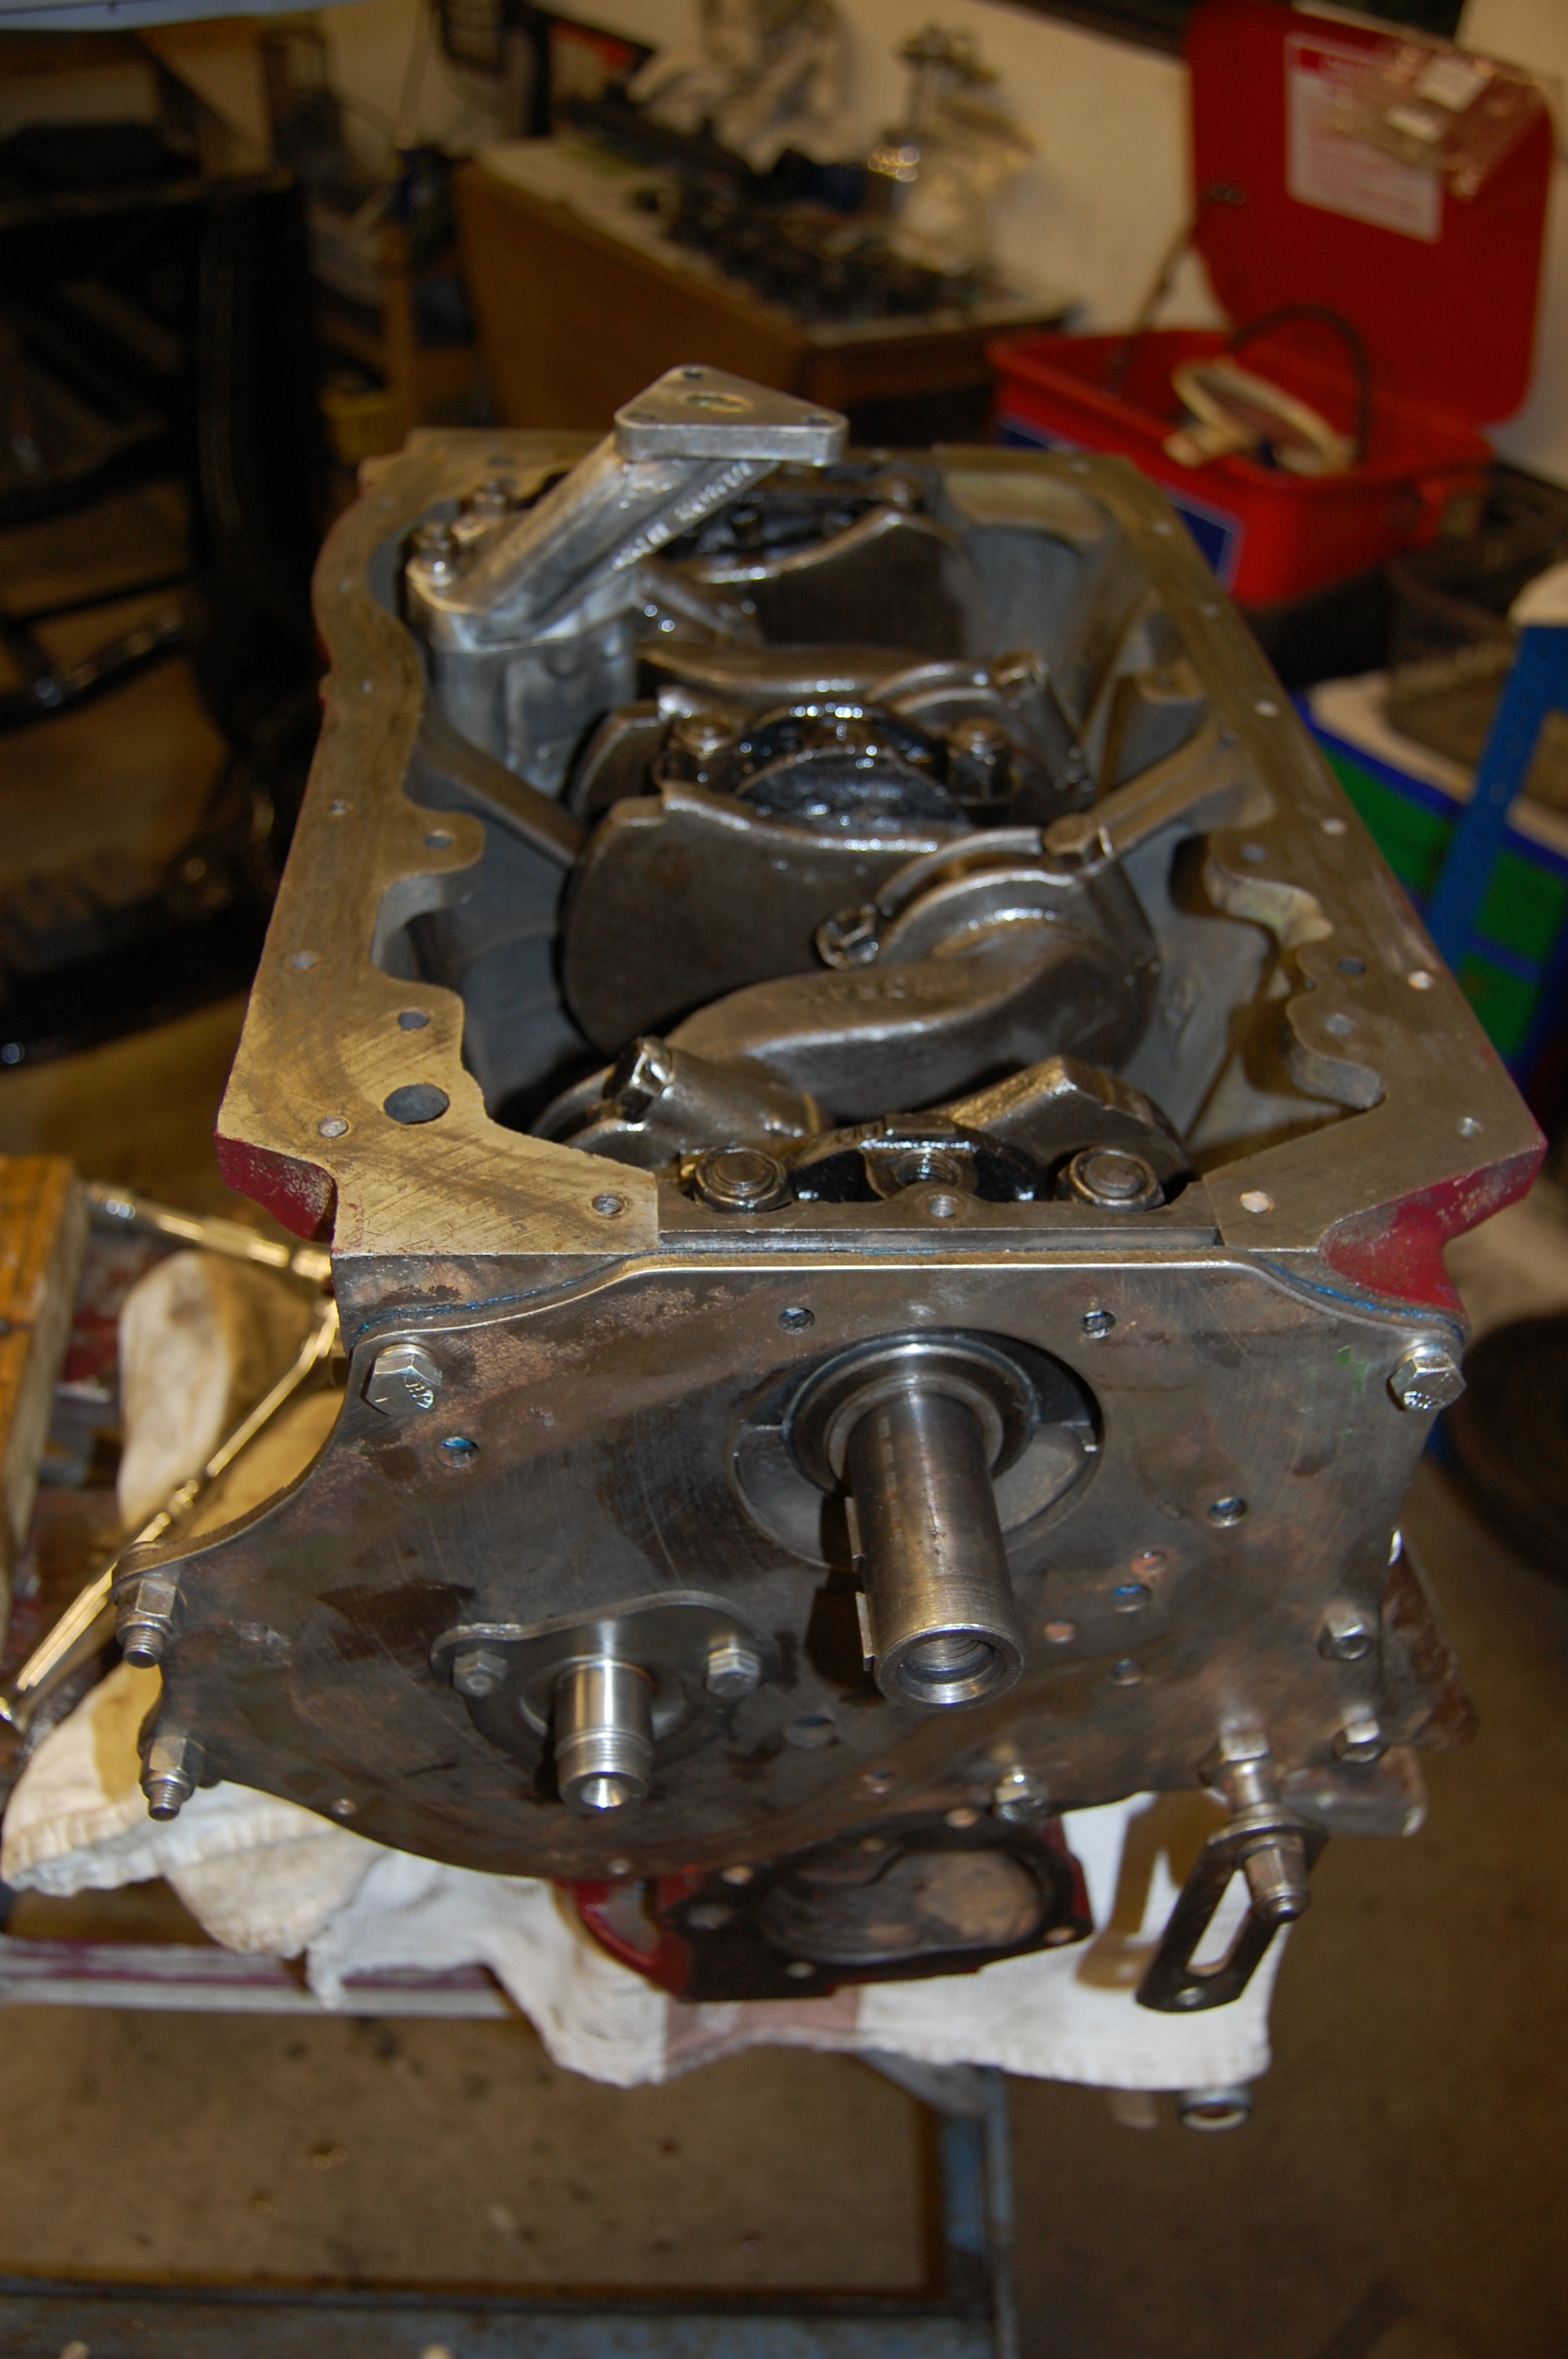
Engine parts cleaned and ready for assembly. New cam followers to be fitted as camshaft has been replaced. Oil pump was within tolerance, so will be re-used.
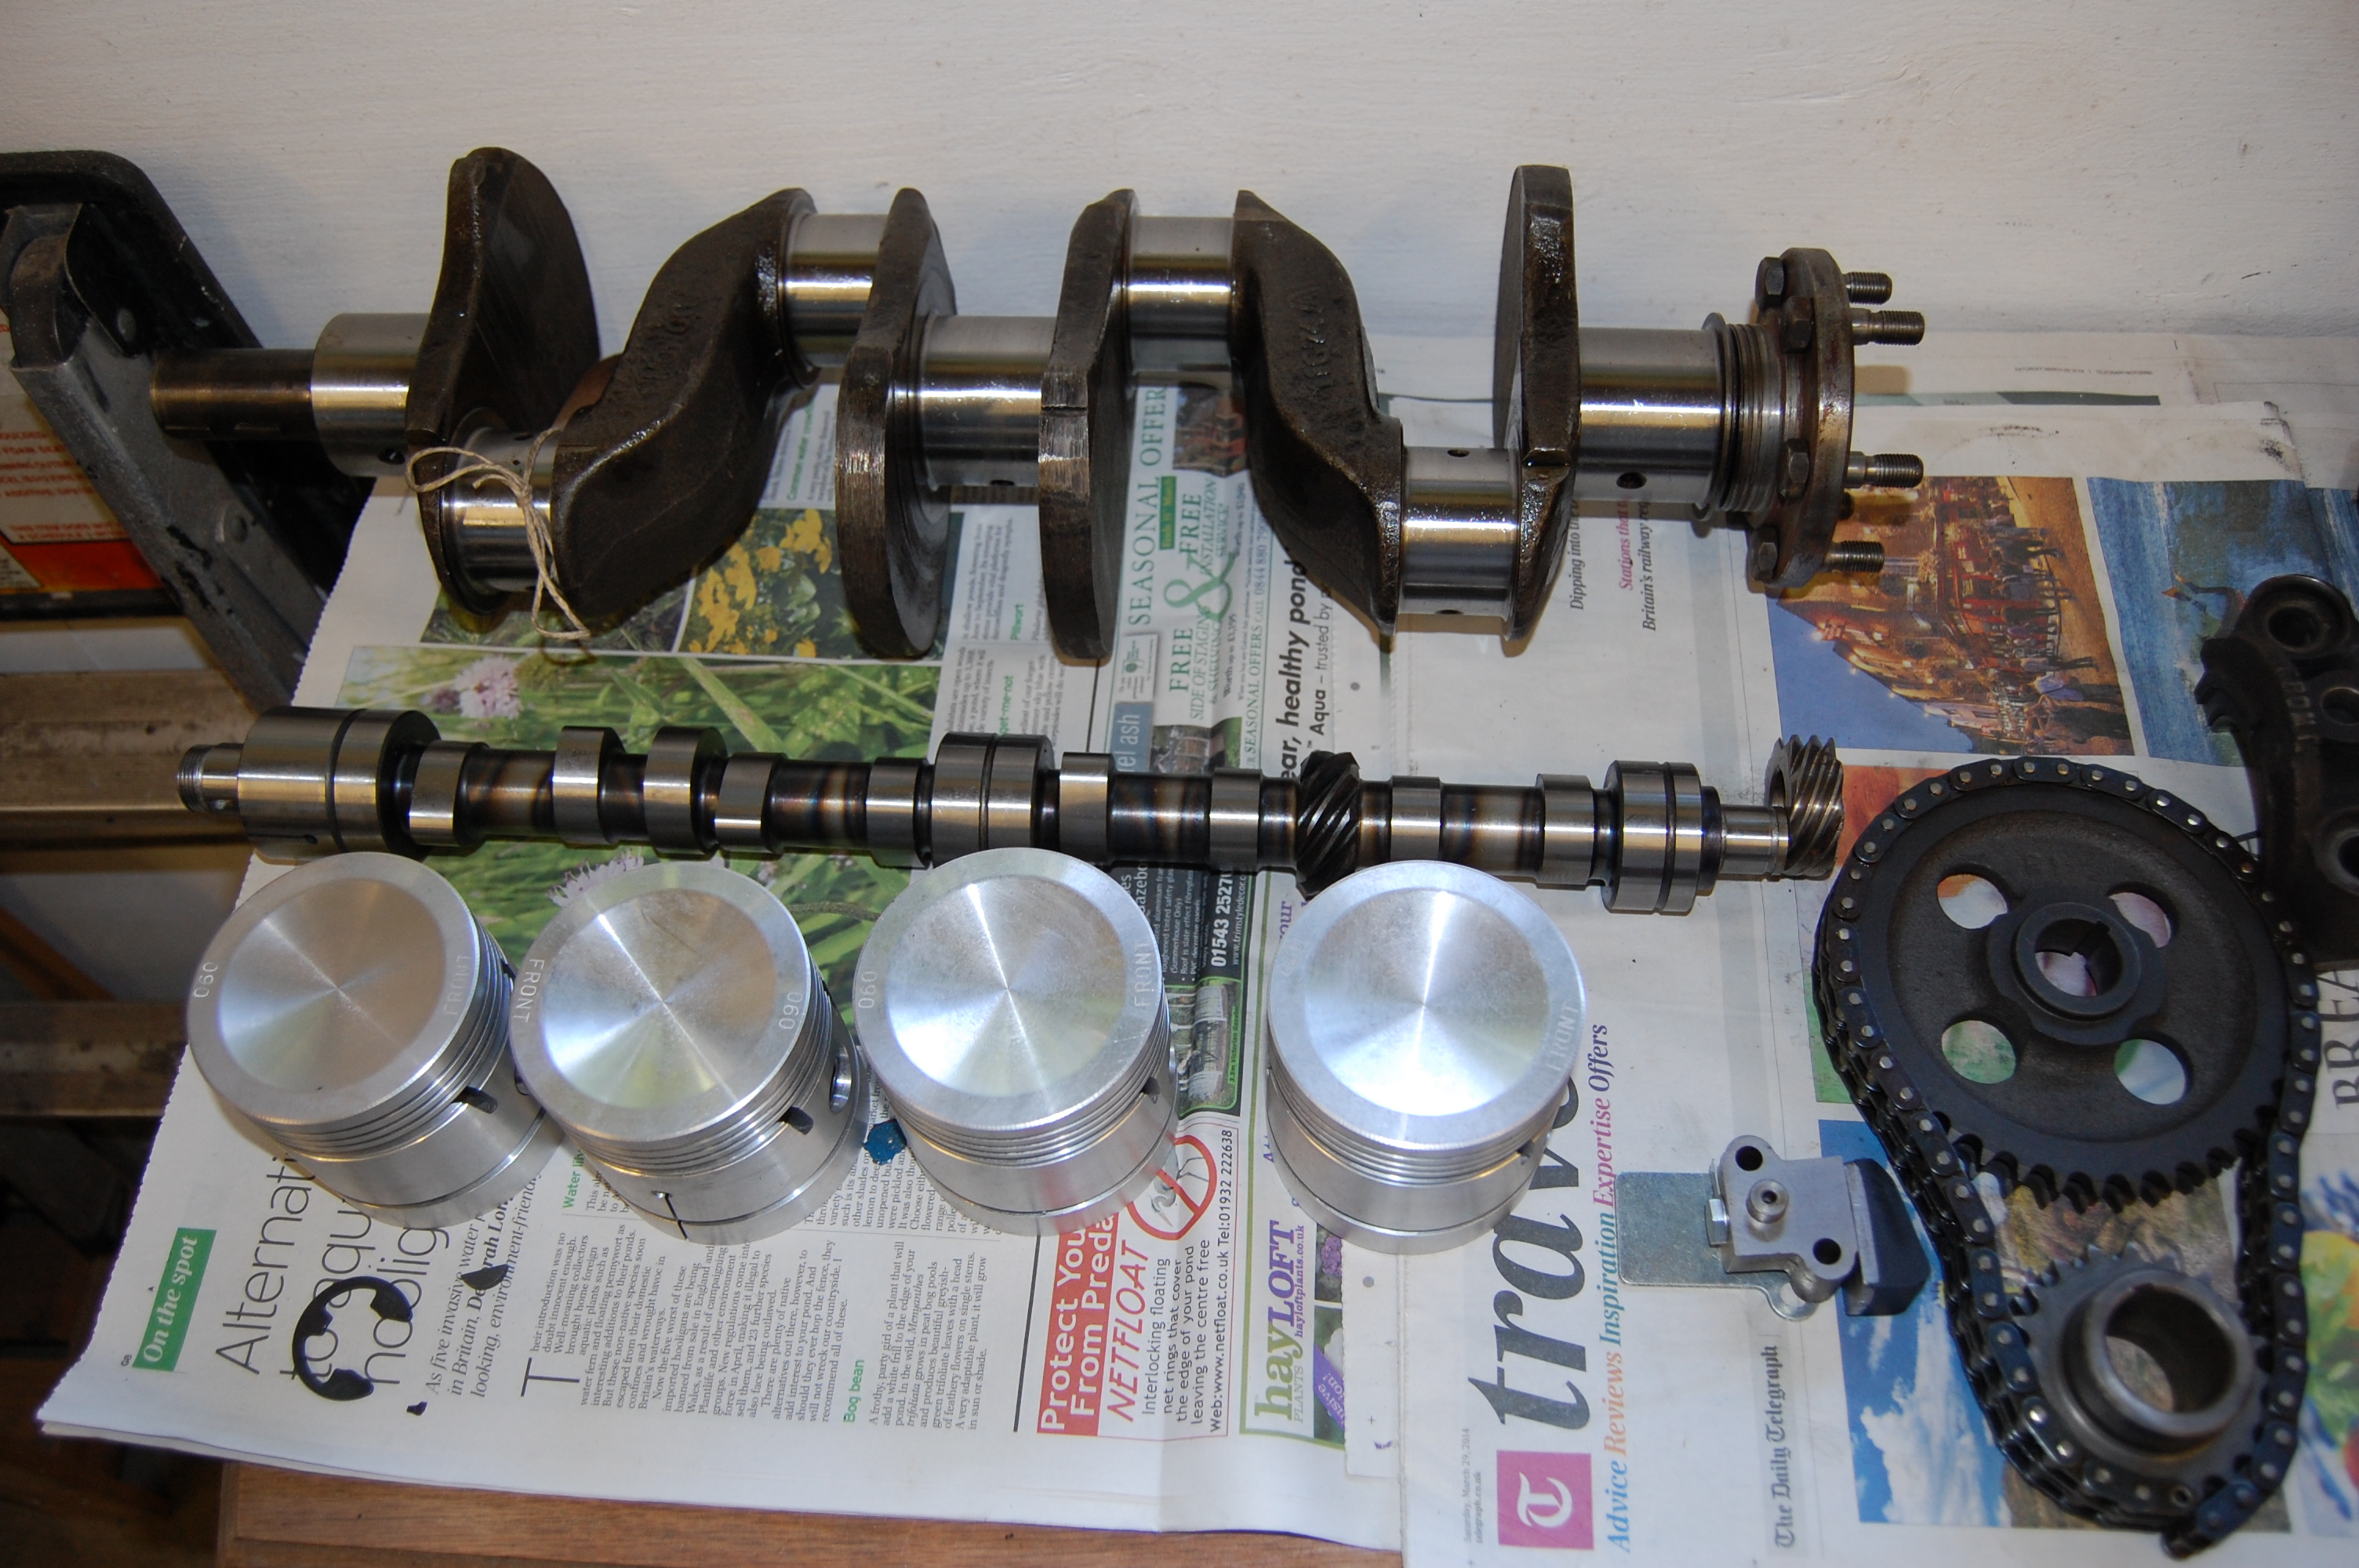
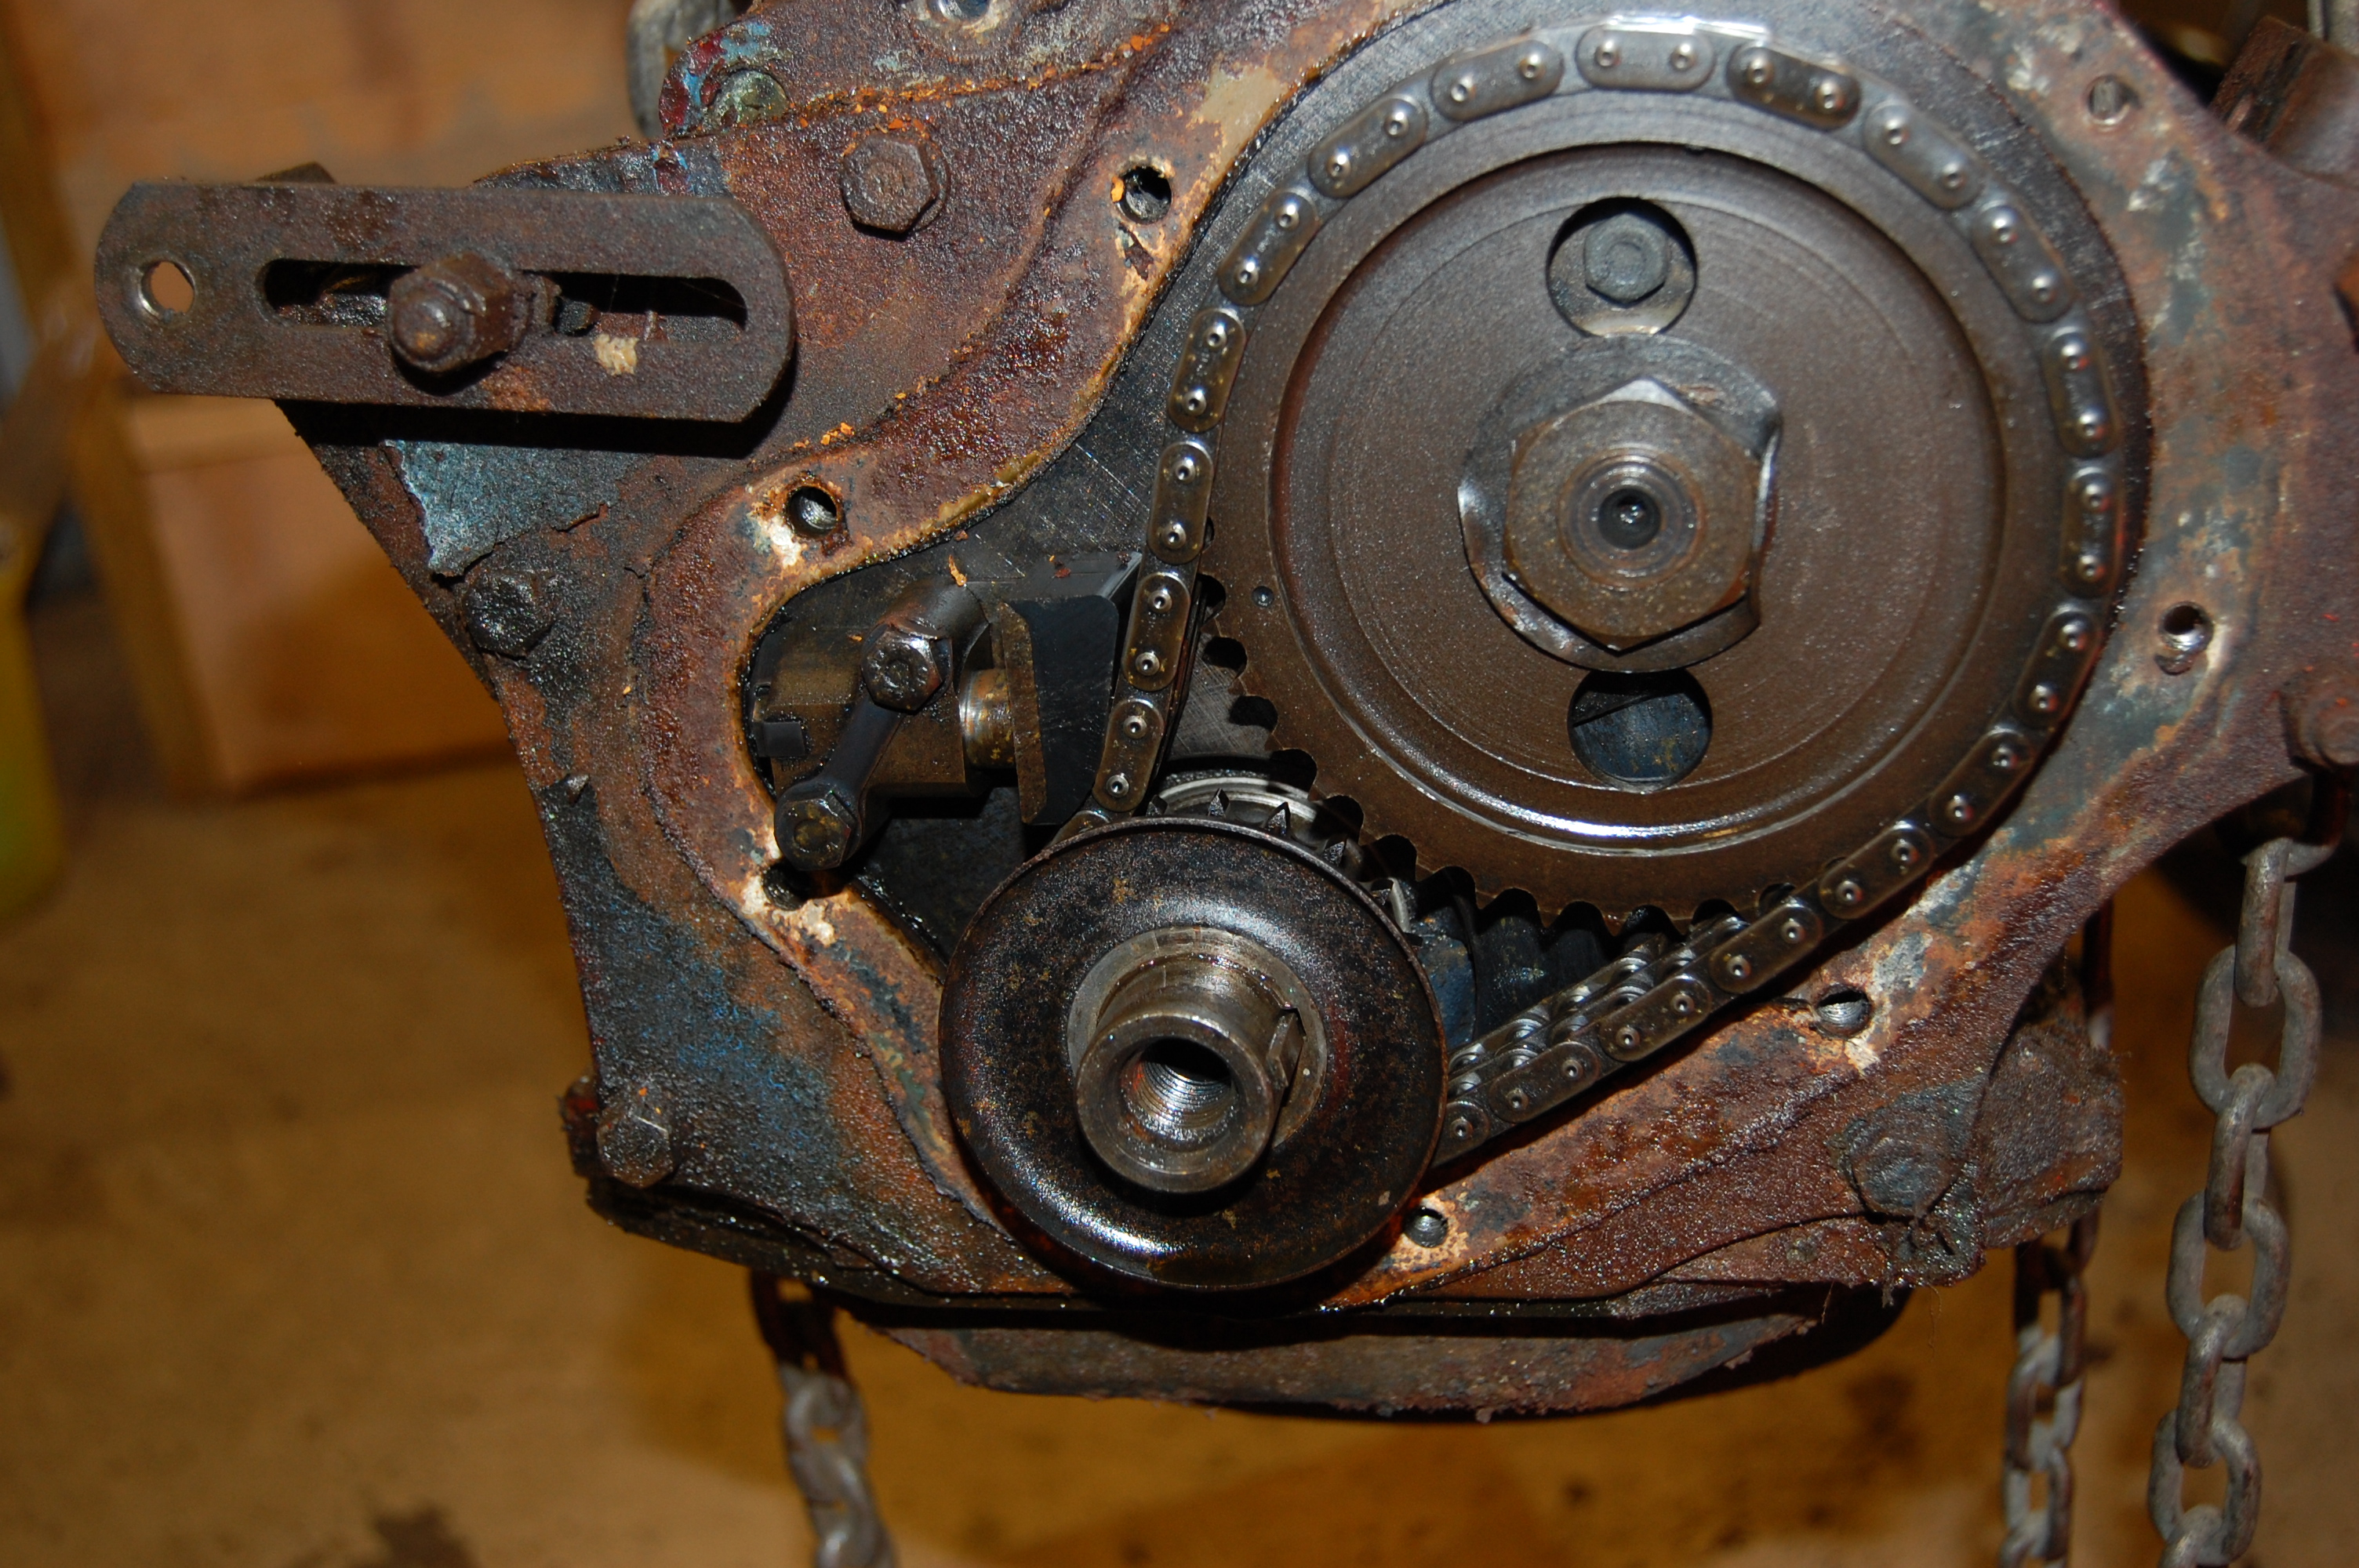
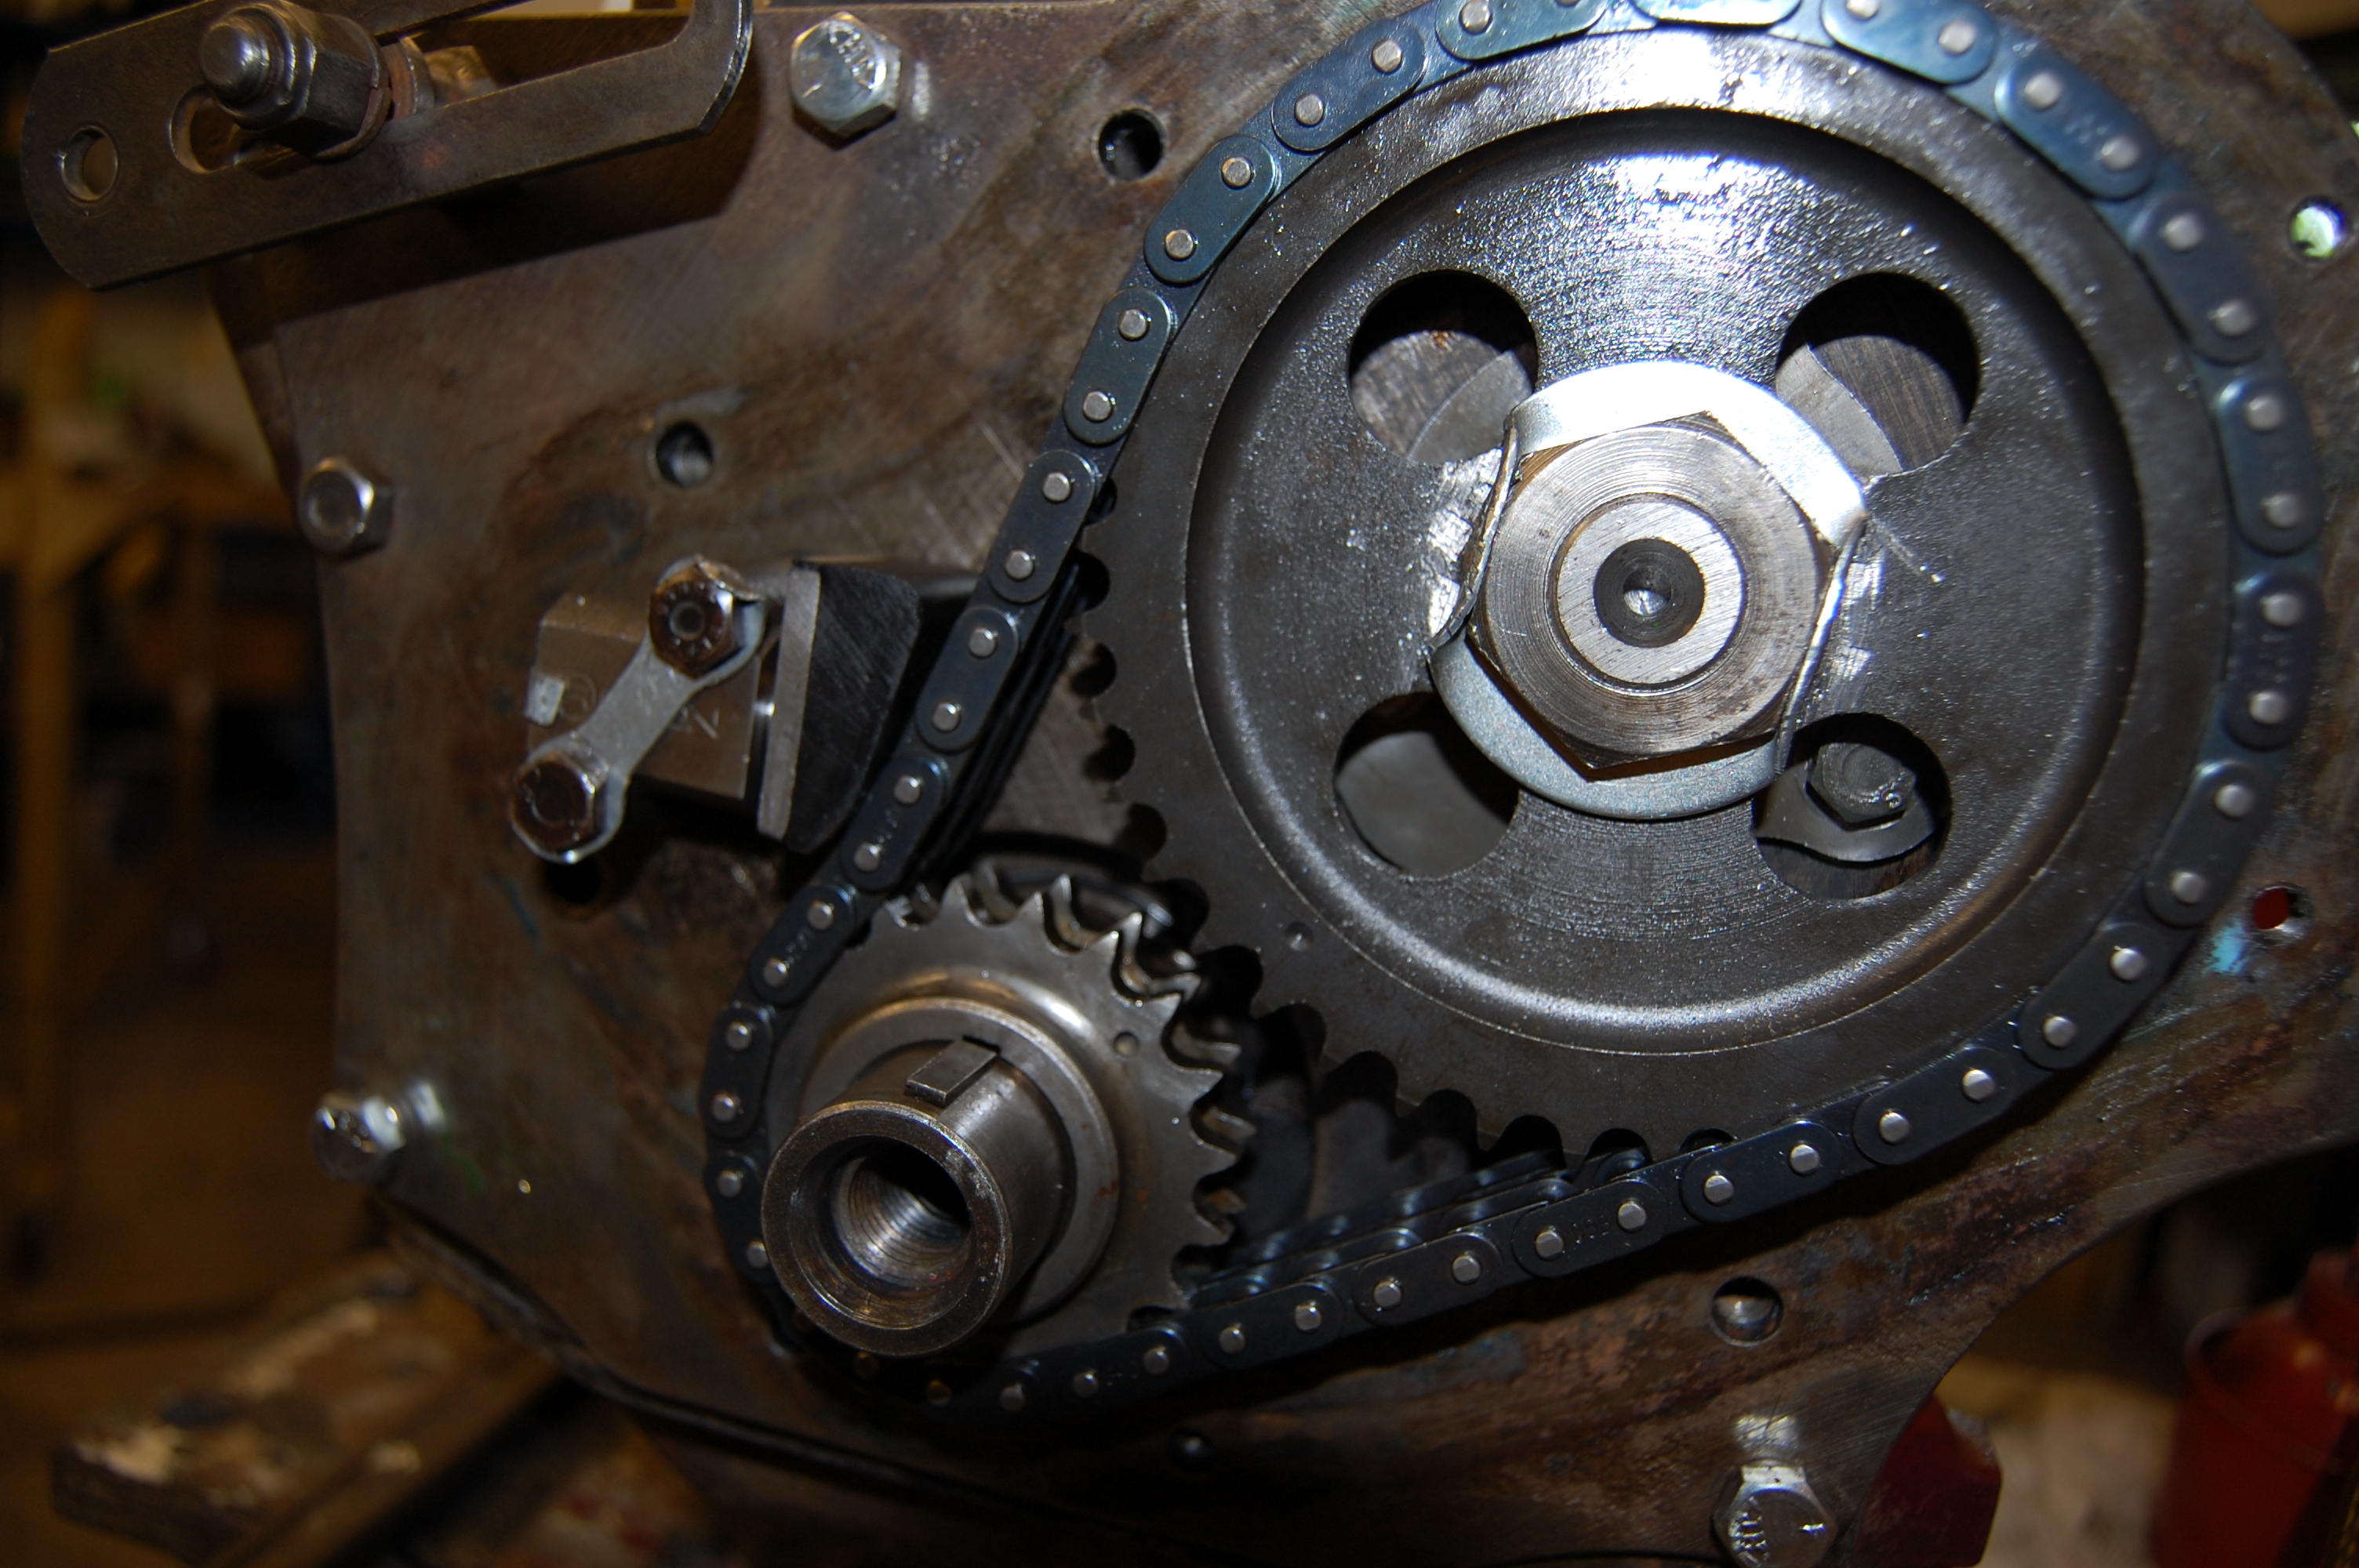
Machined crank, new standard camshaft, +060″ pistons, new Duplex chain, timing wheel and tensioner. Most parts sourced from MGOC.
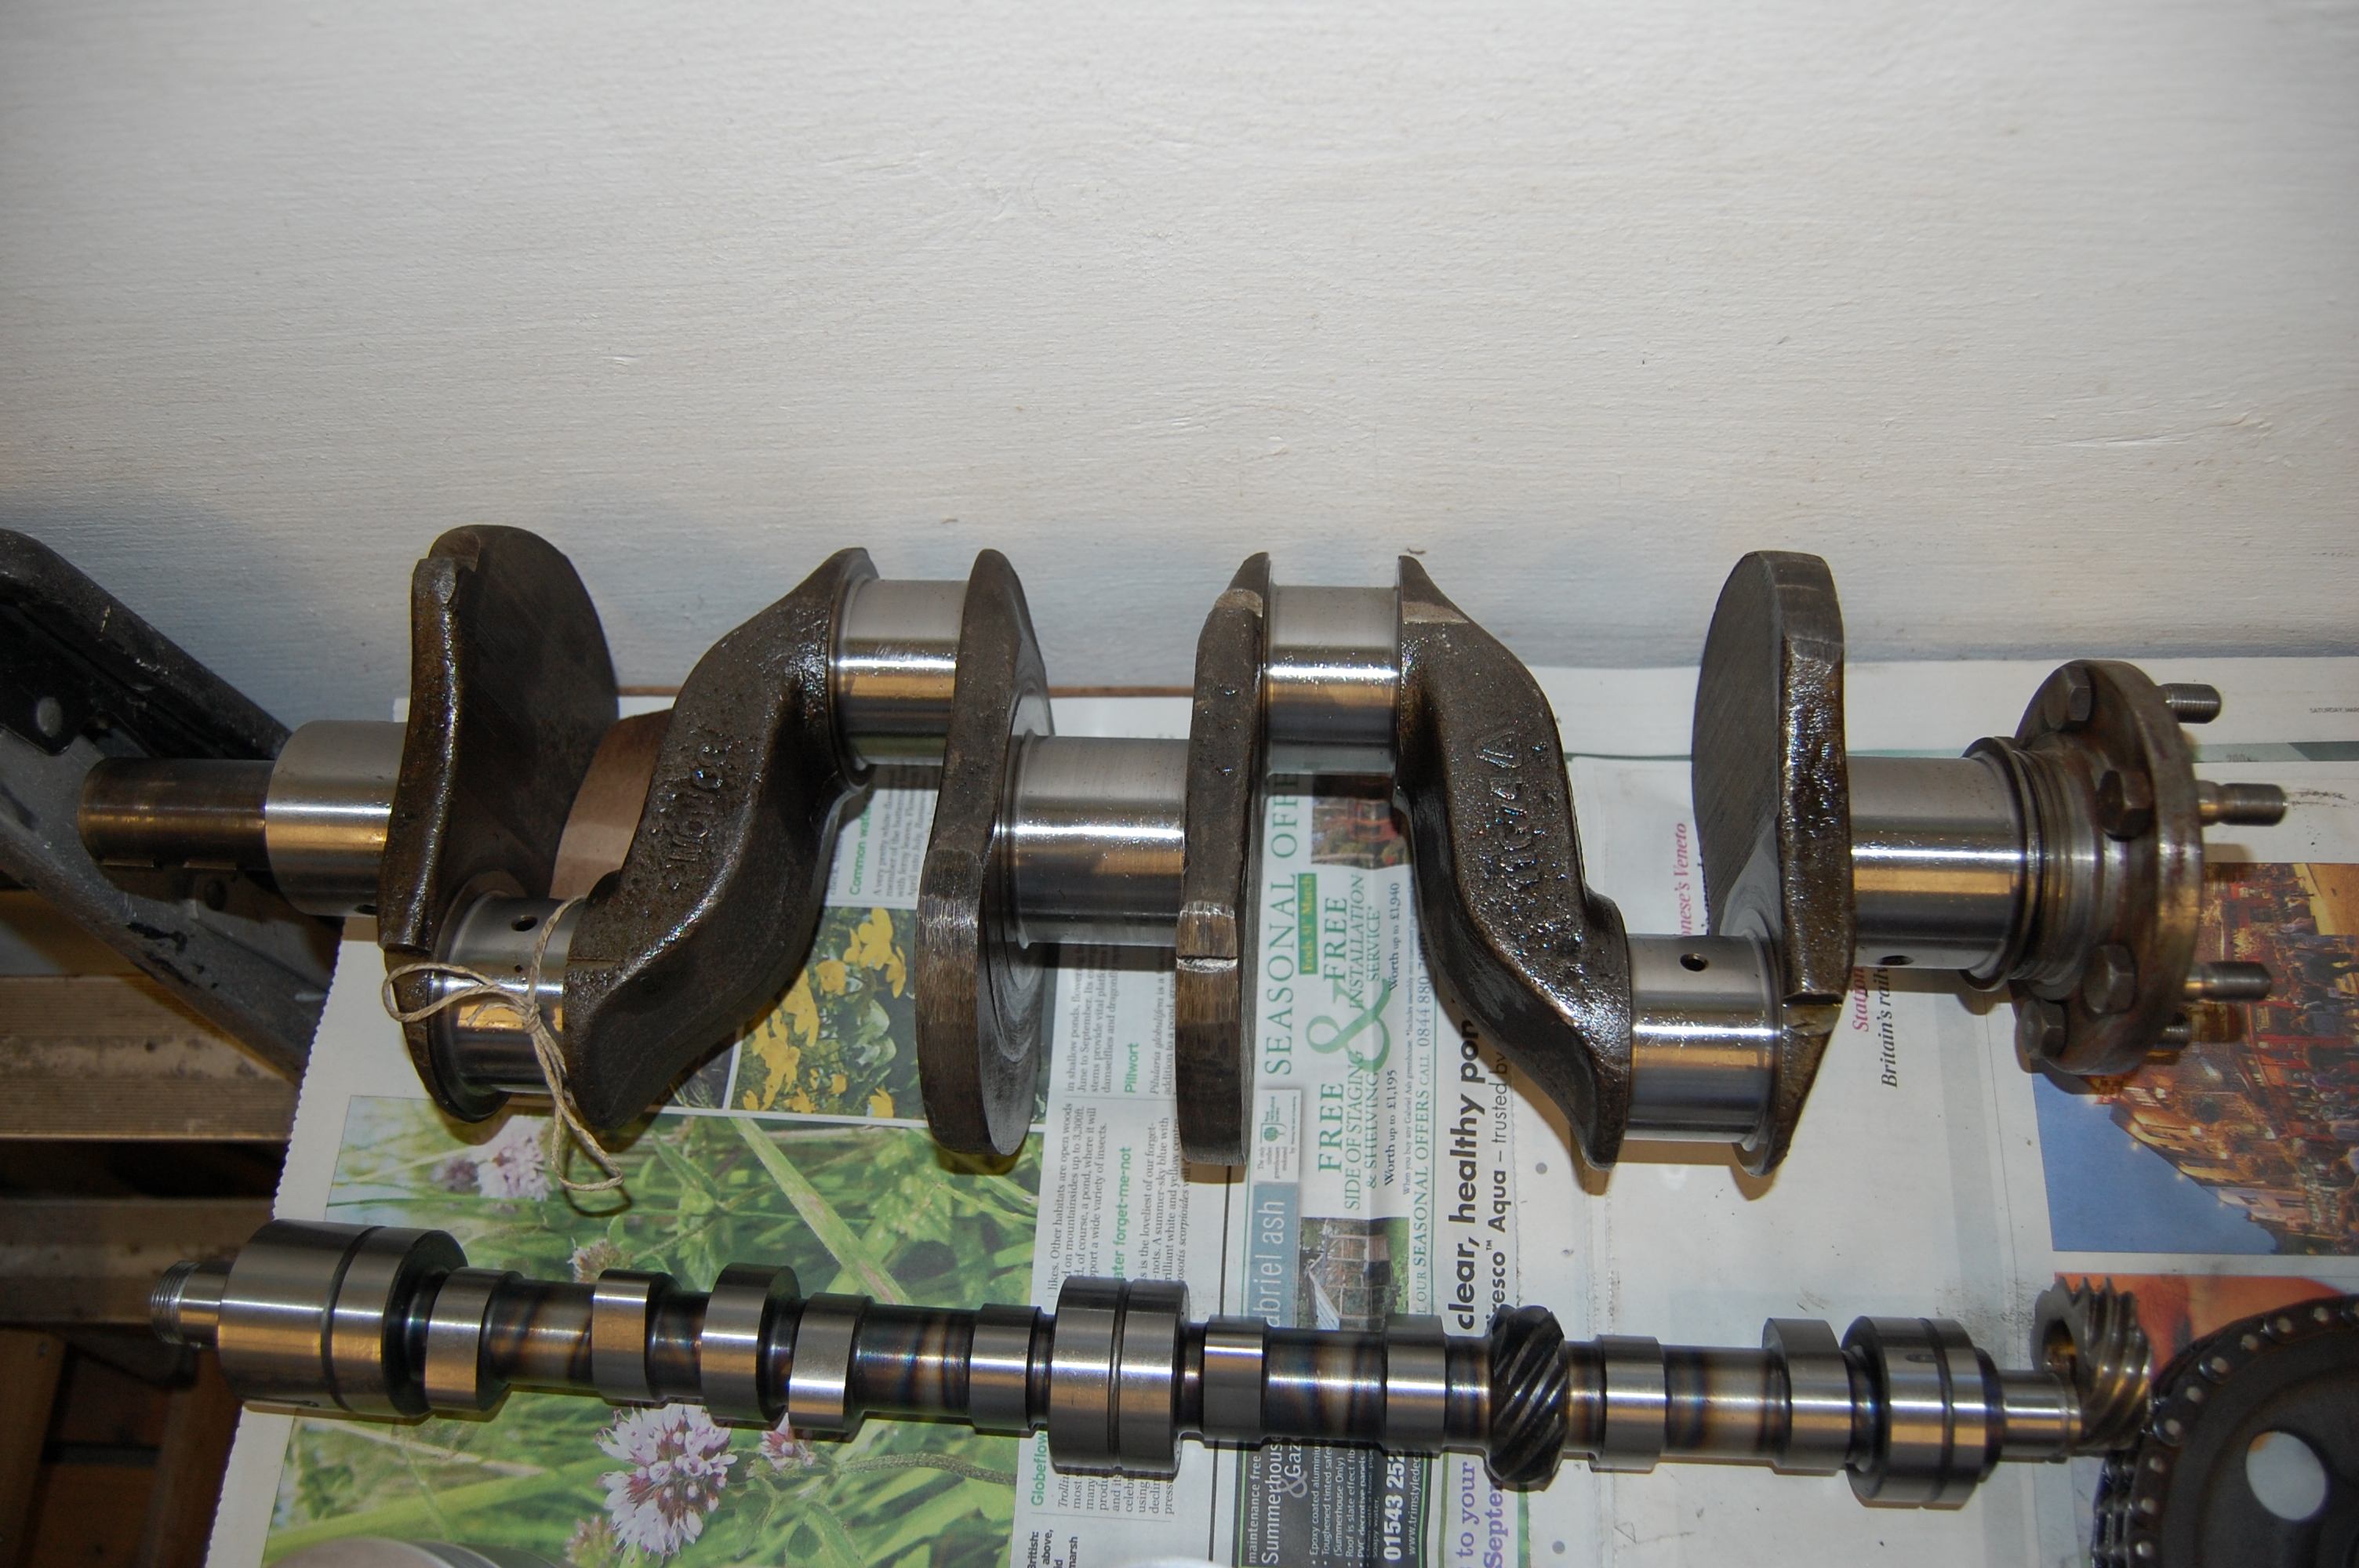
New camshaft is standard MGA profile, which is deemed to be near perfect for road use. Crankshaft was balanced in the 70’s.
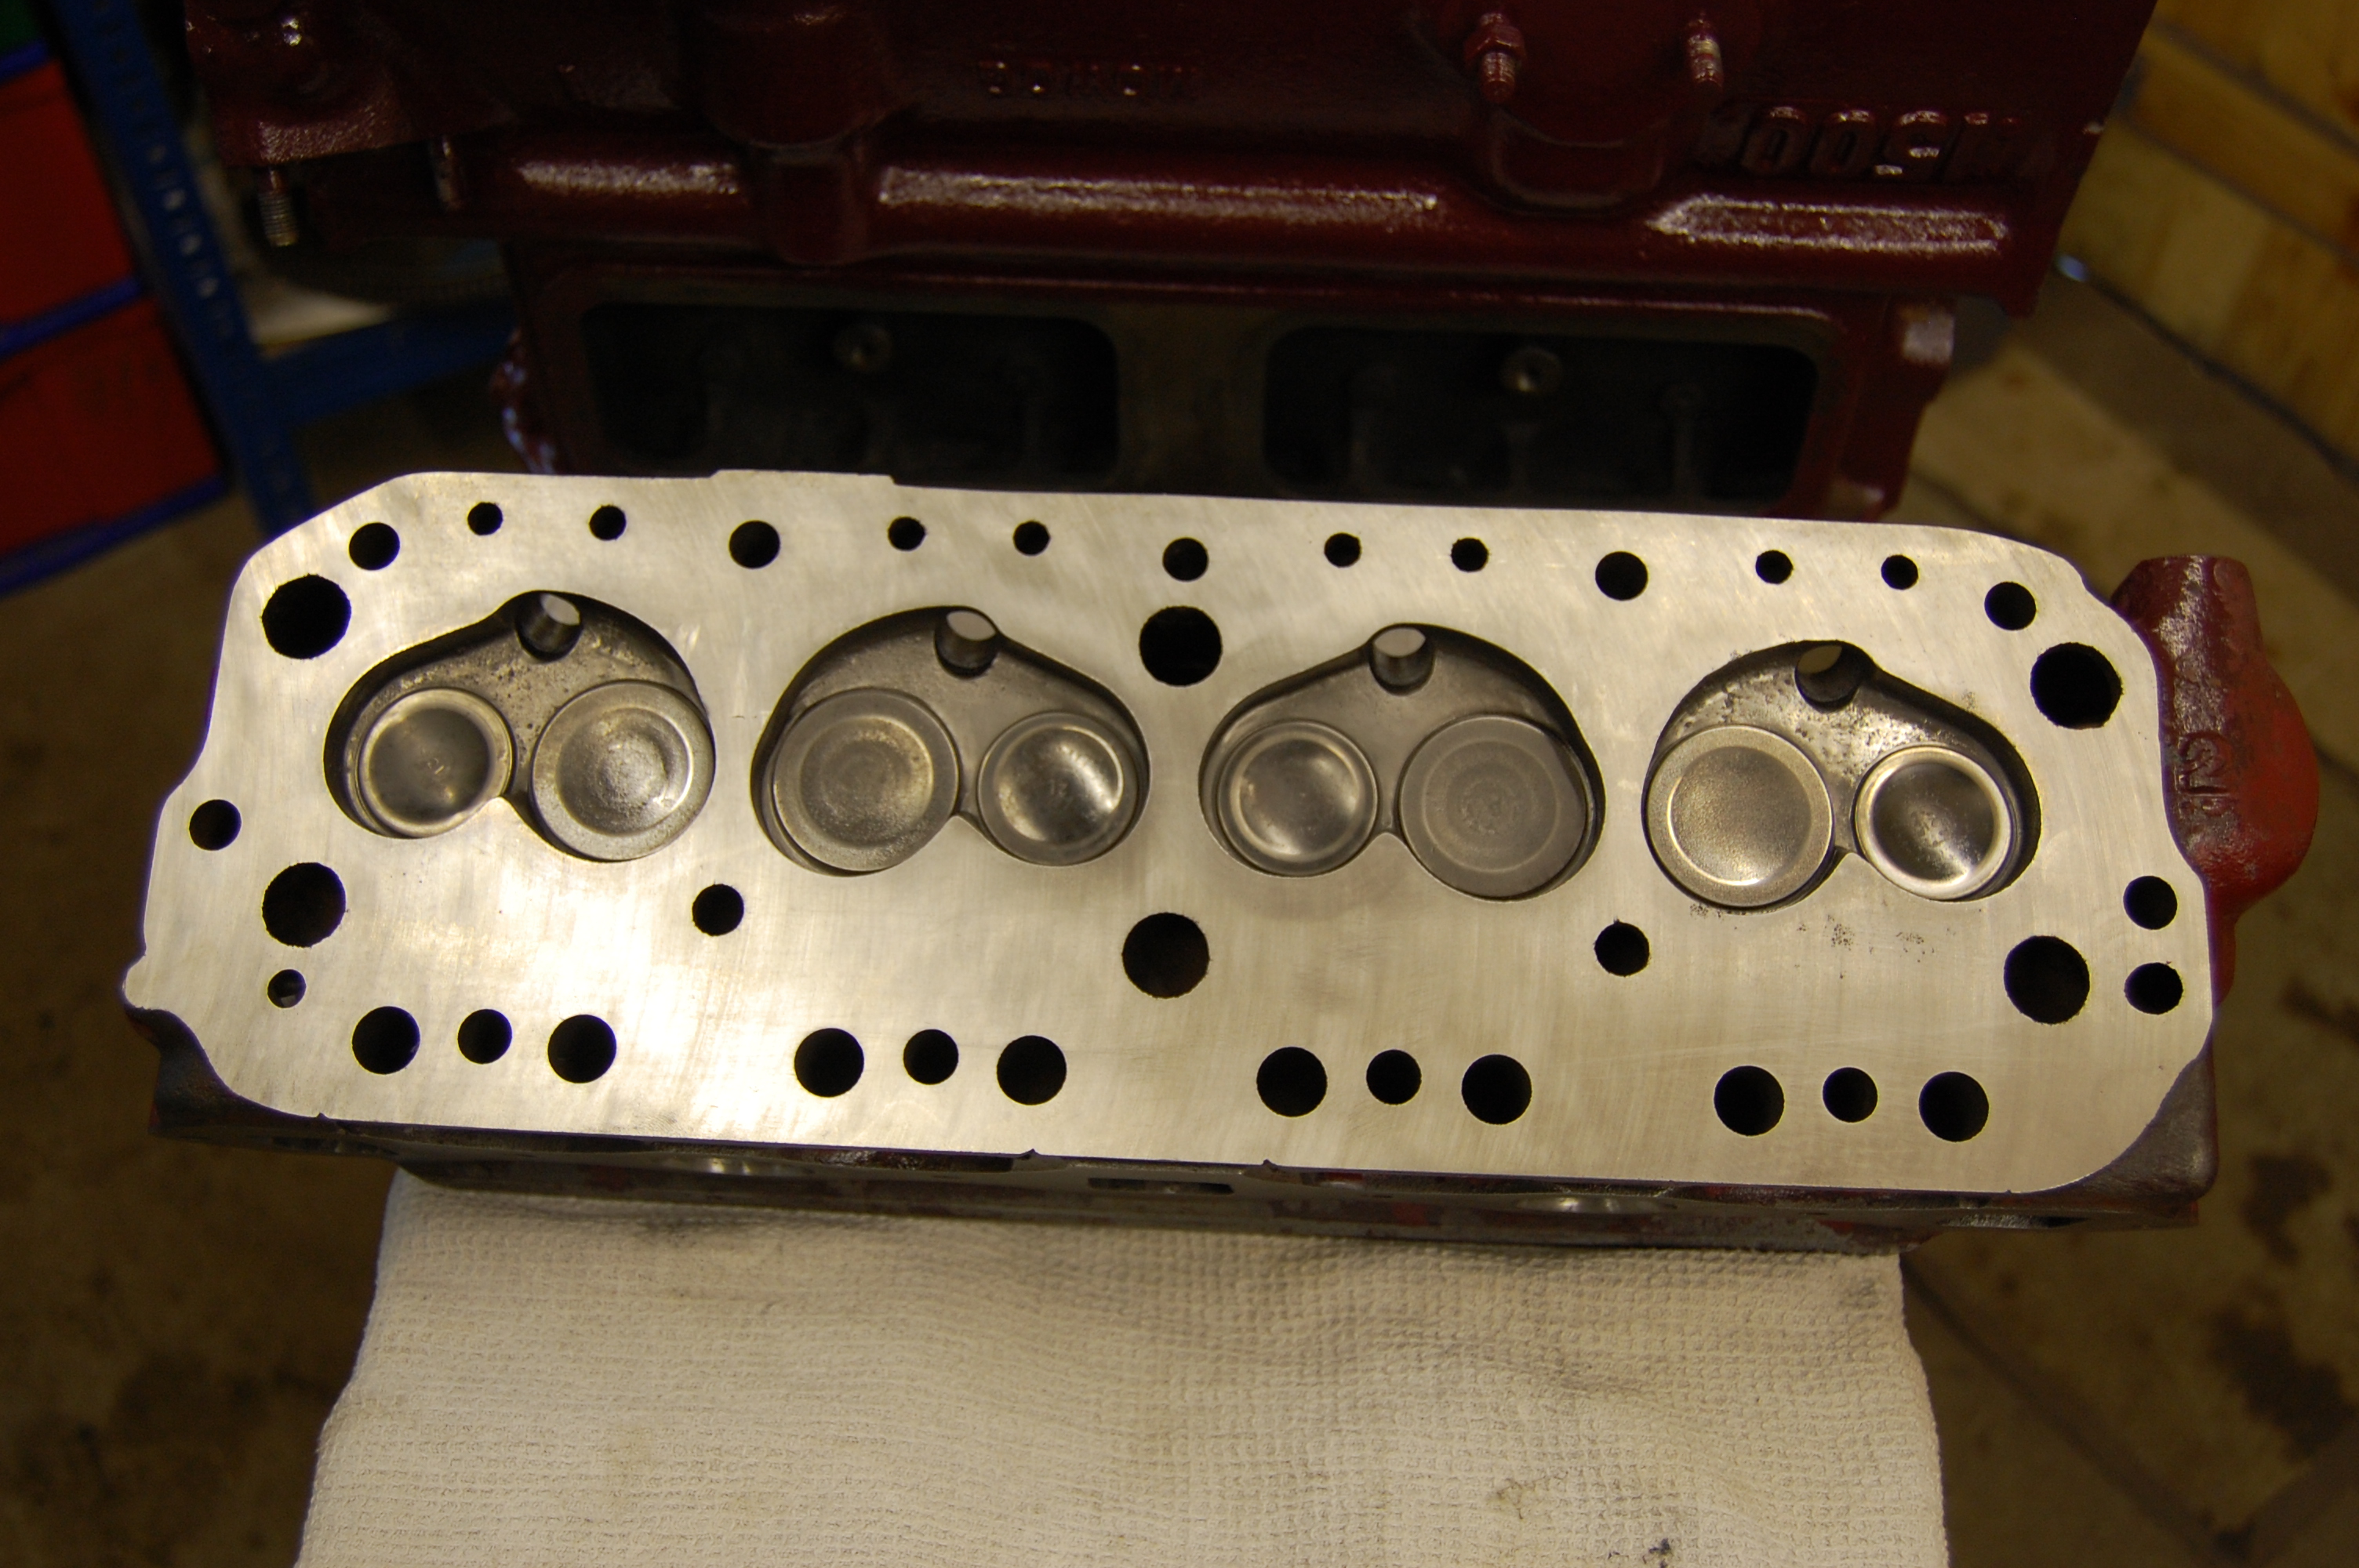
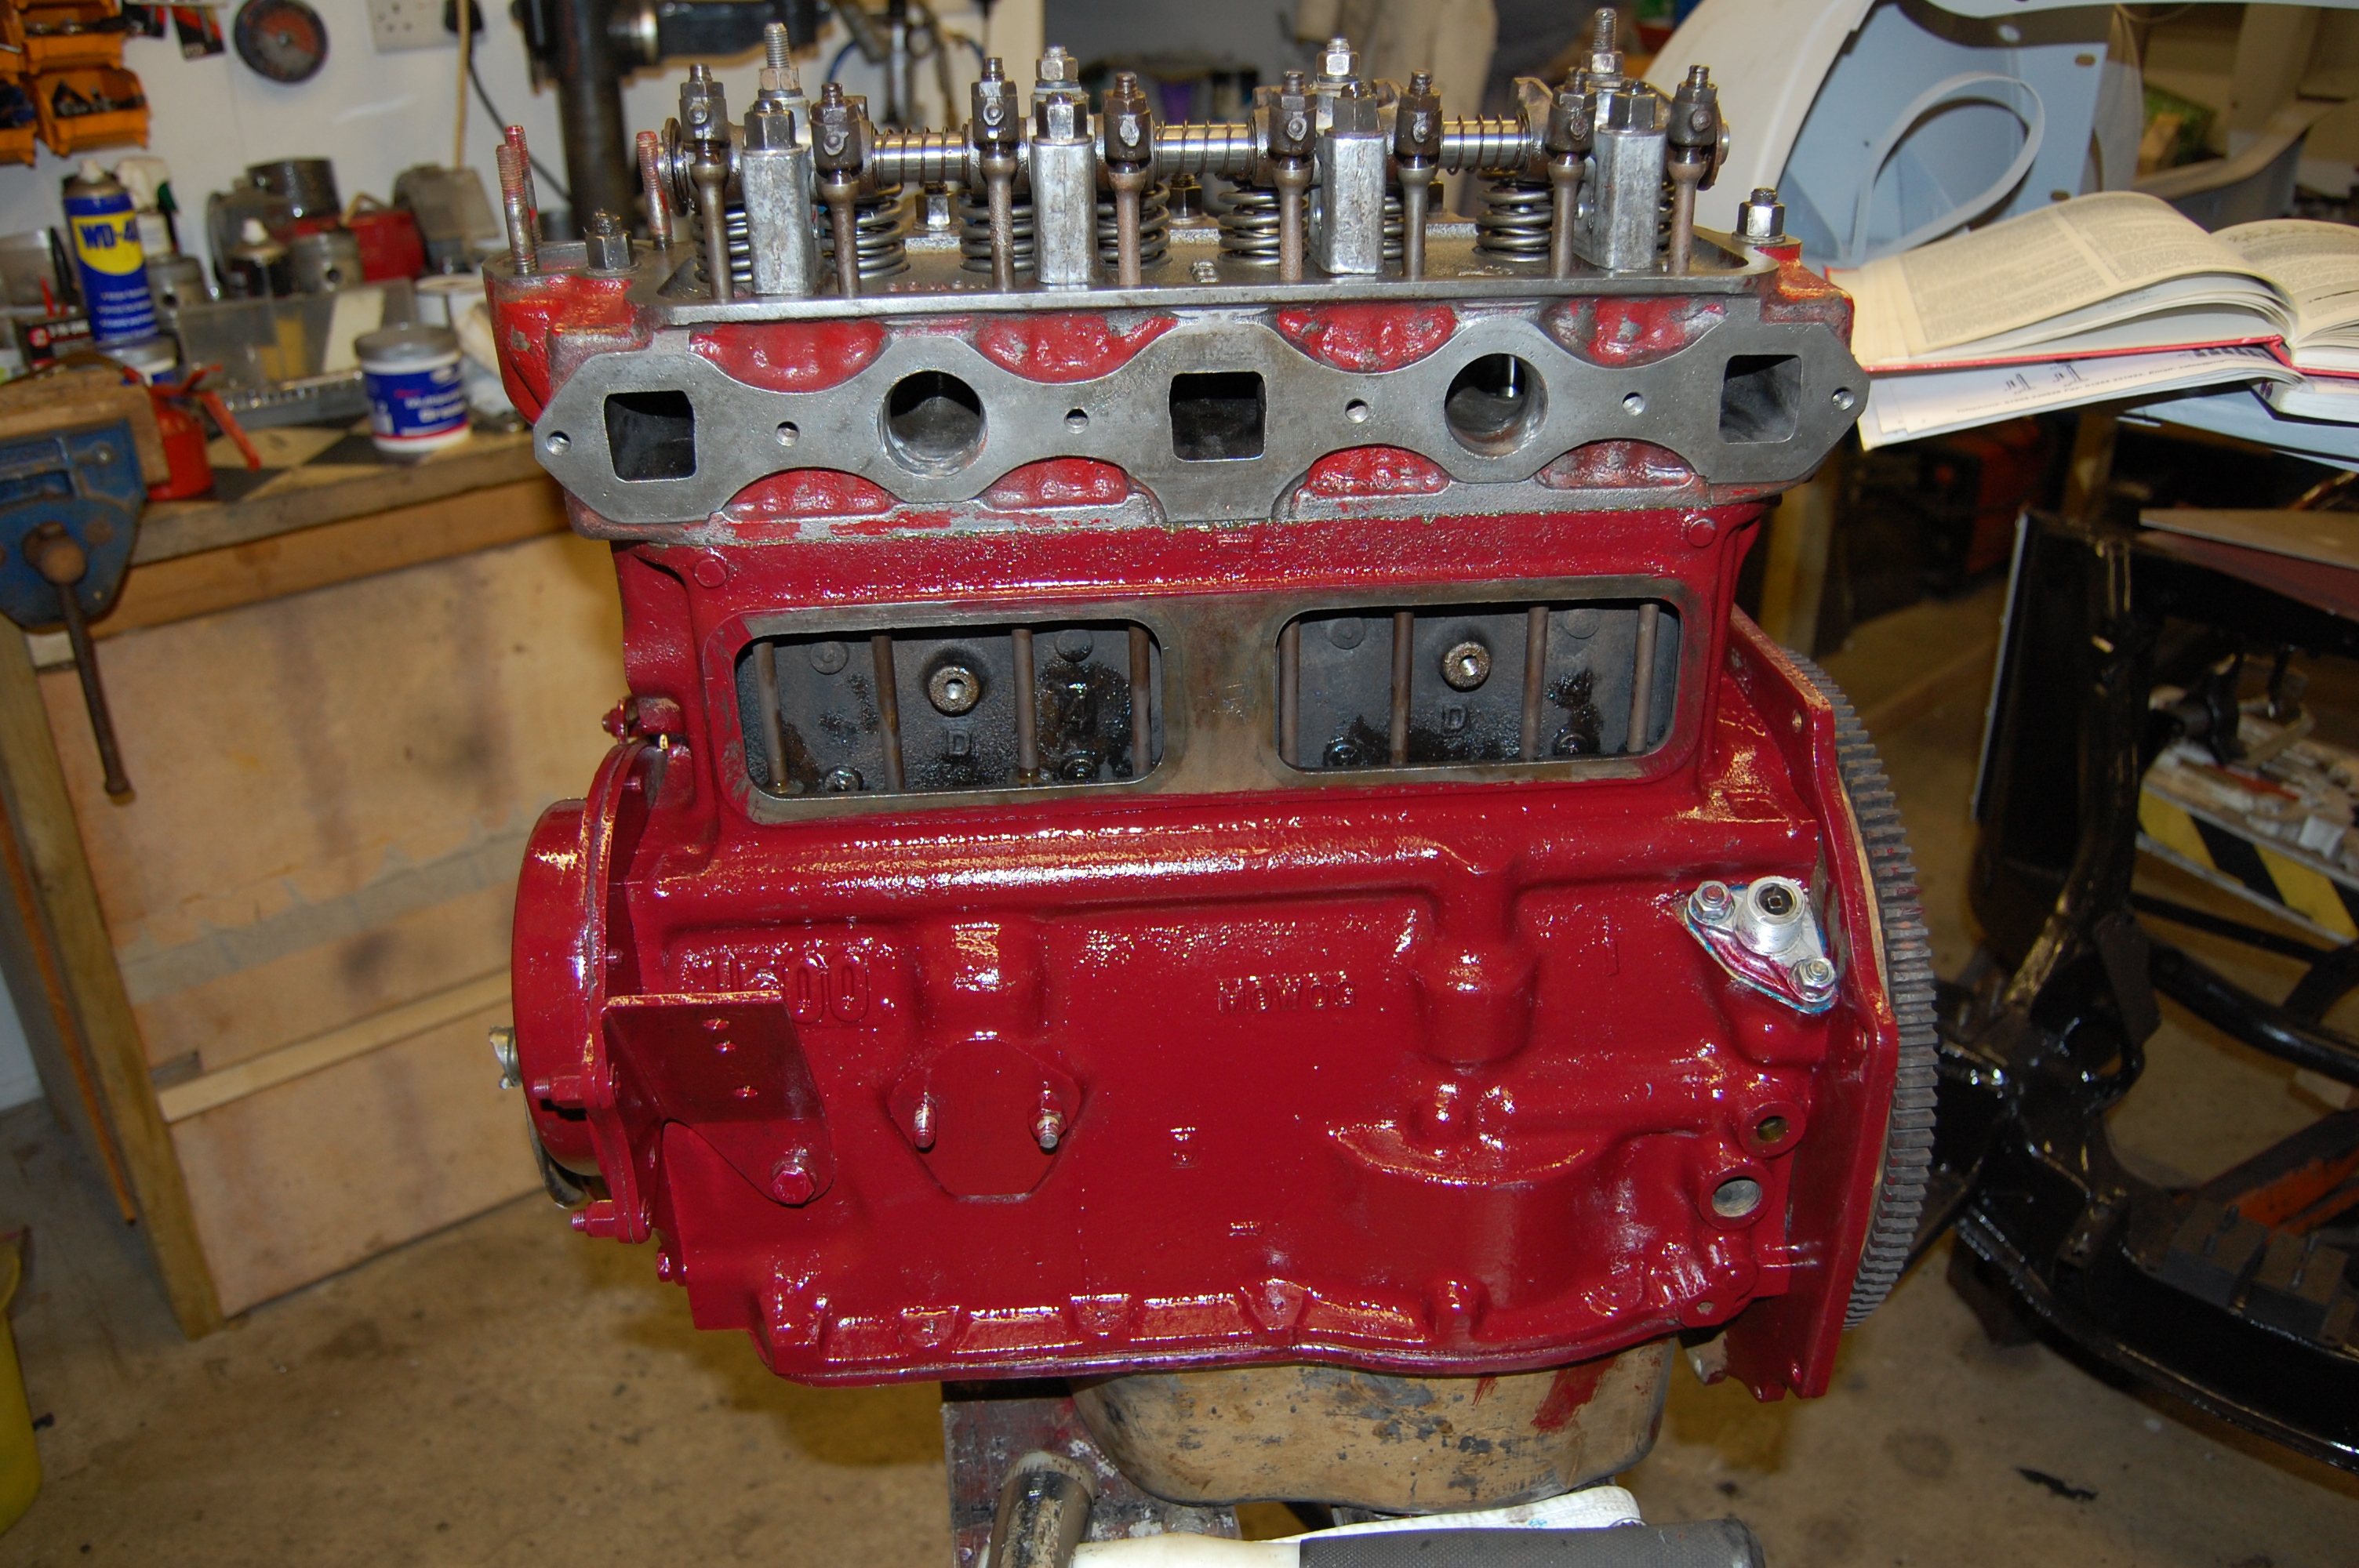
A second head was located complete with lead free conversion. Lightly skimmed and ported.
Having skimmed and tested the original cylinder head ready for converting to unleaded spec, I was fortunate to win on Ebay a complete converted head for £50, which included the valves and rocker gear. The head was stripped, skimmed by 10 thou and gas-flowed.
New camshaft bearings were fitted and reamed at the engineering shop.
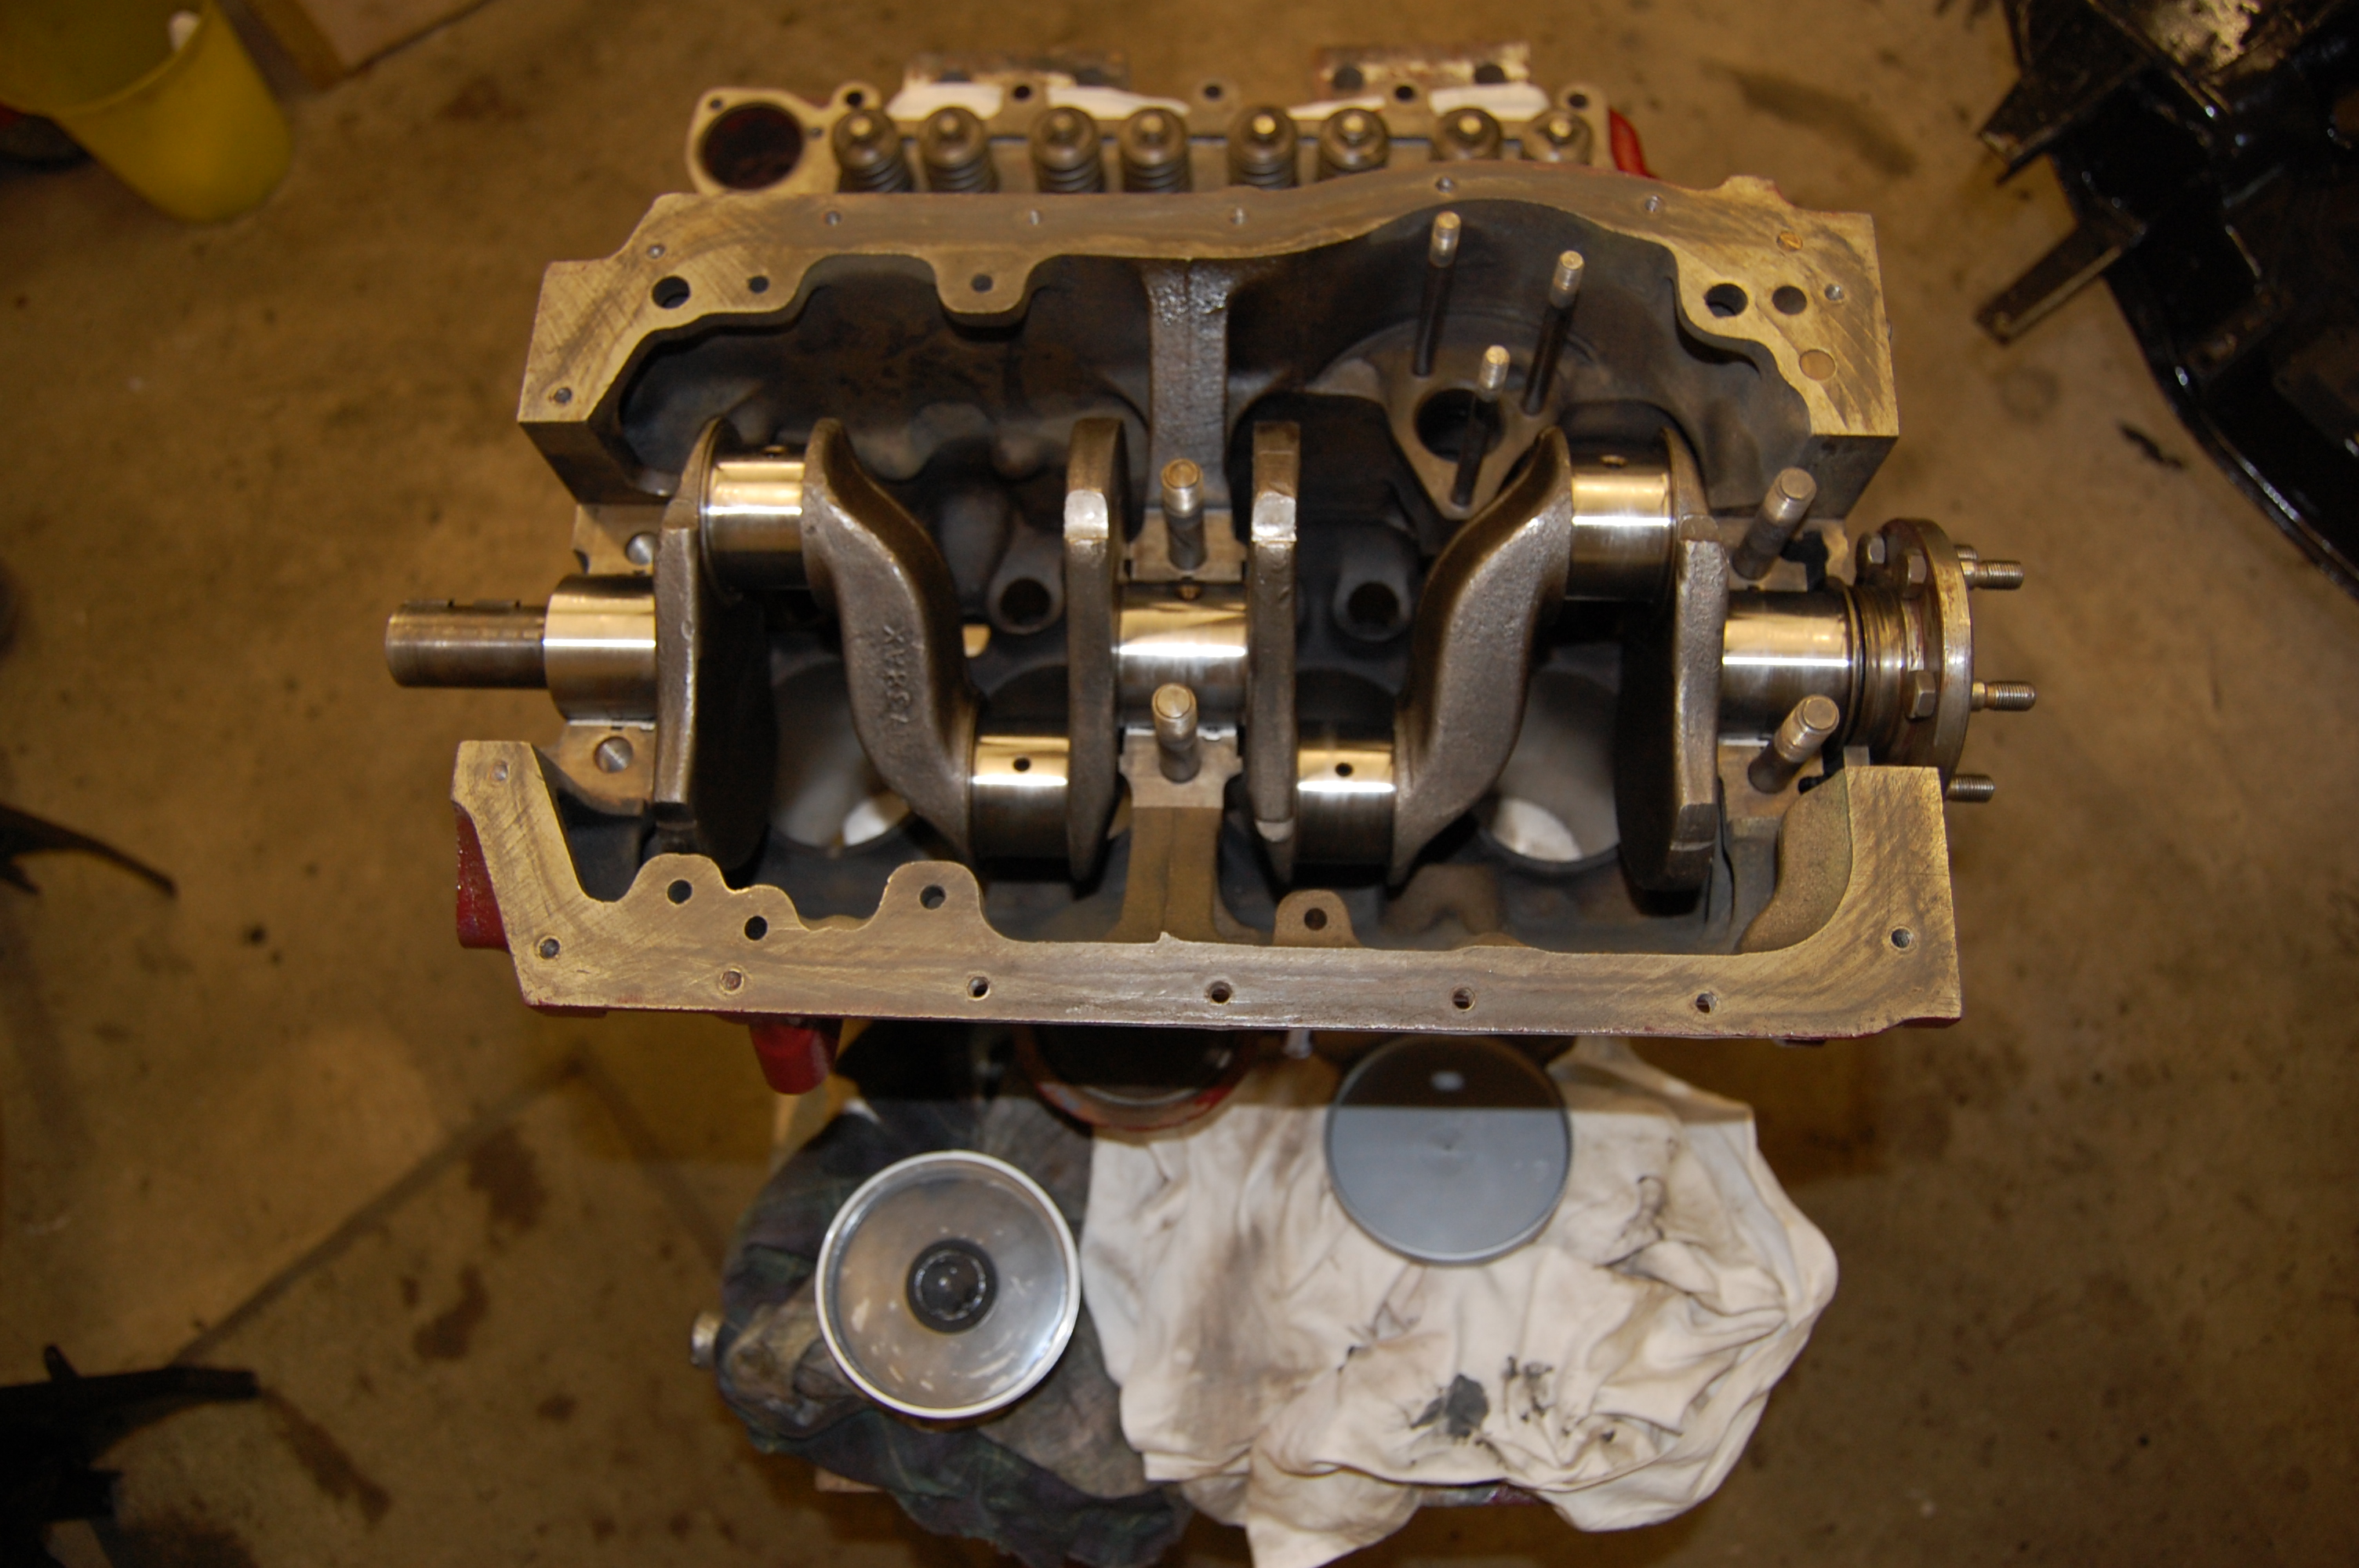
Crankshaft fitted with graphite grease as engine will probably stand for several months before running.
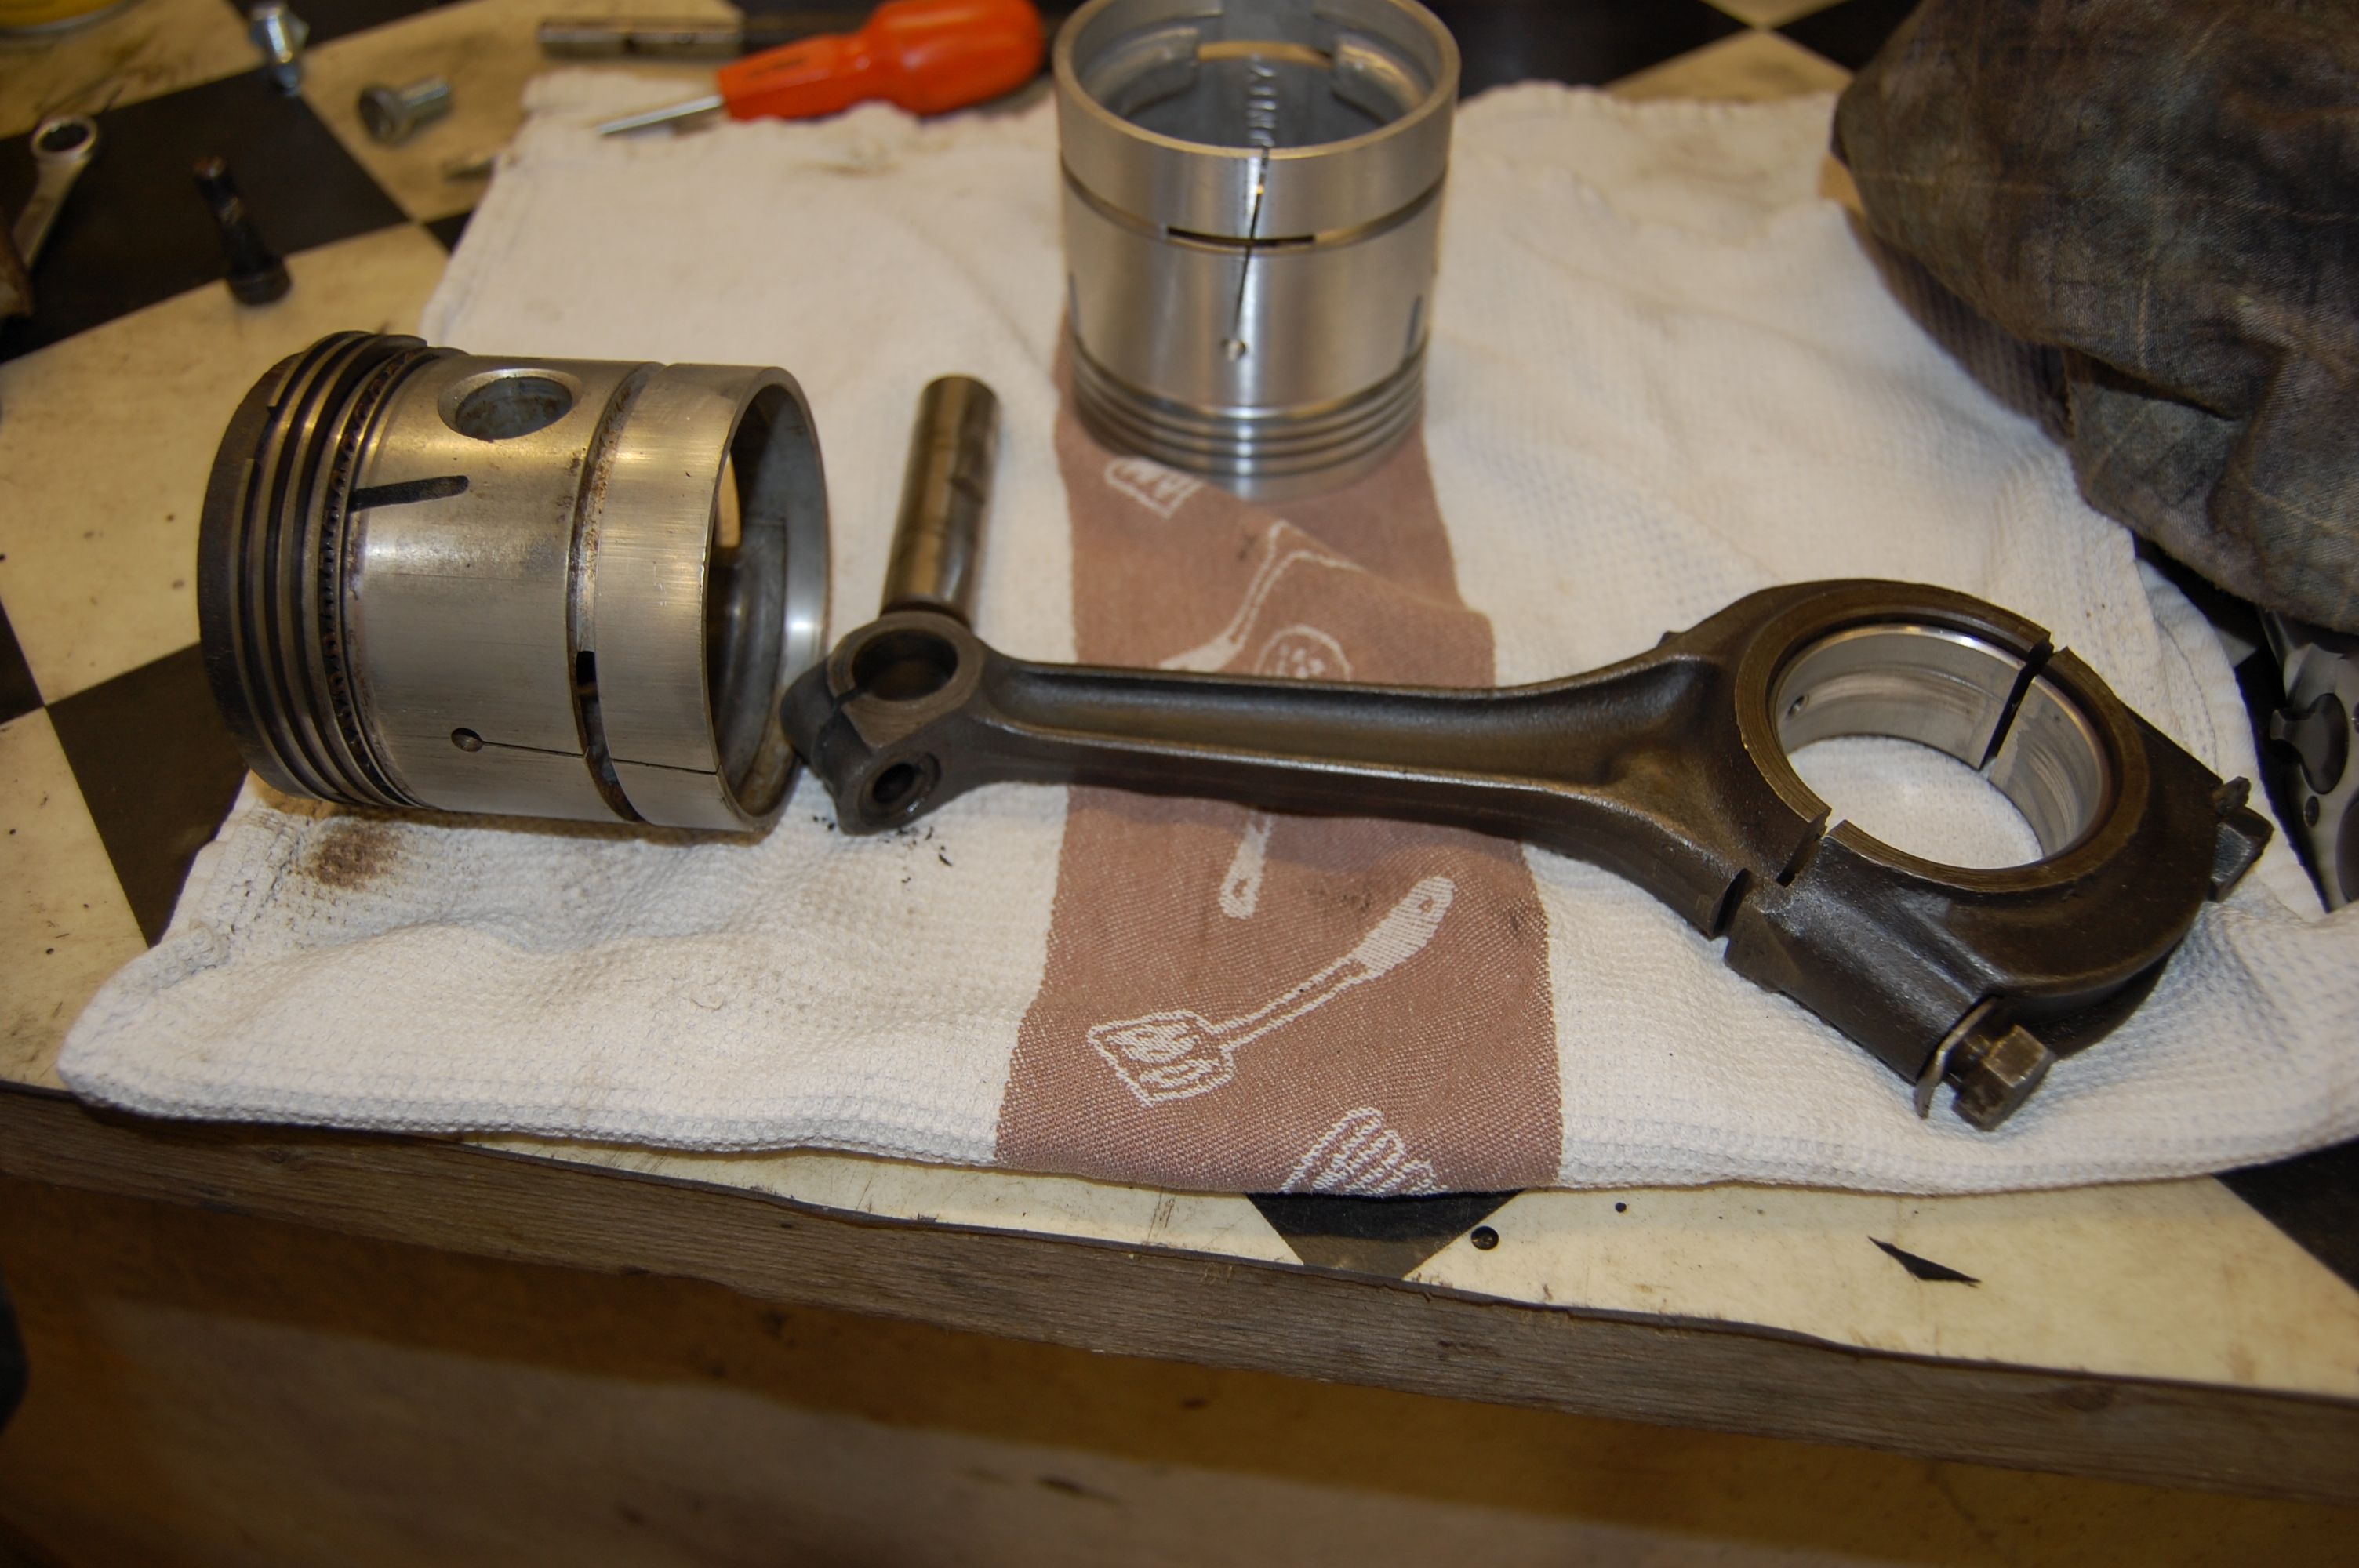
Old pistons had five ring grooves but were only fitted with the three compression and one oil ring. New pistons have five rings.
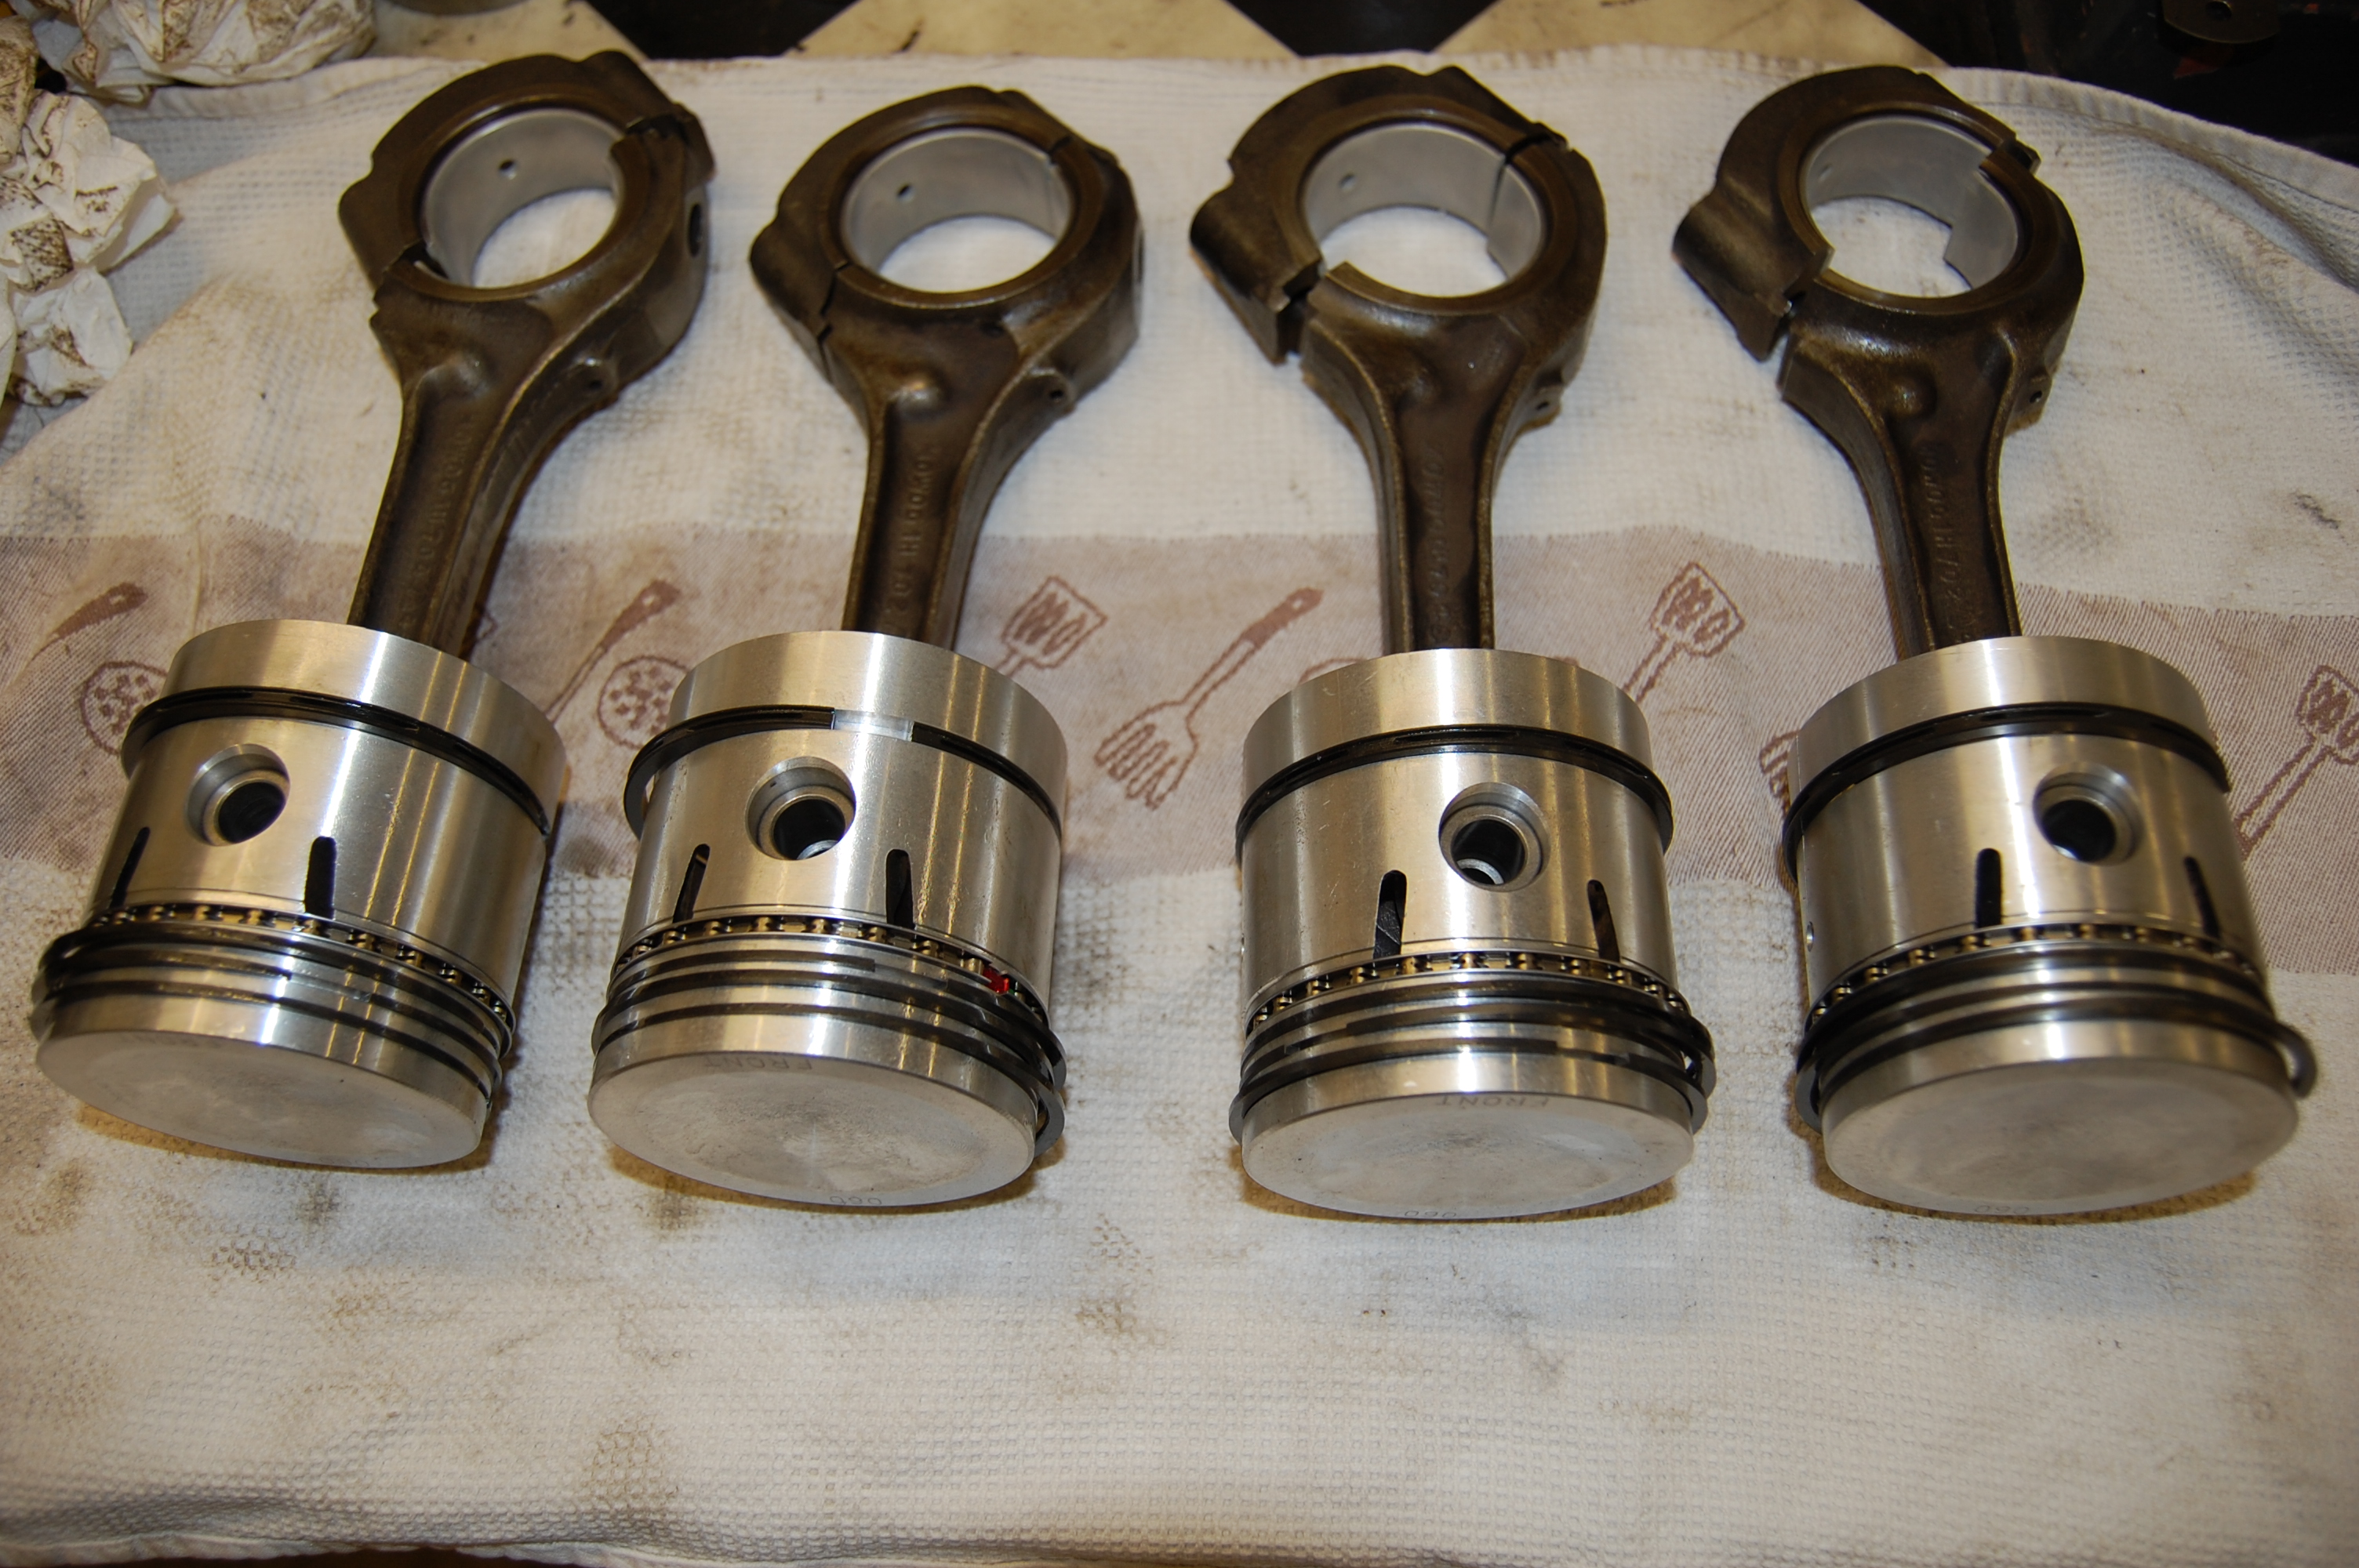
Conrods were lightened and balanced in the 70’s, but were checked with the new pistons.
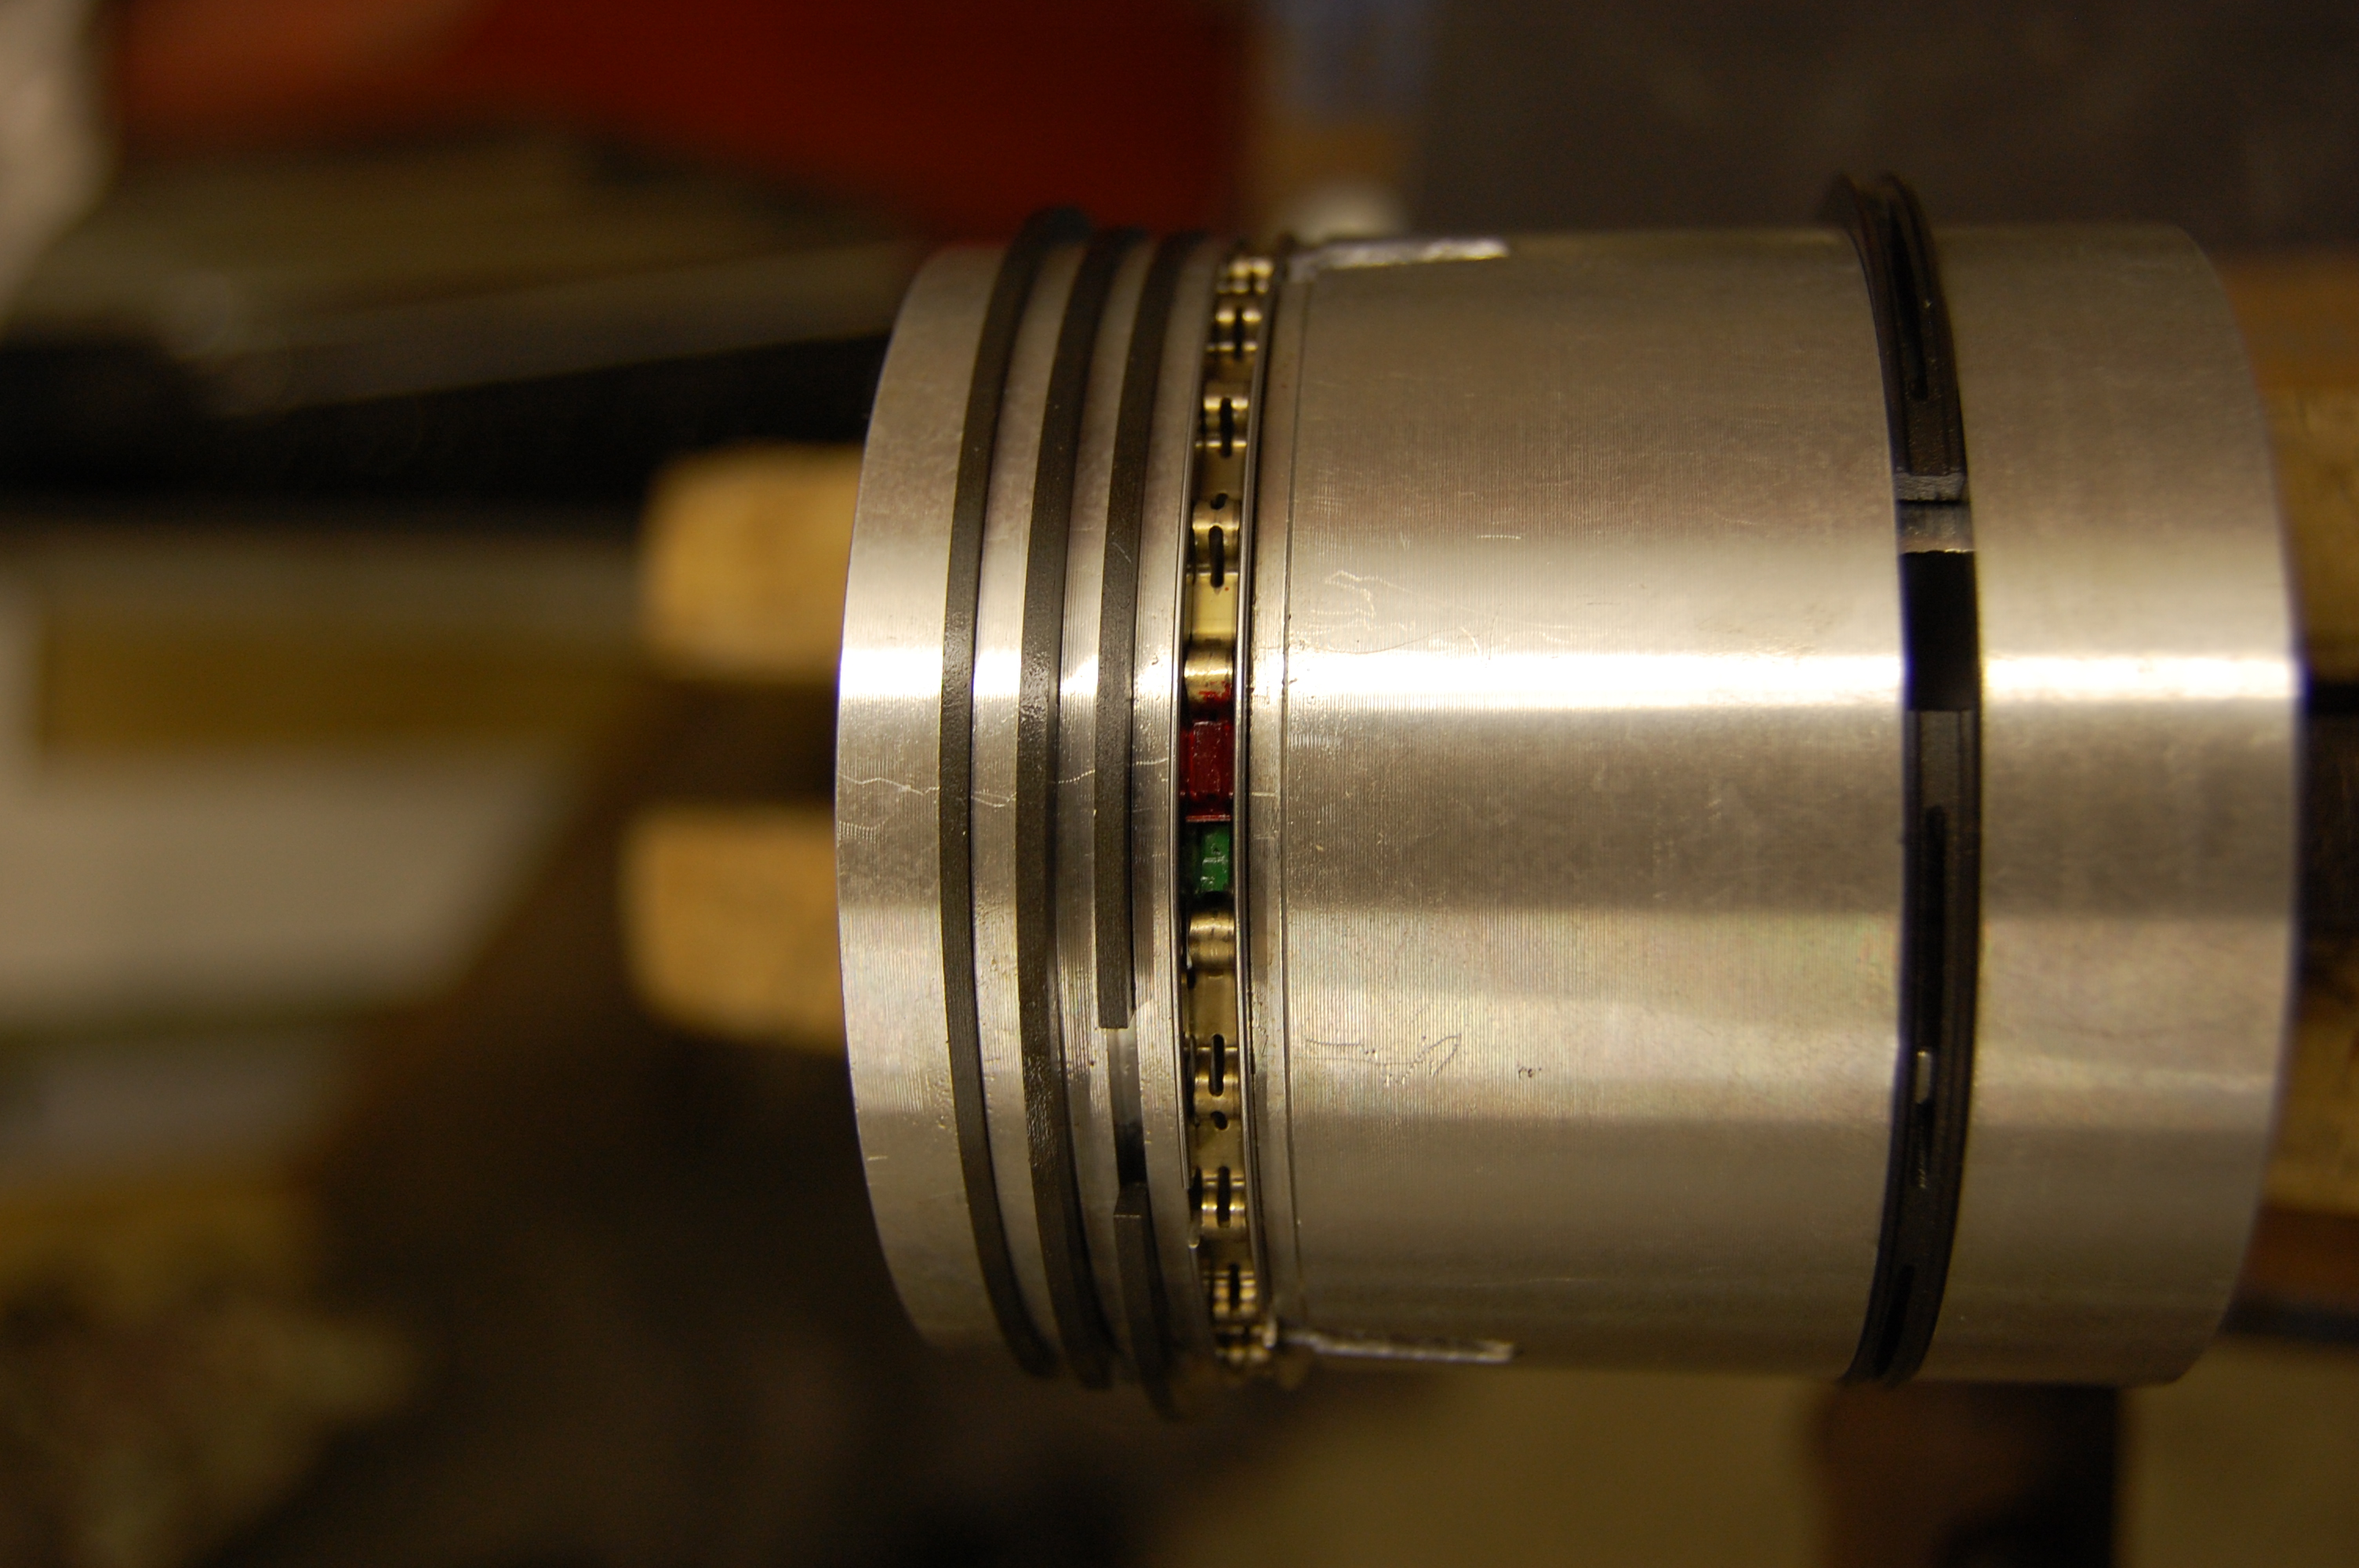
Grant pistons, with five rings. The upper oil control ring is of the spring plus two ring type. It’s essential when fitting that both the green and red ends are visible – they must not overlap
Fitting pistons. Plenty of oil and a good ring compressor makes for an easy job.
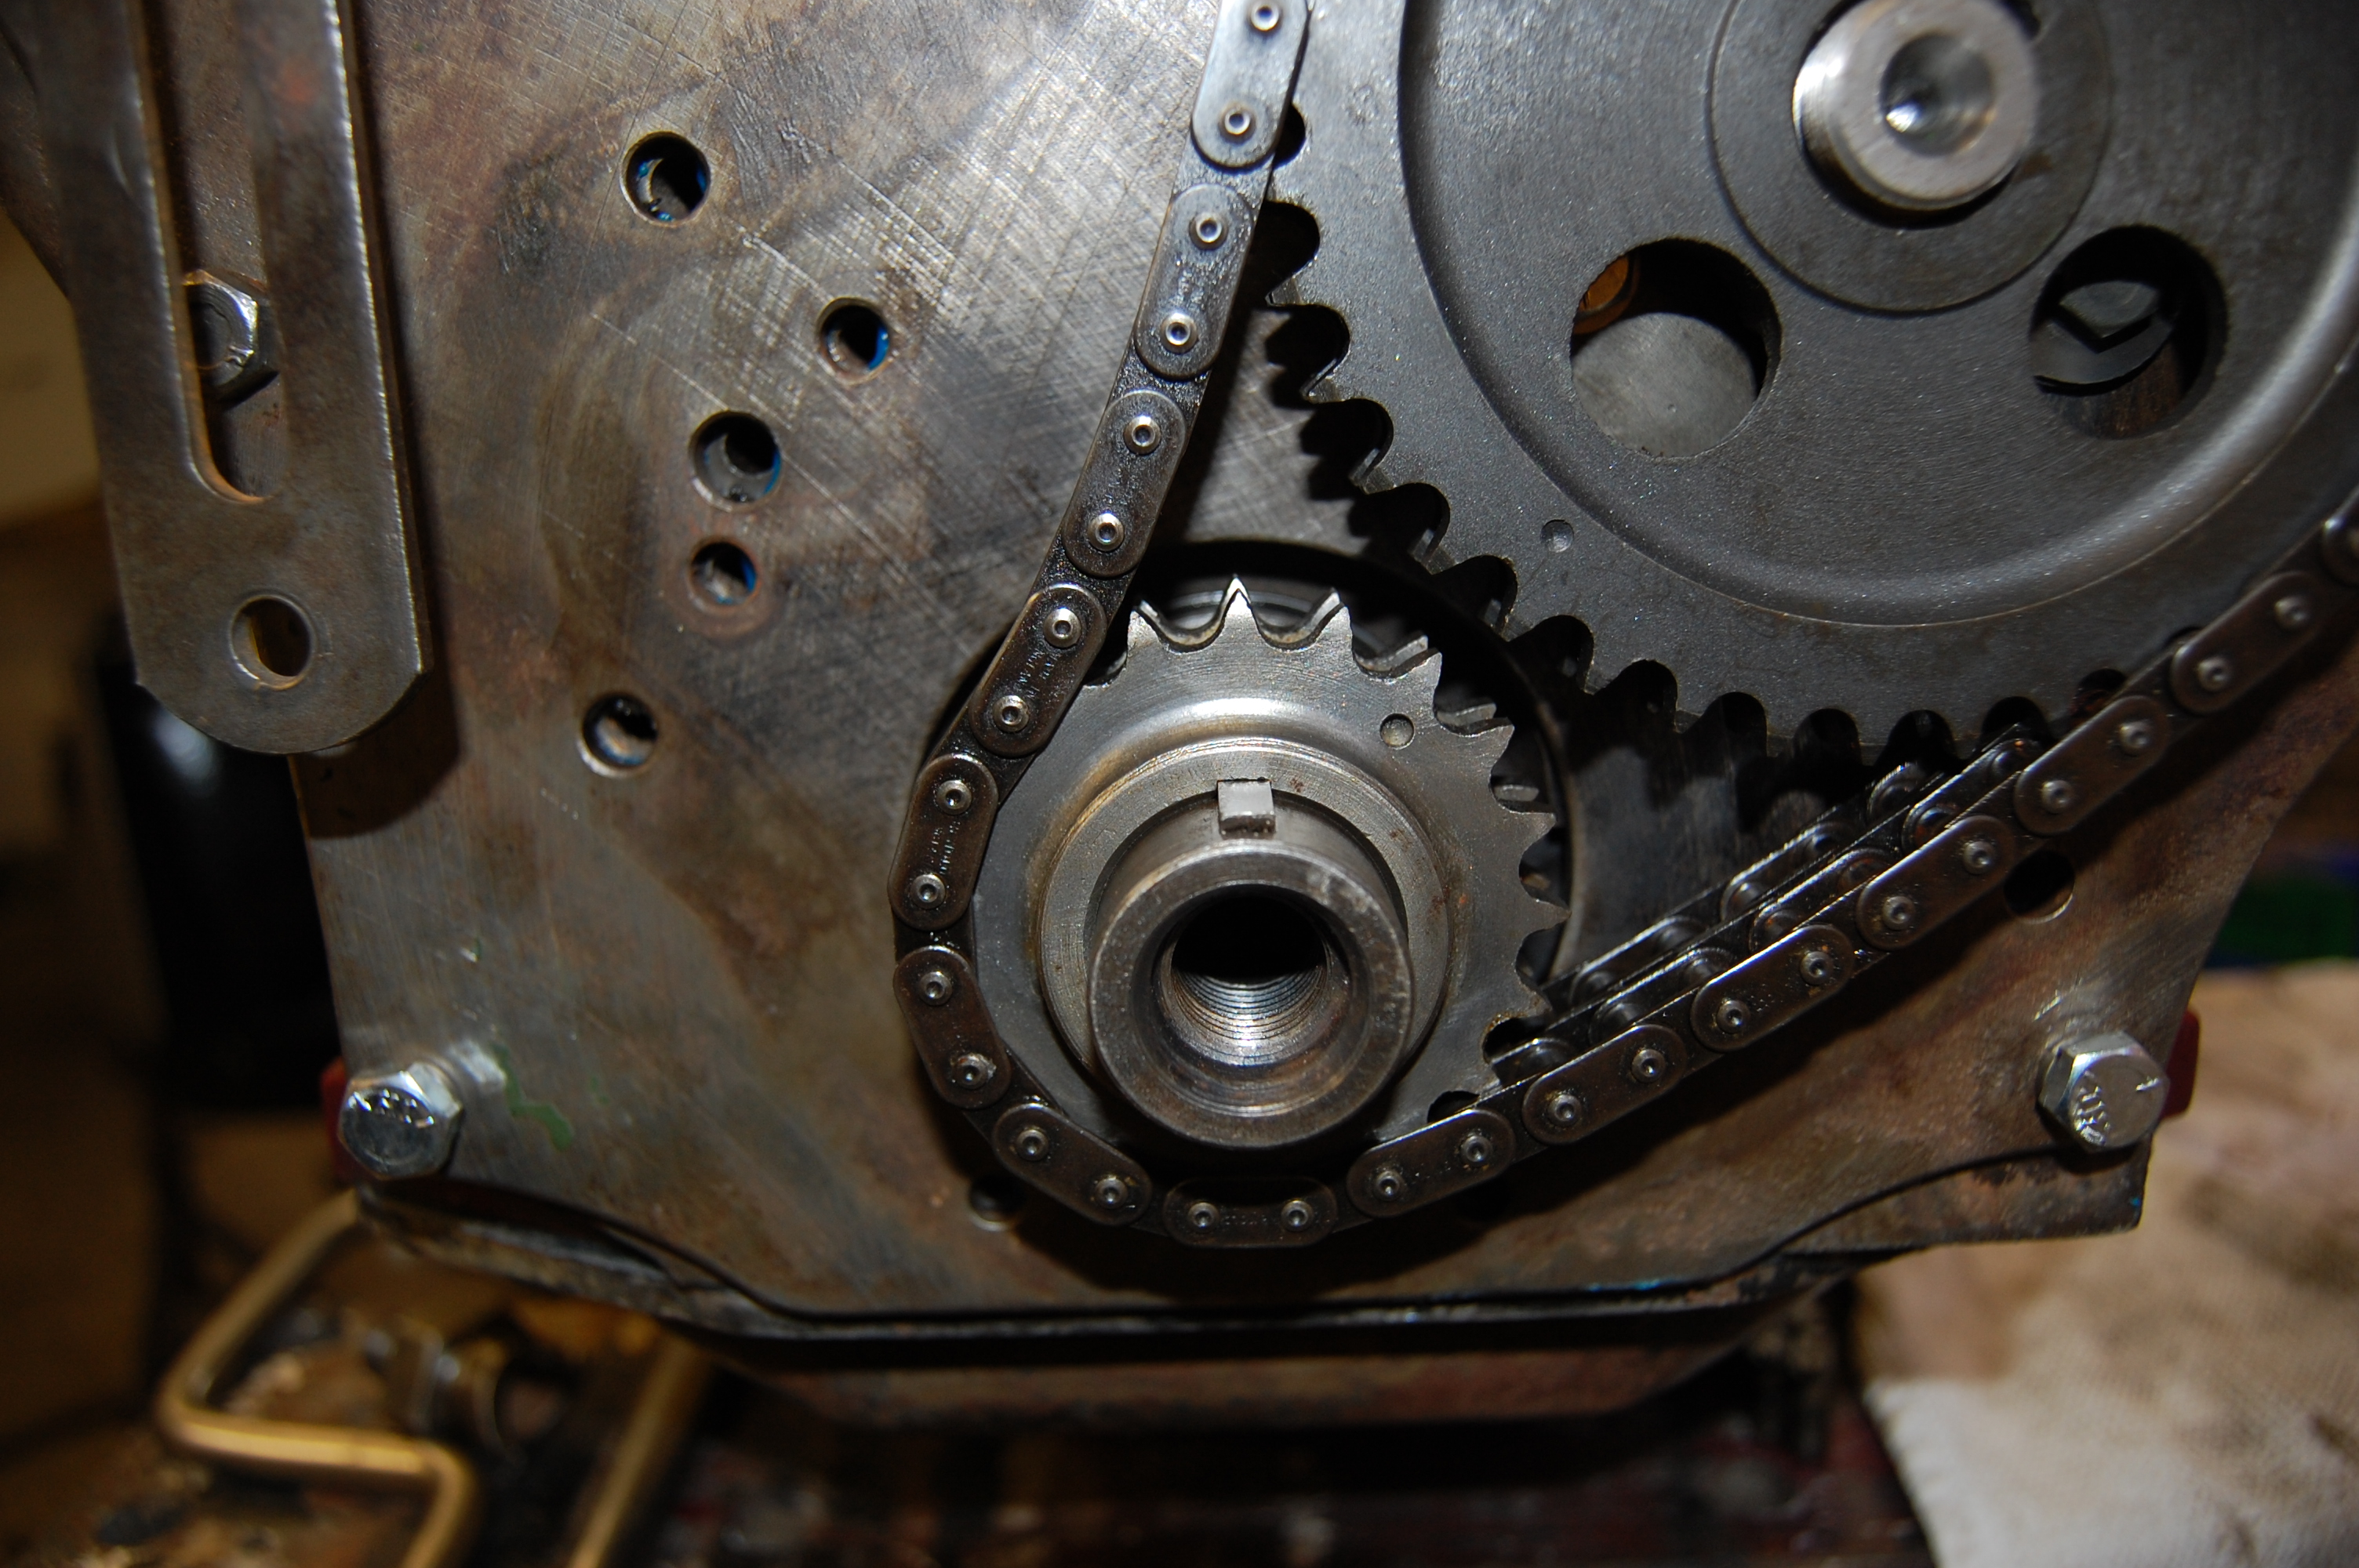
Camshaft timing – aligning the timing gears.
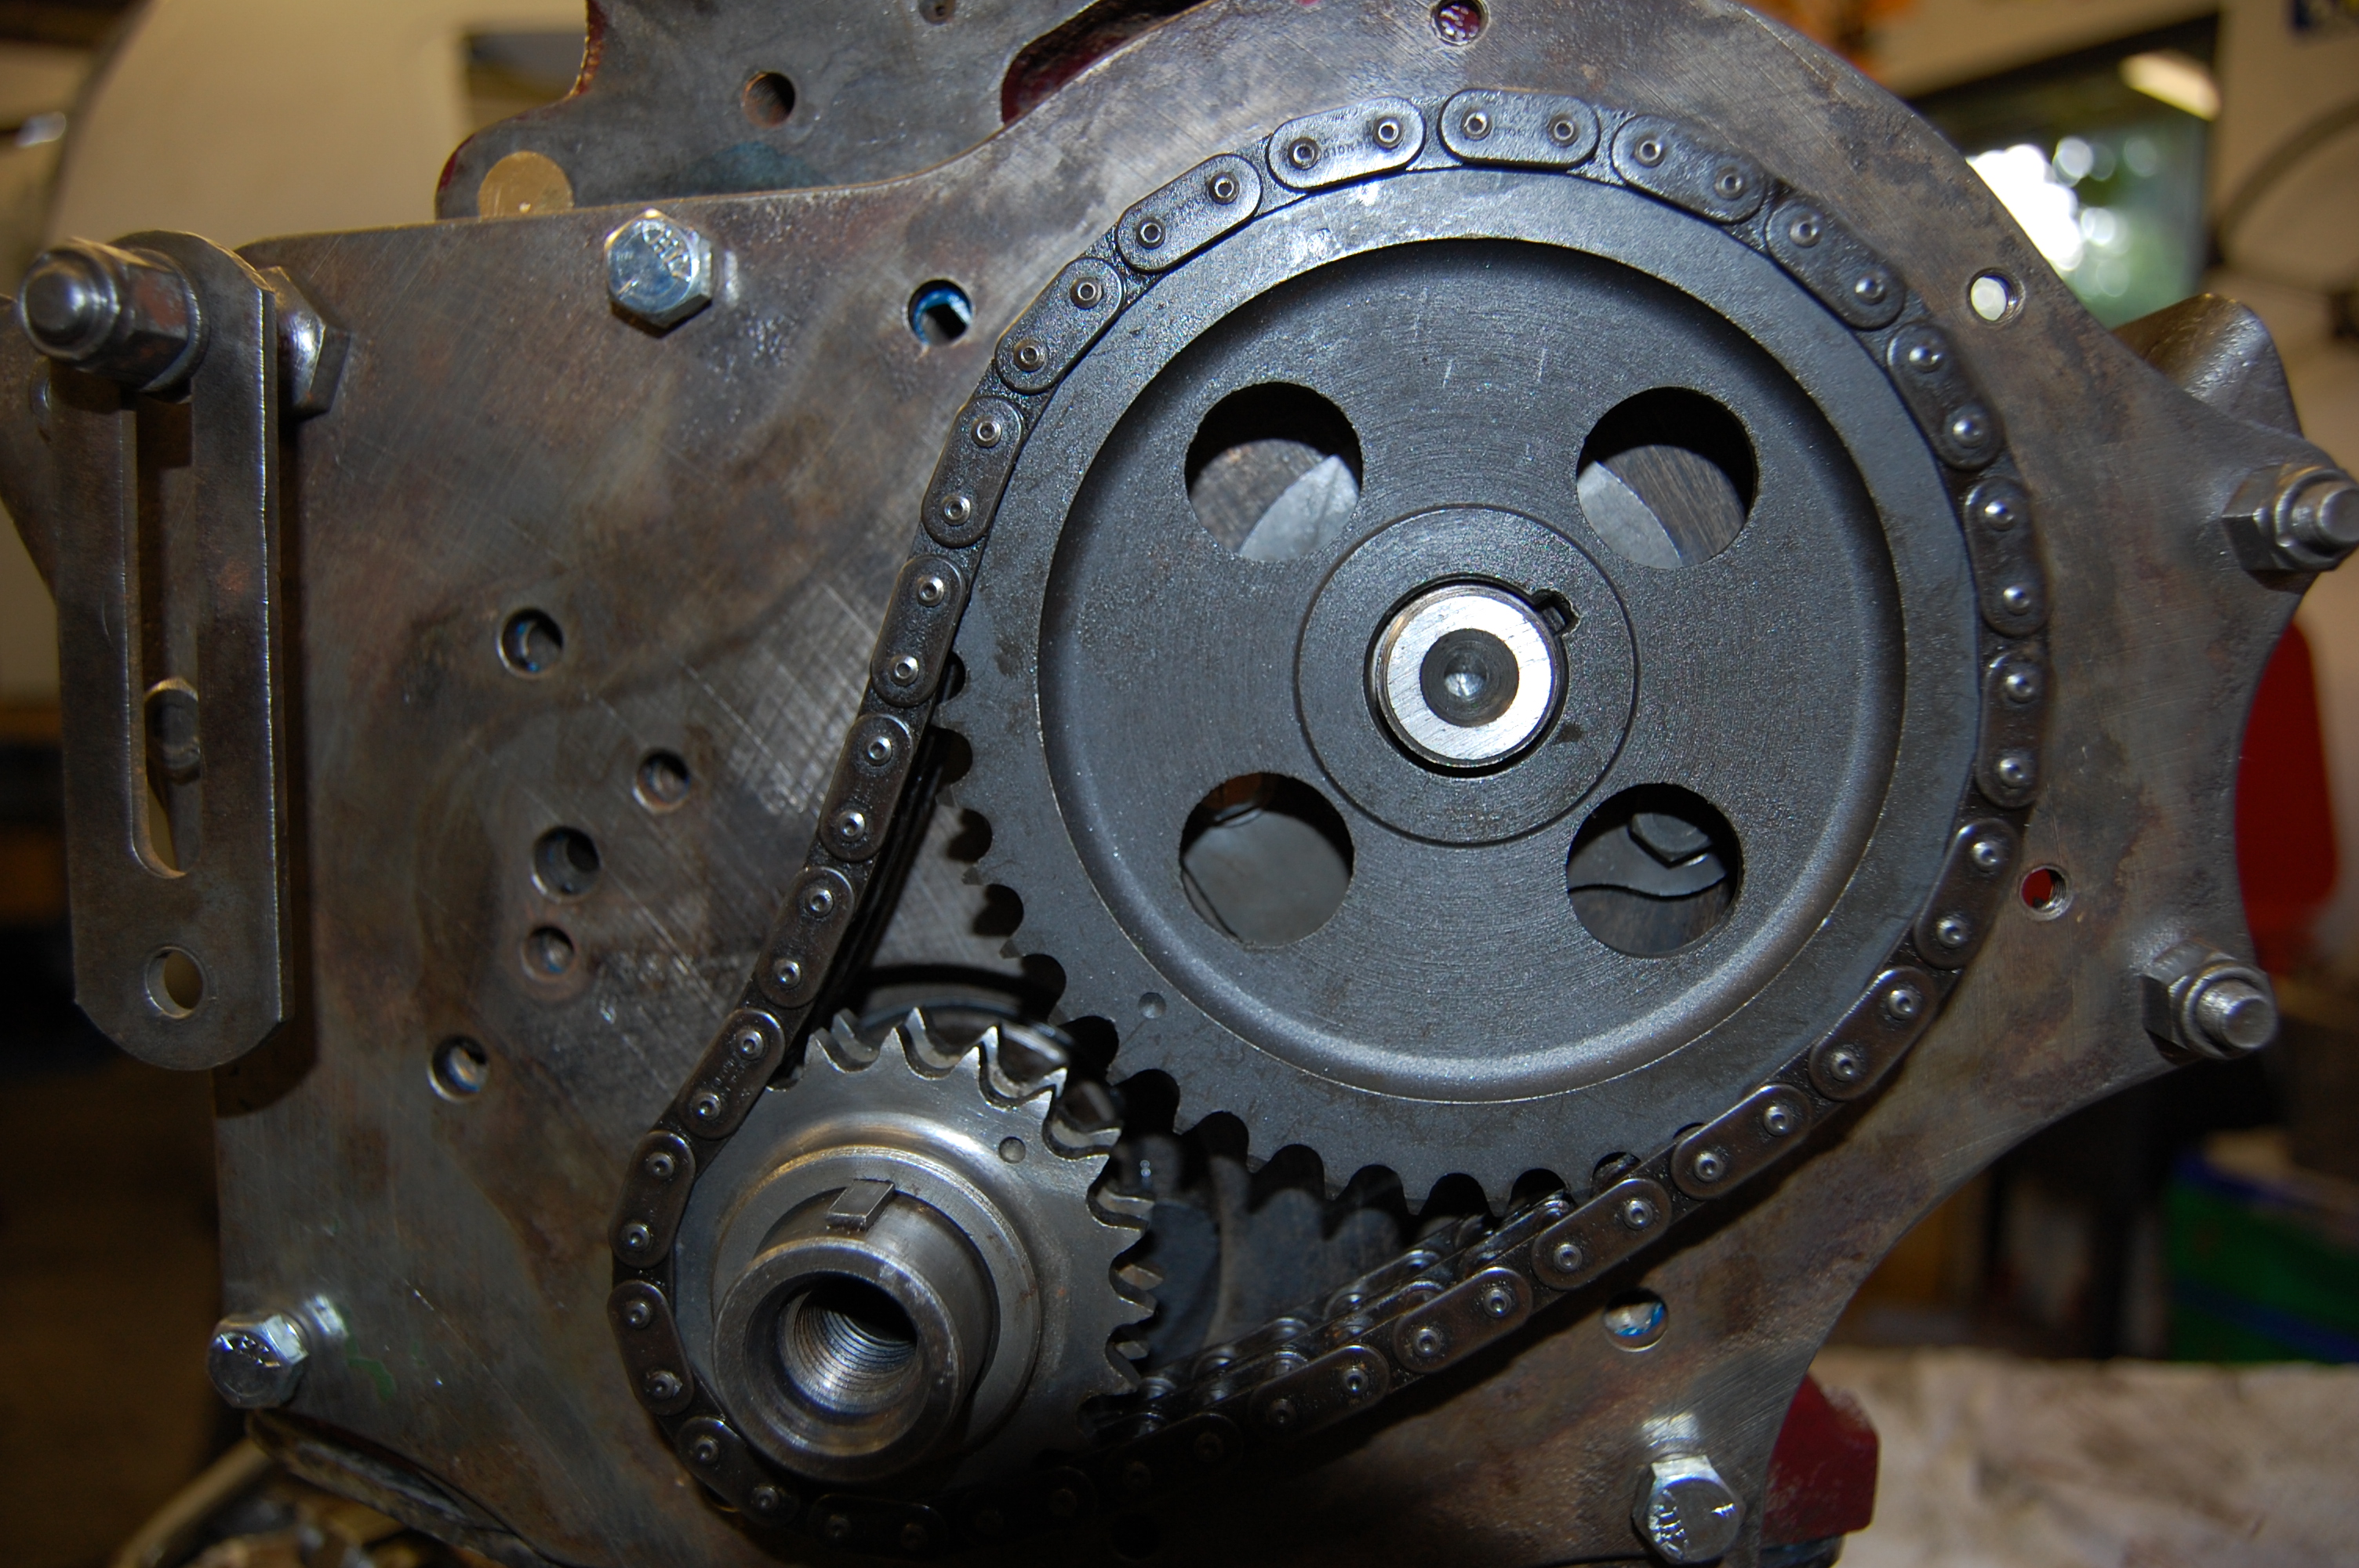
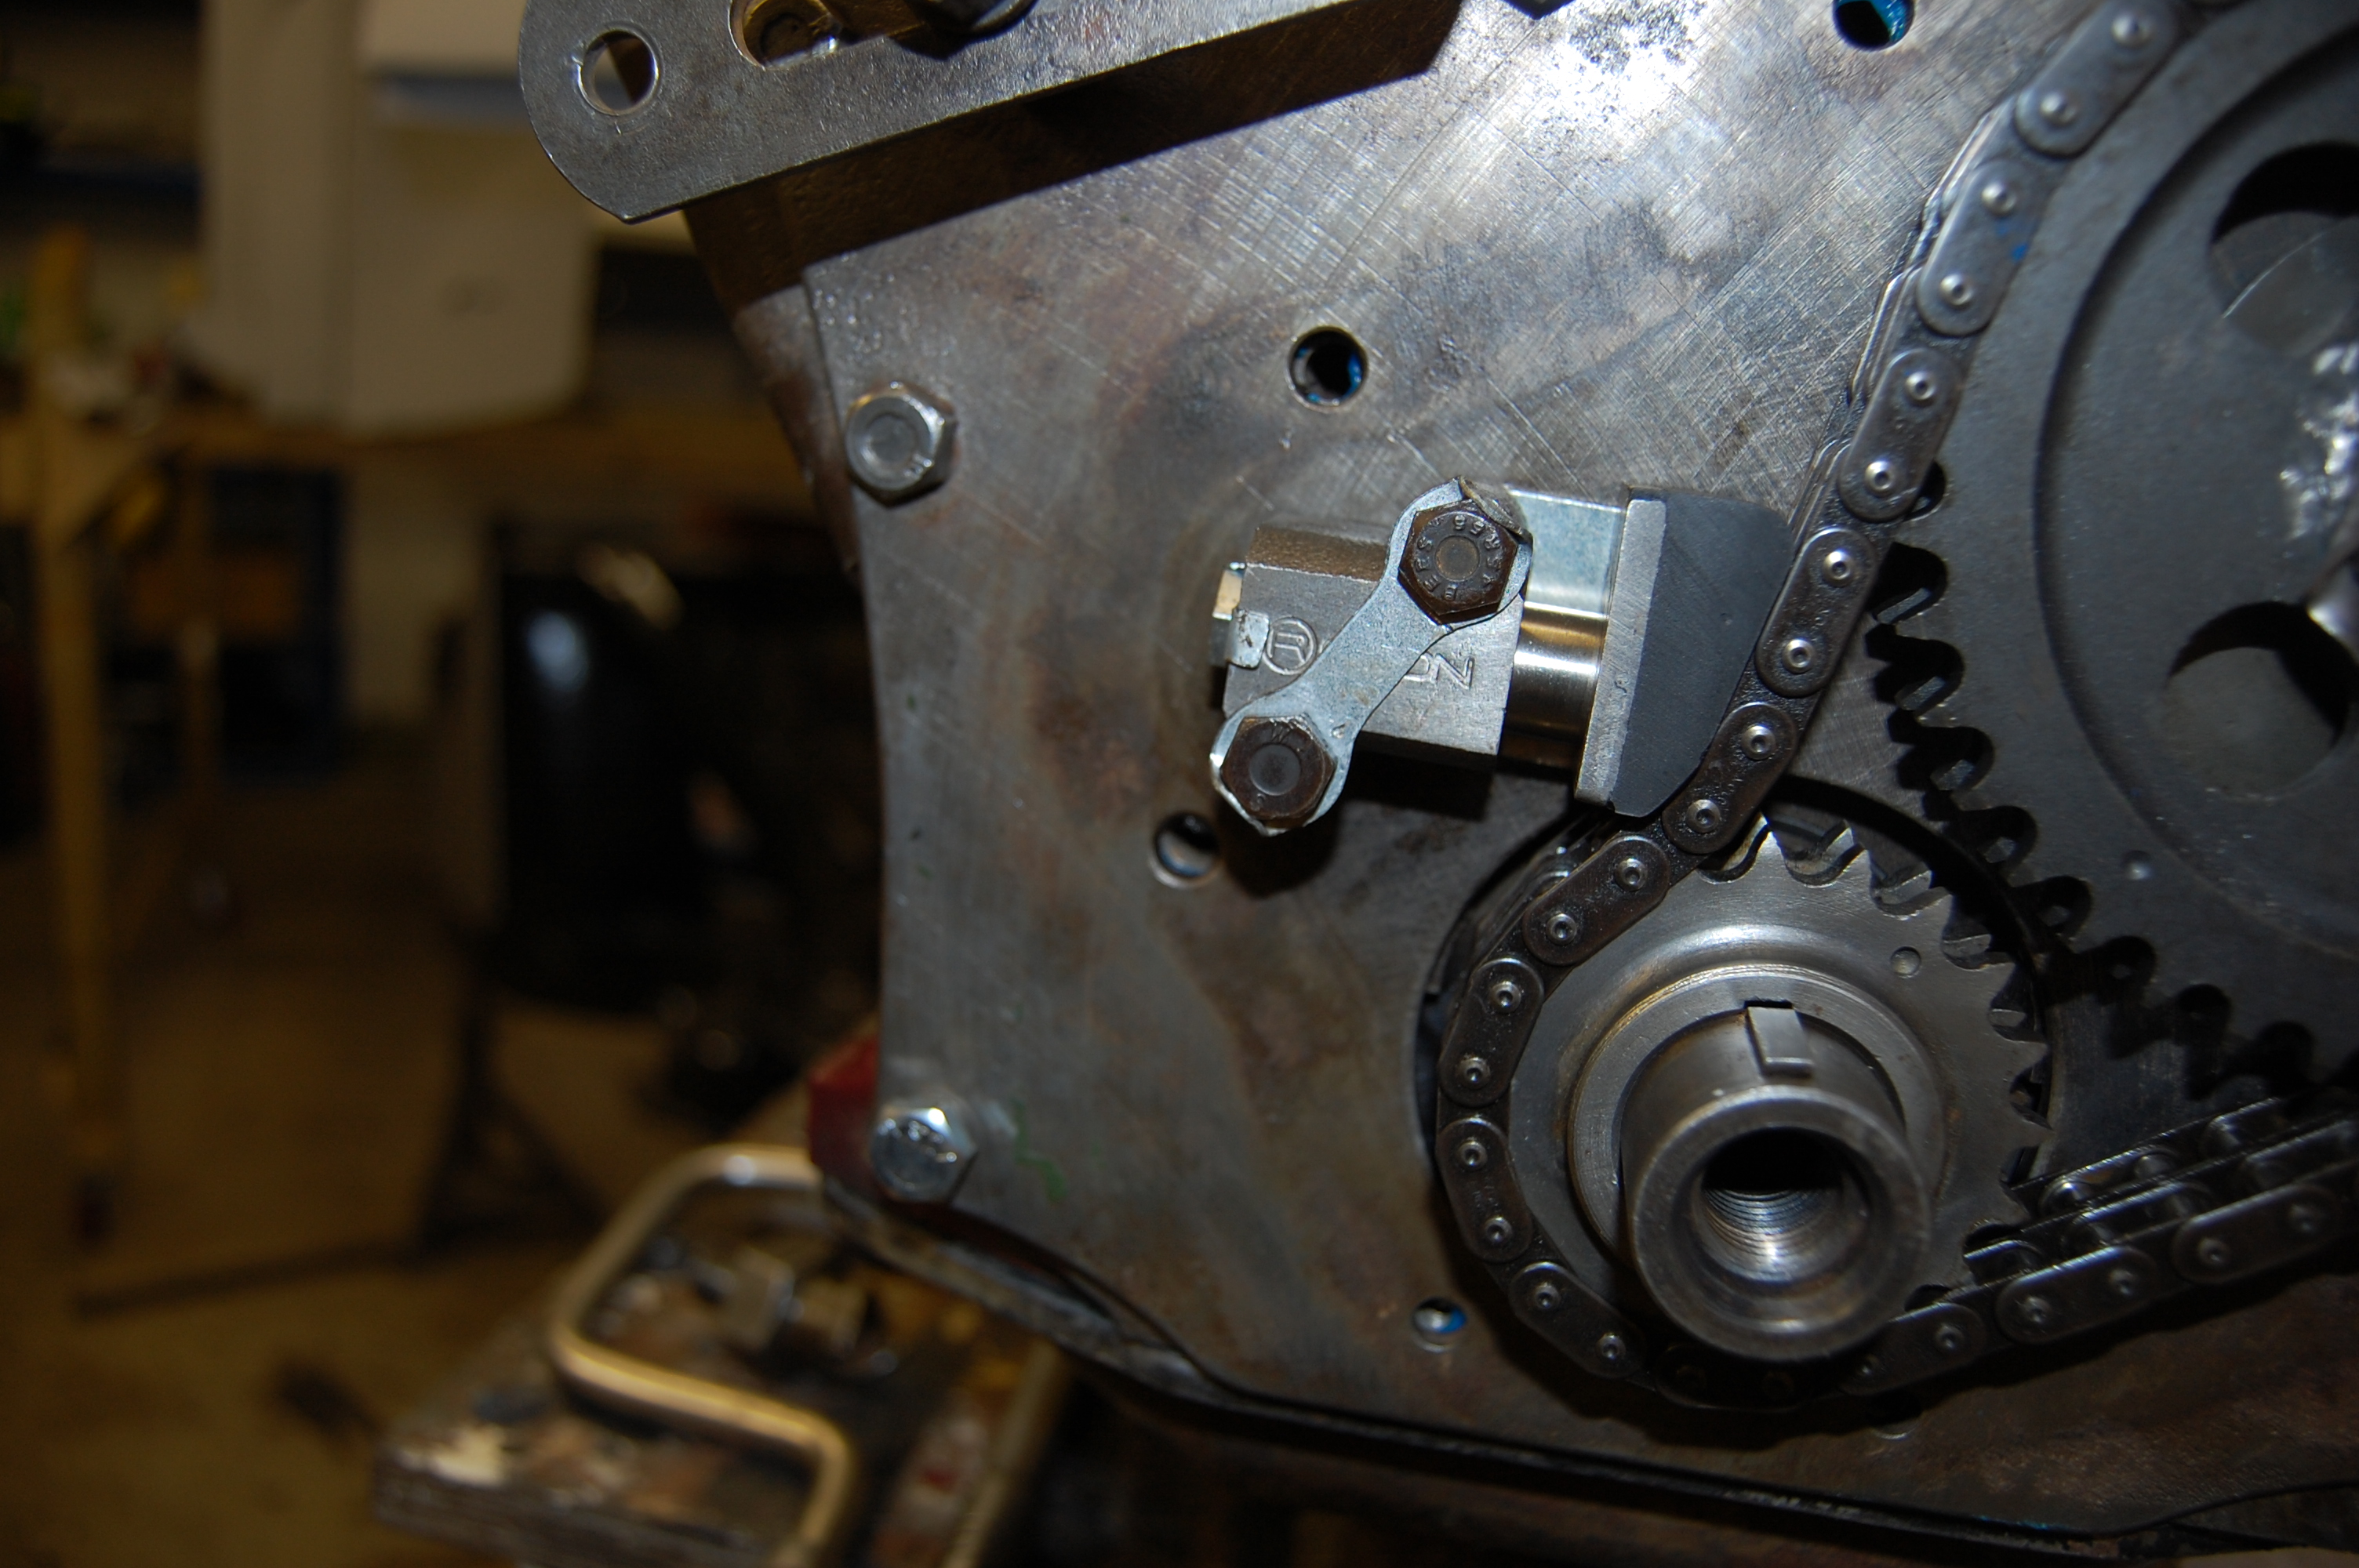
I forgot to fit the small gasket that sits behind the chain tensioner and only realised after finishing the job and fitting the timing cover. The gasket is supplied with the top end gasket set.
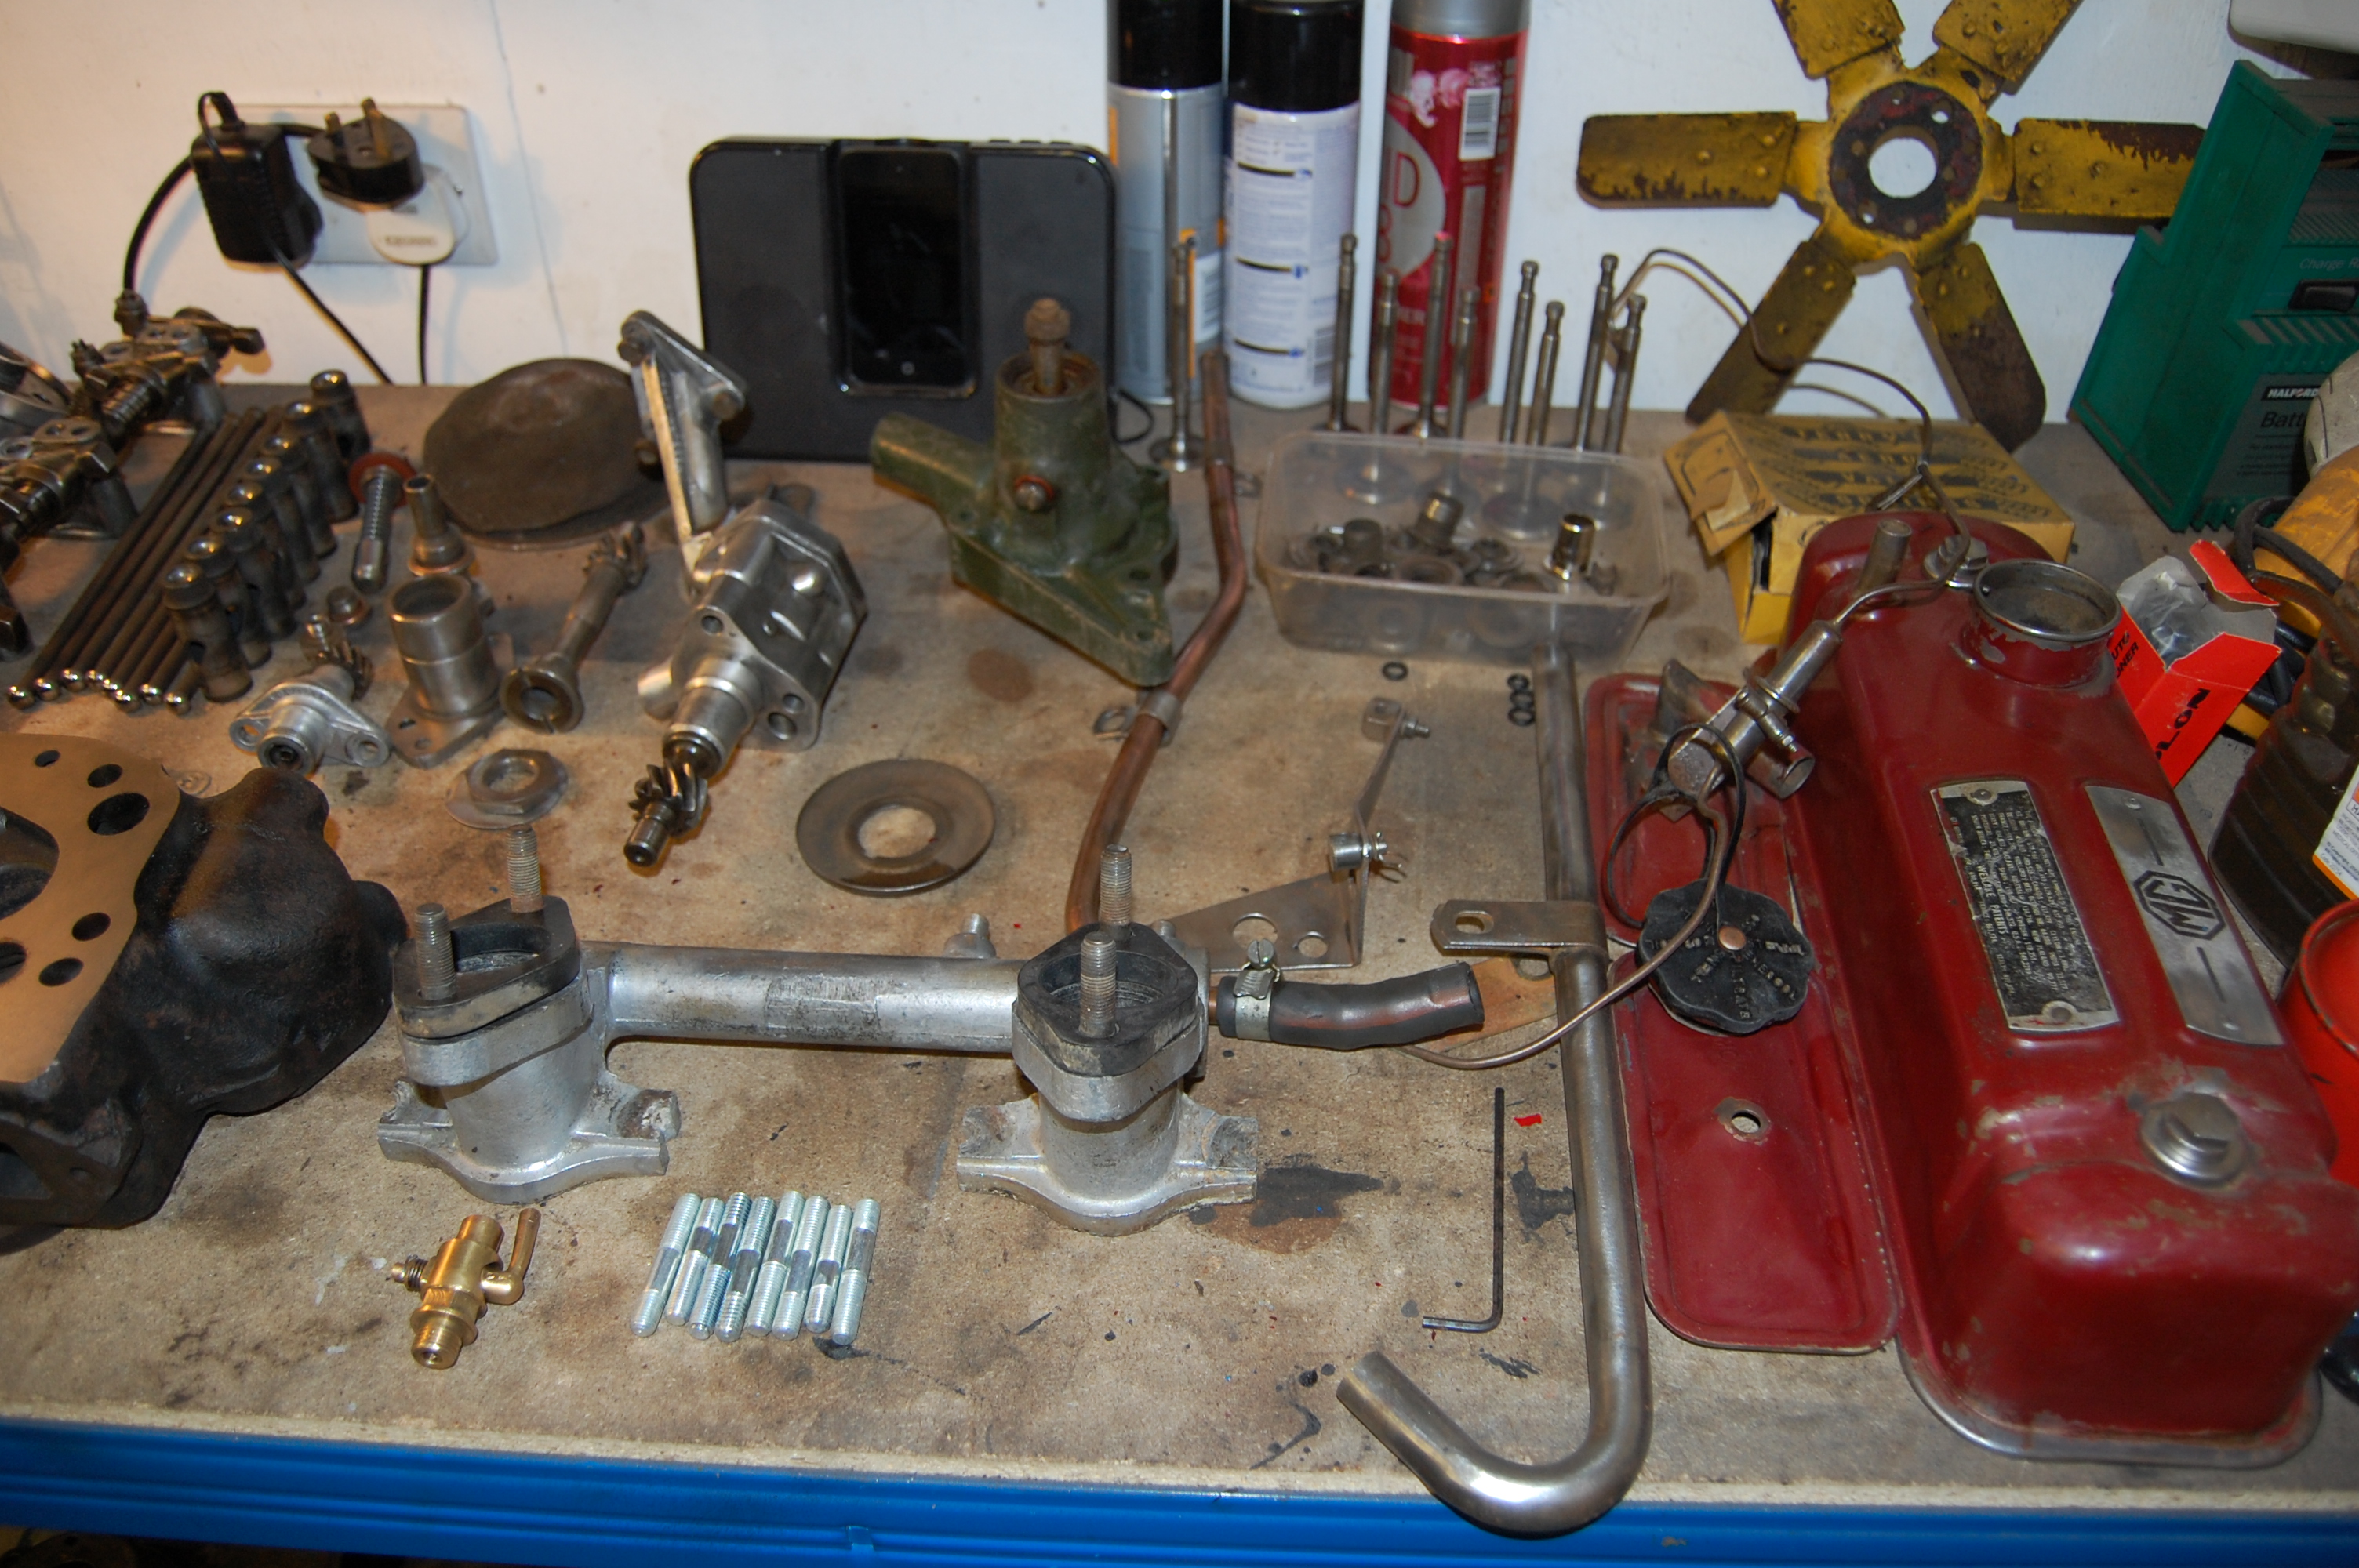
Building up the engine from this point is straightforward and only the usual care and diligence with use of gasket sealent, careful tightening of bolts etc is required.
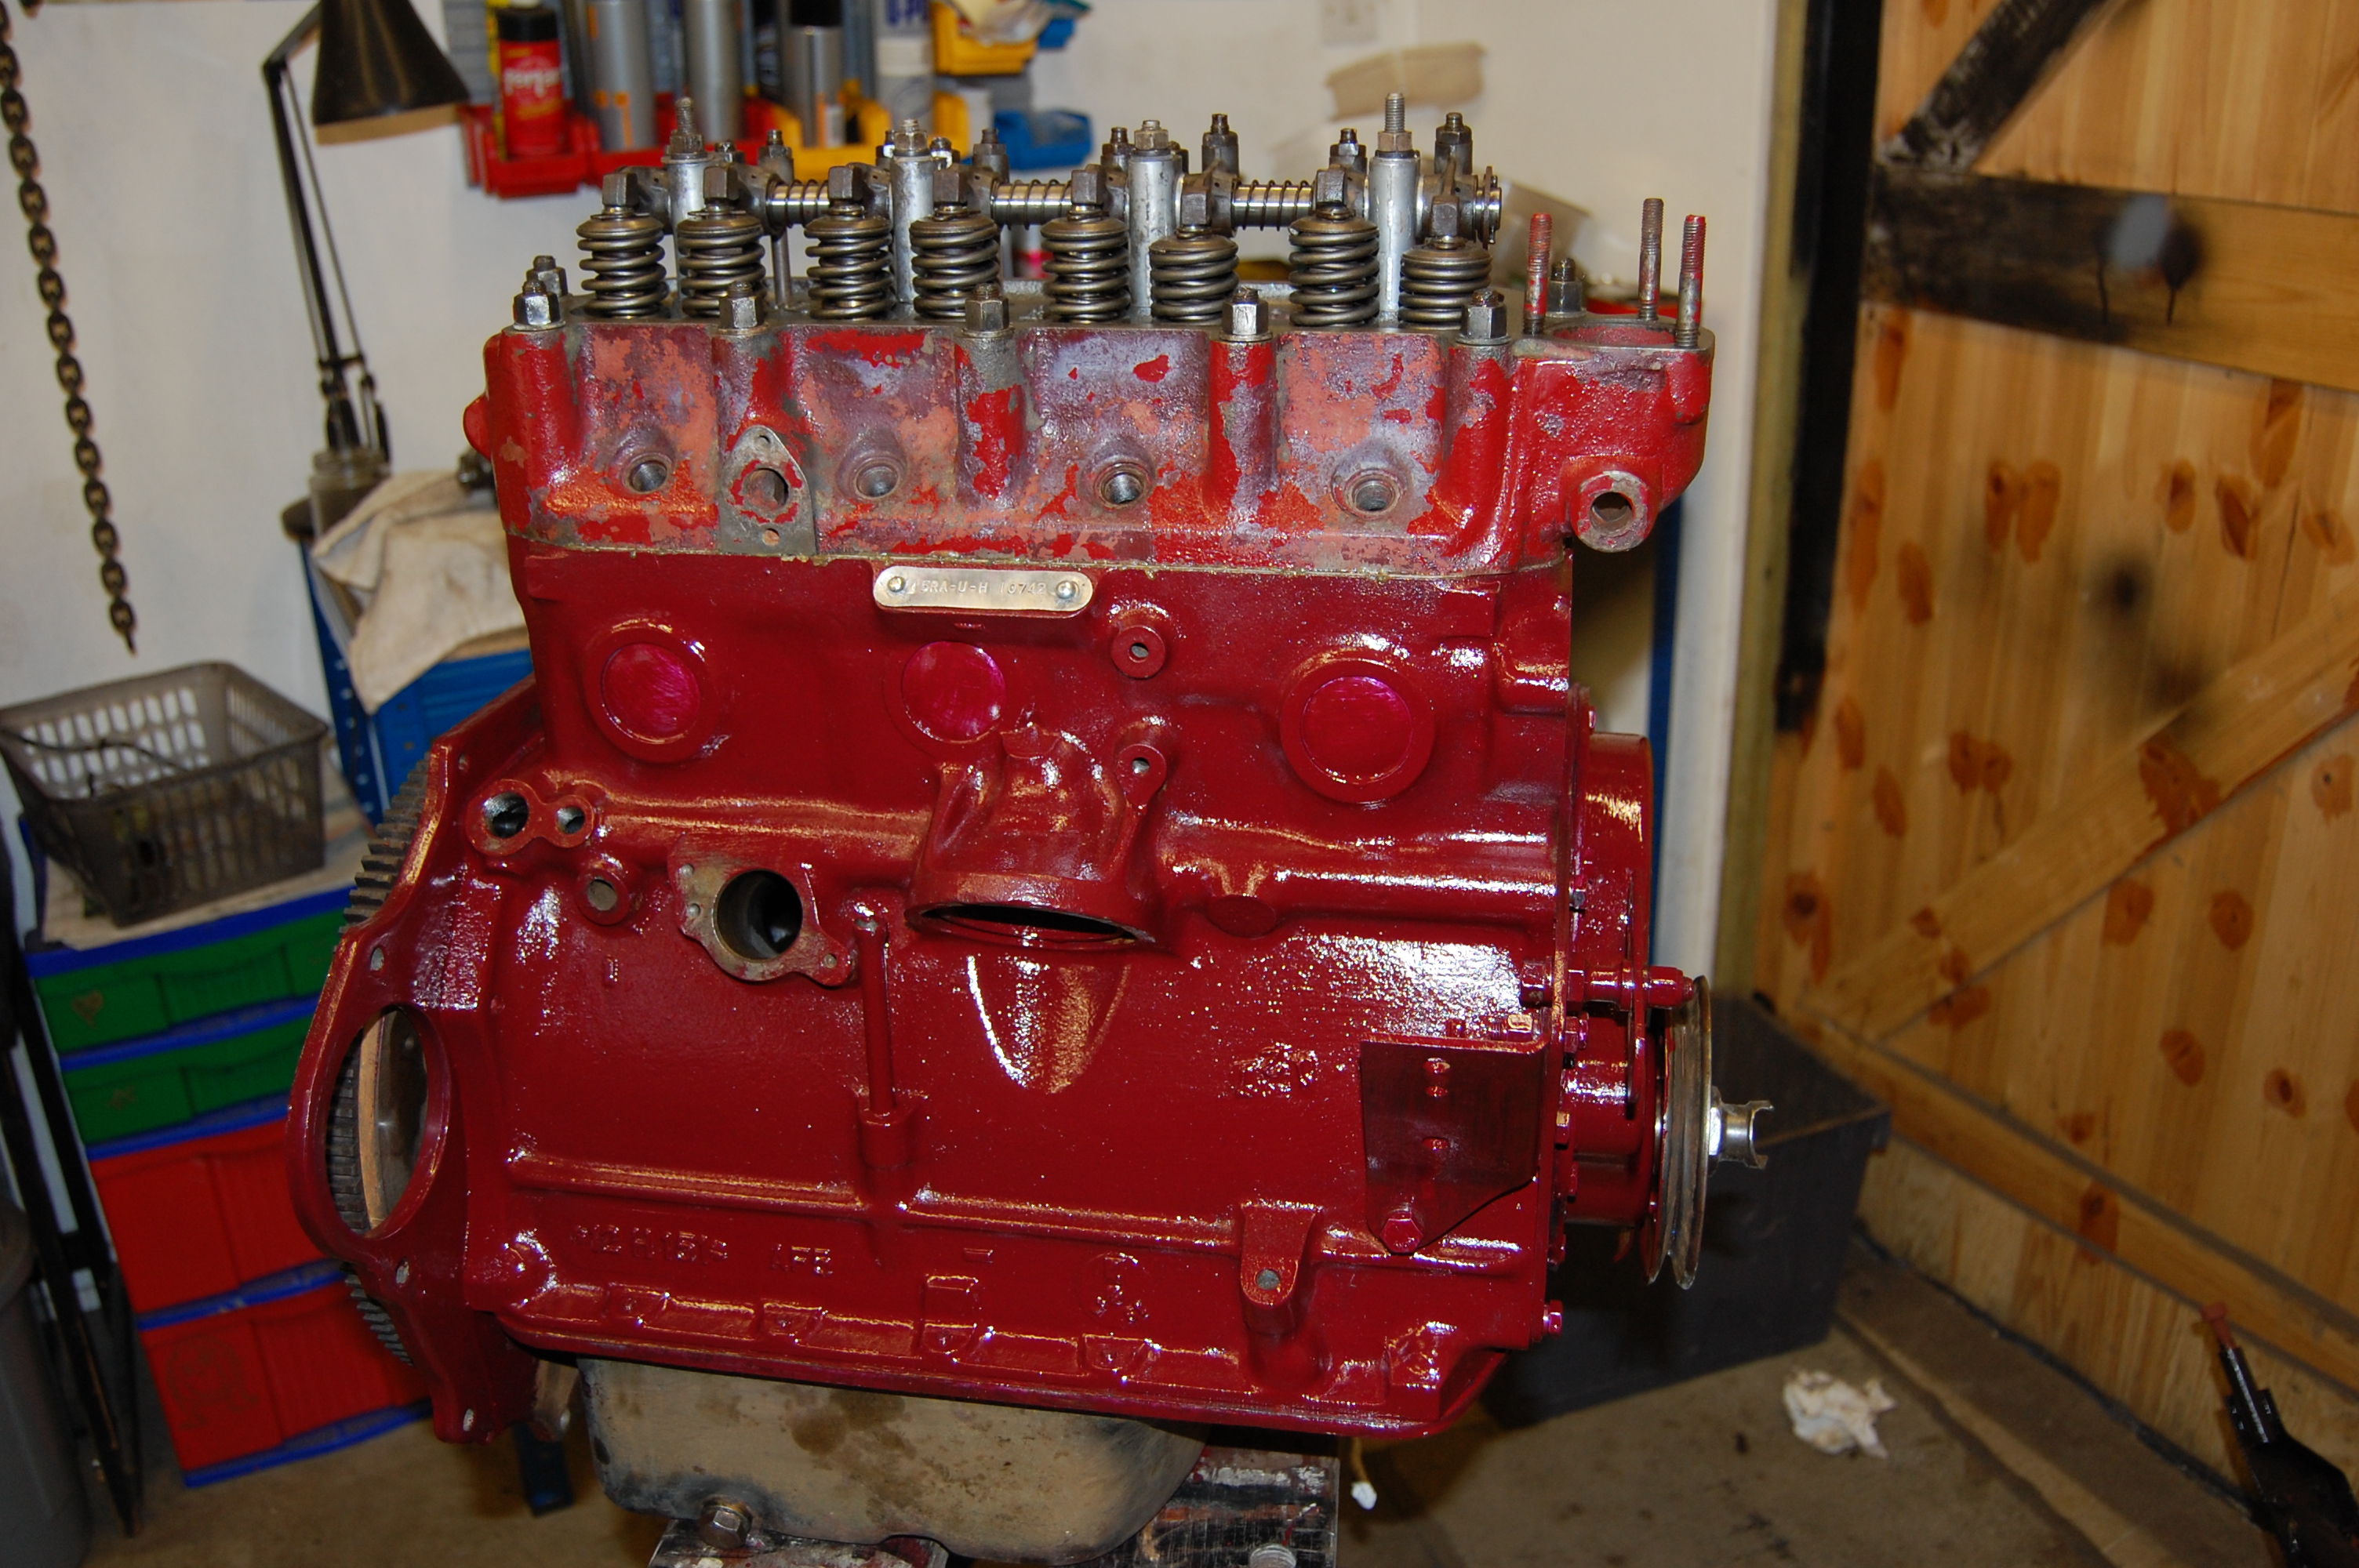
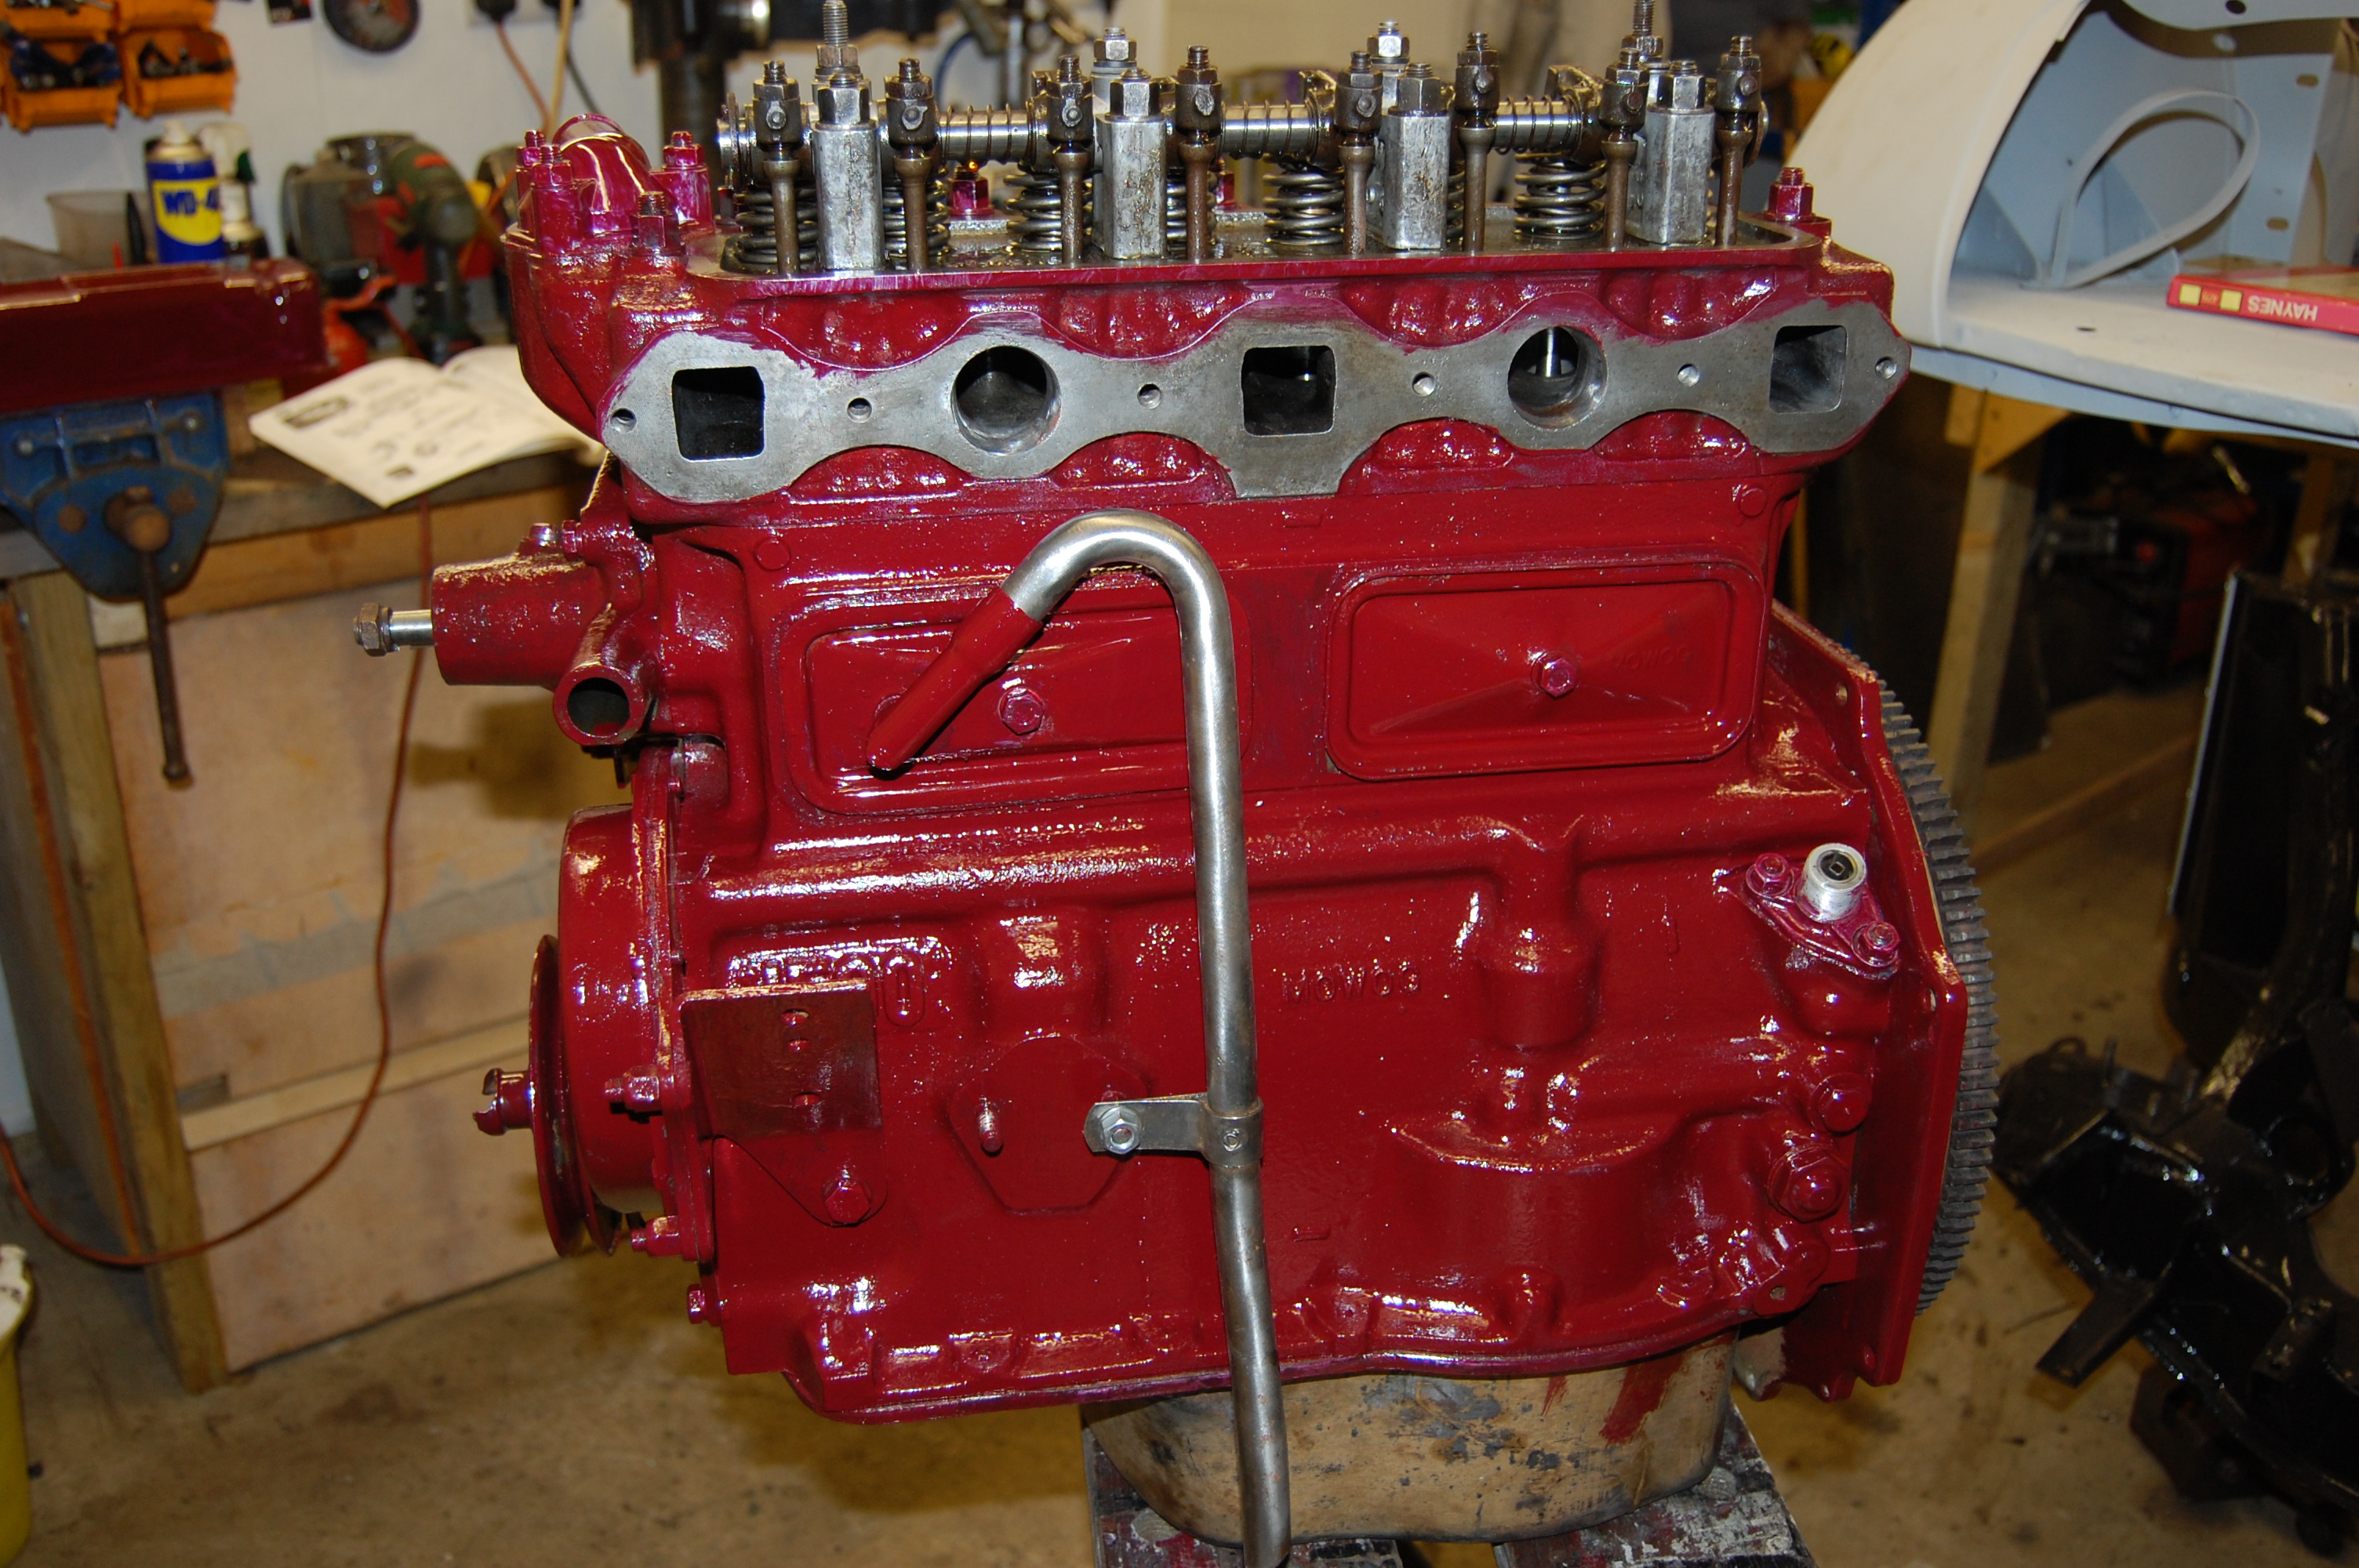
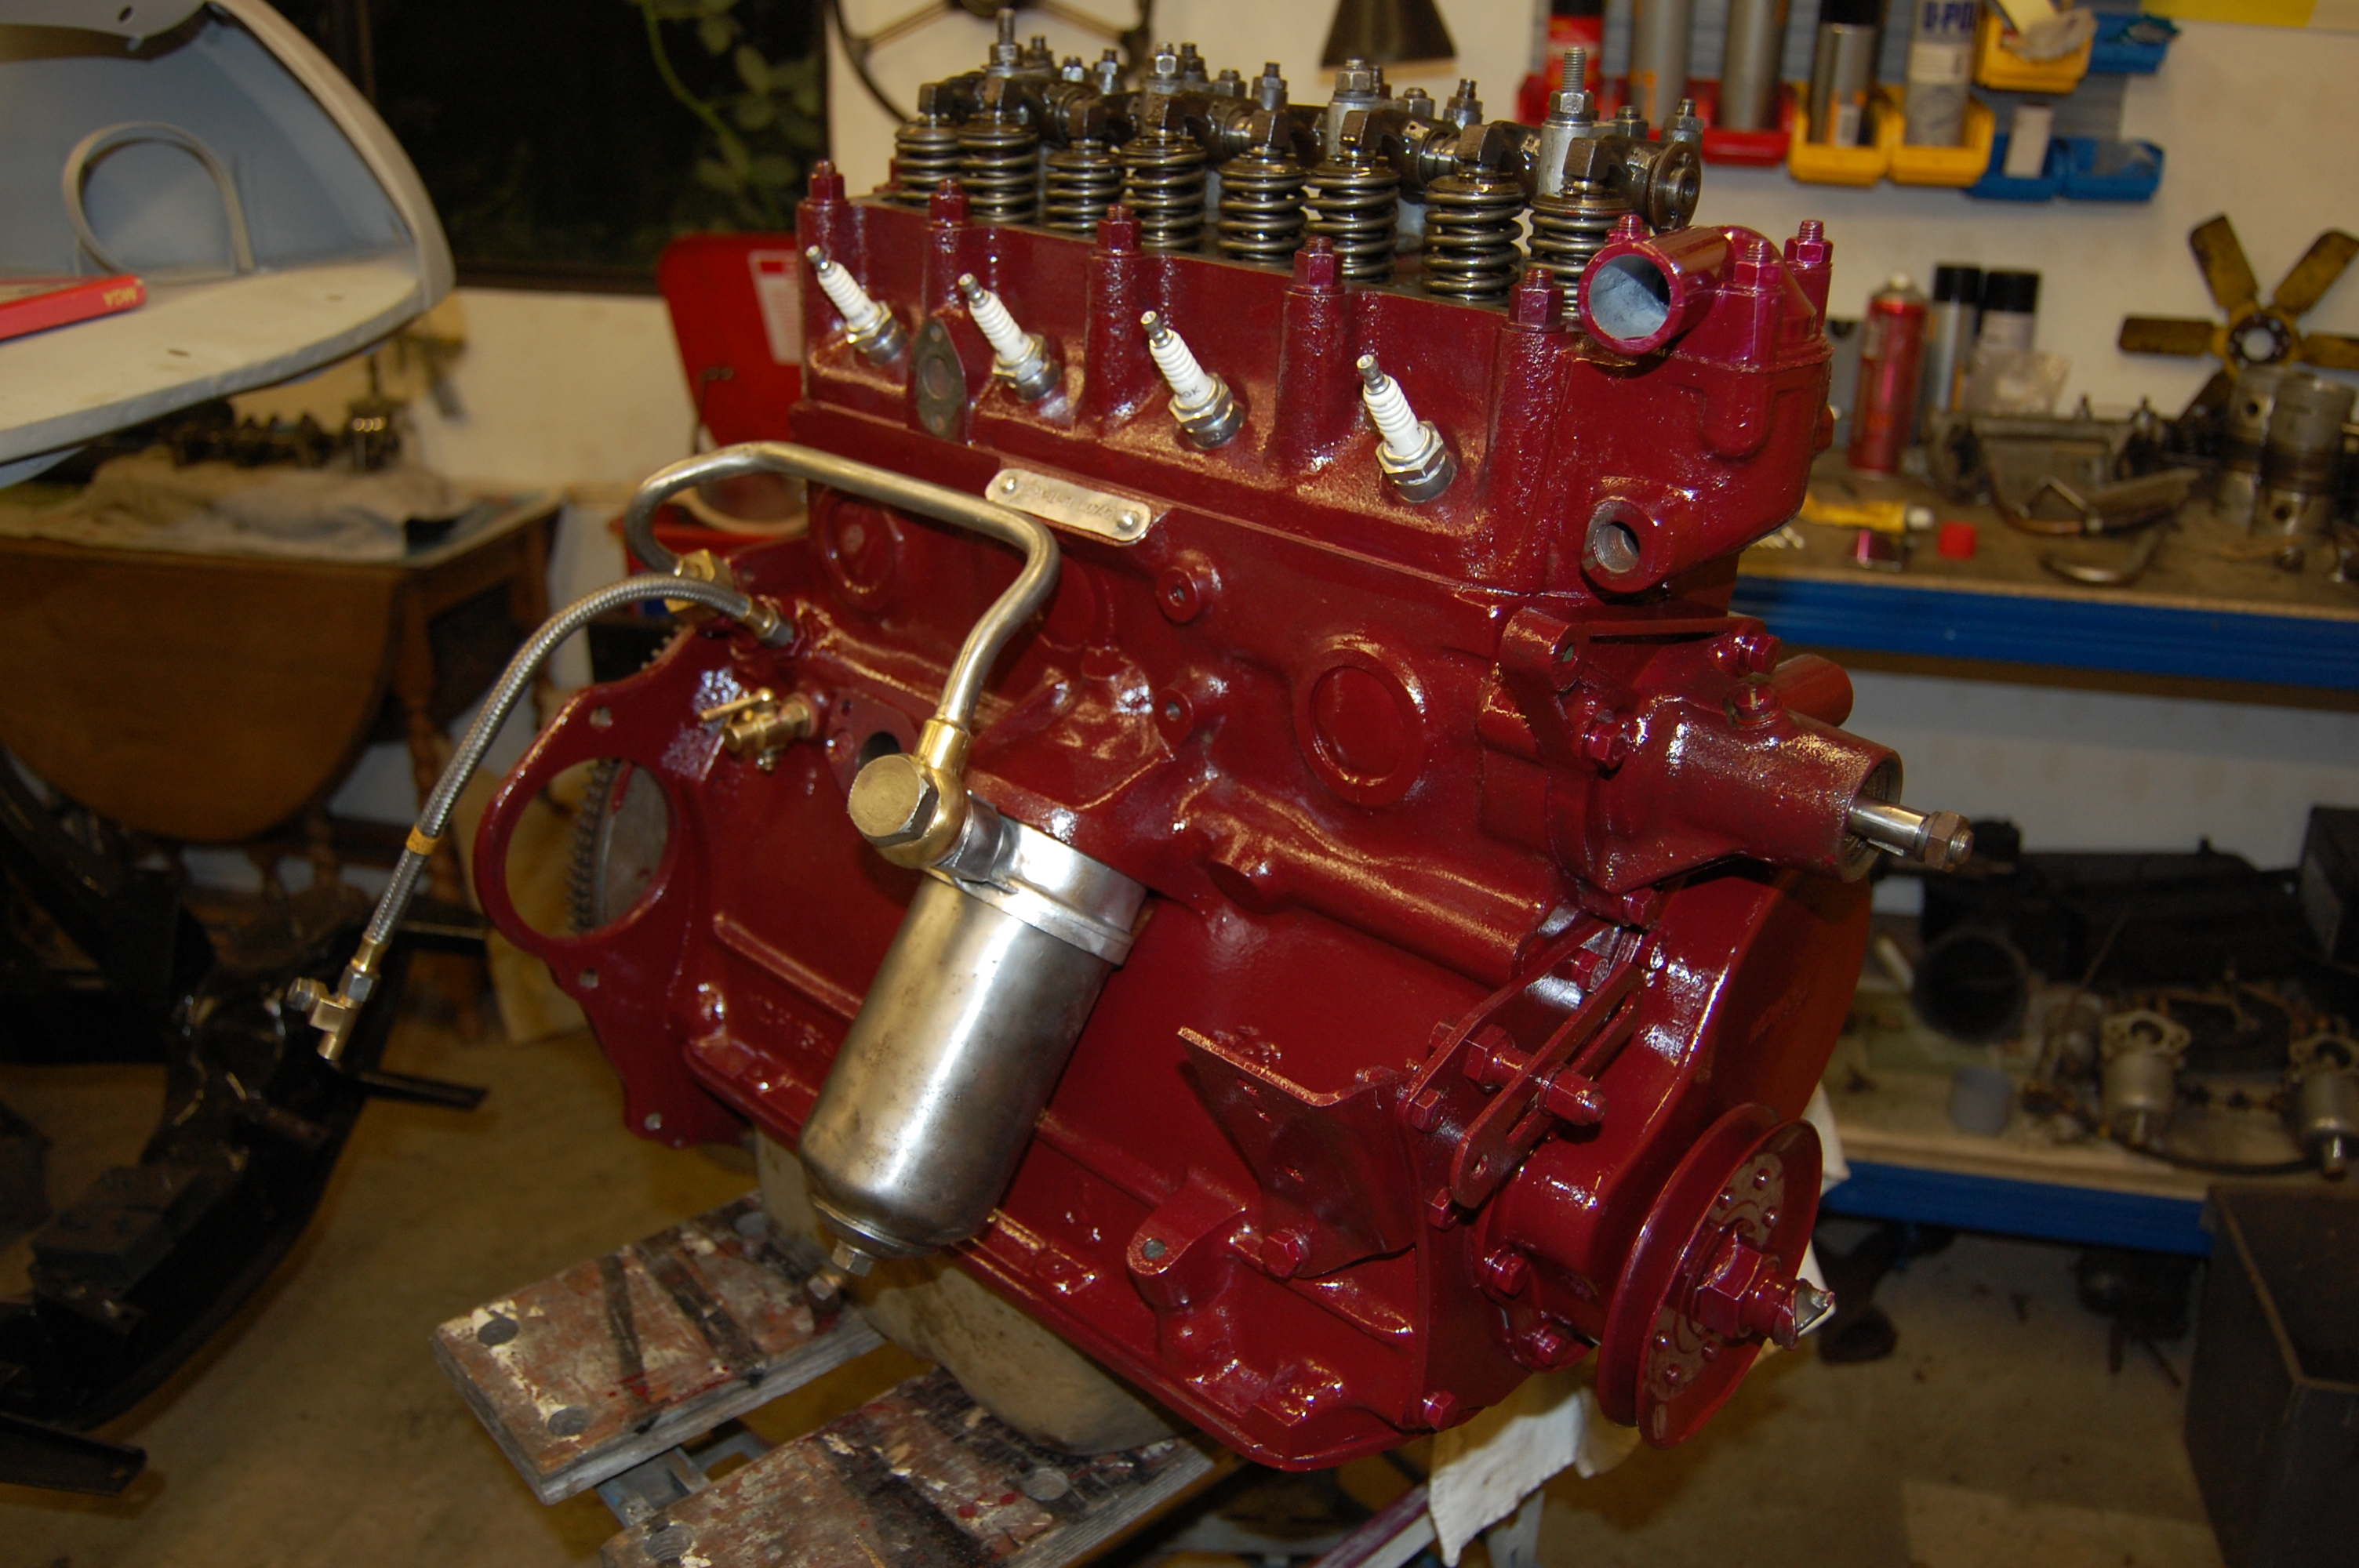

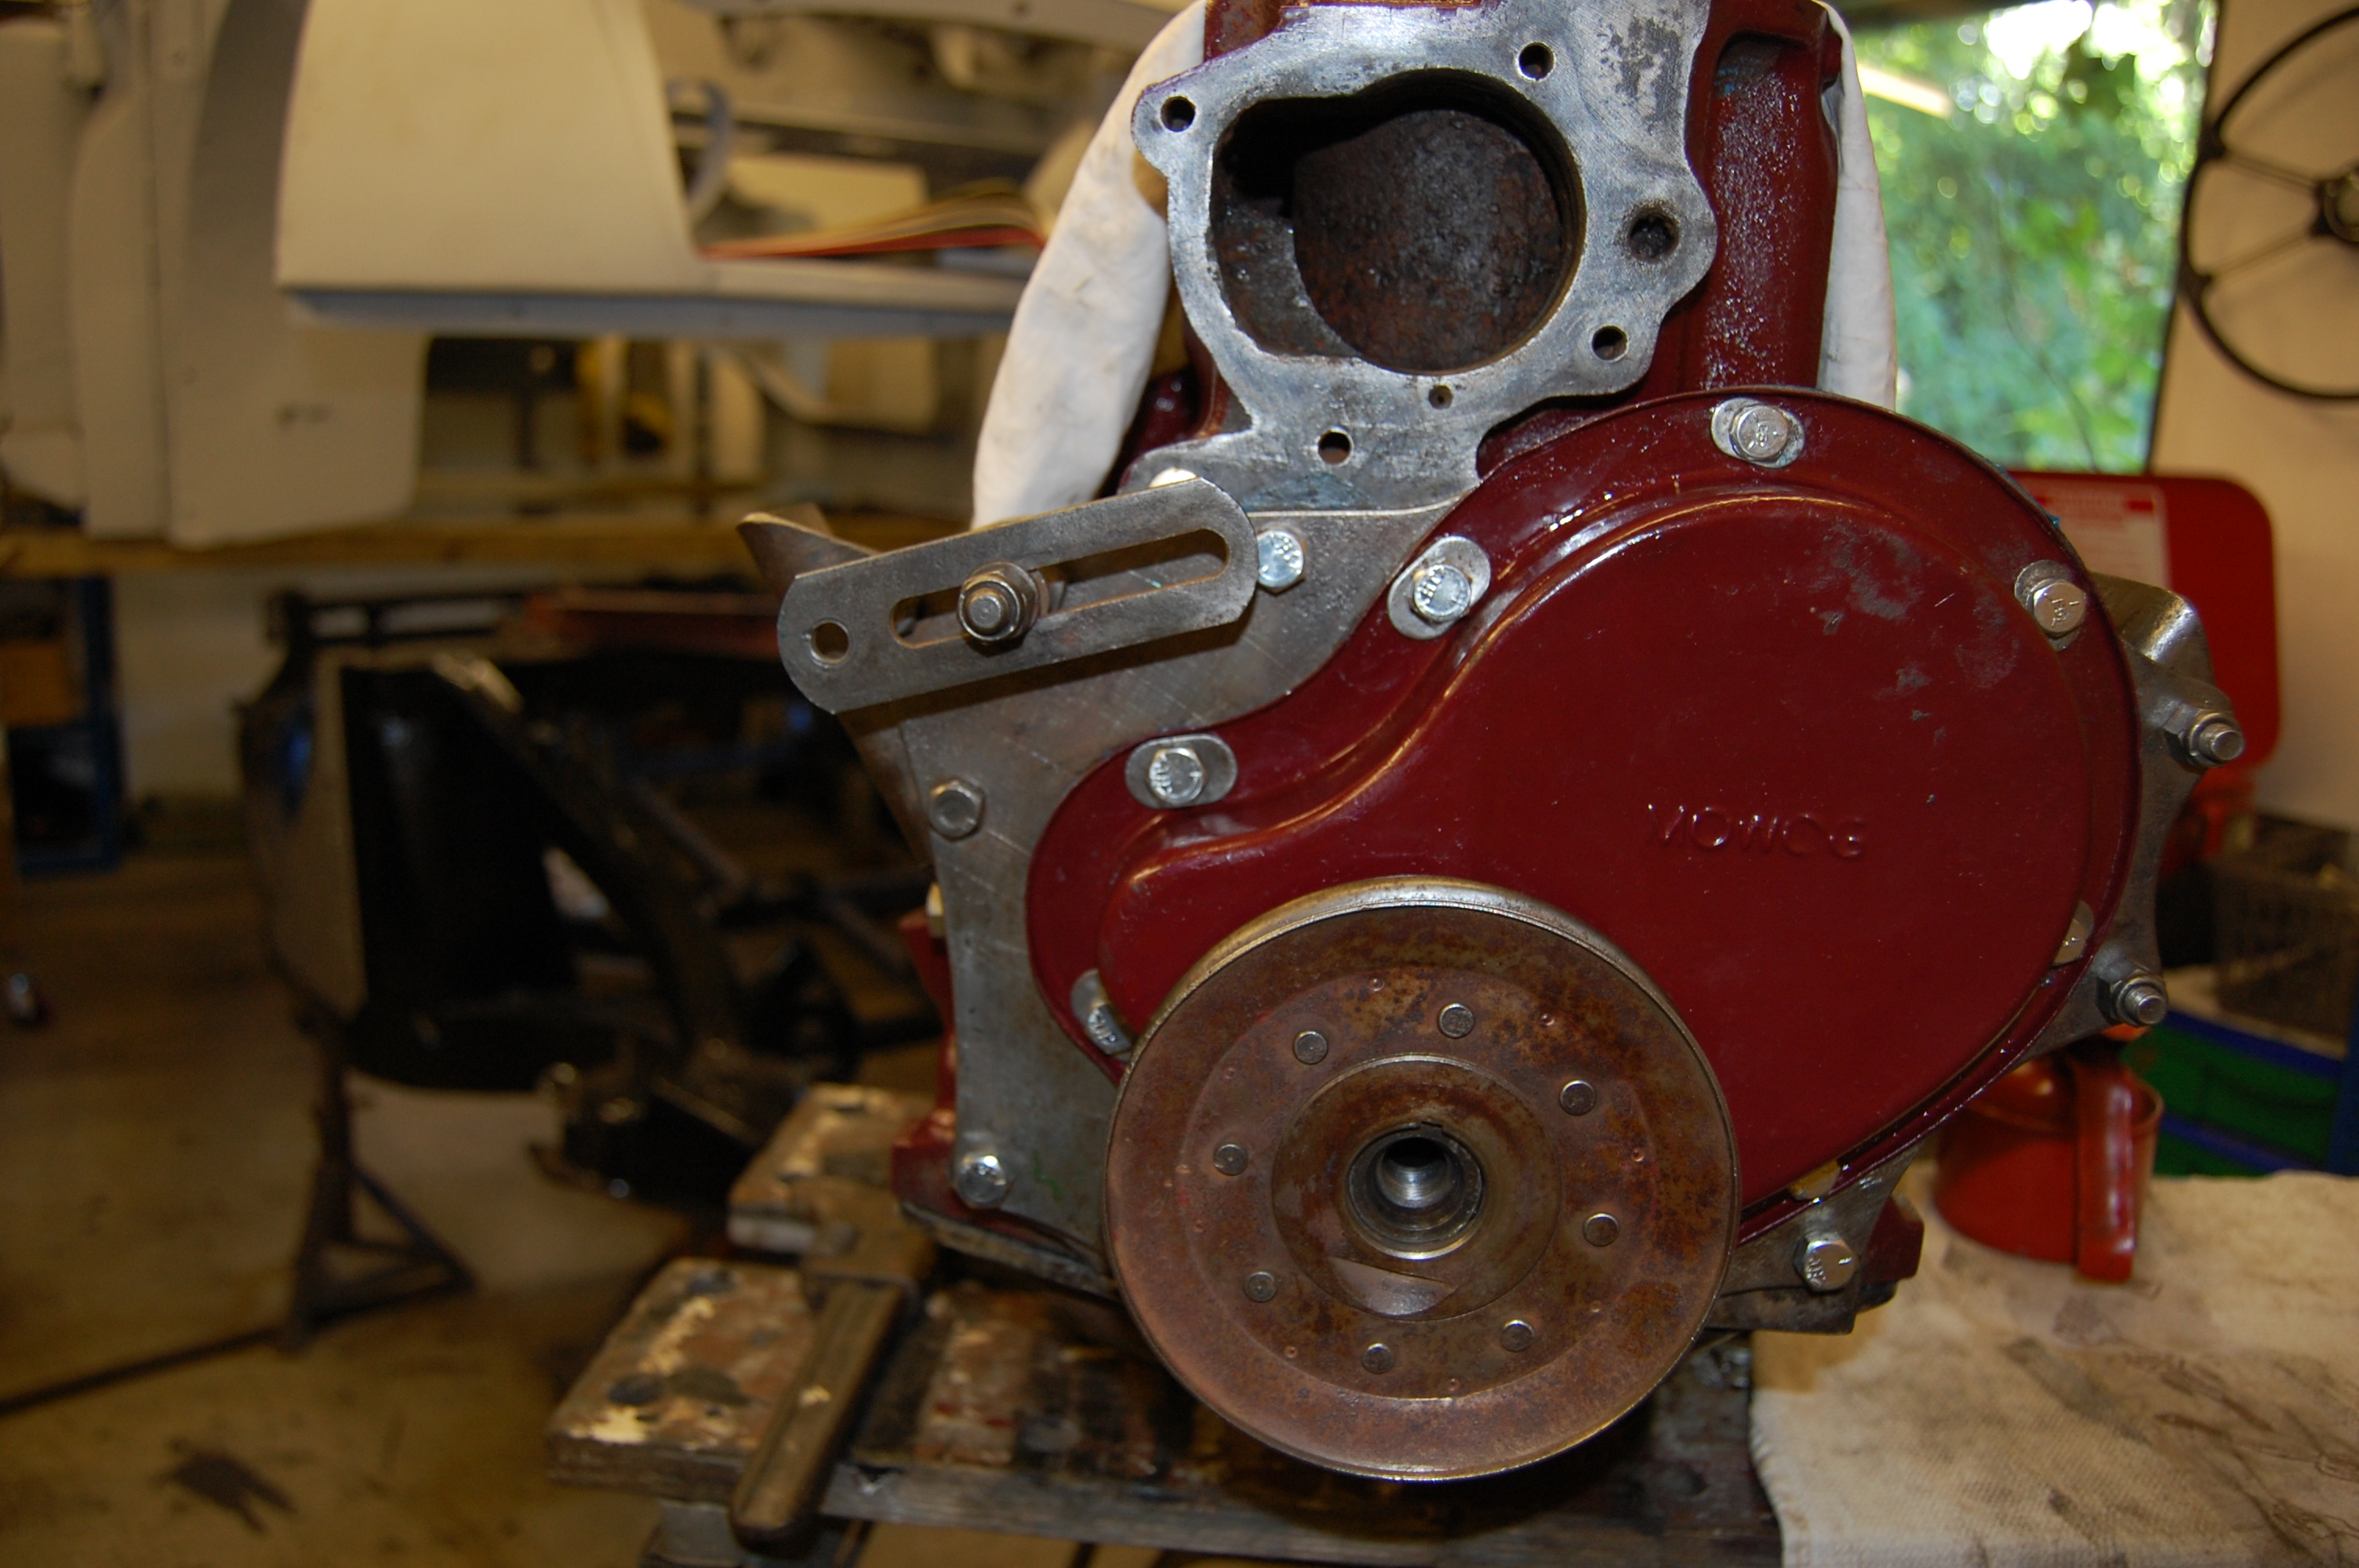
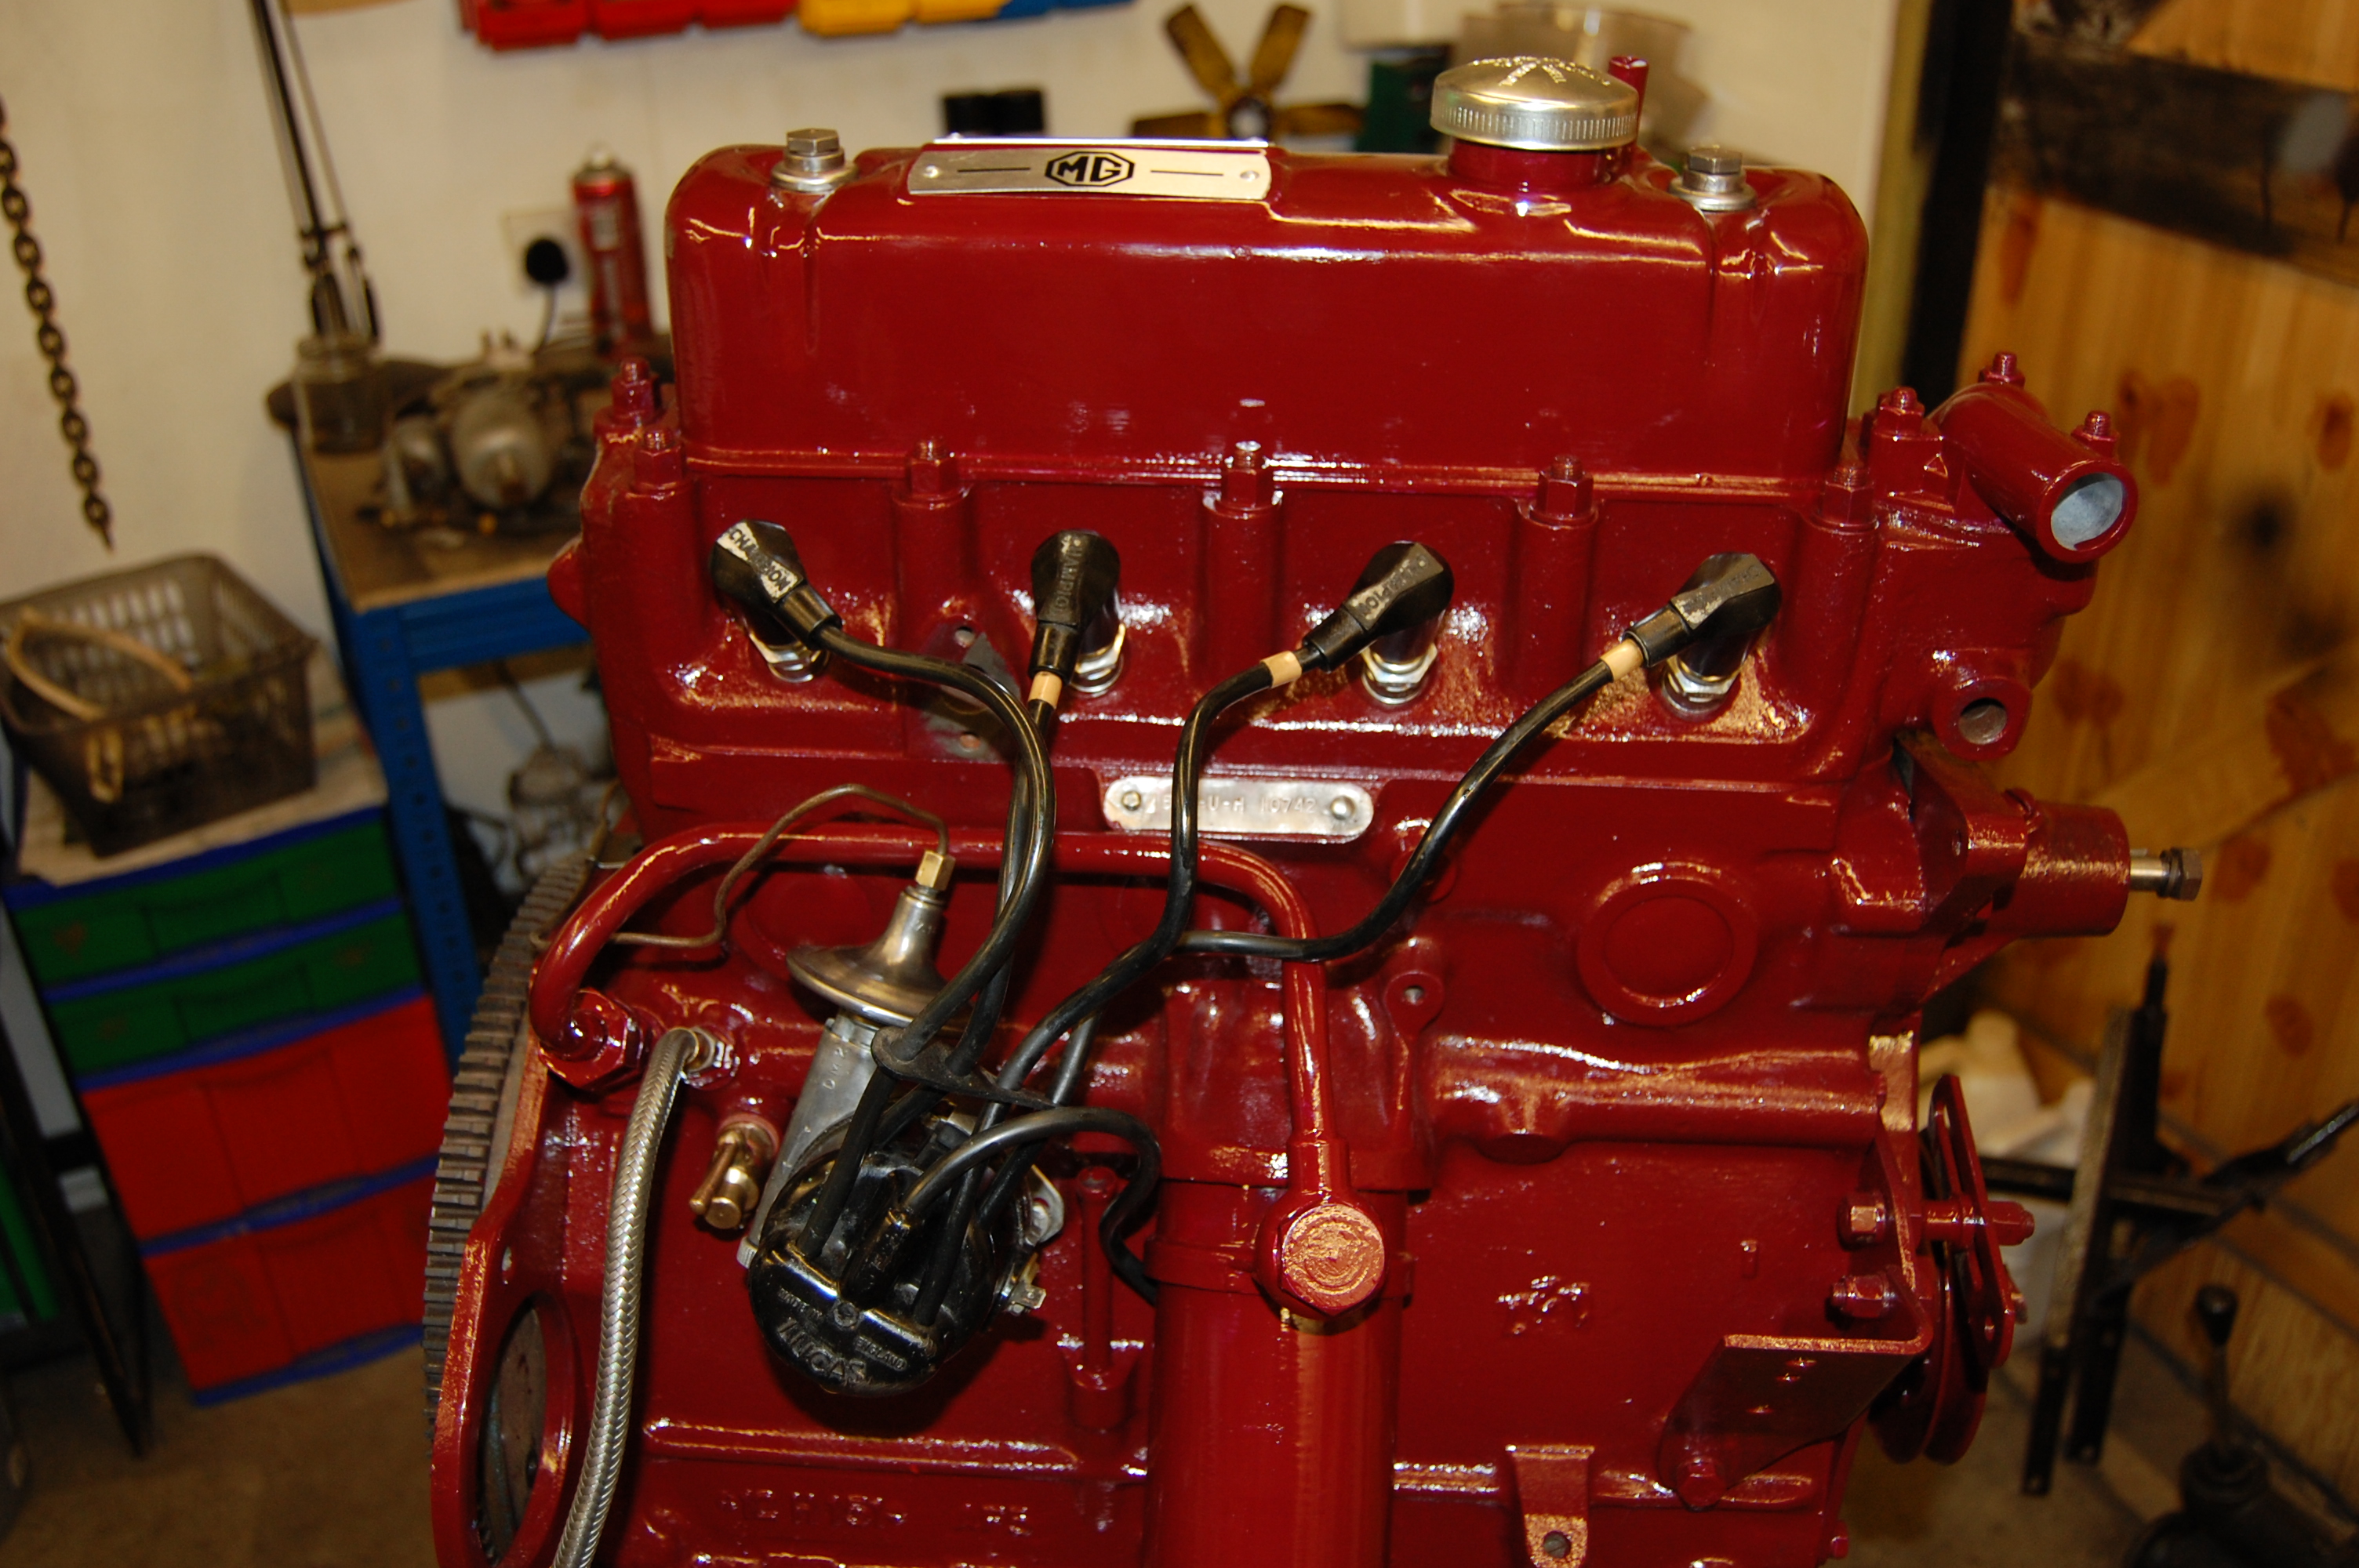
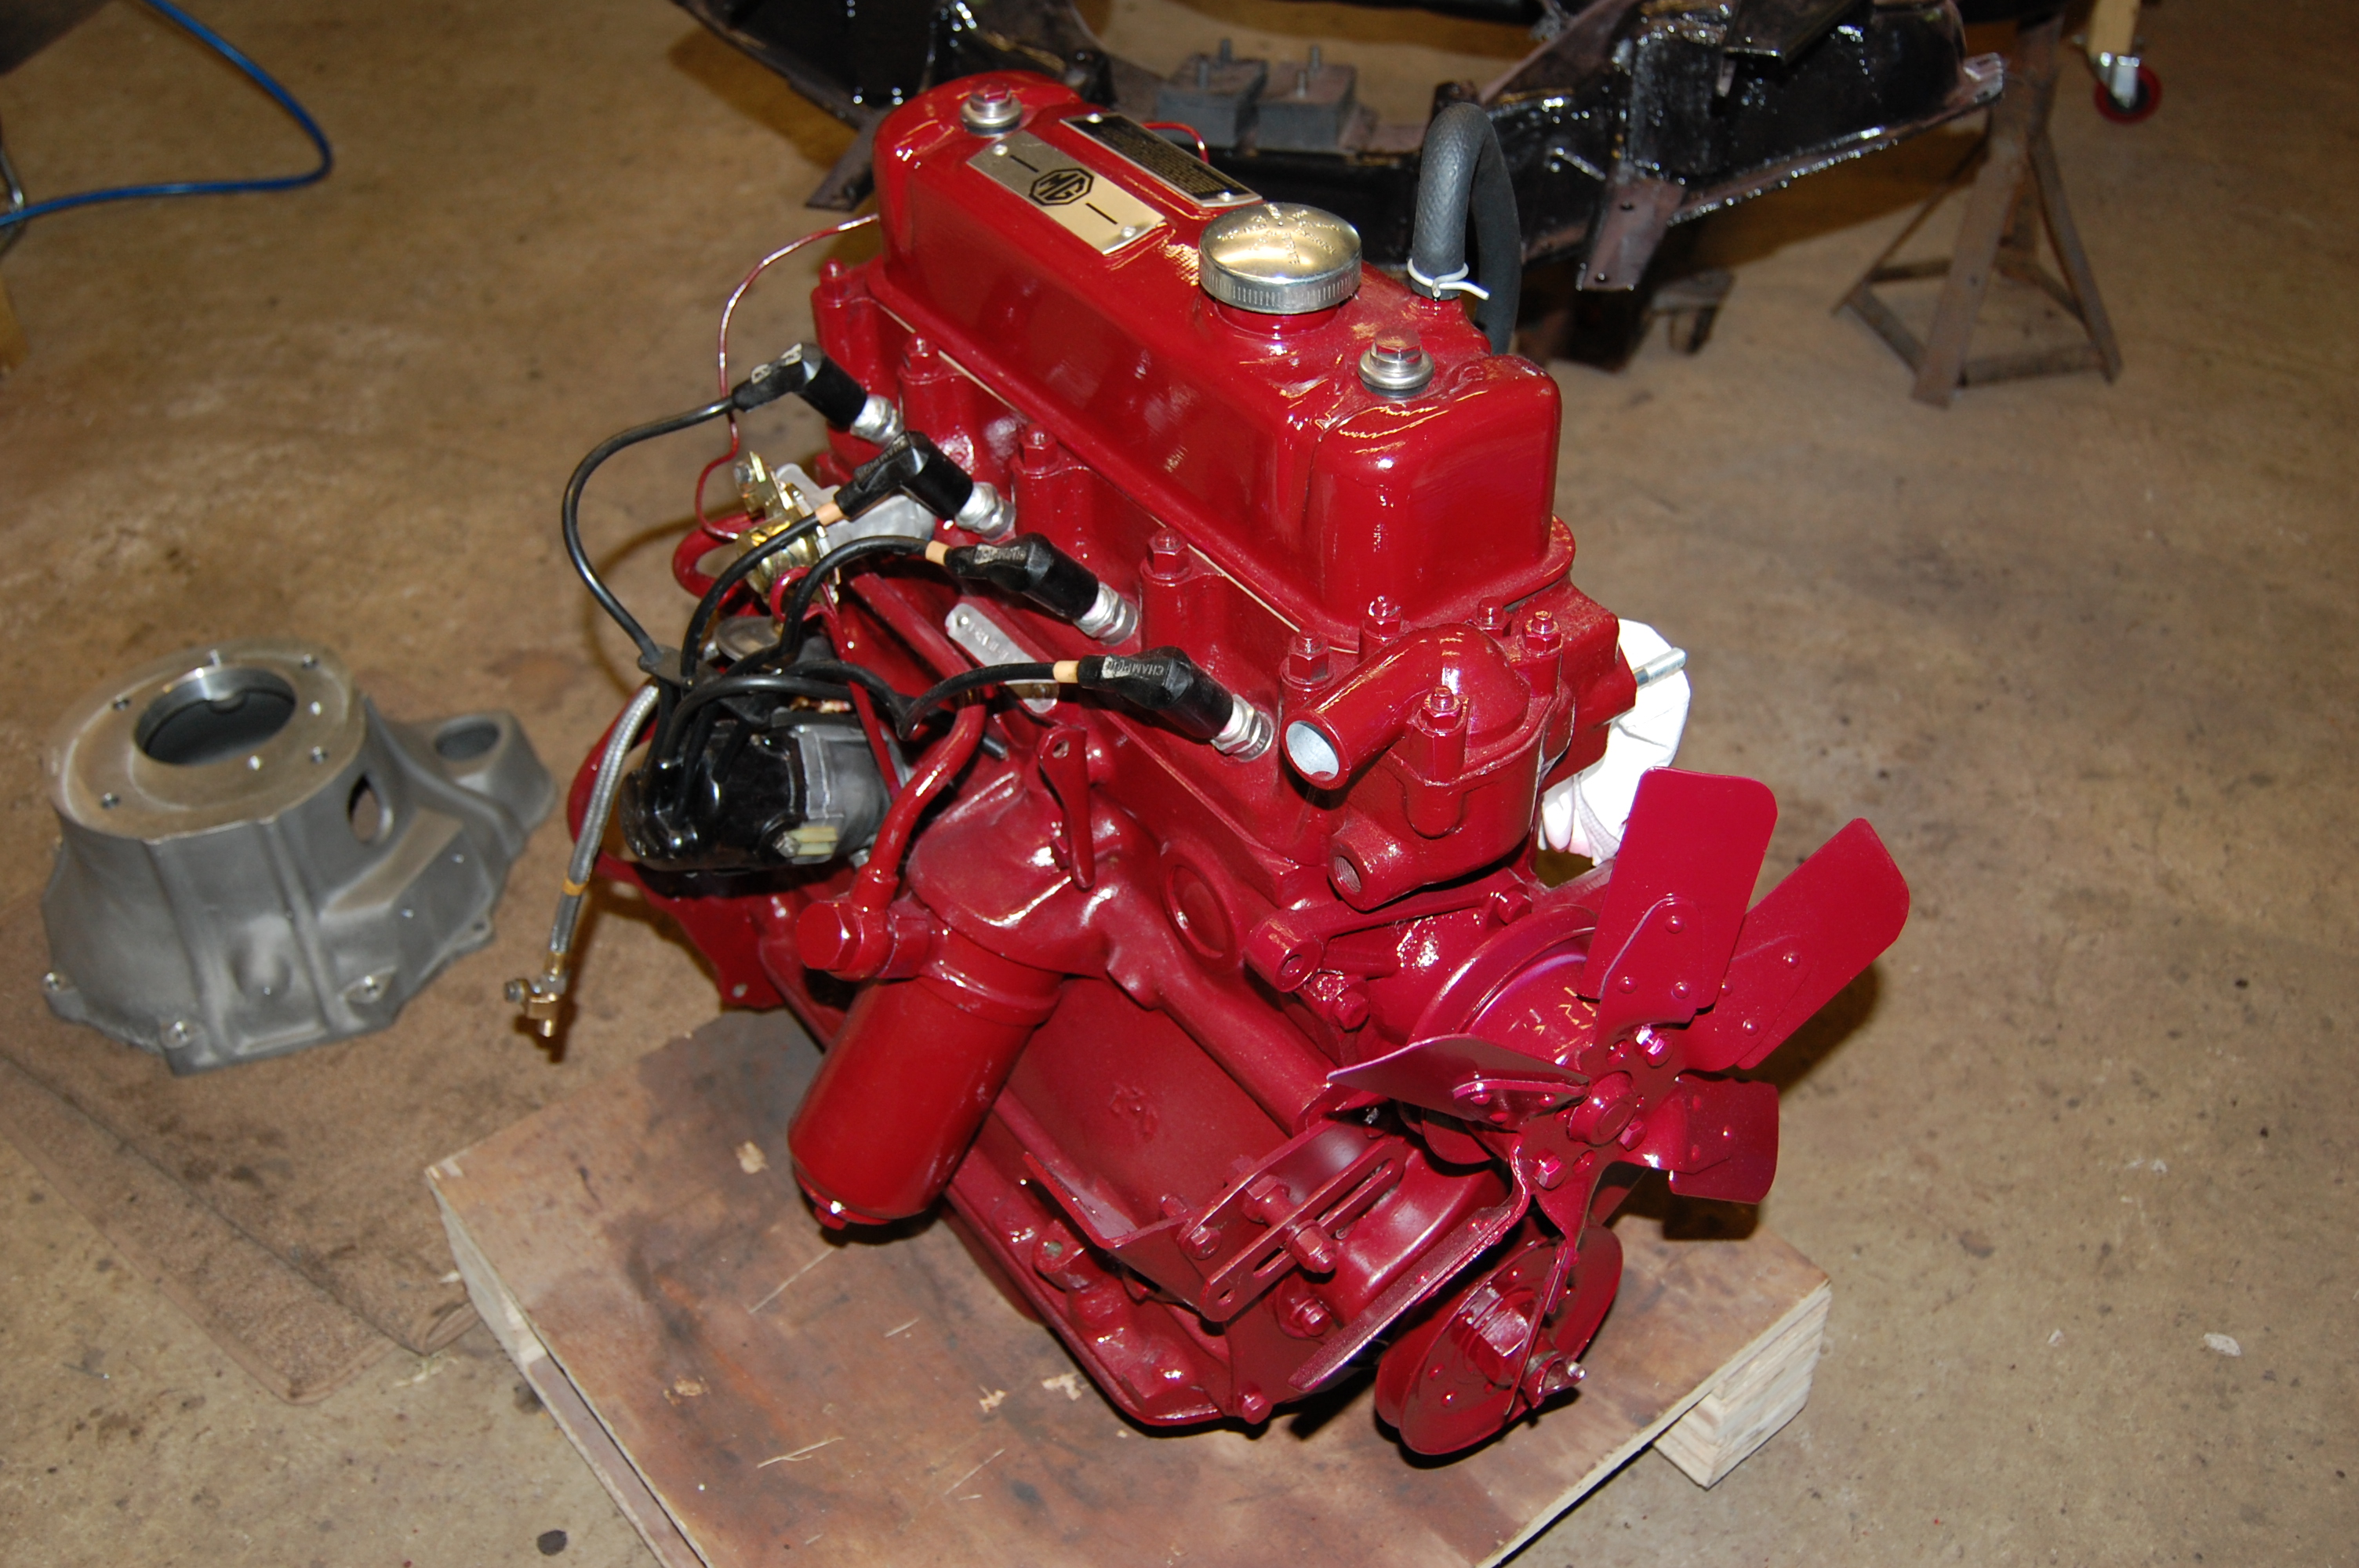
Finished – paint looks much redder in the photos, more maroon in normal light. Hand painted MG Owners Club engine paint, but Rover Damask Red is a good match too and is available in cans from Halfords.
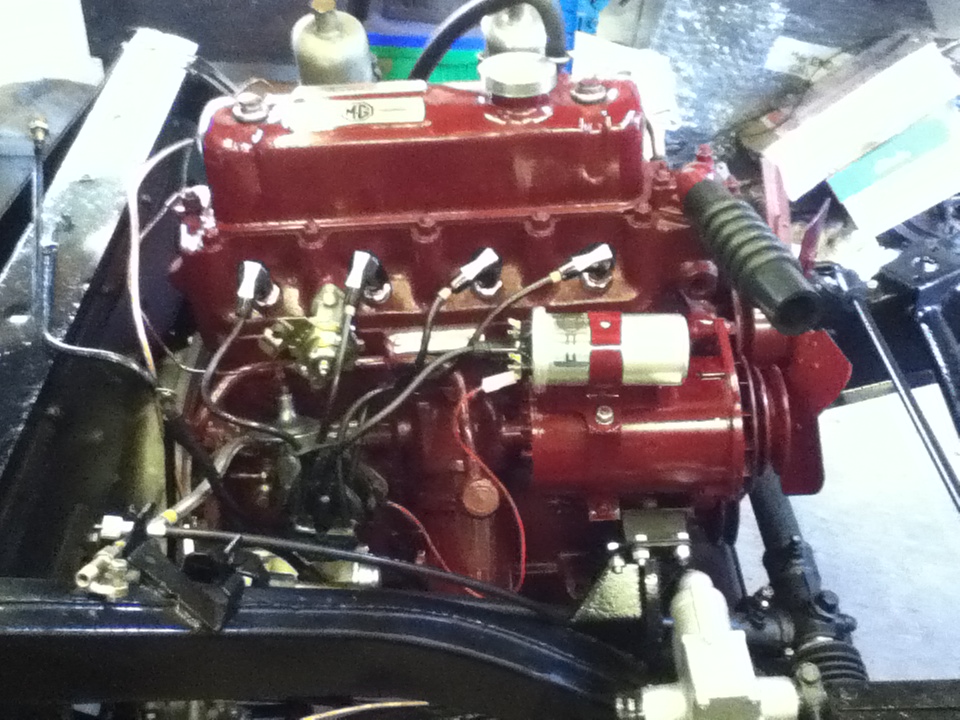
Engine meets the finished chassis.
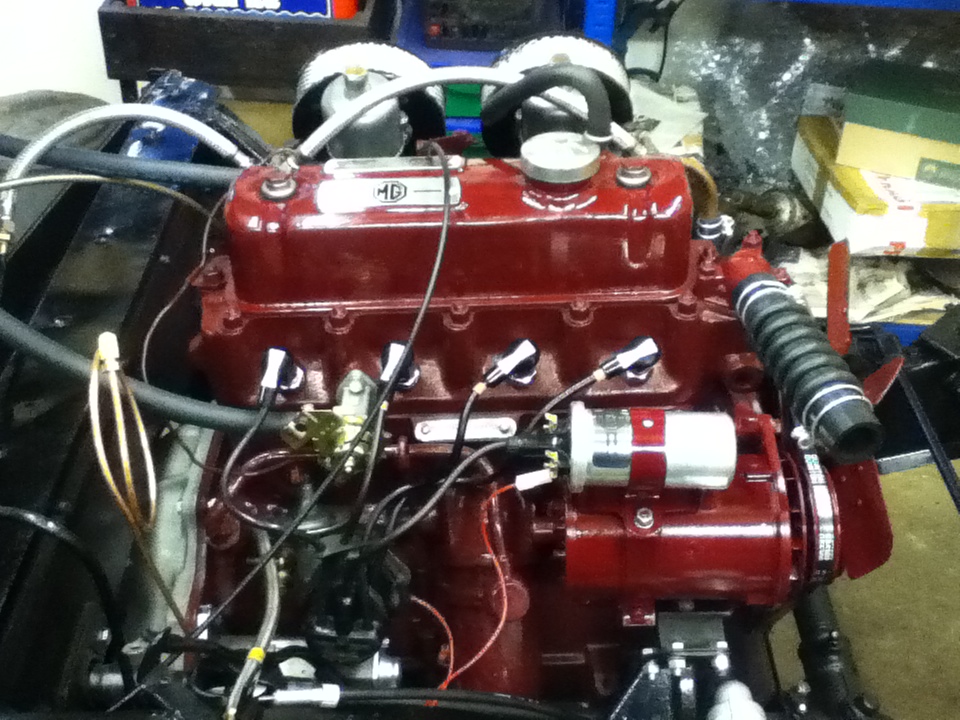
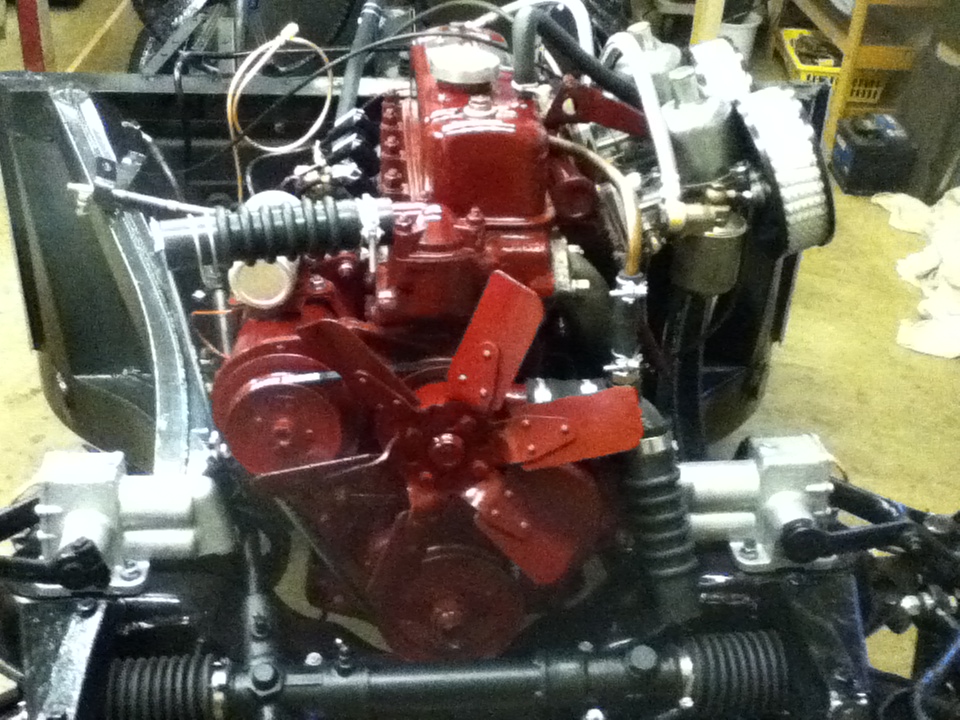
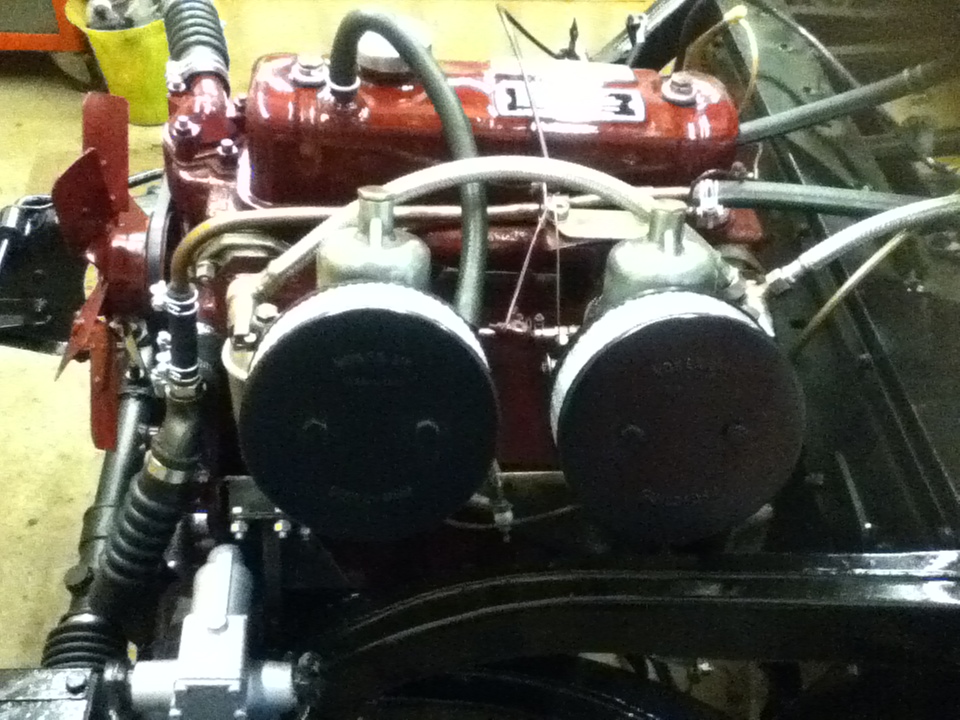
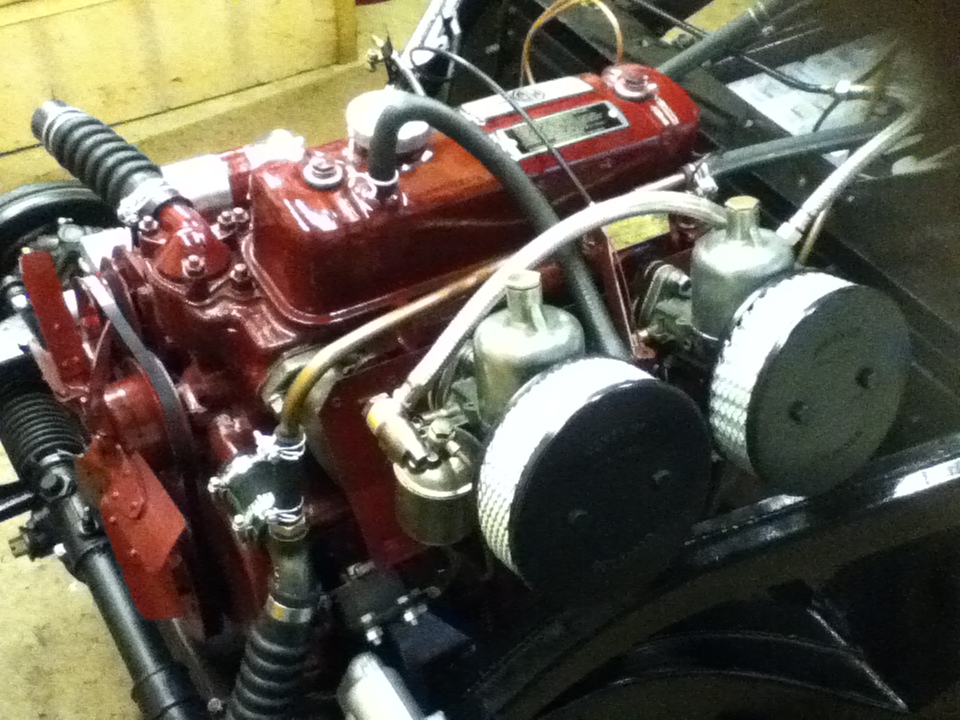
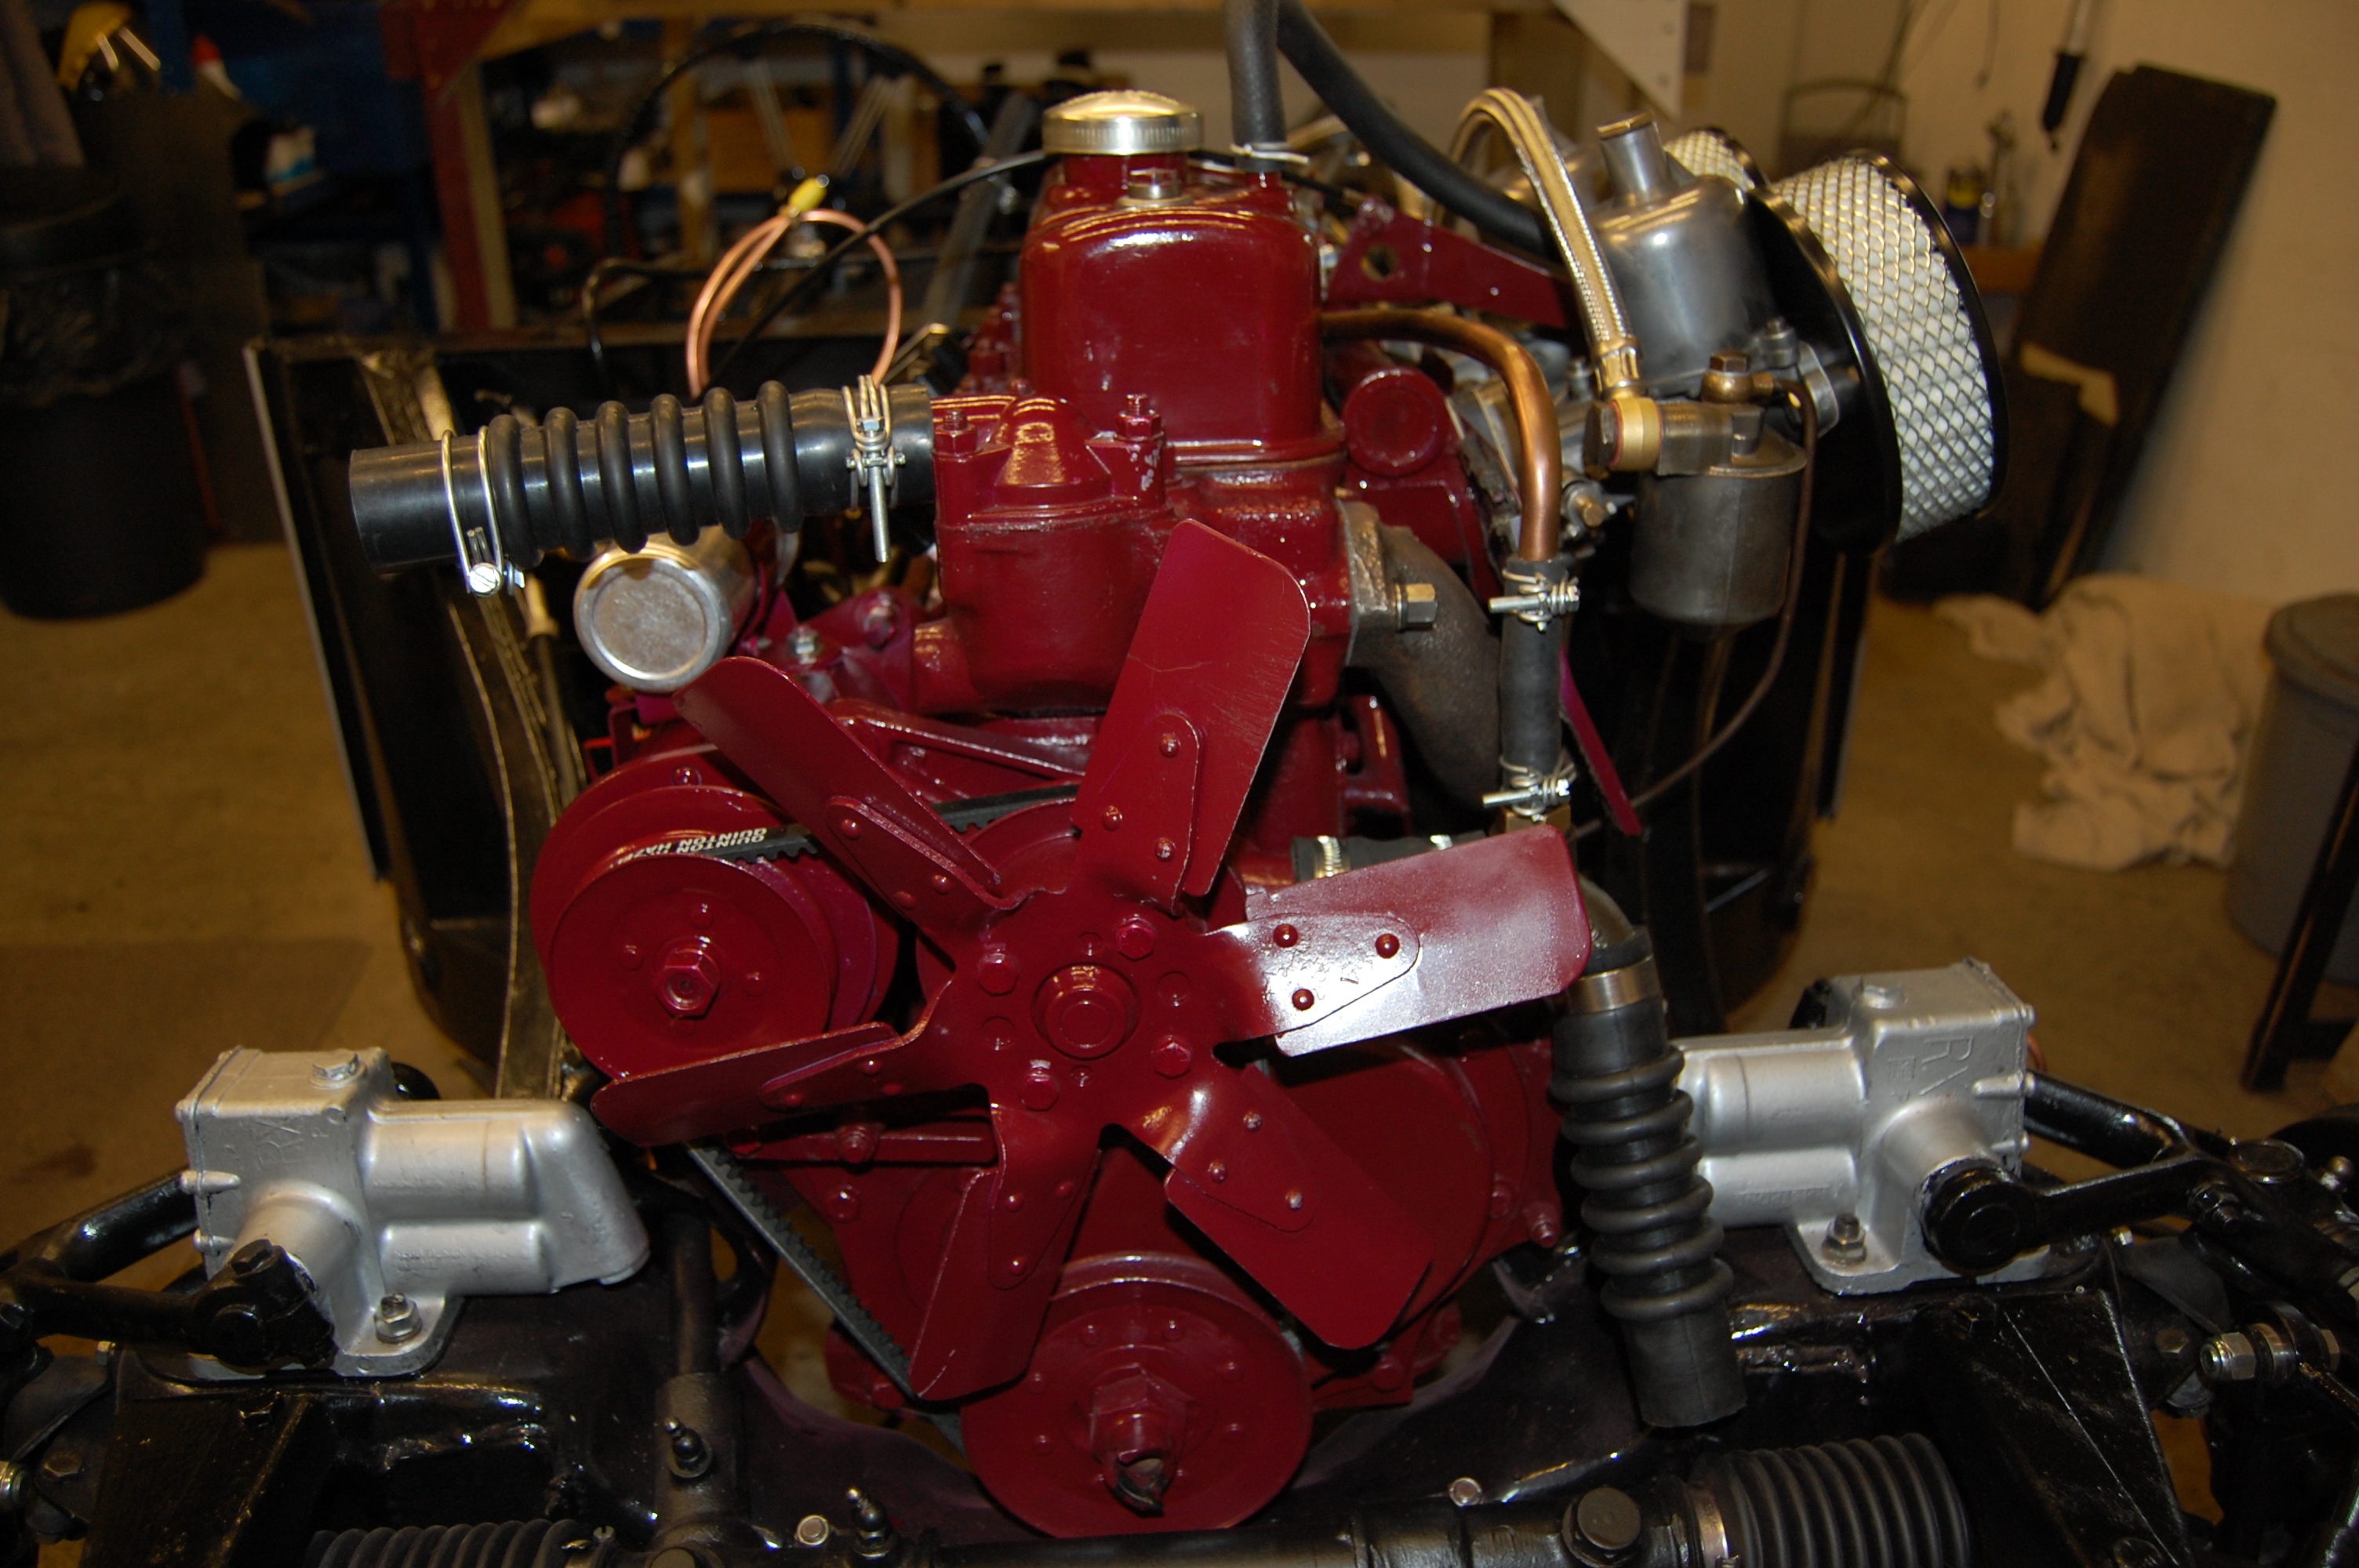
Choke cable still required and throttle cable not attached. MGA 1500 carburettors.
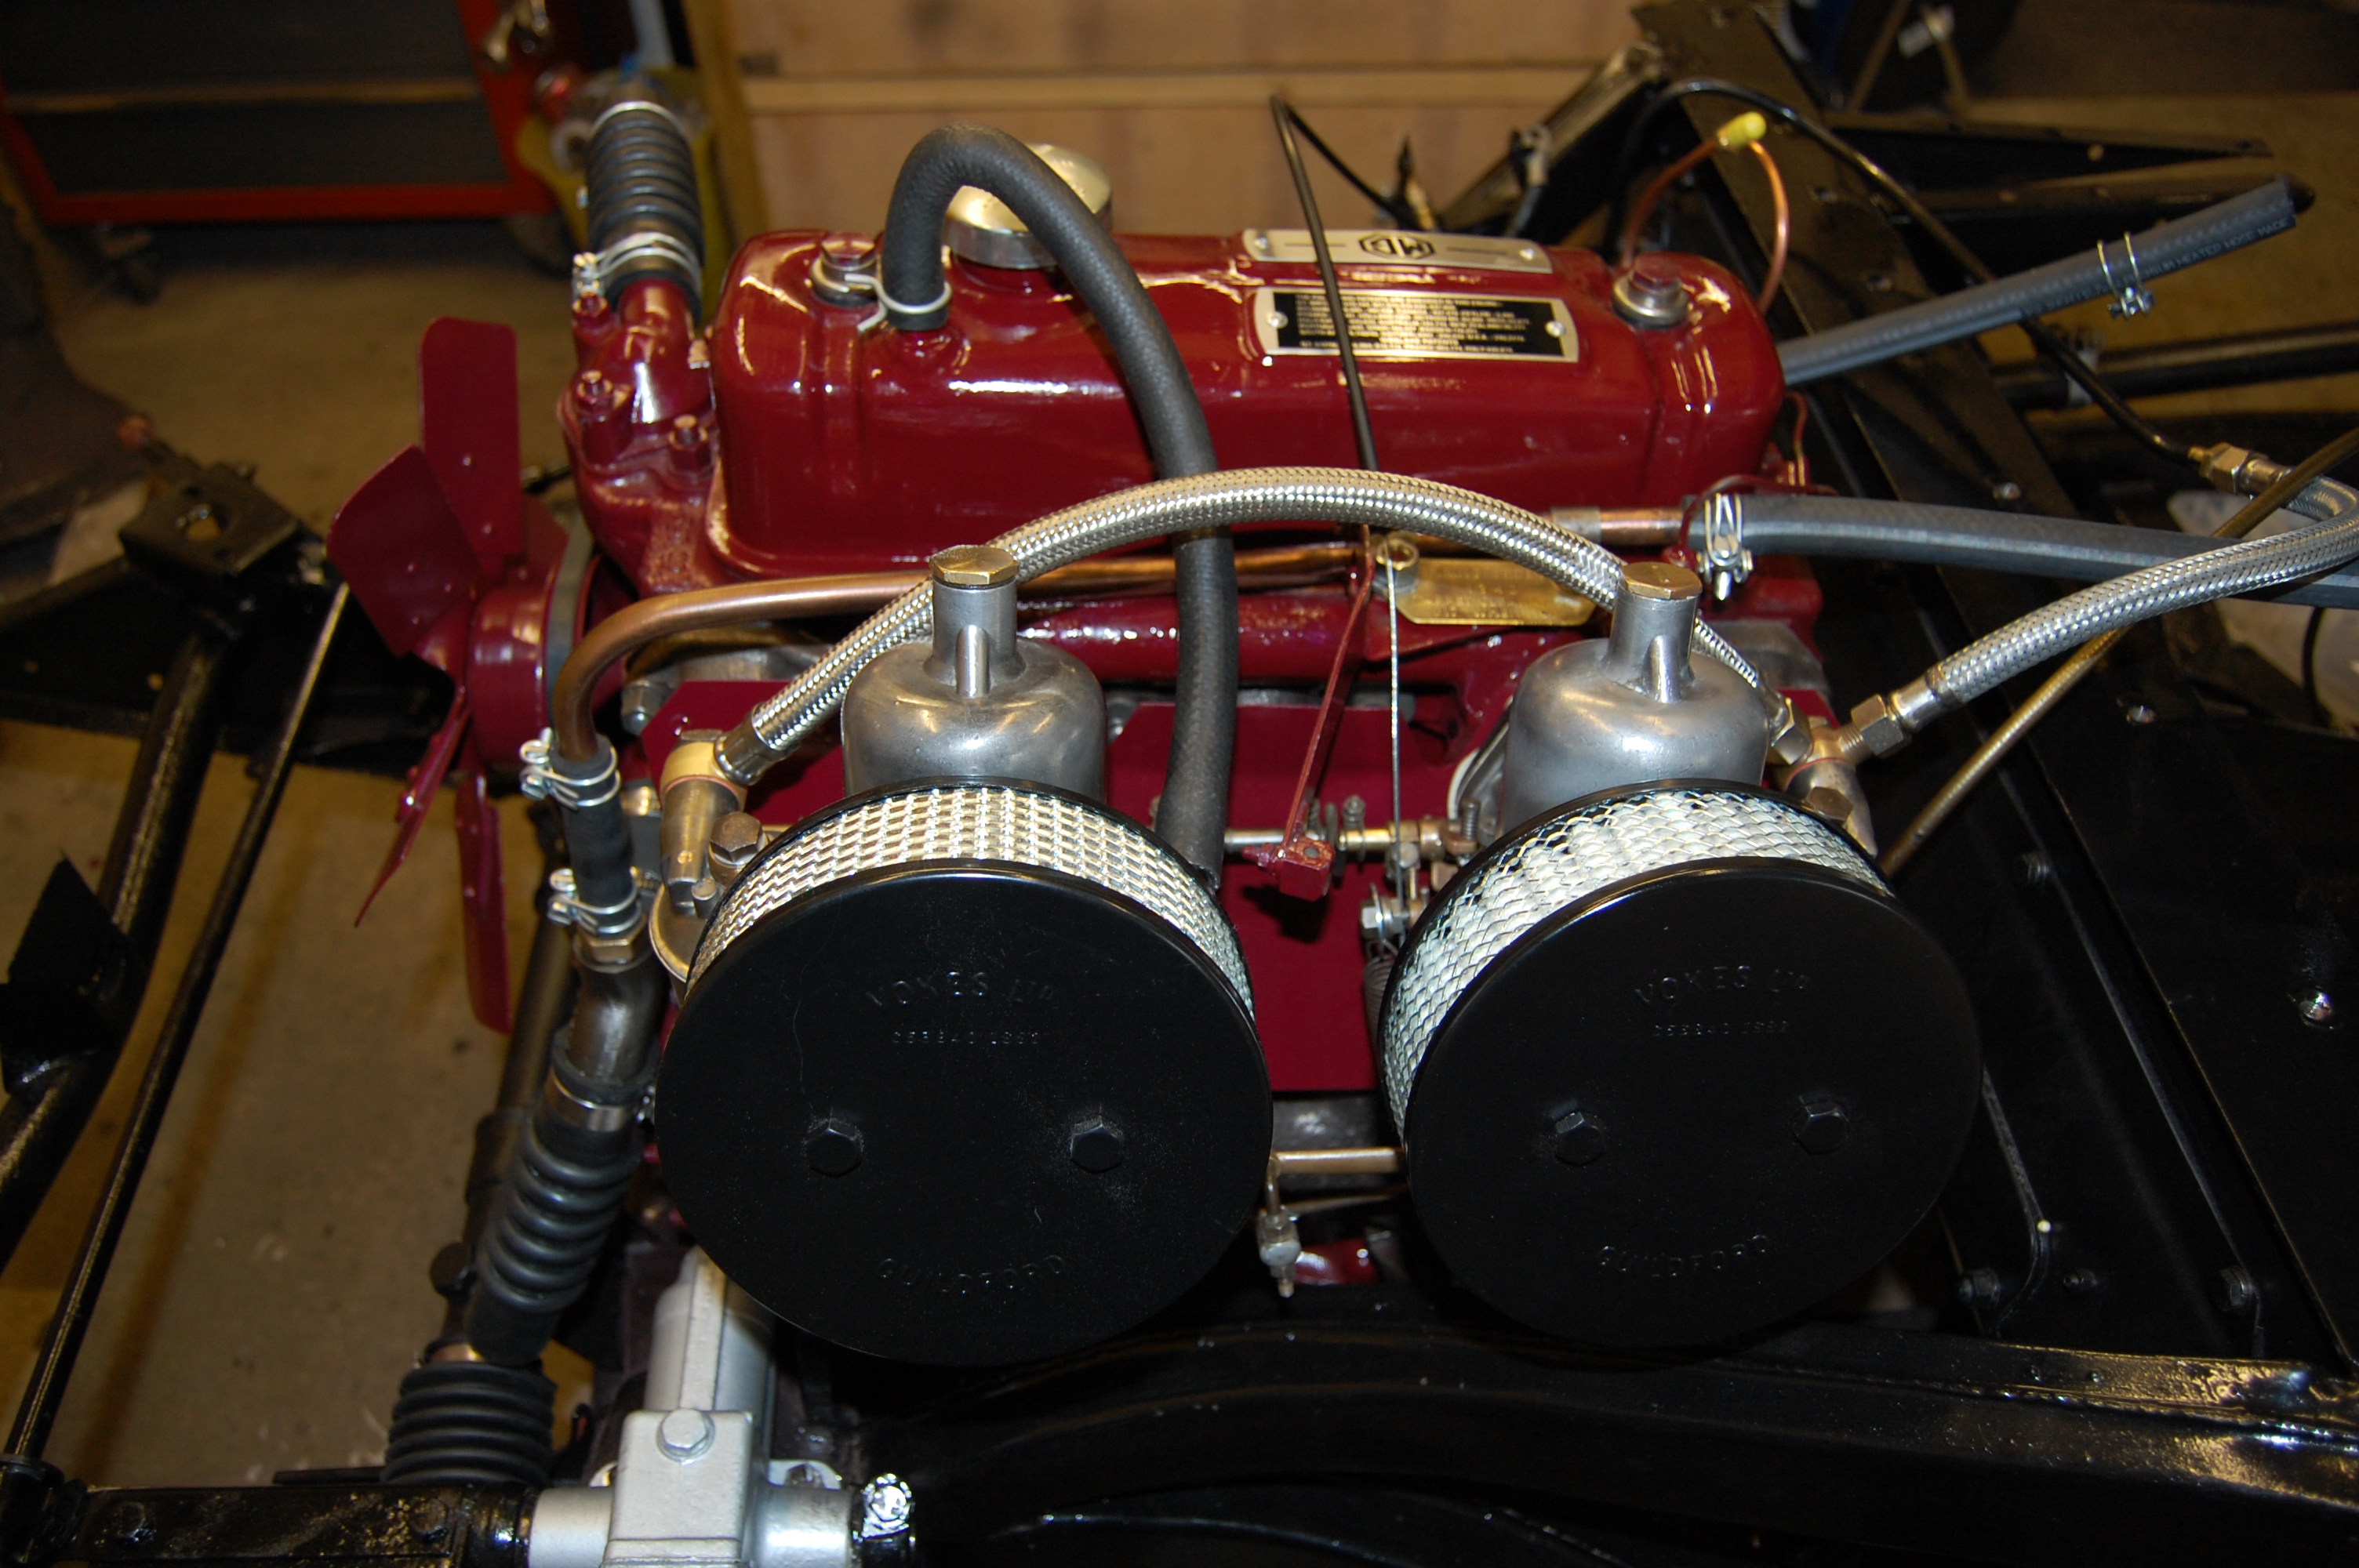
MGA 1500 engine/carburettors.
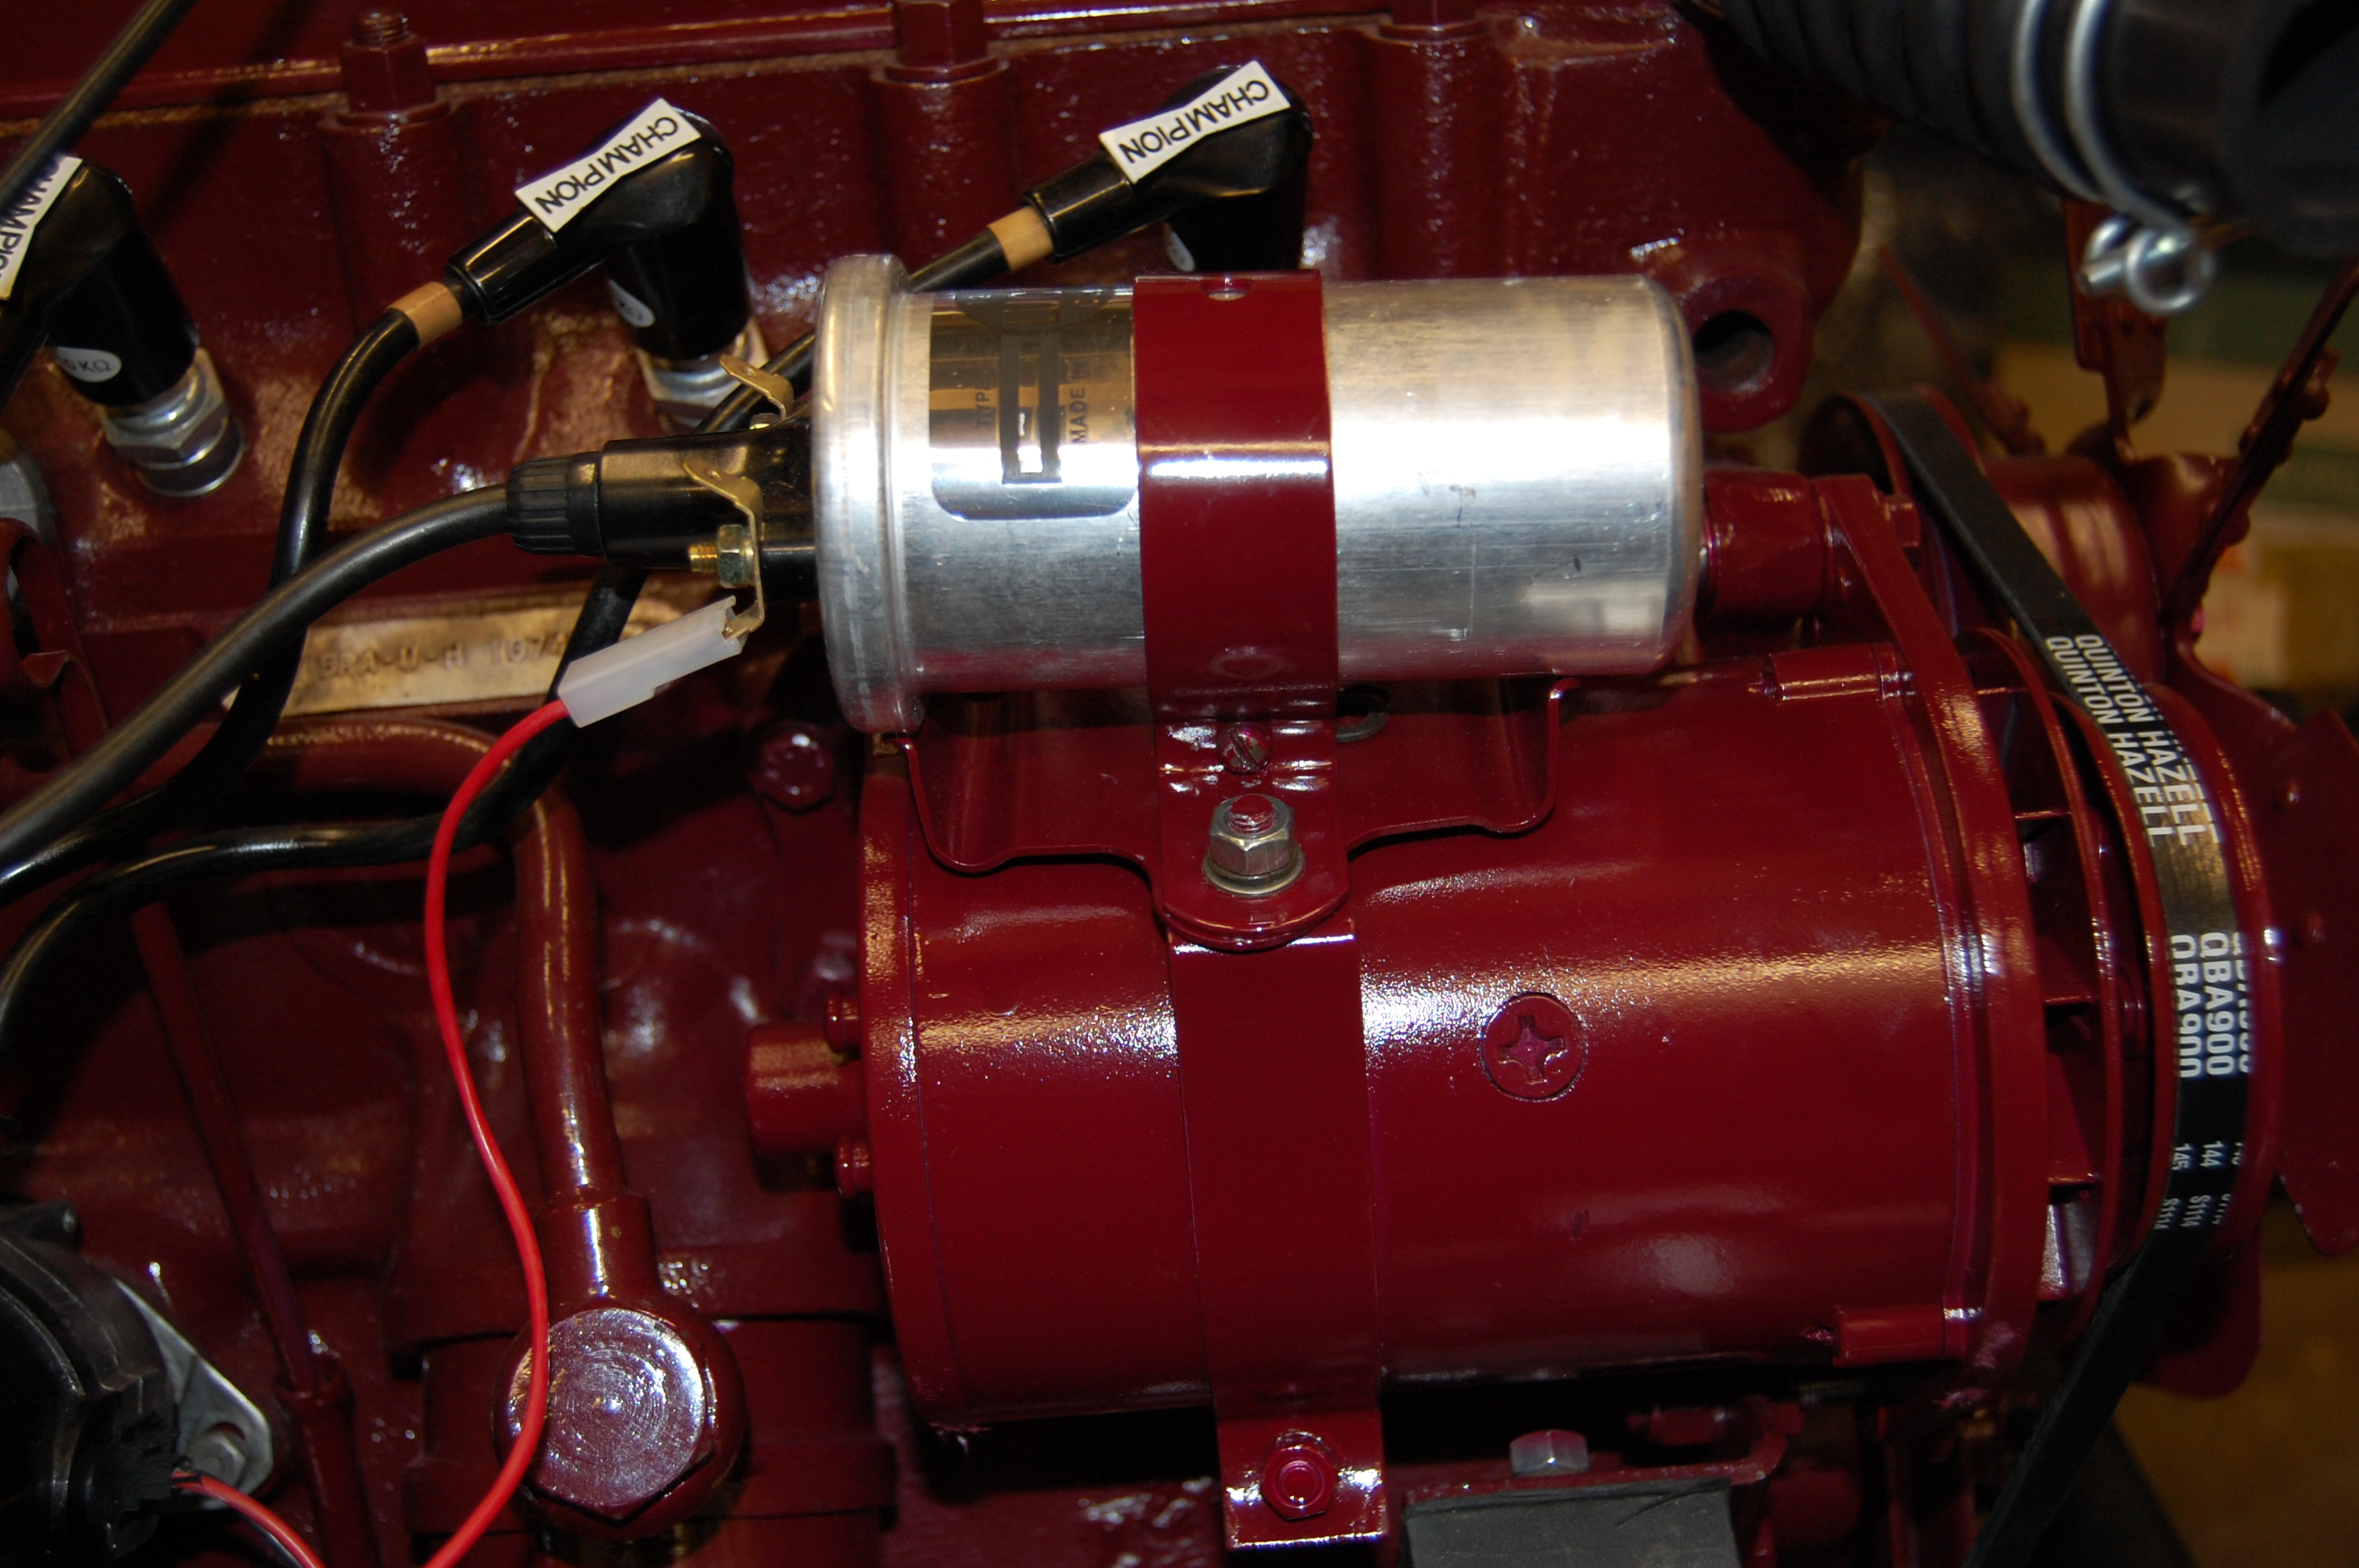
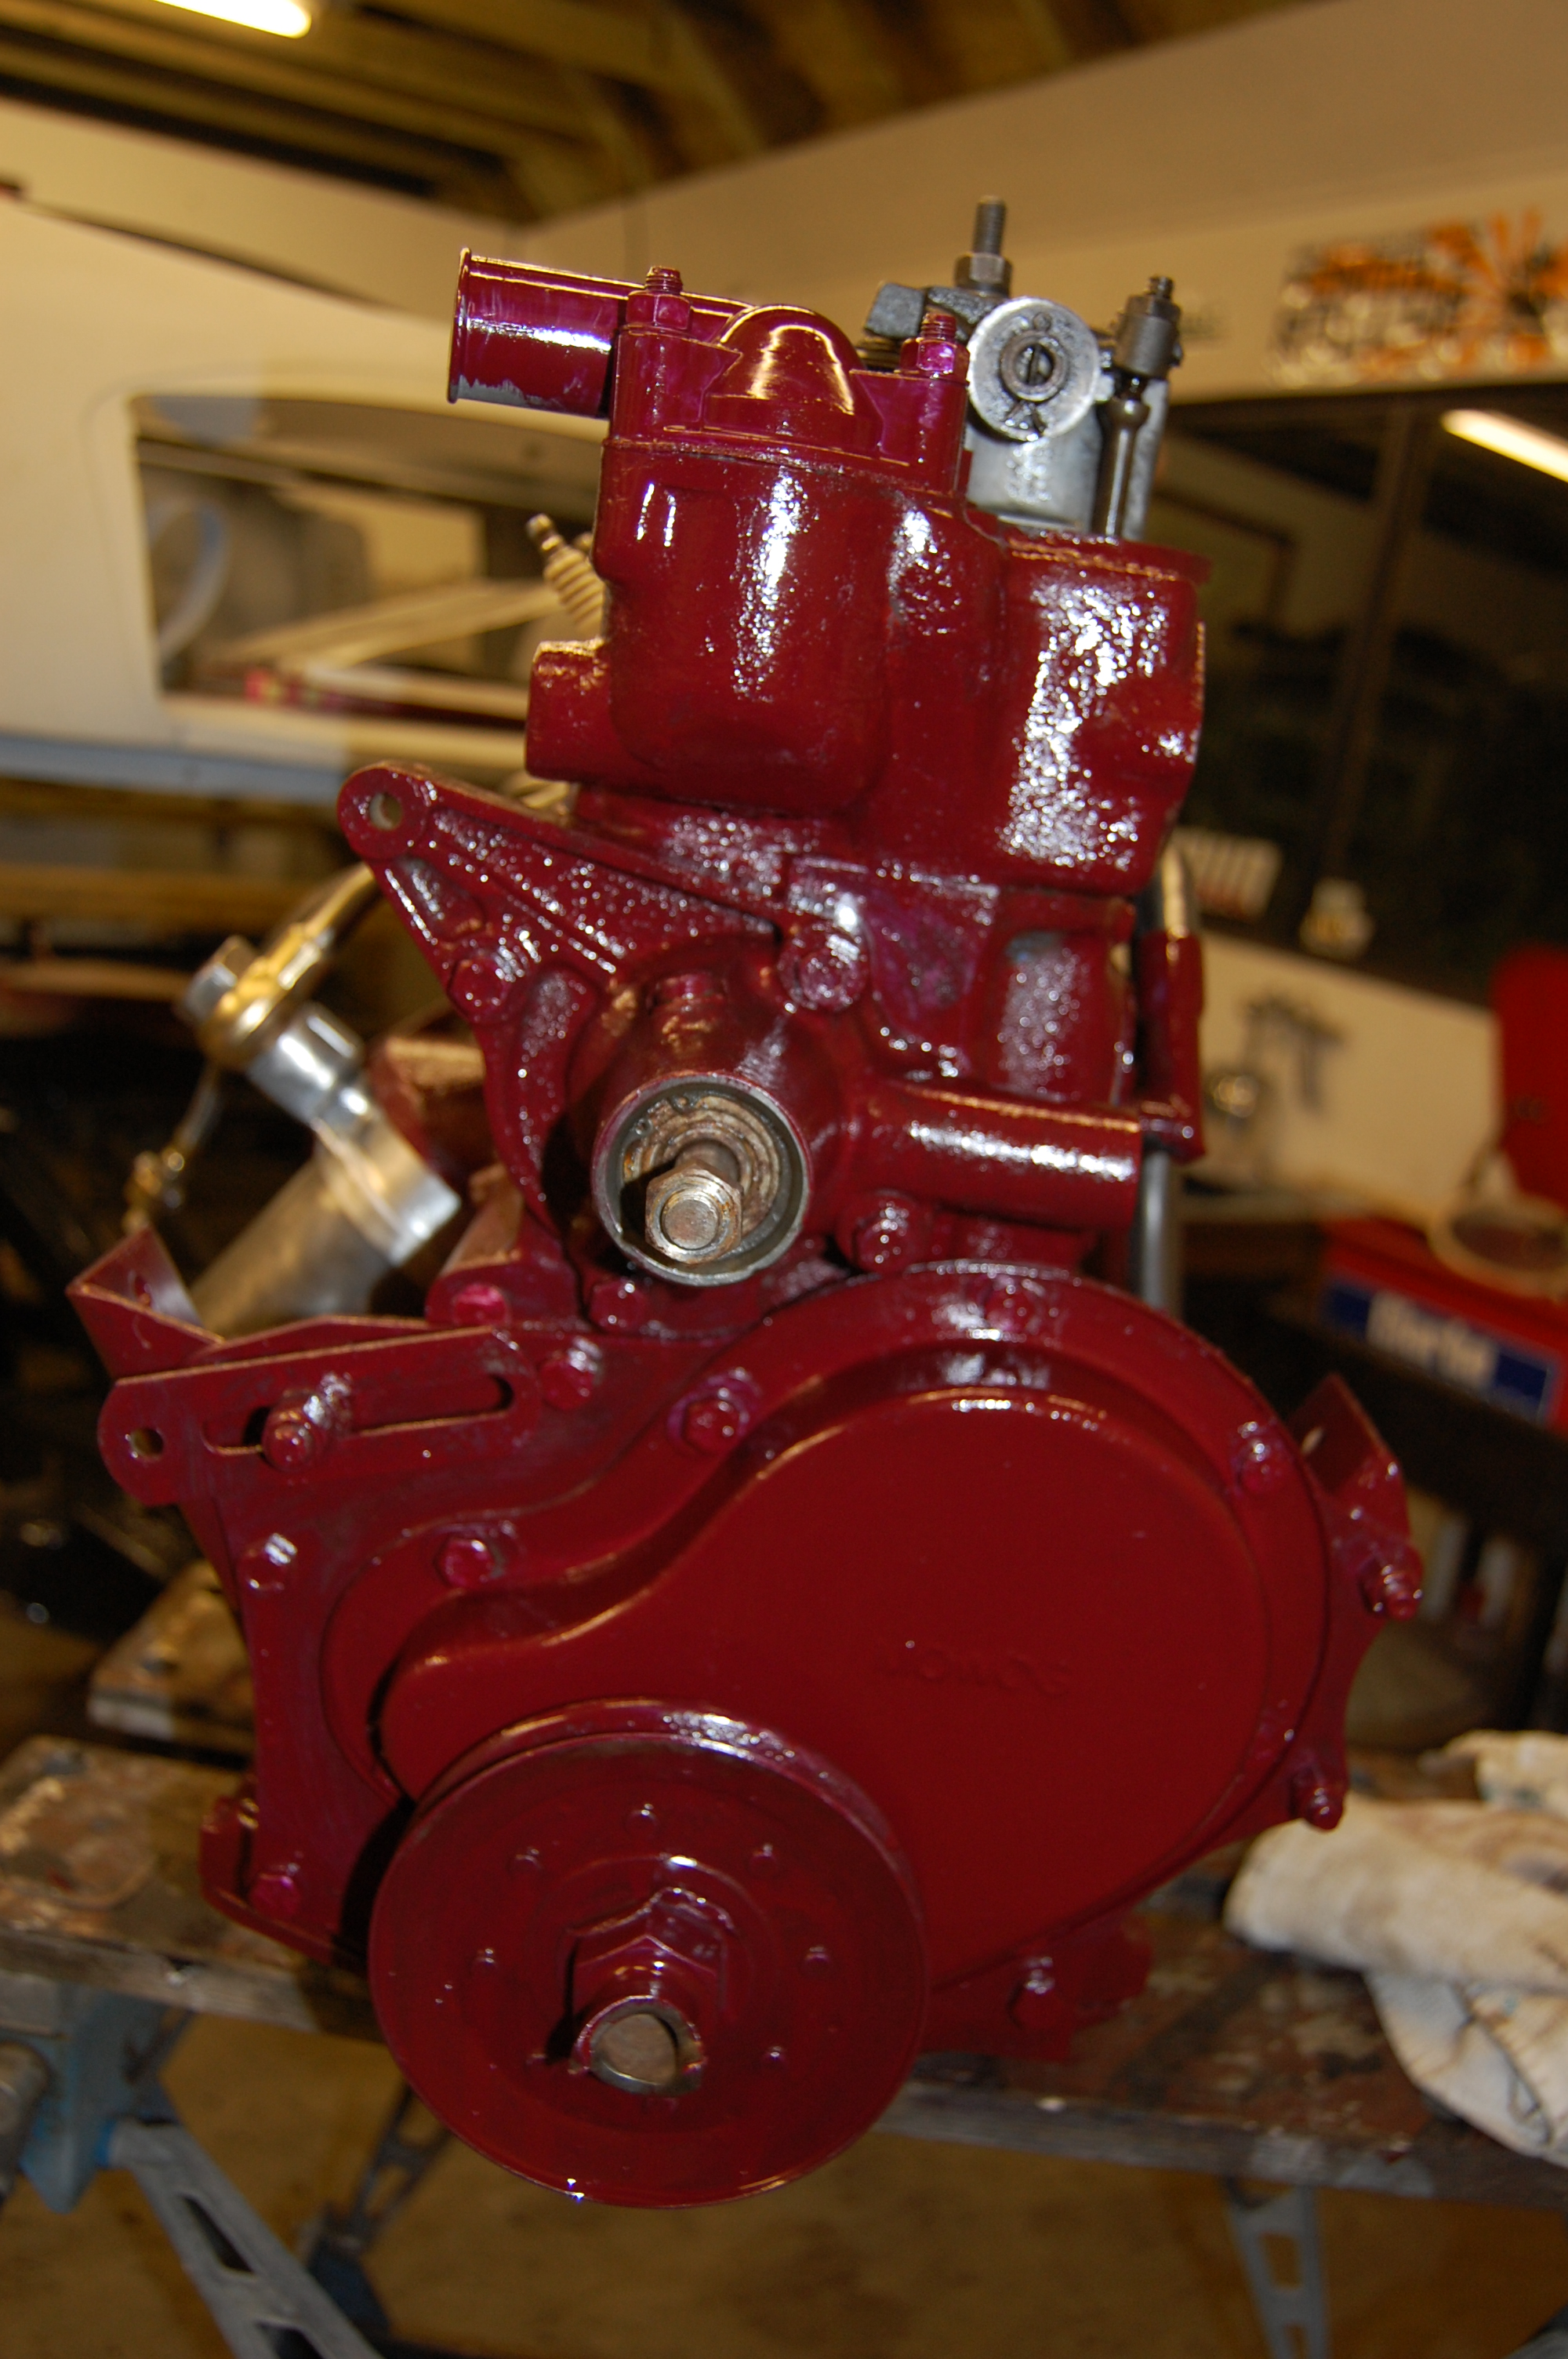
This is the ‘Powerlite Dynamater’ (alternator) , which they say produces 80% more power and weighs 40% less than the original Lucas unit. It was considerably cheaper than other similar products, at £125 purchased through Accuspark, the same unit being sold for in excess of £300 elsewhere. So shop around. The unit is very well made and a straight fit onto the existing mounting brackets, also taking the coil mounting collar and utilising the original fan and pulley. MGA 1500 alternator.
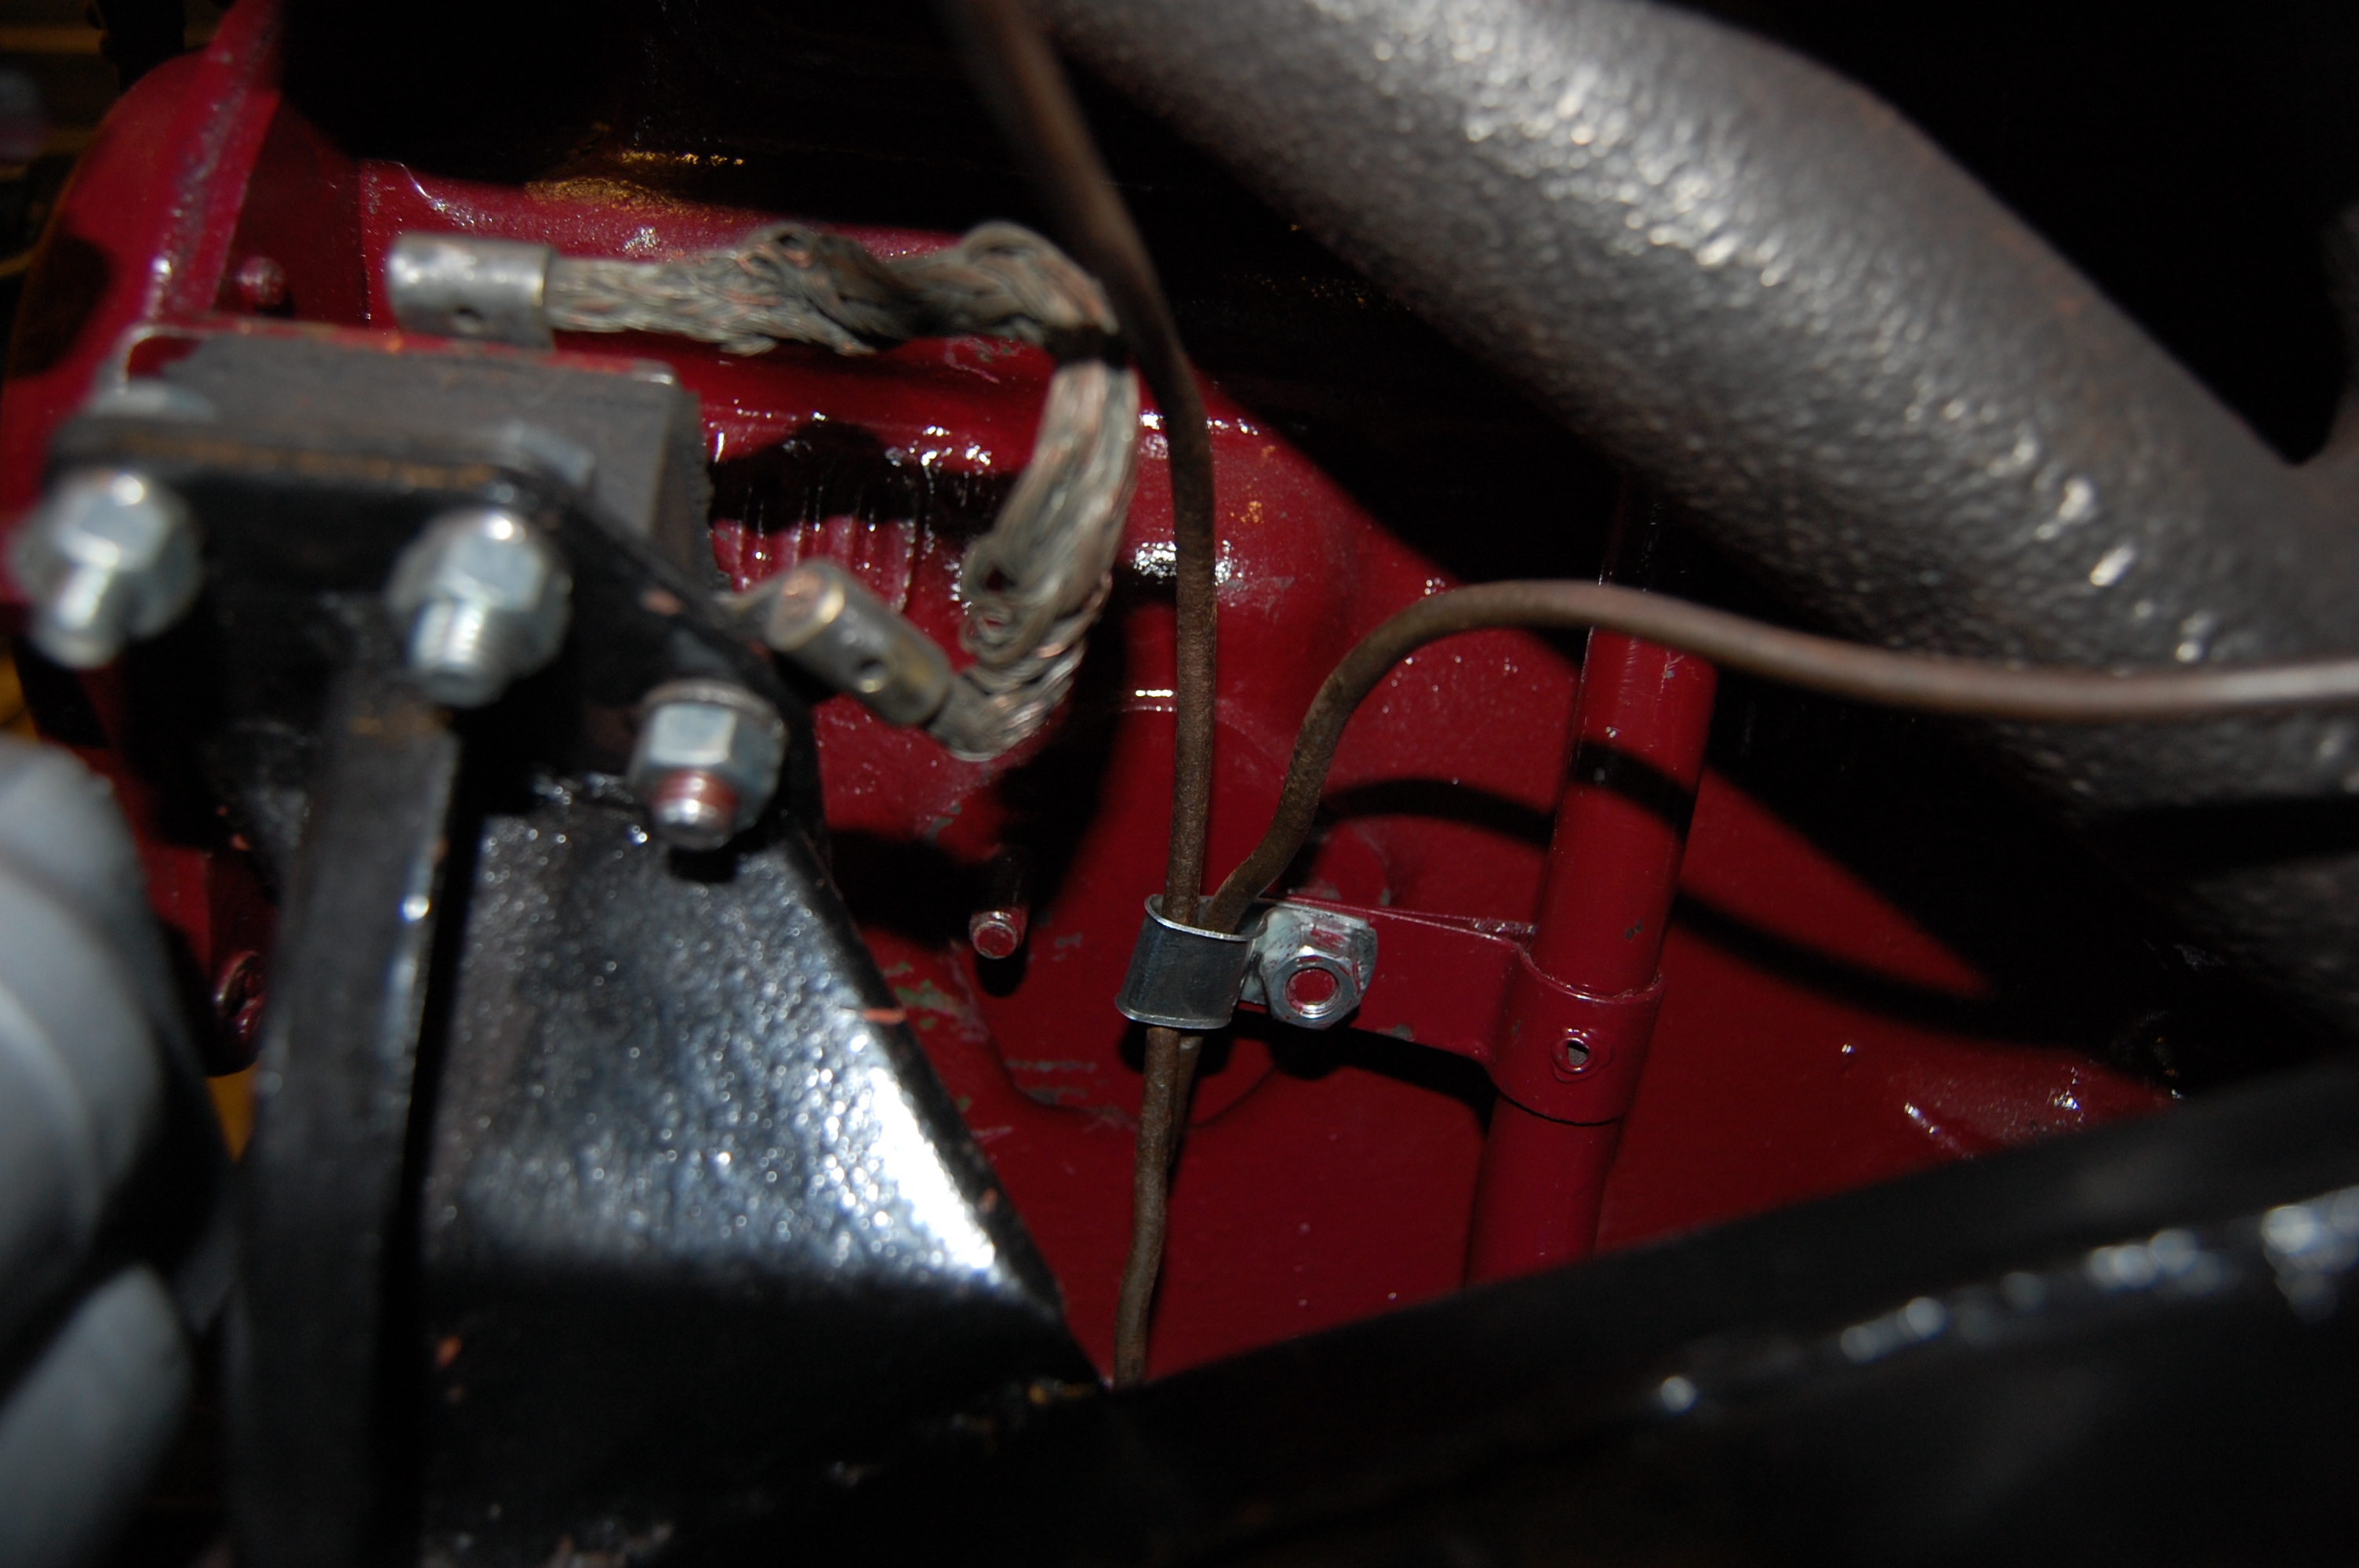
MGA 1500 fuel overflow pipe routing.
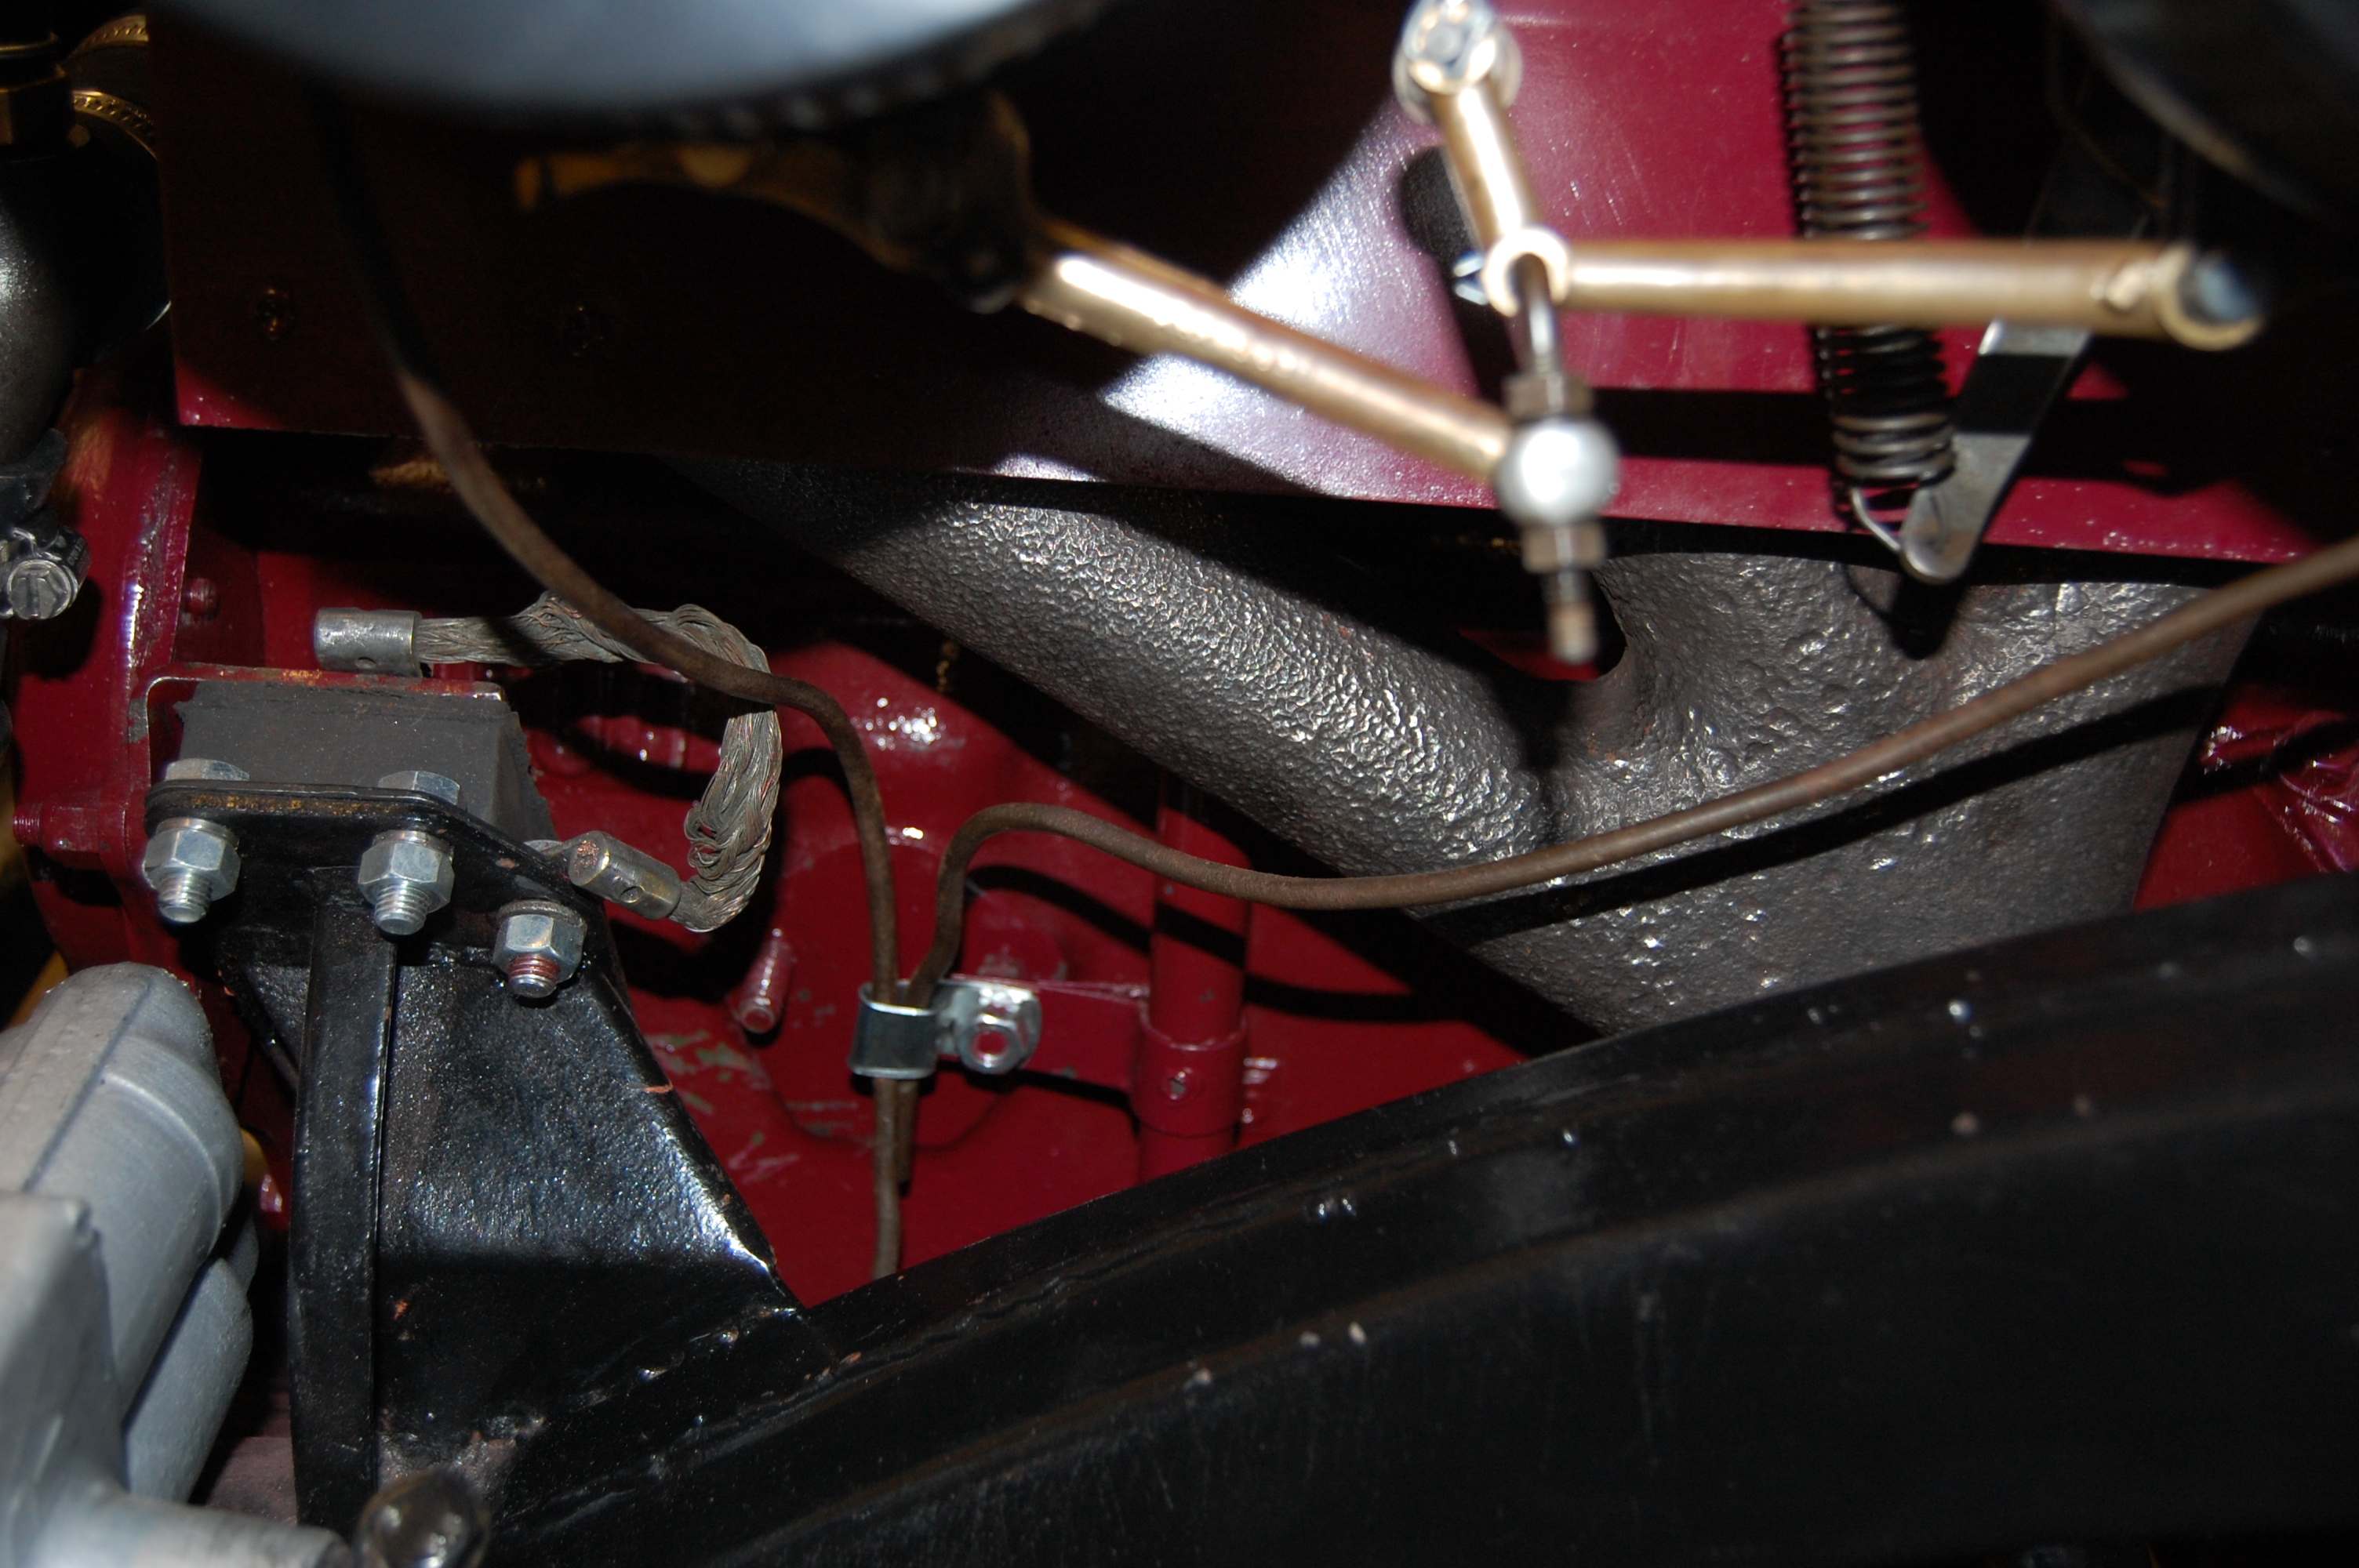
This shows the routing of the carb overflow pipes, which seems to be a topic as to where they should run. This pretty much follows the engine pictures in the original workshop manual and is how they were positioned on my engine originally. 1500 MGA overflow pipes.

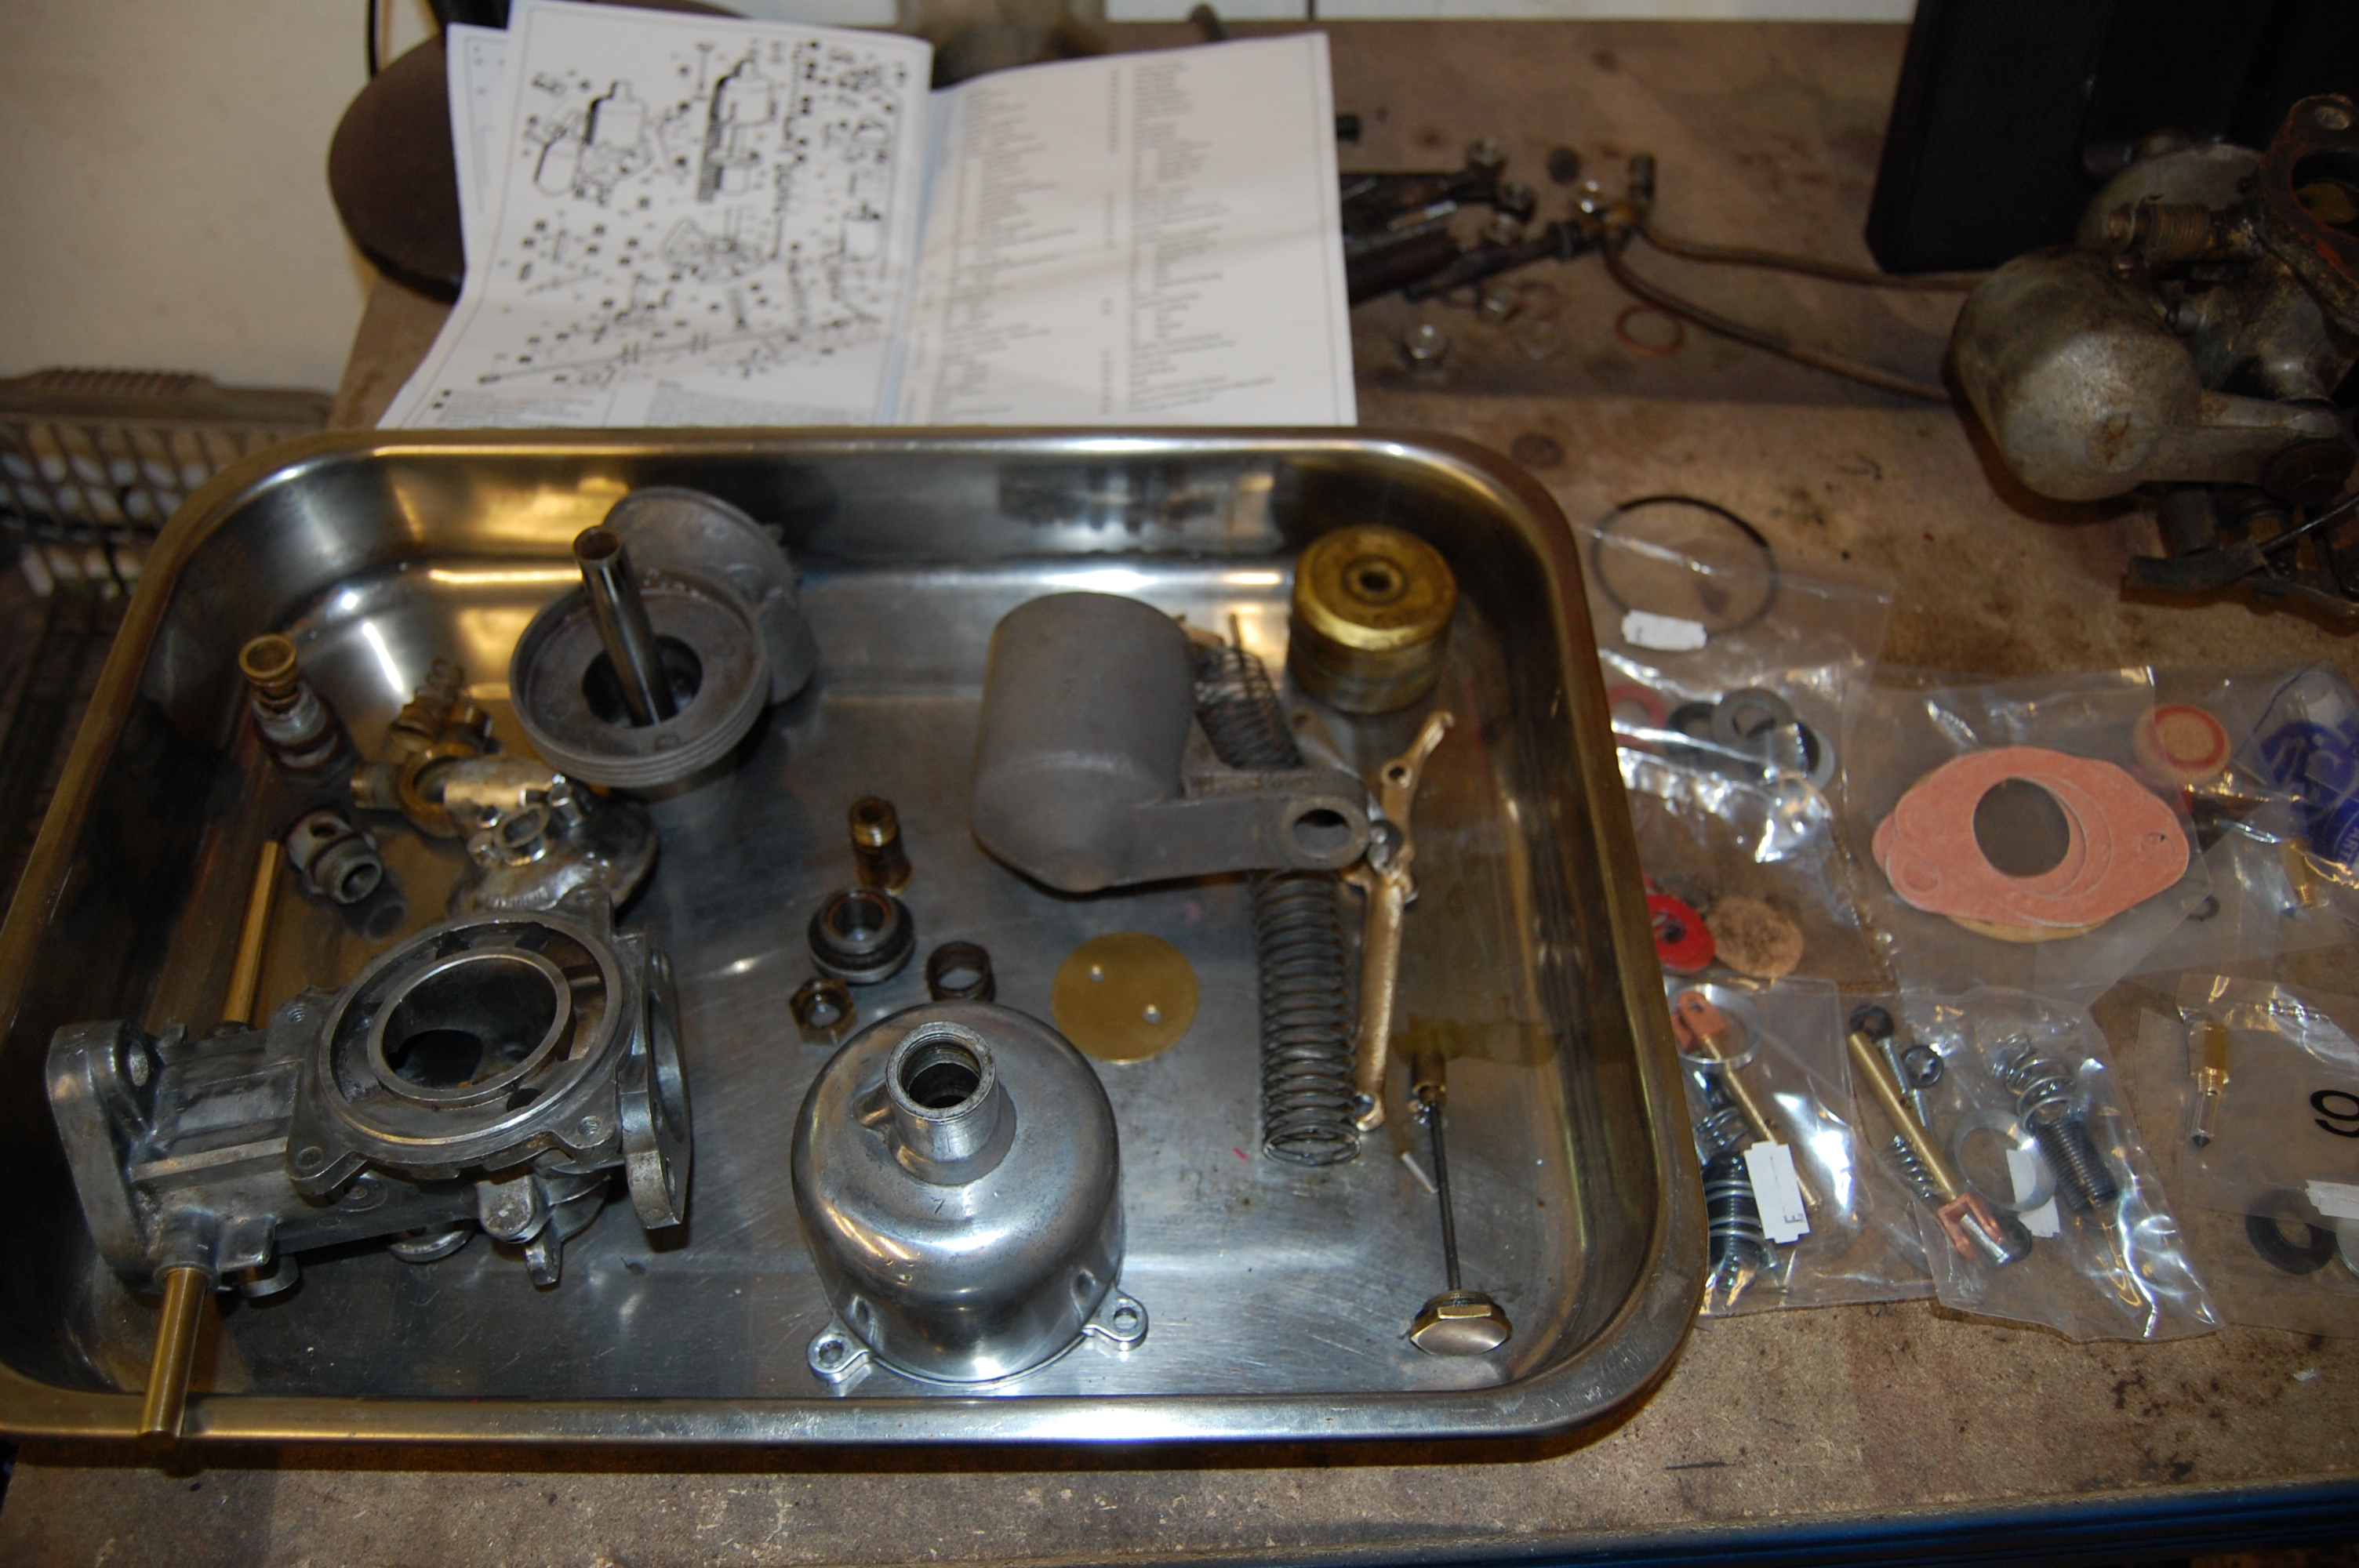
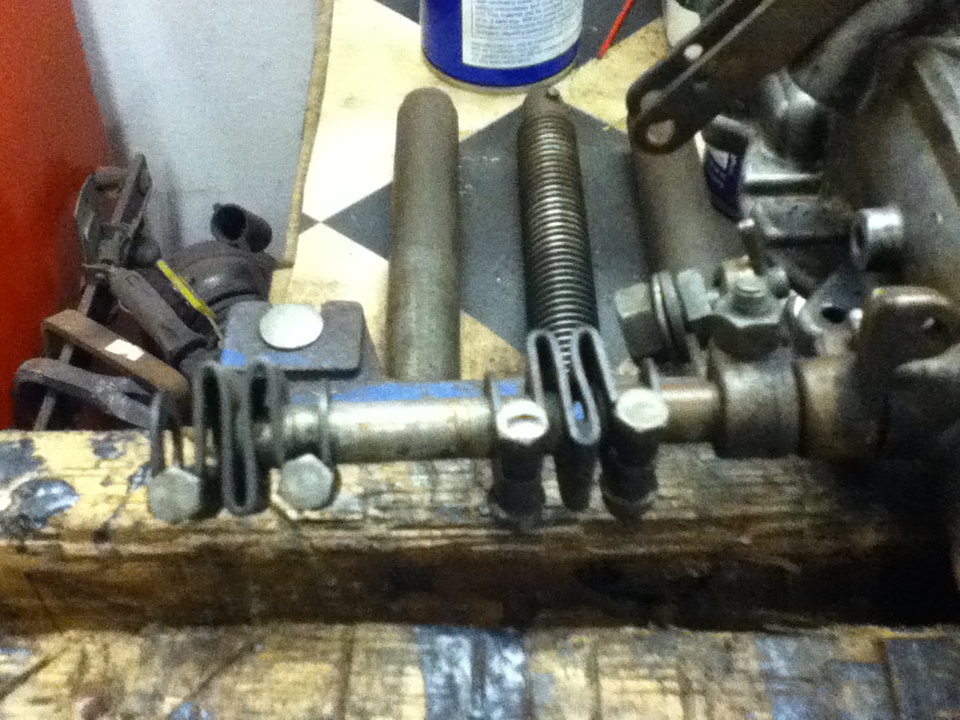
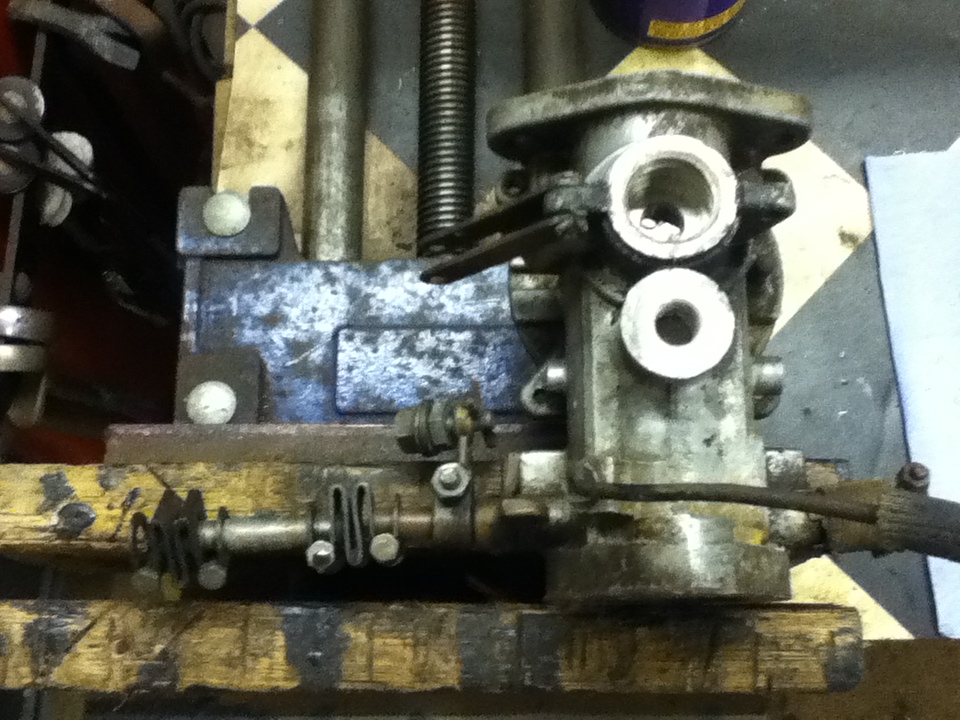
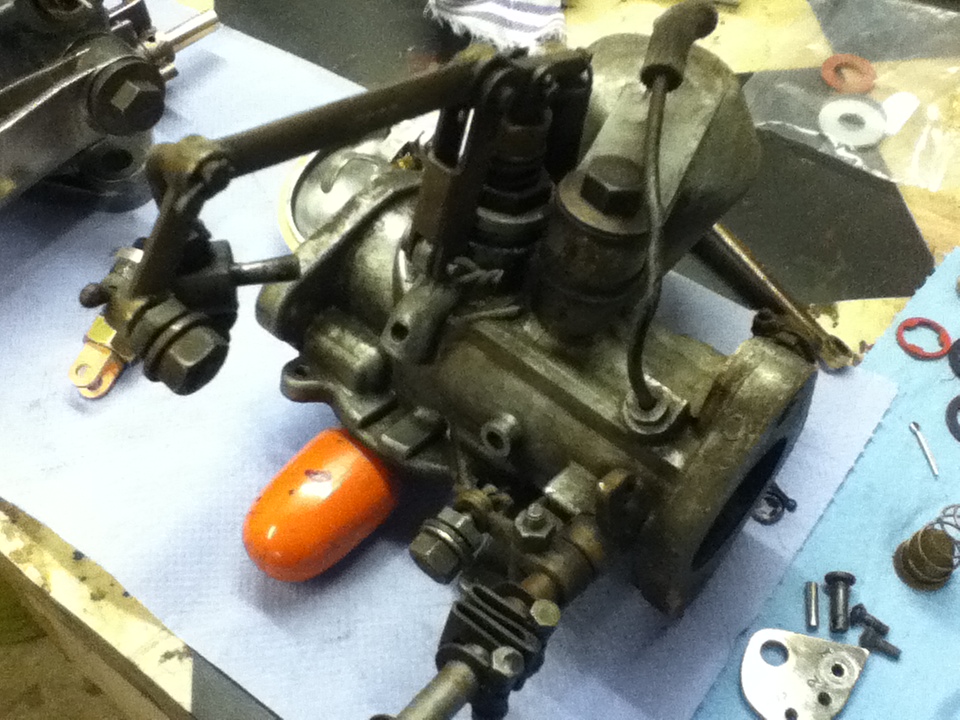
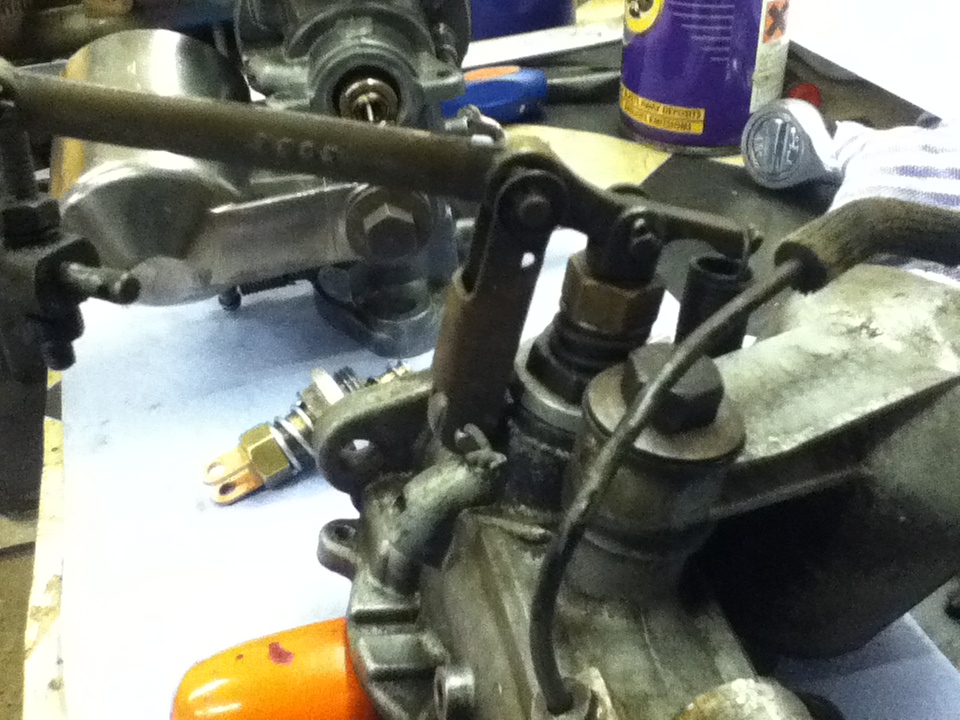
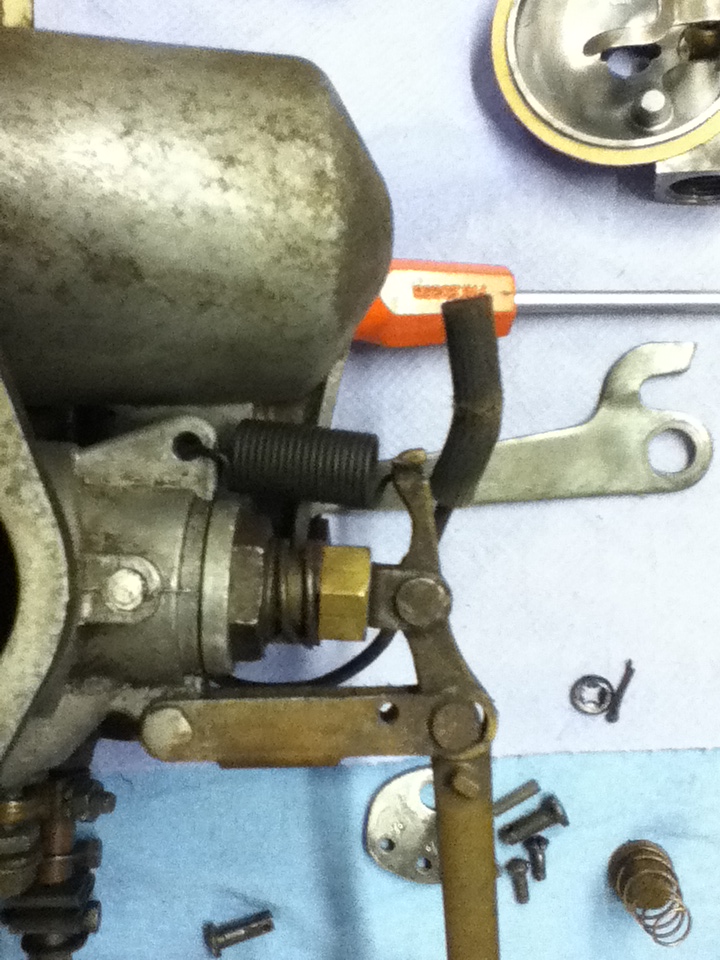
I overhauled the 1 1/2″ SUs using the major overhaul kit from Burlen Services. The kit is expensive, but is comprehensive in its contents with every conceivable part you could need. The carbs have had new spindles and bushes, butterflies, jet carriers, jets and all associated parts. Air filters are copies of the original Vokes fitment. MGA 1500
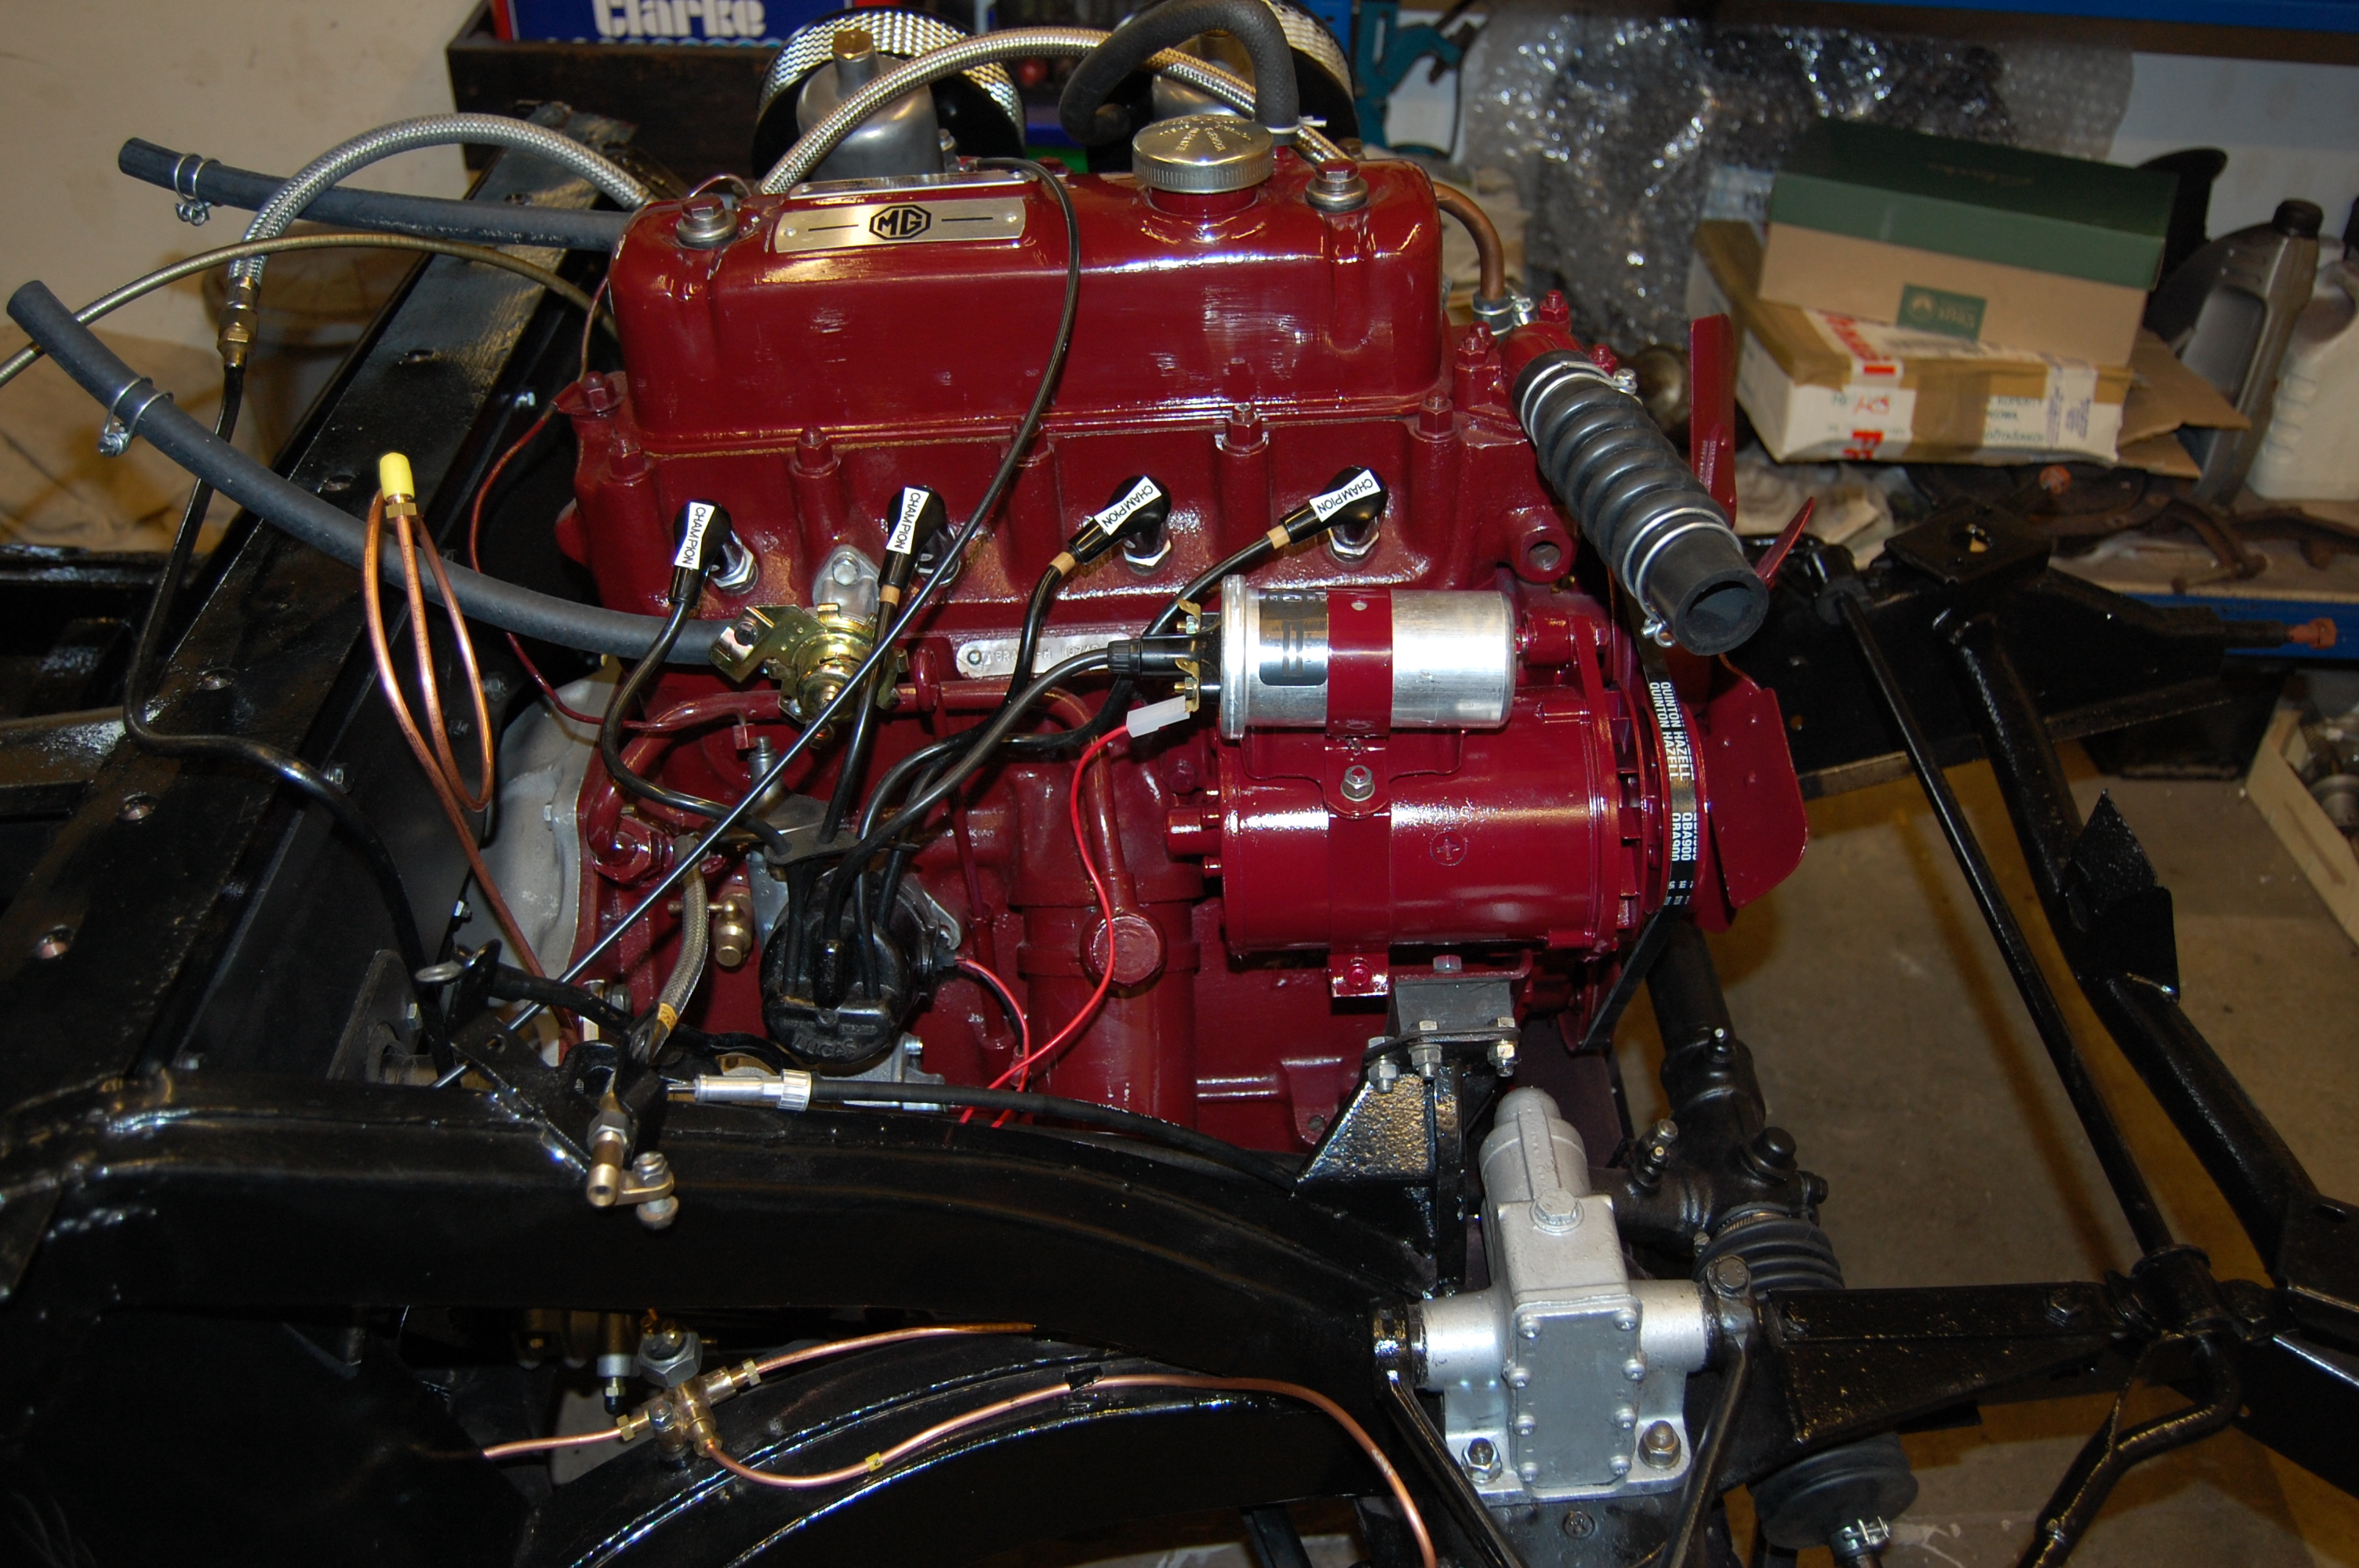
Engine now finished – electronic ignition module fitted in original Lucas distributor, new Lucas coil and Powerlite Dynamater. The Champion plug caps are not original fitment, but during my 41 years of ownership it always had them and I like the look. MGA 1500 engine.
This was the first start-up after the rebuild and not since 1978 had the engine run, watched and filmed by my wife and daughter – note how I ignored them! Rude, but my heart was in my mouth. The fumes were of course, the build up lube burning off.
There was an oil leak from the filter bowl which wasn’t tight, but otherwise it was fine – what a relief!
SU rebuild, using the major overhaul kit from Burlen Services.
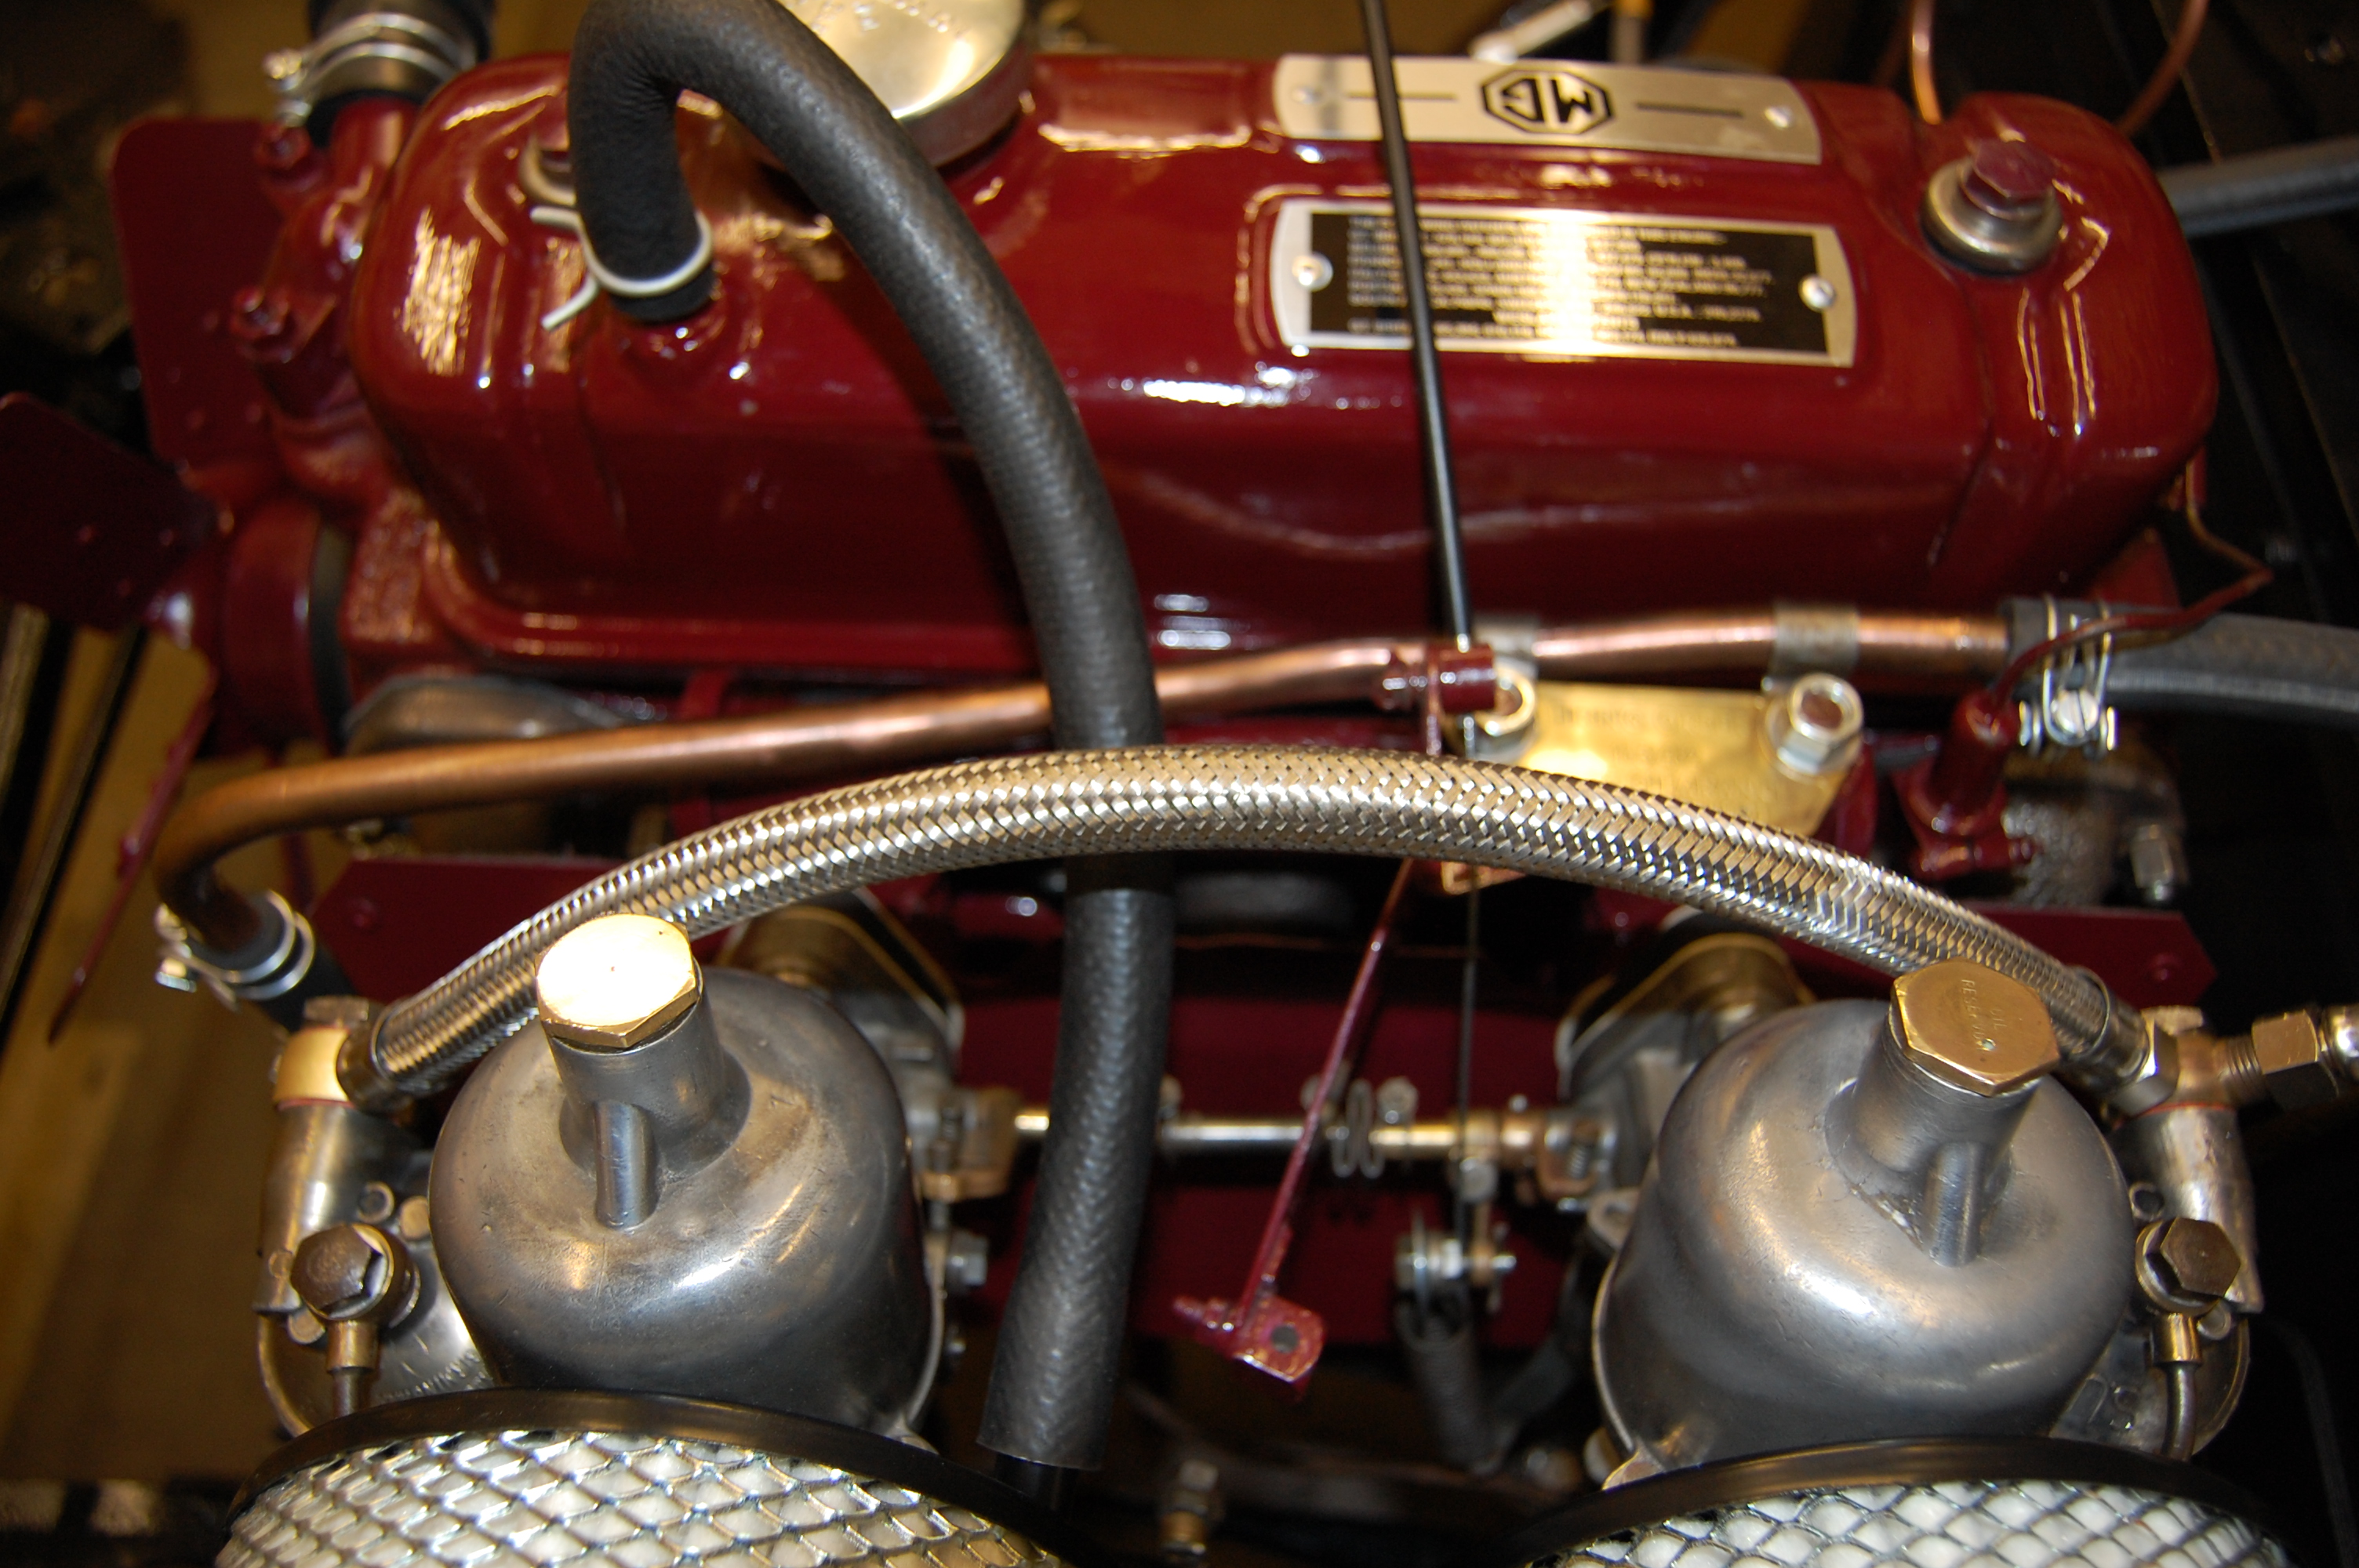
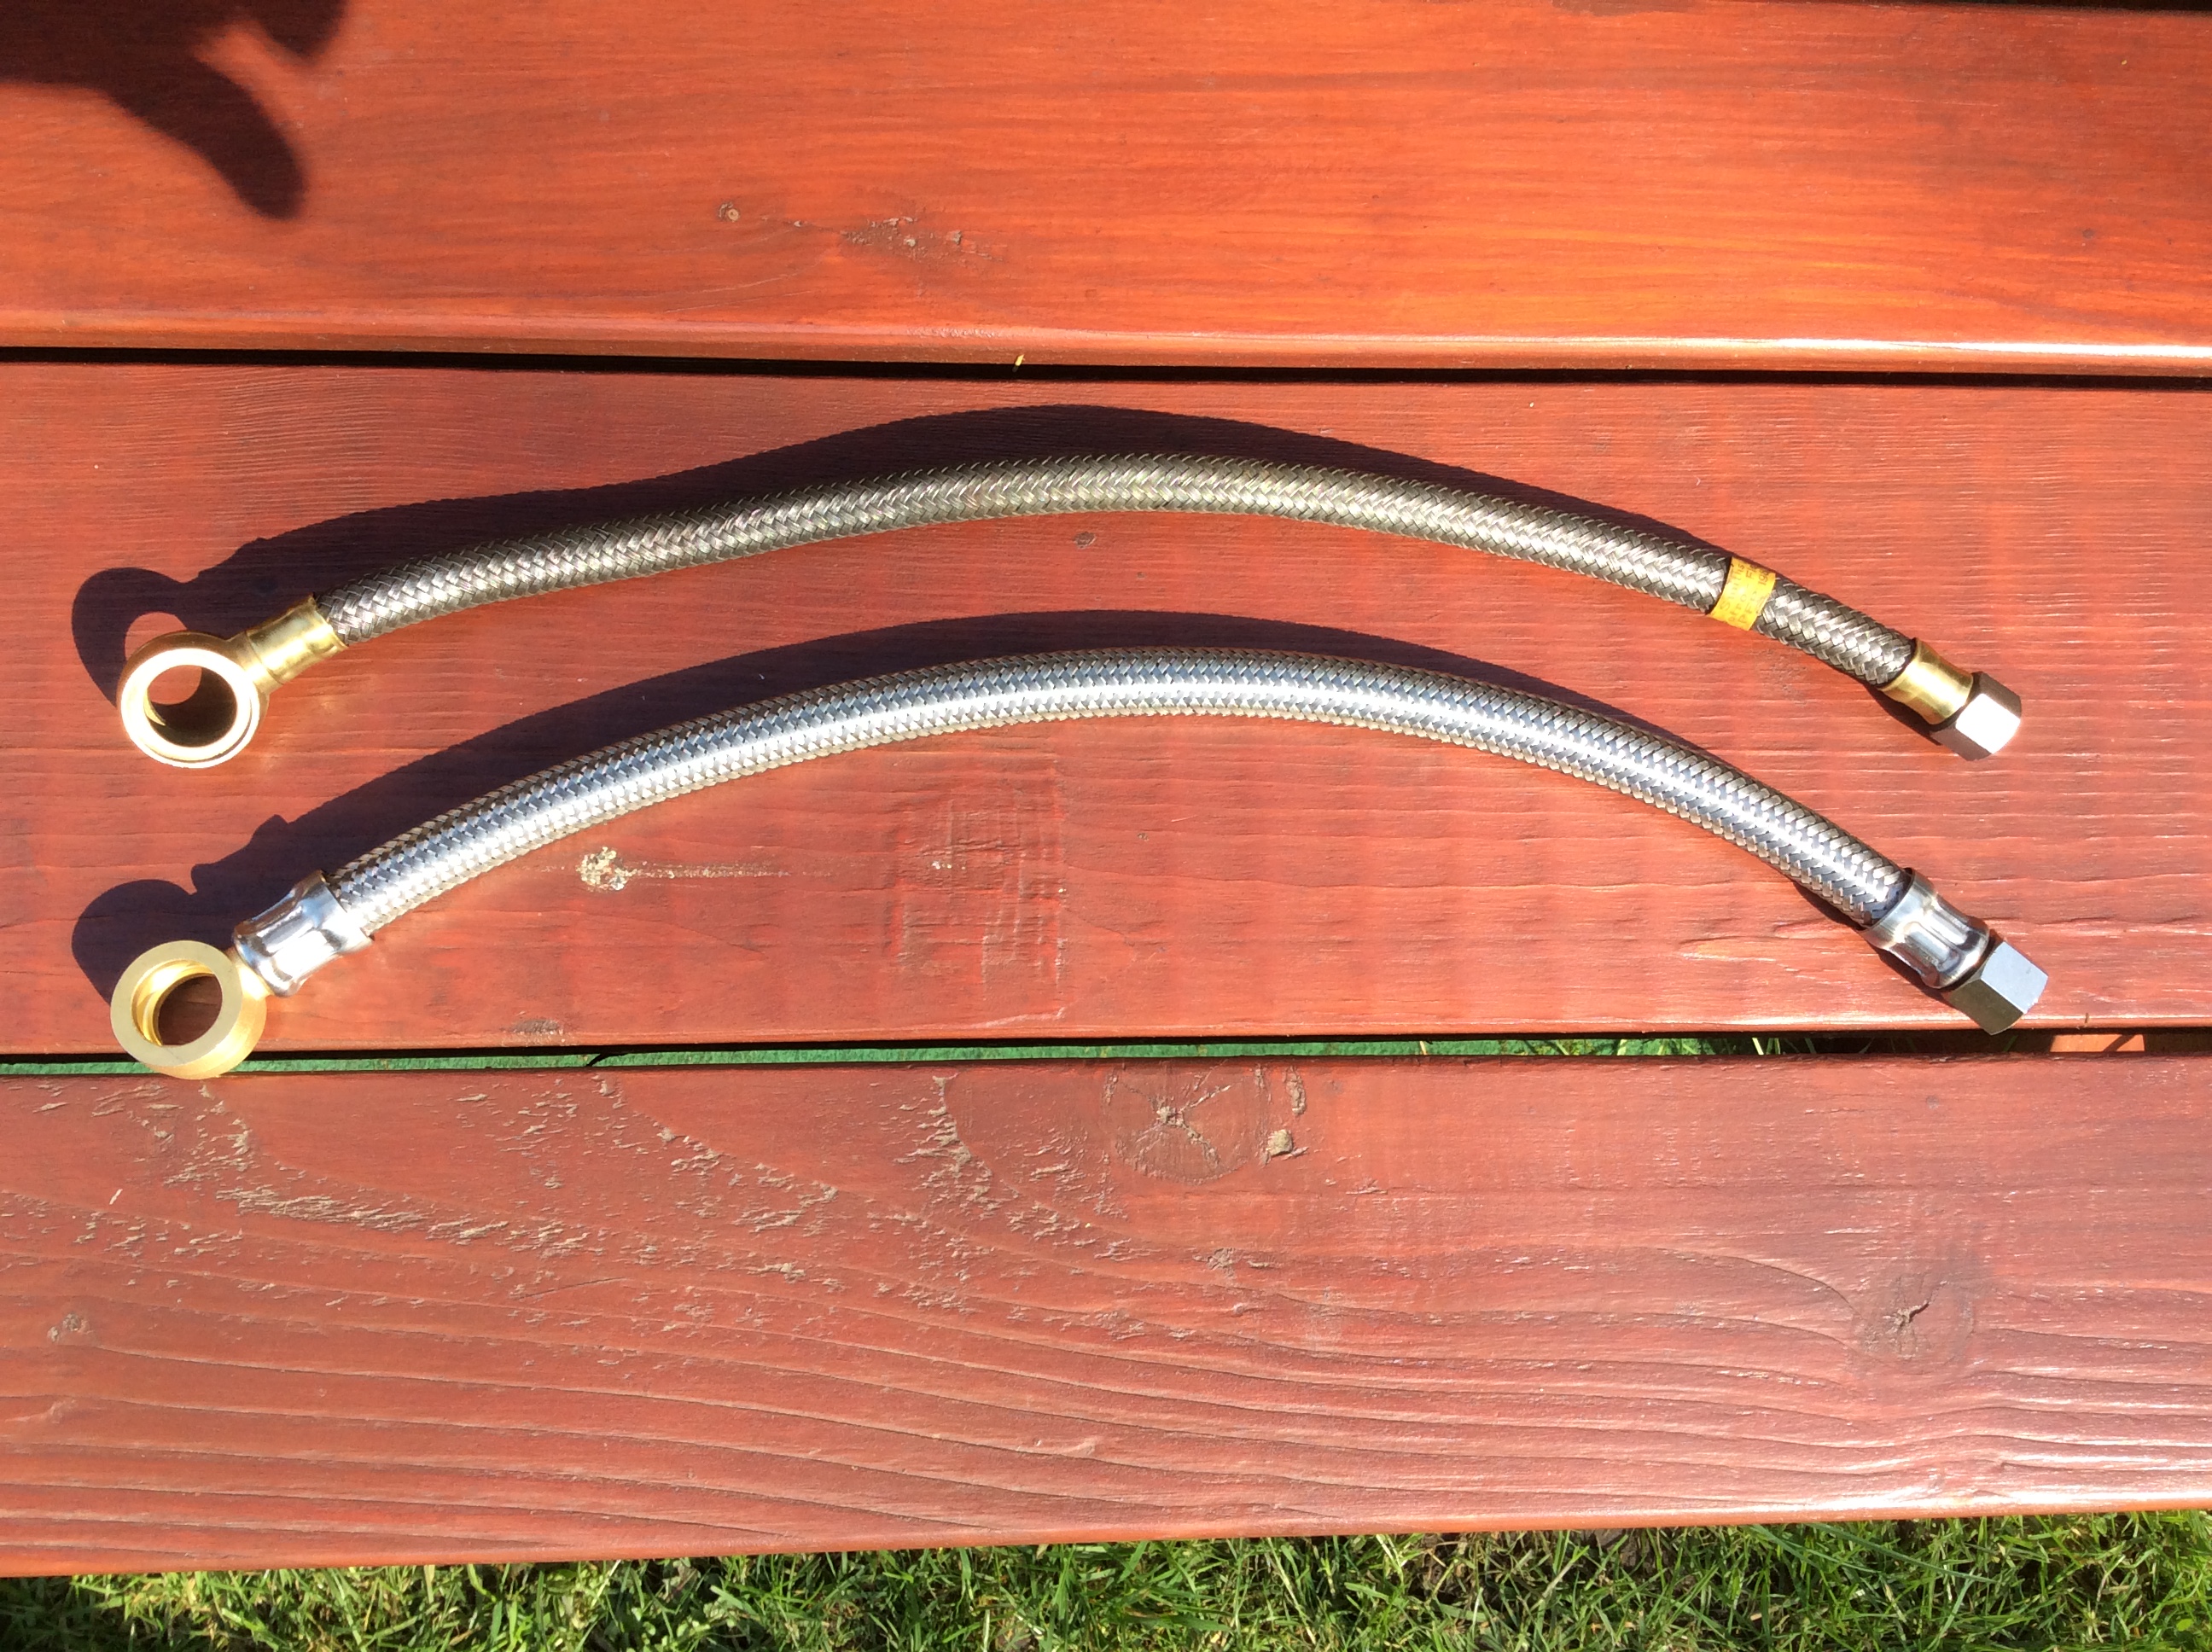
Carburettor feed pipes. The top one is the original Smiths pipe as supplied with the car when new. It wrankles that I can’t risk re using it, due to the age of the rubber pipe inside the brading and also the damage modern fuels will do. The lower pipe is the Moss Europe supplied pipe which is a greater in diameter and much chunkier looking. Unfortunately. as far as I know, there is no other option available that is nearer to the original.
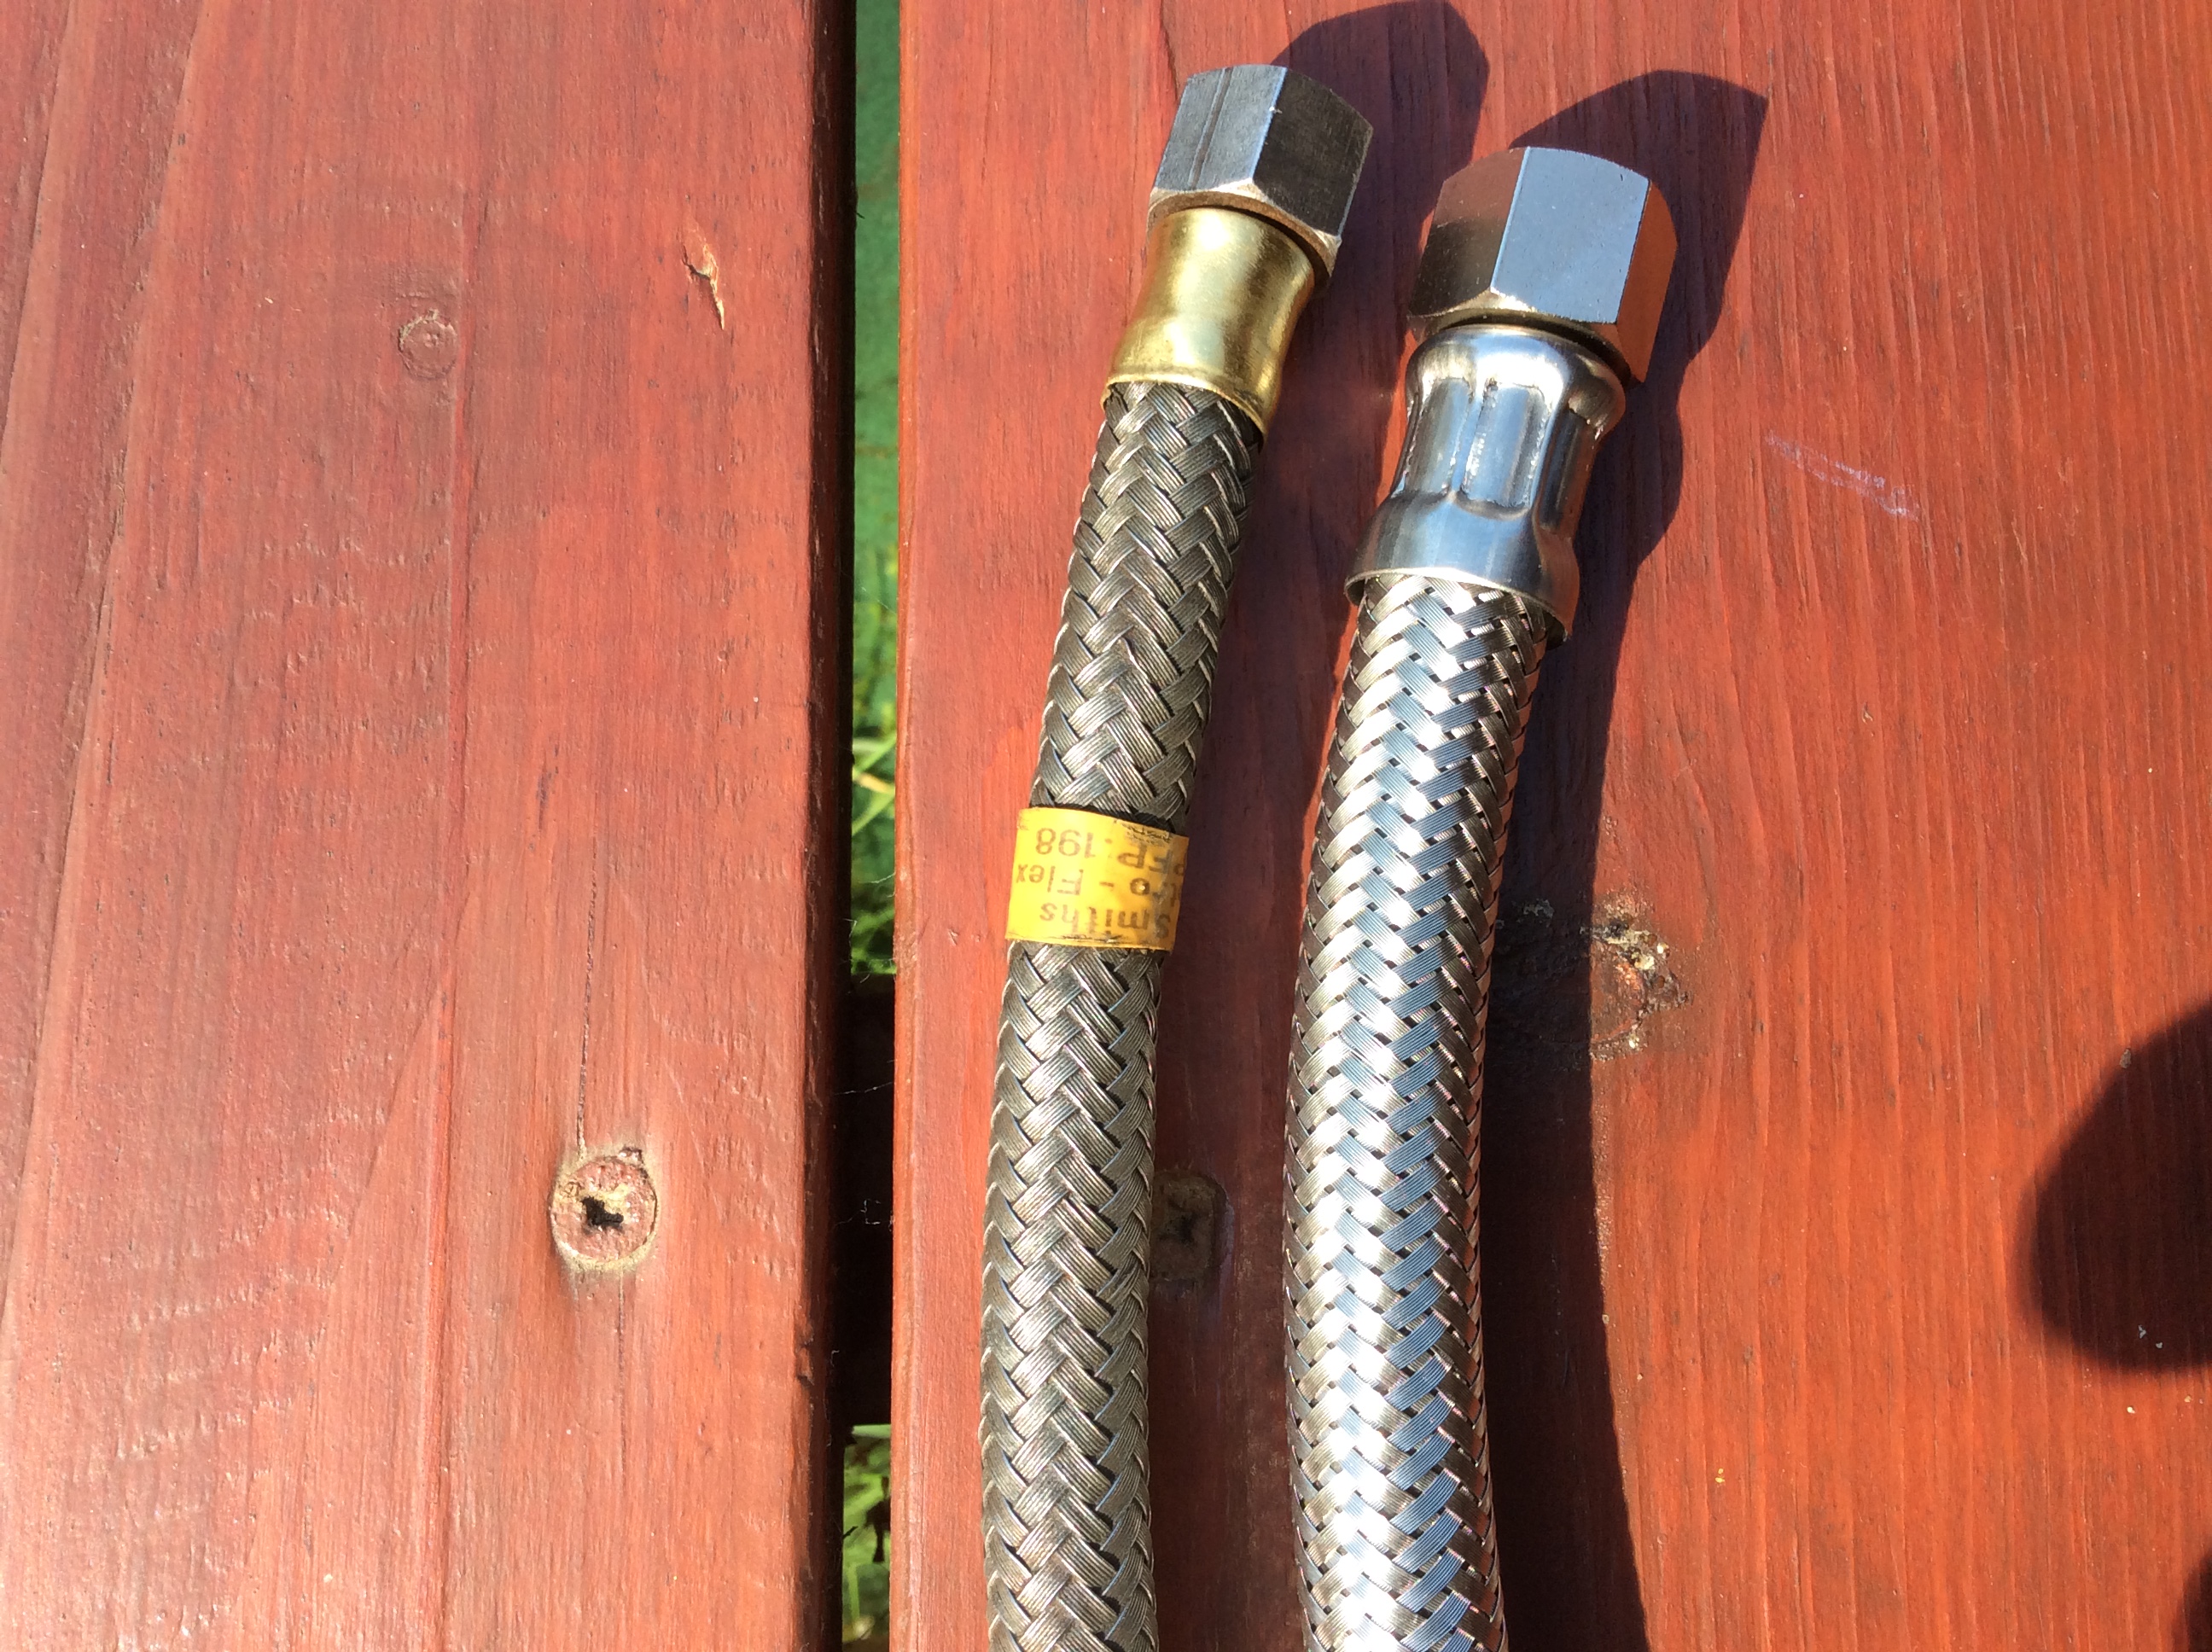

New pipe on right lacks the indented end as on the original.
SU reference shots to aid re-building.

Radiator.
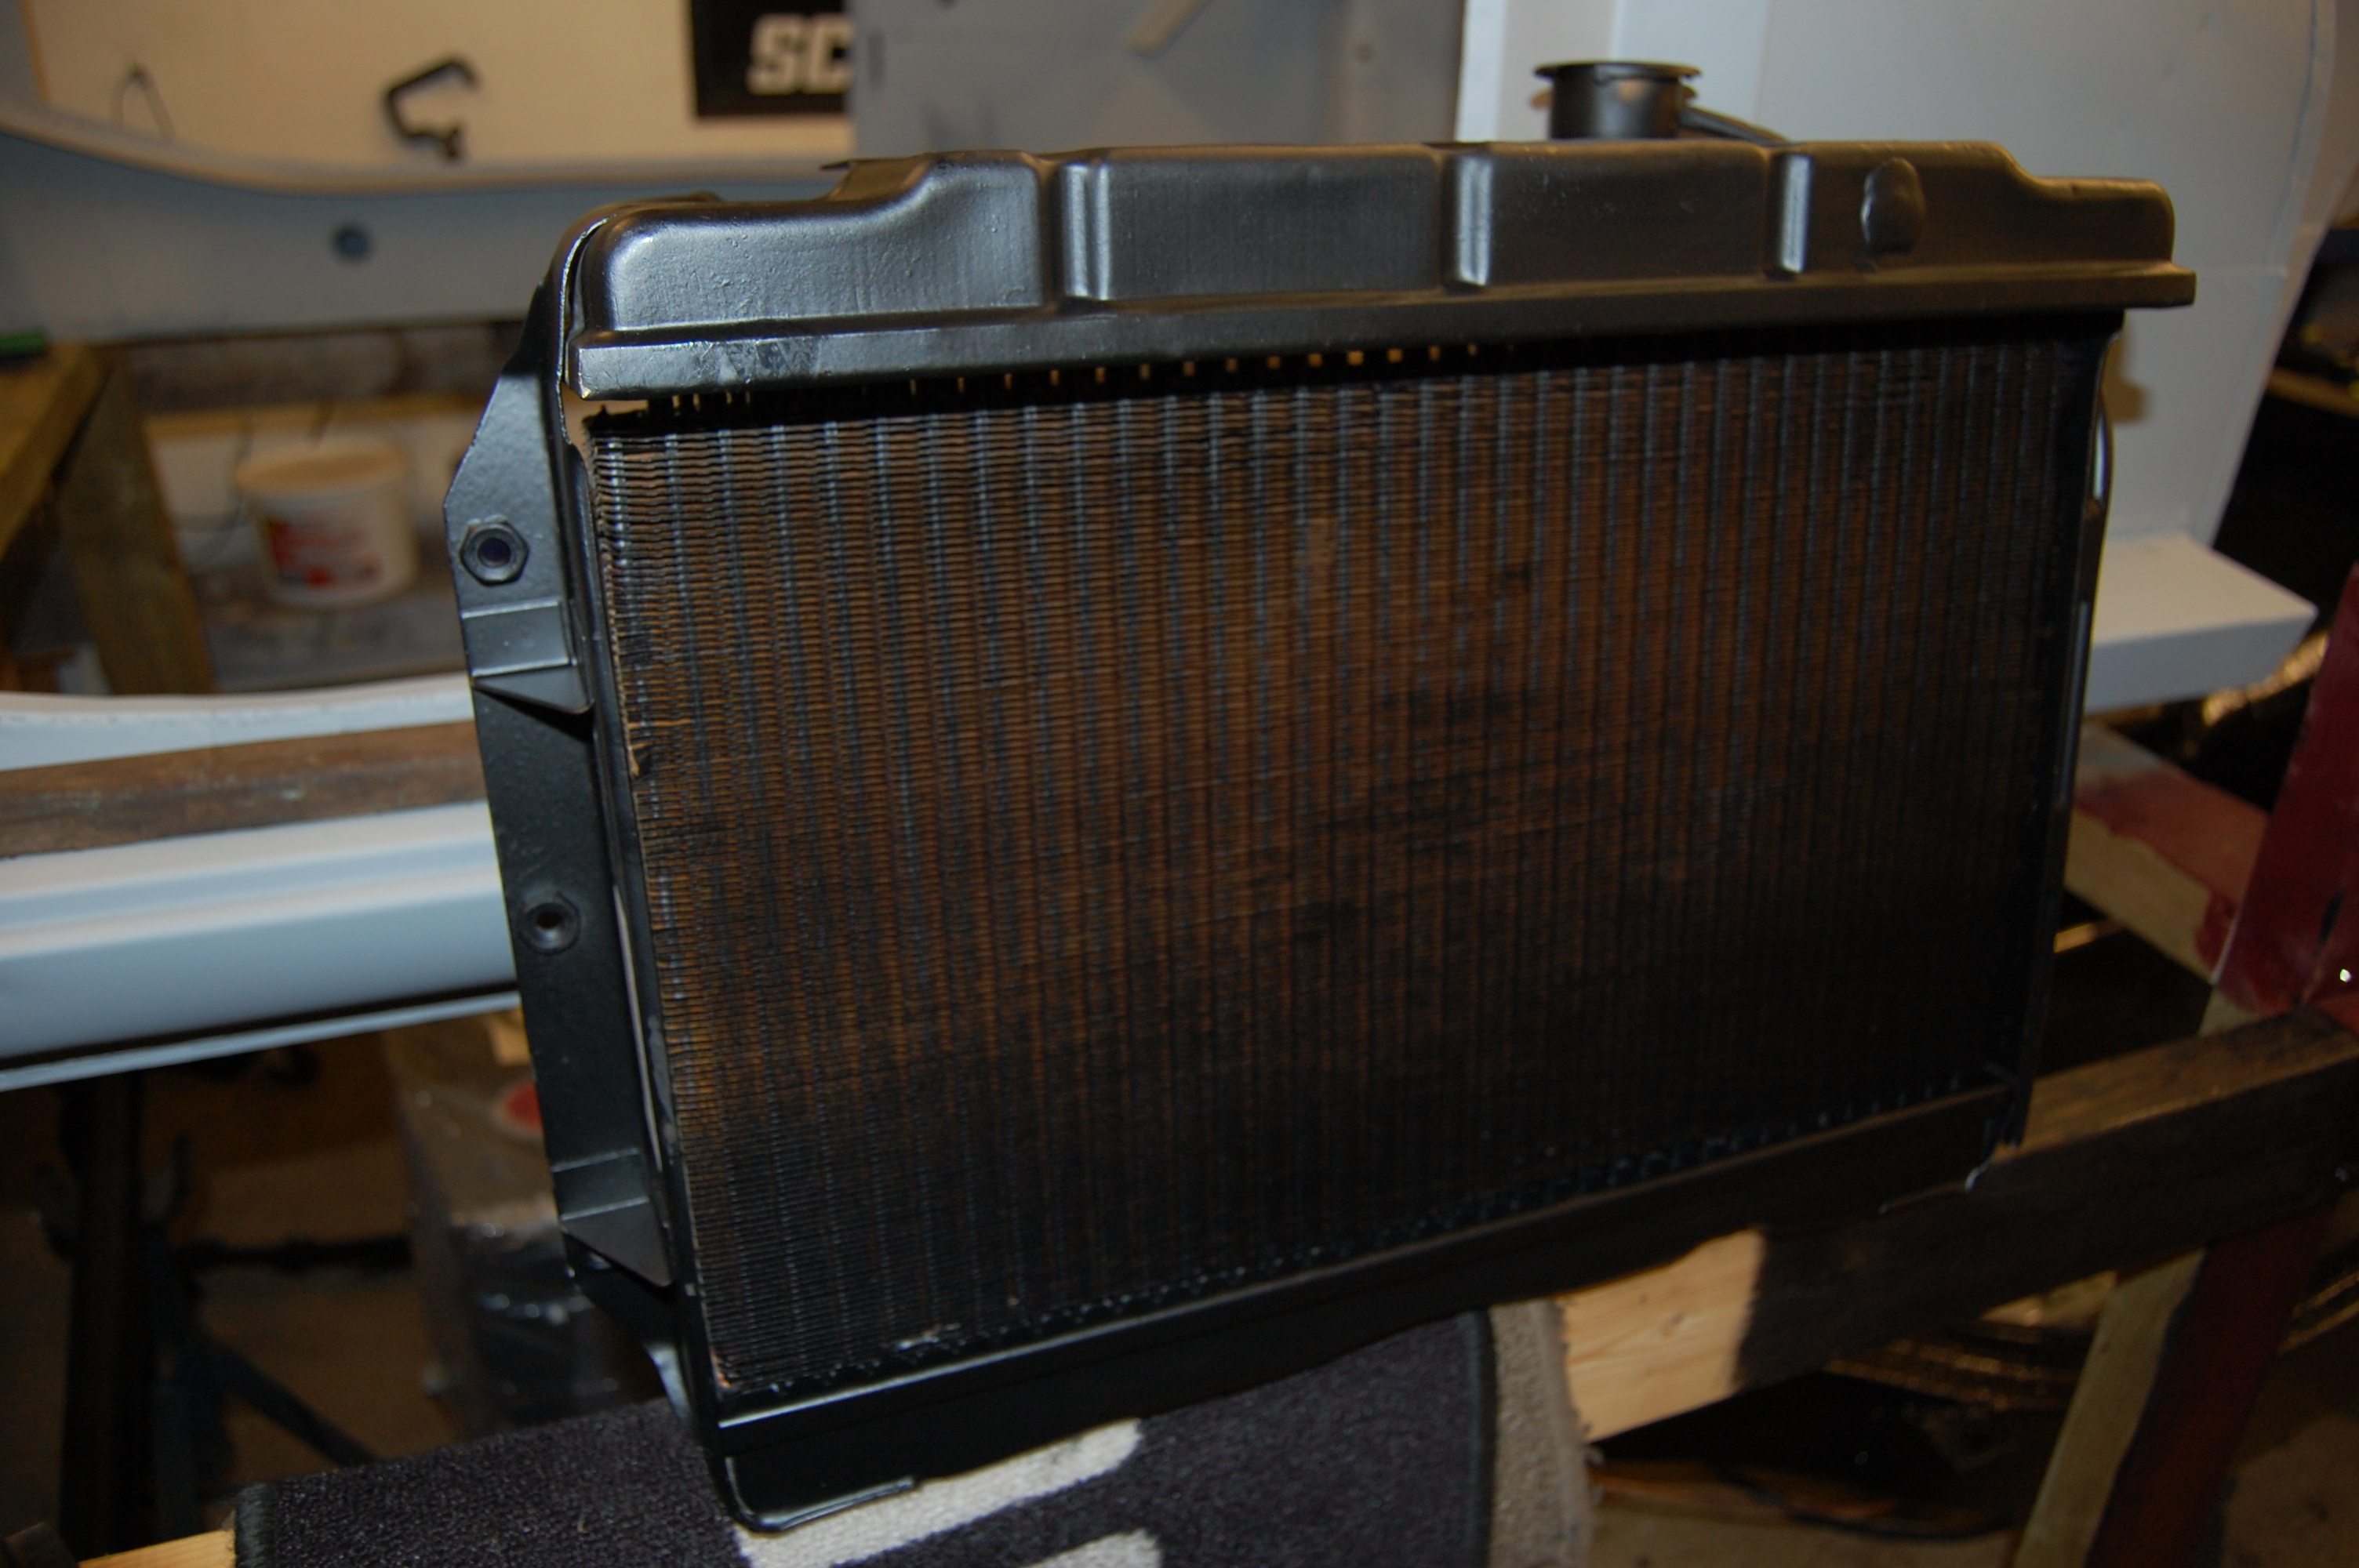
I dedcided to have the original radiator overhauled and recored, as this was the same price as a new one, which I’m convinced are not anywhere near the quality of the originals and partly why so many restored ‘A’s have cooling problems.
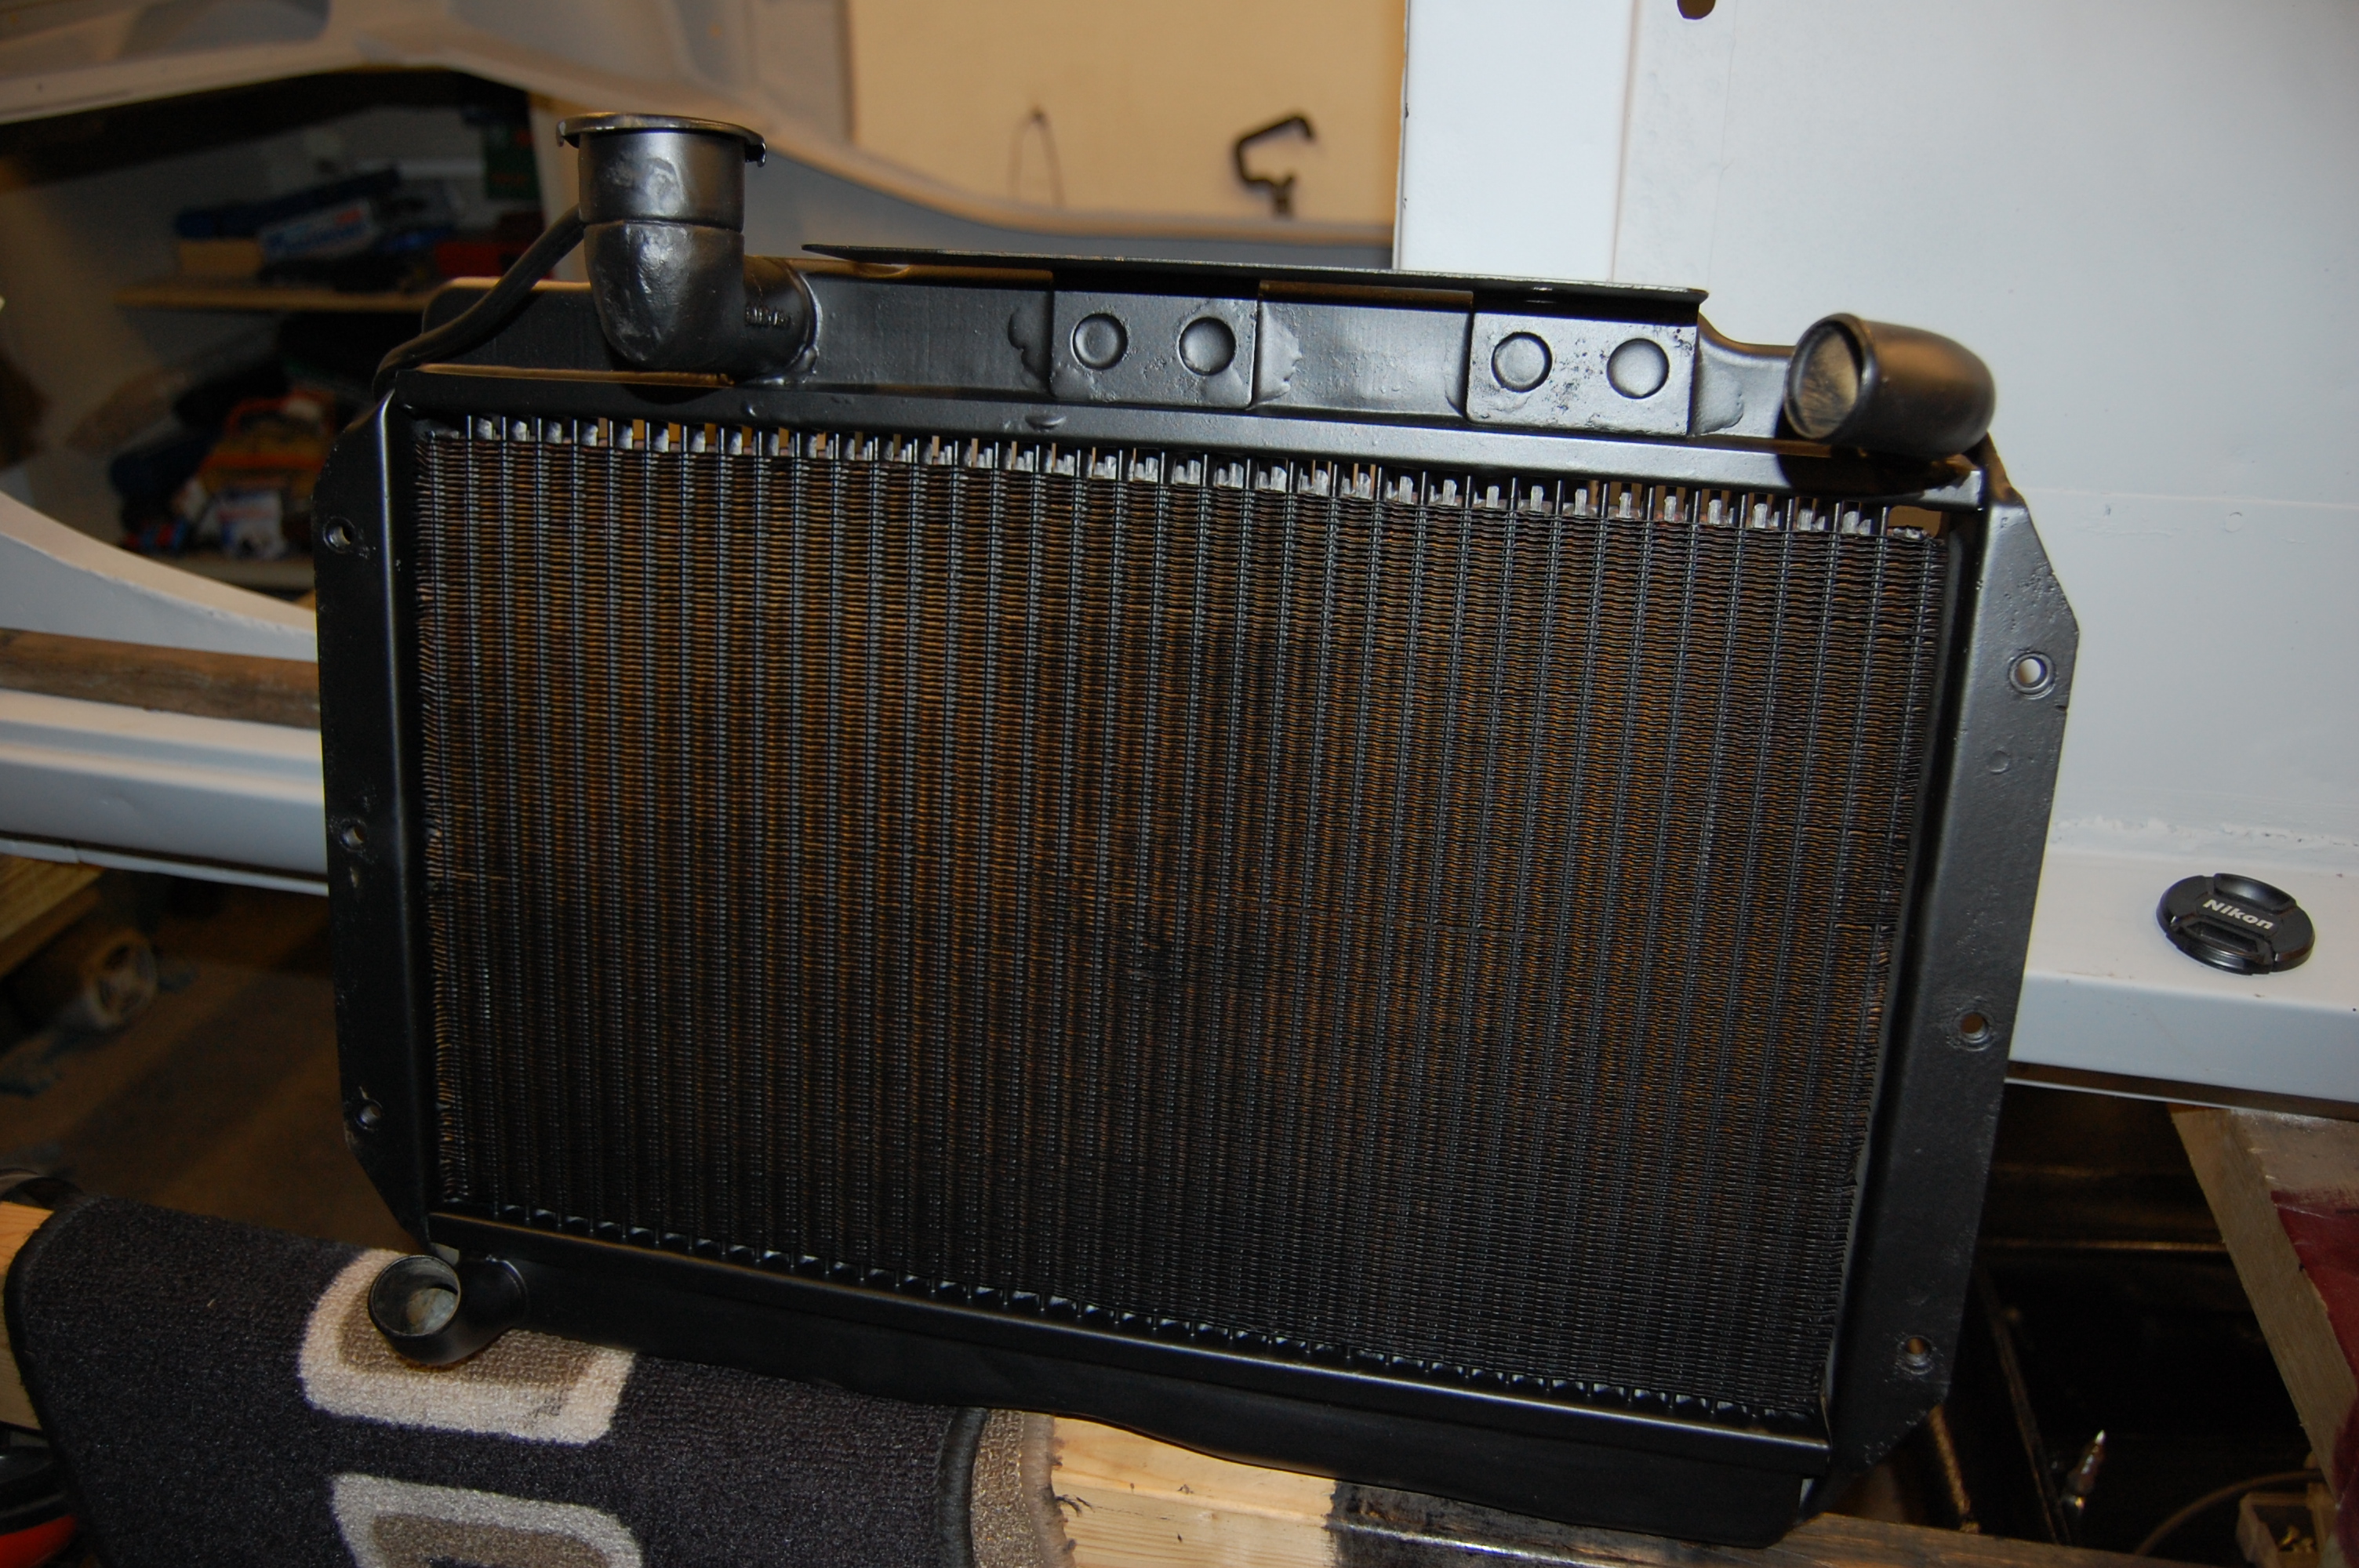
The rad was overhauled by Guildford Radiators for a total £150.00, which included collection and delivery to my home 40 miles away – great service. T : 0044 1483 277713 E : guildfordrads@autocoolingcentre.co.uk
