
This section is split into the various stages that constituted my restoration. Click on the highlighted sections to access.
- Dismantling
- Structural repairs
- Chassis
- Engine overhaul
- Gearbox/rear axle/brakes
- Suspension and Brakes
- Fuel/brake/electrical pipe and wire routing
- Body rebuild
- Upgrades/Alterations
- Refurbishments
- Cockpit trimming
- Finishing
- Paint
The section missing here is the one that is impossible to quantify in a home restoration – that of the hundreds of hours often spent lonely and cold, endlessly cleaning up filthy and rusted parts, or wrangling over seemingly insurmountable challenges. This might seem over dramatic, but it’s probably the biggest cause of all the ‘unfinished projects’ that litter the world of classic car restorations and should be considered before taking any serious restoration on. If, on the other hand this can be dealt with, then there is the tremendous satisfaction and pride that goes with each problem overcome and each finished part of the job – and one day you might actually get to drive it!
In 1977, when Maggie was taken off the road, I foolishly started dismantling her without any plan or idea of what a restoration might involve. At that time I was just starting out on a career in the motor industry and was a year away from marriage and eventually five children; all of which was to prove something of a distraction. Fortunately, I was wise enough to keep all the original parts and fastenings, which was a great help when the serious work began.
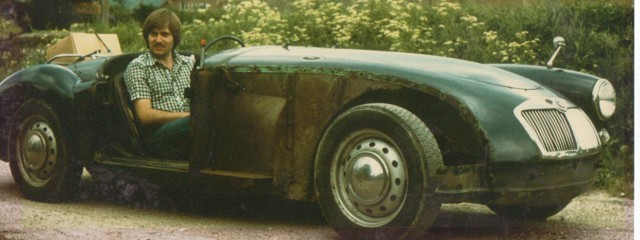
Maggie going into her first stage of hibernation in 1977, with various parts stripped. Still got the car, wish I could say the same about the hair.
Fast forward to 2010, a year into retirement and work completed on my workshop and the restoration began in earnest. Initially I had bags of time, but then casual work at Goodwood motor circuit, work on our house and other family commitments, once again took precedence over the restoration. So, sporadic work took place over the next 5 years, but this time there was a plan!

Stuart Mumby’s superb 1960 MGA
In my mind was this image of how our finished MGA would look one day, which sustained me through the hundreds of hours of work that lay ahead. Thanks to Stuart Mumby, registrar to the MGA section of the MG Car Club for this vision – even the right colour.
My intention was to do as much as I could myself and as I trained as a technician with Ford in the ealy 70’s, I felt comfortable with the mechanical side of the restoration. This however, was the easy bit. Far more daunting was the body structure which by now was in a very poor state, with serious corrosion in all the places that MGAs rot so well. The redeeming feature was the chassis, which was relatively solid, only (!) requiring stripping, blasting and a bit of plating.
Realising the cost of having the body structure professionally done was out of my league, I decided to do it myself, which was to be a year of head scratching, searching the web for advice and taking the plunge, the biggest headache being to understand how the inner and outer sill structure all fitted together. Along the way I discovered many new skills like MIG welding, lead loading and basic panel forming amongst others.
The restoration could not have been possible without the advice, information, help and encouragement forthcoming from so many sources. One of the side pleasures of a home restoration is the endless research and information gathering that forms an essential part of completing the work as accurately and economically as possible.
I have attempted to recognise as many of the people and sources as possible, within this site.
Bill Jeffries billnjeffries@gmail.com
